JSON是目前主流的前后端数据传输方式, SpringMVC中使用消息转化器HttpMessageConverter对JSON的转换提供了很好的支持,在SpringBoot中对相关配置做了进一步简化. HttpMessageConverter既可以将服务端返回的对象序列化为JSON串, 也可以将JSON串反序列化为对象.
常见的JSON处理器除了Jackson-databind,还有Gson和fastjson.
前者是spring/springboot处理JSON的默认的自带方案. 后两者分别由Google和阿里提供, 在使用后两者前应排除掉自身的Jackson依赖以使其生效.
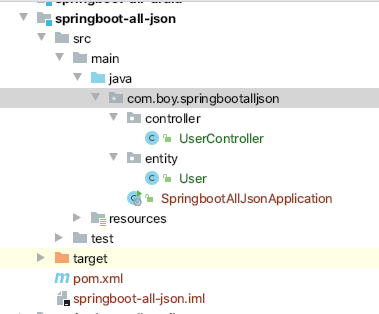
1. Springboot 整合Jackson 1.1 项目目录结构
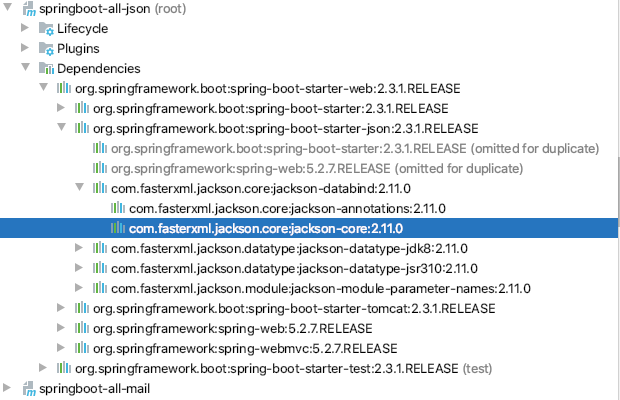
1.2 构建过程 1.2.1 新建项目 新建项目导入spring-boot-starter-web即可, 因为该starter内已经有Jackson相关依赖.
1.2.2 准备entity 1 2 3 4 5 6 7 8 9 10 11 12 13 14 15 16 17 18 19 20 21 22 23 24 25 26 27 package com.boy.springbootalljson.entity;import com.fasterxml.jackson.annotation.JsonFormat;import java.util.Date;public class User private Integer id; private String username; private Date birth; @Override public String toString () return "User{" + "id=" + id + ", username='" + username + '\'' + ", birth=" + birth + '}' ; } public Integer getId () return id; } public void setId (Integer id) this .id = id; } public String getUsername () return username; } public void setUsername (String username) this .username = username;} public Date getBirth () return birth; } public void setBirth (Date birth) this .birth = birth; } }
1.2.3 准备controller 1 2 3 4 5 6 7 8 9 10 11 12 13 14 15 16 17 18 19 20 21 22 23 24 25 26 27 28 29 package com.boy.springbootalljson.controller;import com.boy.springbootalljson.entity.User;import org.springframework.stereotype.Controller;import org.springframework.web.bind.annotation.GetMapping;import org.springframework.web.bind.annotation.ResponseBody;import java.util.ArrayList;import java.util.Arrays;import java.util.Date;import java.util.List;@Controller public class UserController @GetMapping ("/user" ) @ResponseBody public List<User> Users () ArrayList<User> users = new ArrayList<User>(); for (int i = 0 ; i <4 ; i++) { User user = new User(); user.setId(i); user.setUsername("Elo" ); user.setBirth(new Date()); users.add(user); } return users; } }
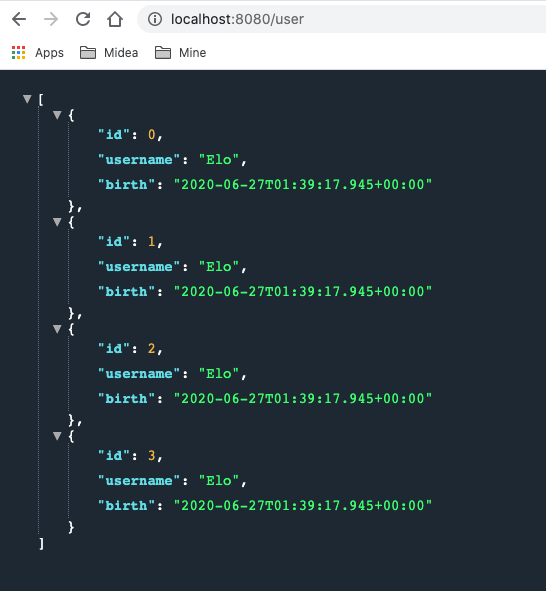
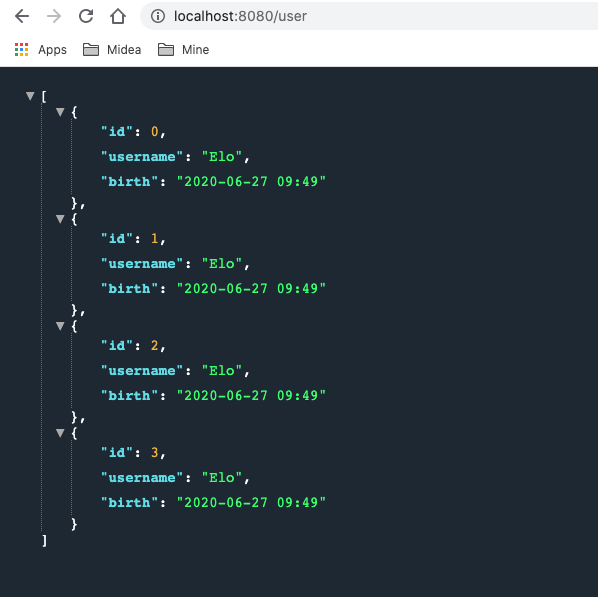
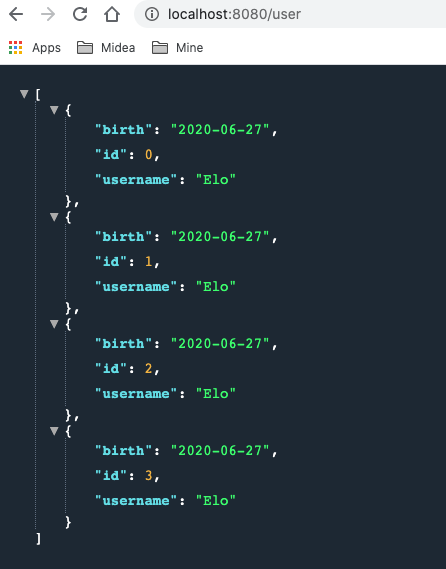
1.2.4 测试
1.2.5分析 可以看出测试结果中日期是没有被格式化的. 因为Jackson的默认配置中并没有对日期进行特殊处理. 从源码可以看出这一点:
1 org.springframework.boot.autoconfigure.http.JacksonHttpMessageConvertersConfiguration类中有如下代码片段:
1 2 3 4 5 6 7 8 9 10 11 12 13 static class MappingJackson2HttpMessageConverterConfiguration MappingJackson2HttpMessageConverterConfiguration() { } @Bean @ConditionalOnMissingBean ( value = {MappingJackson2HttpMessageConverter.class }, ignoredType = {"org.springframework.hateoas.server.mvc.TypeConstrainedMappingJackson2HttpMessageConverter" , "org.springframework.data.rest.webmvc.alps.AlpsJsonHttpMessageConverter" } ) MappingJackson2HttpMessageConverter mappingJackson2HttpMessageConverter (ObjectMapper objectMapper) { return new MappingJackson2HttpMessageConverter(objectMapper); } }
1.2.6 两种解决方案 有两种方法可以解决这个问题
一种”简单”的方法就是在entity的日期属性上加一个注解,如下:
1 2 3 private Date birth; ...
但是如果有很多实体类中都有日期字段,都需要添加该注解就显得臃肿, 不和适宜.
一种更为简单的方式就是单独的配置日期格式.自己提供一个MappingJackson2HttpMessageConverter类型的bean, 让autoConfiguration默认配置失效, 然后再在自建的bean中进行日期格式化处理.
新建一个config类.
1
2
3
4
5
6
7
8
9
10
11
12
13
14
15
16
17
18
19
20
21
22
23
24
25
26
27
package com.boy.springbootalljson.config;import com.fasterxml.jackson.databind.ObjectMapper;import org.springframework.context.annotation.Bean;import org.springframework.context.annotation.Configuration;import org.springframework.http.converter.HttpMessageConverter;import org.springframework.http.converter.json.MappingJackson2HttpMessageConverter;import java.text.SimpleDateFormat;@Configuration public class MyJsonConfig @Bean public MappingJackson2HttpMessageConverter mappingJackson2HttpMessageConverter () MappingJackson2HttpMessageConverter mappingJackson2HttpMessageConverter = new MappingJackson2HttpMessageConverter(); ObjectMapper objectMapper = new ObjectMapper(); objectMapper.setDateFormat(new SimpleDateFormat("yyyy-MM-dd" )); mappingJackson2HttpMessageConverter.setObjectMapper(objectMapper); return mappingJackson2HttpMessageConverter; } }
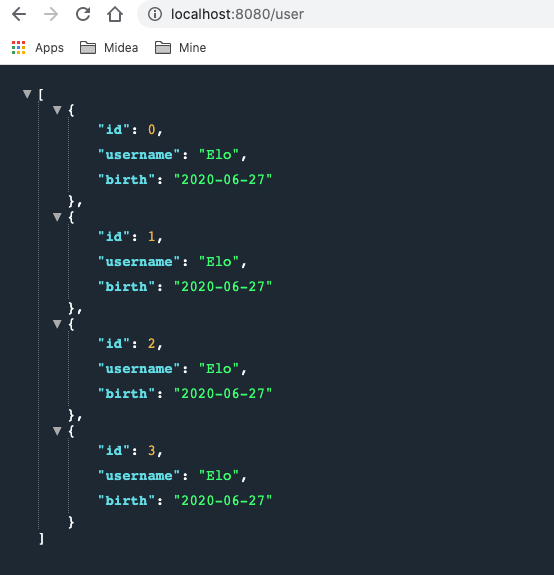
使用配置类处理日期格式后的测试结果:
从源码片段最后的返回语句
1 return new MappingJackson2HttpMessageConverter(objectMapper);
可以看出默认配置中返回的 MappingJackson2HttpMessageConverter bean是有一个new objectMapper的参数的, 该参数是自动注入的.
往上游追可以知道该参数是JacksonAutoConfiguration类提供的, 源码片段 :
1 org.springframework.boot.autoconfigure.jackson.JacksonAutoConfiguration
1 2 3 4 5 6 7 8 9 10 11 12 @Configuration (proxyBeanMethods = false ) @ConditionalOnClass (Jackson2ObjectMapperBuilder.class ) static class JacksonObjectMapperConfiguration { @Bean @Primary @ConditionalOnMissingBean ObjectMapper jacksonObjectMapper (Jackson2ObjectMapperBuilder builder) { return builder.createXmlMapper(false ).build(); } }
也就是说, 可以得出如下结论:
项目中没有自己提供ObjectMapper bean时, MappingJackson2HttpMessageConverter使用的是JacksonAutoConfiguration中提供的objectmapper bean来进行构造bean并返回到容器中的.
基于这样的结论, 以及最终实现日期格式化操作是objectmapper提供的setDateFormat(format) 的这一事实, 所以, 在自动一的MyJsonConfig类中也可以之定义一个objectmapper bean并返回即可. (即: 可以用如下bean替换掉MyJsonConfig类中的 mappingJackson2HttpMessageConverter bean )
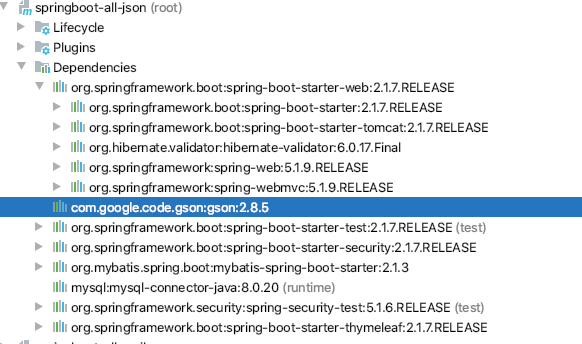
1 2 3 4 5 6 7 8 @Bean public ObjectMapper objectMapper () ObjectMapper objectMapper = new ObjectMapper(); objectMapper.setDateFormat(new SimpleDateFormat("yyyy-MM-dd hh:mm" )); return objectMapper; }
测试结果:
2. Springboot 整合Gson 2.1 引入pom依赖 因为Gson是第三方(Google)提供的json处理方案, 所以pom要先将自身的Jackson依赖进行排除, 然后再添加Gson依赖. 具体操作如下:
1 2 3 4 5 6 7 8 9 10 11 12 13 14 15 <dependency > <groupId > org.springframework.boot</groupId > <artifactId > spring-boot-starter-web</artifactId > <exclusions > <exclusion > <groupId > org.springframework.boot</groupId > <artifactId > spring-boot-starter-json</artifactId > </exclusion > </exclusions > </dependency > <dependency > <groupId > com.google.code.gson</groupId > <artifactId > gson</artifactId > </dependency >
2.2 测试依赖引入是否成功 reimport后可以看到, 此时spring-boot-starter-web中已经没有Jackson而是换成了gson
2.3 Gson源码解析 从GsonHttpMessageConvertersConfiguration的源码可以看出:
1: 如果pom依赖中提供了gson, 那么GsonHttpMessageConvertersConfiguration配置就会生效, 因为该类有一个注解: @ConditionalOnClass(Gson.class)
2: 如果用户没有提供GsonHttpMessageConverter bean, 那么自动配置的GsonHttpMessageConverter bean就会生效, 其处理逻辑类似Jackson源码,只不过该bean的自动注入参数是gson而非objectmapper.
1 2 3 4 5 6 7 8 9 10 11 12 13 14 15 16 17 18 19 20 21 22 23 24 25 26 27 28 29 30 31 32 33 34 35 36 37 38 package org.springframework.boot.autoconfigure.http;import com.google.gson.Gson;... @Configuration @ConditionalOnClass (Gson.class ) class GsonHttpMessageConvertersConfiguration @Configuration @ConditionalOnBean (Gson.class ) @Conditional (PreferGsonOrJacksonAndJsonbUnavailableCondition .class ) protected static class GsonHttpMessageConverterConfiguration { @Bean @ConditionalOnMissingBean public GsonHttpMessageConverter gsonHttpMessageConverter (Gson gson) GsonHttpMessageConverter converter = new GsonHttpMessageConverter(); converter.setGson(gson); return converter; } } . . . }
2.4 自定义GsonHttpMessageConverter bean 在MyJsonConfig类中提供一个GsonHttpMessageConverter bean:
1 2 3 4 5 6 @Bean public GsonHttpMessageConverter gsonHttpMessageConverter (Gson gson) GsonHttpMessageConverter gsonHttpMessageConverter = new GsonHttpMessageConverter(); gsonHttpMessageConverter.setGson(new GsonBuilder().setDateFormat("yyyy/MM/dd hh:mm:ss" ).create()); return gsonHttpMessageConverter; }
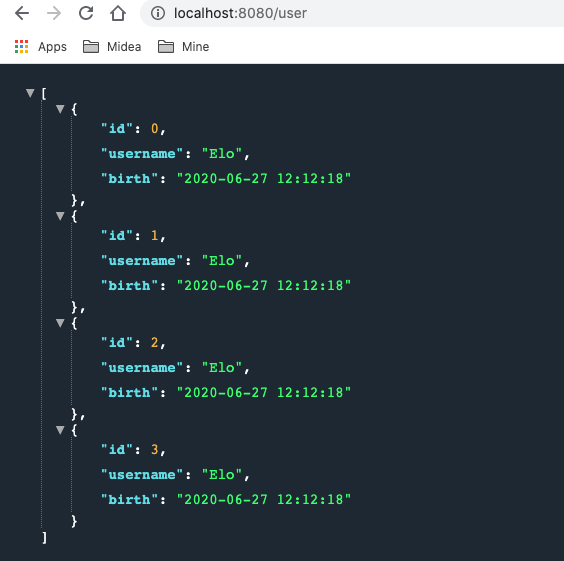
启动项目查看结果(如下图),从日期格式可以看出GsonHttpMessageConverter配置在生效了.
2.5 自定义Gson bean 对比Jackson的源码分析思路, 以及日期设置是在Gson参数中设置的, 可以对Gson进行同样的分析. org.springframework.boot.autoconfigure.gson.GsonAutoConfiguration部分源码片段如下:
1 2 3 4 5 6 7 8 9 10 11 12 13 14 15 16 17 18 19 @Configuration @ConditionalOnClass (Gson.class ) @EnableConfigurationProperties (GsonProperties .class ) public class GsonAutoConfiguration @Bean @ConditionalOnMissingBean public GsonBuilder gsonBuilder (List<GsonBuilderCustomizer> customizers) GsonBuilder builder = new GsonBuilder(); customizers.forEach((c) -> c.customize(builder)); return builder; } @Bean @ConditionalOnMissingBean public Gson gson (GsonBuilder gsonBuilder) return gsonBuilder.create(); } ...
可以看出:
1: 只要pom依赖中引入了Gson, GsonAutoConfiguration配置就会会生效, 因为其被注解 @ConditionalOnClass(Gson.class)修饰
2: GsonHttpMessageConverter bean中的gson参数是从此处的Gson构造引入的,
所以类比整合Jackson时可以只在配置文件中提供一个objectmapper bean的情况, 可以推断, 整合gson也可以在MyJsonConfig类中只提供一个Gson bean, 应该也能实现同样的整合配合.
在MyJsonConfig注释掉GsonHttpMessageConverter bean, 然后 提供如下bean后重启项目测试:
1 2 3 4 @Bean public Gson gson (GsonBuilder gsonBuilder) return gsonBuilder.setDateFormat("yyyy-MM-dd" ).create(); }
测试结果:
3. 整合FastJson 3.1 引入依赖 因为Fastjson是第三方(阿里)提供的json处理方案, 所以pom要先将自身的Jackson依赖进行排除, 但你果然也要将志气啊添加的Gson排除, 然后再添加fastjson依赖. 具体操作如下:
1 2 3 4 5 6 7 8 9 10 11 12 13 14 15 16 17 18 19 20 21 <dependency > <groupId > org.springframework.boot</groupId > <artifactId > spring-boot-starter-web</artifactId > <exclusions > <exclusion > <groupId > org.springframework.boot</groupId > <artifactId > spring-boot-starter-json</artifactId > </exclusion > </exclusions > </dependency > <dependency > <groupId > com.alibaba</groupId > <artifactId > fastjson</artifactId > <version > 1.2.49</version > </dependency >
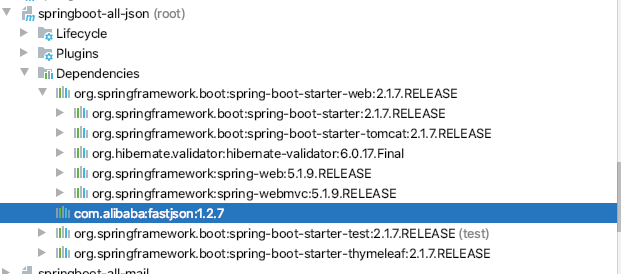
3.2测试依赖引入是否成功 reimport后可以看出只存在fastjson依赖相关的jar包了
3.3 源码分析 与Jackson和Gson不同的是, 要整合fastjson, 则必须引入FastJsonHttpMessageConverter bean, 因为没有starter中并没有相关的autoconfiguration.
源码:
1 2 3 4 5 6 7 8 9 public class FastJsonHttpMessageConverter extends AbstractHttpMessageConverter <Object > public final static Charset UTF8 = Charset.forName("UTF-8" ); private Charset charset = UTF8; private SerializerFeature[] features = new SerializerFeature[0 ]; public FastJsonHttpMessageConverter () super (new MediaType("application" , "json" , UTF8), new MediaType("application" , "*+json" , UTF8)); } ... }
可以看见,
1: FastJsonHttpMessageConverter 类和其构造方法并没有被任何@ConditionalOnMissingBean(…)或@ConditionalOnBean(…)之类的注解修饰,
2: 构造方法为空参构造, 也就是说只能提供FastJsonHttpMessageConverter bean进行自定义配置, 而不能像Gson只提供gson bean或者Jackson只提供objectmapper bean那样进行配置.
3.4 自定义FastJsonHttpMessageConverter 在MyJsonConfig类中提供一个FastJsonHttpMessageConverter bean后重启项目; (注意fastjson的配置是在FastJsonConfig中设置的, 这一点与Gson和jackson稍有不同)
1 2 3 4 5 6 7 8 9 @Bean public FastJsonHttpMessageConverter fastJsonHttpMessageConverter () FastJsonHttpMessageConverter fastJsonHttpMessageConverter = new FastJsonHttpMessageConverter(); FastJsonConfig fastJsonConfig = new FastJsonConfig(); fastJsonConfig.setDateFormat("yyyy-MM-dd" ); fastJsonHttpMessageConverter.setFastJsonConfig(fastJsonConfig); return fastJsonHttpMessageConverter; }
3.5 测试结果 测试结果如下图: