本节主要介绍传统SSM项目环境构建过程, 然后引入SpringBoot项目构建过程进行对比分析.
SpringBoot基础介绍
XML-Spring项目构建
新建maven项目,
pom文件添加packaging标签,表示项目最终打包成war包
1
| <packaging>war</packaging>
|
项目目录结构组织
在项目目录结构中添加webapp目录及其里面的web.xml文件

pom中引入webmvc相关依赖
1
2
3
4
5
6
7
| <dependencies>
<dependency>
<groupId>org.springframework</groupId>
<artifactId>spring-webmvc</artifactId>
<version>5.1.6.RELEASE</version>
</dependency>
</dependencies>
|
配置spring和MVC的配置文件:
applicationContext.xml :
1
2
3
4
5
6
7
8
9
10
11
12
| <?xml version="1.0" encoding="UTF-8"?>
<beans xmlns="http://www.springframework.org/schema/beans"
xmlns:xsi="http://www.w3.org/2001/XMLSchema-instance"
xmlns:context="http://www.springframework.org/schema/context"
xsi:schemaLocation="http://www.springframework.org/schema/beans http://www.springframework.org/schema/beans/spring-beans.xsd http://www.springframework.org/schema/context http://www.springframework.org/schema/context/spring-context.xsd">
<context:component-scan base-package="com.lee" use-default-filters="true">
<context:exclude-filter type="annotation" expression="org.springframework.stereotype.Controller"/>
</context:component-scan>
</beans>
|
spring-MVC.xml :
1
2
3
4
5
6
7
8
9
10
11
12
13
| <?xml version="1.0" encoding="UTF-8"?>
<beans xmlns="http://www.springframework.org/schema/beans"
xmlns:xsi="http://www.w3.org/2001/XMLSchema-instance"
xmlns:context="http://www.springframework.org/schema/context"
xmlns:mvc="http://www.springframework.org/schema/mvc"
xsi:schemaLocation="http://www.springframework.org/schema/beans http://www.springframework.org/schema/beans/spring-beans.xsd http://www.springframework.org/schema/context http://www.springframework.org/schema/context/spring-context.xsd http://www.springframework.org/schema/mvc http://www.springframework.org/schema/mvc/spring-mvc.xsd">
<context:component-scan base-package="com.lee">
<context:include-filter type="annotation" expression="org.springframework.stereotype.Controller"/>
</context:component-scan>
<mvc:annotation-driven/>
</beans>
|
配置web.xml
1
2
3
4
5
6
7
8
9
10
11
12
13
14
15
16
17
18
19
20
21
22
23
24
25
26
27
28
29
30
31
| <?xml version="1.0" encoding="UTF-8"?>
<web-app xmlns="http://xmlns.jcp.org/xml/ns/javaee"
xmlns:xsi="http://www.w3.org/2001/XMLSchema-instance"
xsi:schemaLocation="http://xmlns.jcp.org/xml/ns/javaee http://xmlns.jcp.org/xml/ns/javaee/web-app_4_0.xsd"
version="4.0">
<context-param>
<param-name>contextConfigLocation</param-name>
<param-value>classpath:applicationContext.xml</param-value>
</context-param>
<listener>
<listener-class>org.springframework.web.context.ContextLoaderListener</listener-class>
</listener>
<servlet>
<servlet-name>springmvc</servlet-name>
<servlet-class>org.springframework.web.servlet.DispatcherServlet</servlet-class>
<init-param>
<param-name>contextConfigLocation</param-name>
<param-value>classpath:spring-MVC.xml</param-value>
</init-param>
</servlet>
<servlet-mapping>
<servlet-name>springmvc</servlet-name>
<url-pattern>/</url-pattern>
</servlet-mapping>
</web-app>
|
创建Controller
1
2
3
4
5
6
7
8
9
10
11
12
13
14
15
16
17
18
| package com.lee.controller;
import com.lee.service.HiService;
import org.springframework.beans.factory.annotation.Autowired;
import org.springframework.stereotype.Controller;
import org.springframework.web.bind.annotation.GetMapping;
import org.springframework.web.bind.annotation.RestController;
@RestController
public class HiController {
@Autowired
HiService hiService;
@GetMapping(value = "/hi",produces = "text/html;charset=utf-8")
public String hi(){
return hiService.sayHi();
}
}
|
@GetMapping(value = “/hi”,produces = “text/html;charset=utf-8”) 中的produces是为了解决前端乱码问题.
创建Service
1
2
3
4
5
6
7
8
9
10
11
12
| package com.lee.service;
import org.springframework.stereotype.Service;
import javax.xml.ws.ServiceMode;
@Service
public class HiService {
public String sayHi() {
return "Hi Spring,久仰!";
}
}
|
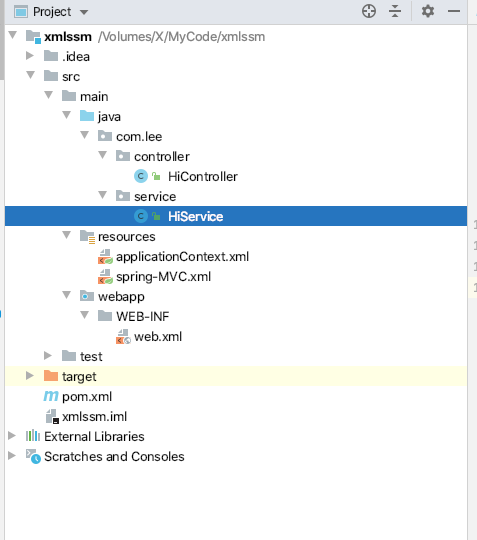
至此, 整个项目的目录结构:
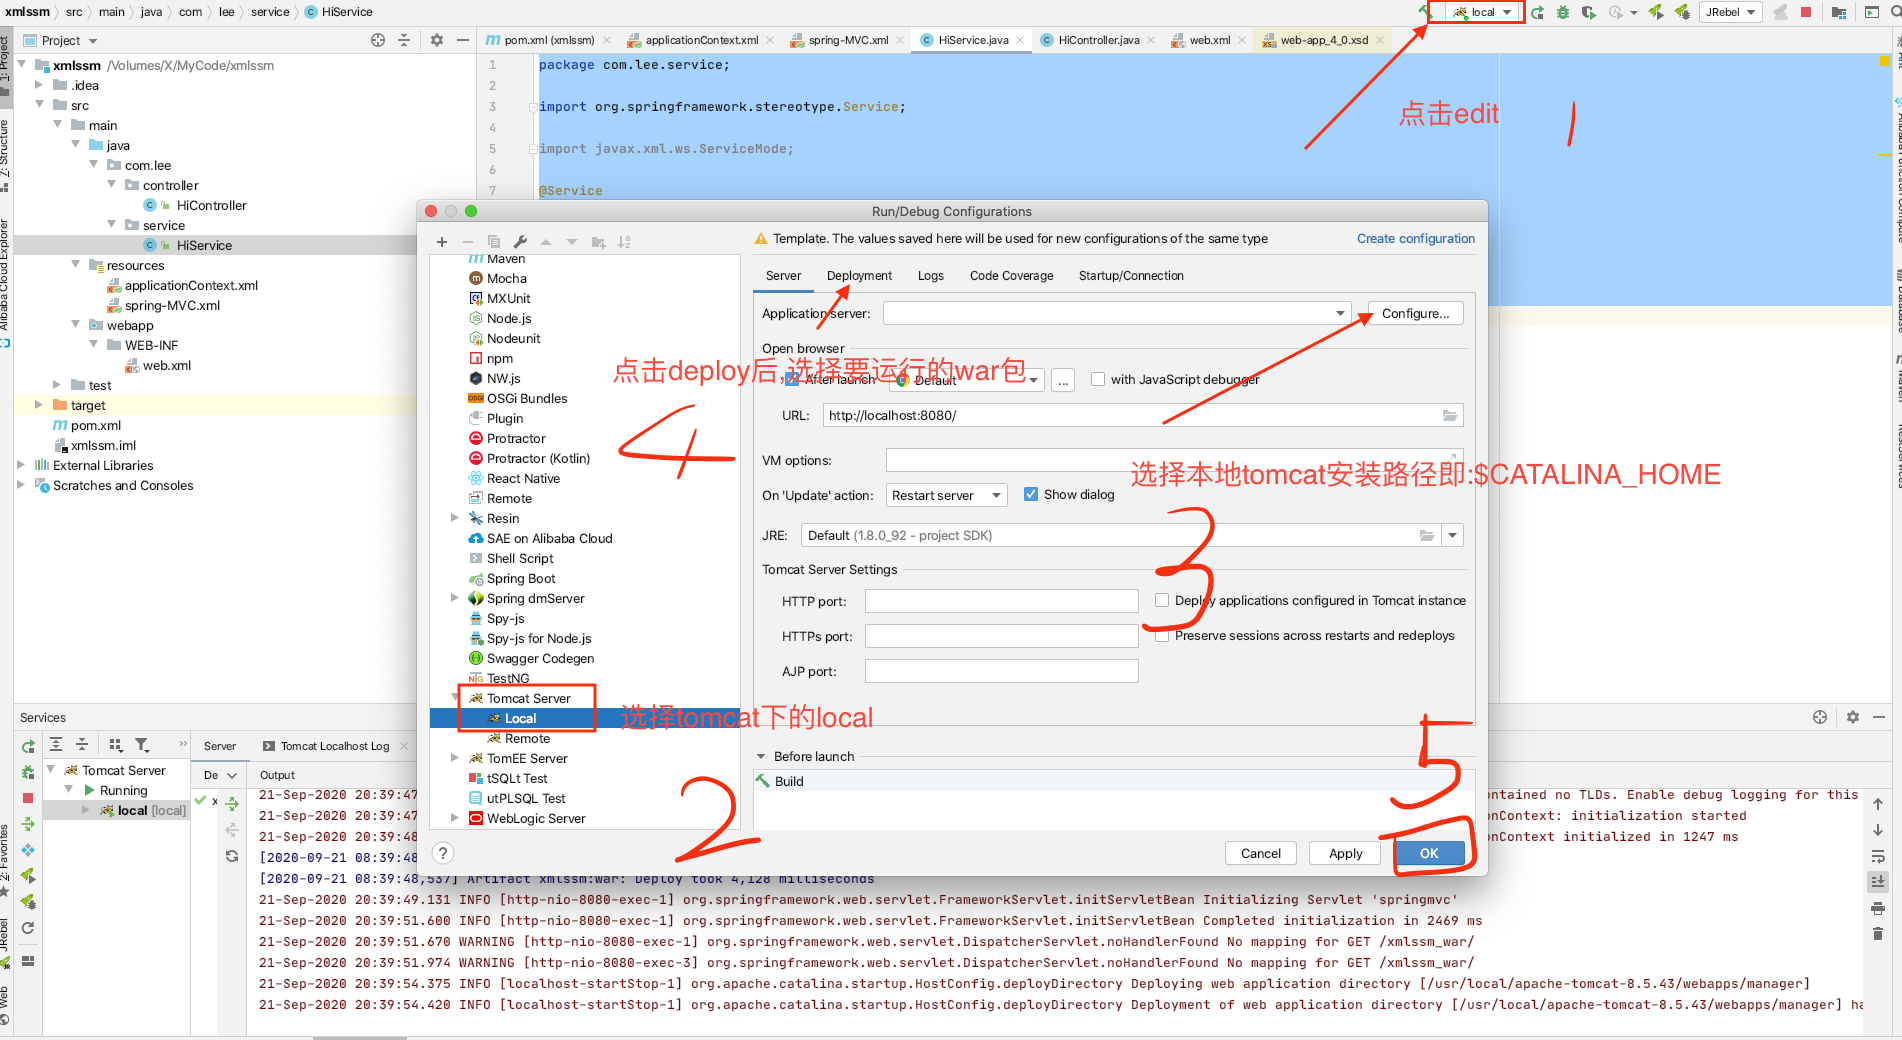
配置本地Tomcat
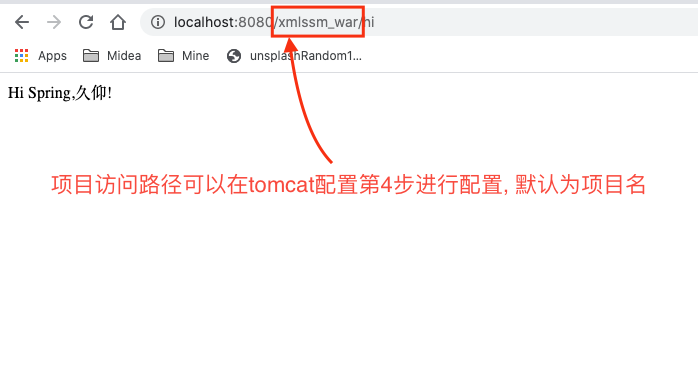
测试结果
Annotation-Spring项目构建
新建maven项目
并添加package和webMVC依赖 (和XML方式构建spring项目一致)
新建Spring配置类
1
2
3
4
5
6
7
| @Configuration
@ComponentScan(basePackages = {"com.lee"}
,useDefaultFilters = true,
excludeFilters = {@ComponentScan.Filter(type = FilterType.ANNOTATION,classes = {Controller.class})})
public class ApplicationContextConfig {
}
|
新建MVC配置类
1
2
3
4
5
6
| @Configuration
@ComponentScan(basePackages = {"com.lee"}
,useDefaultFilters = false,
includeFilters = {@ComponentScan.Filter(type = FilterType.ANNOTATION,classes = {Controller.class})})
public class MvcConfig {
}
|
新建初始化配置加载类WebInit
该类功能等效于XML配置中的web.xml, 用来加载spring和mvc的配置类
1
2
3
4
5
6
7
8
9
10
11
12
13
14
15
16
17
18
19
20
21
22
23
| package com.lee.config;
import org.springframework.context.annotation.Configuration;
import org.springframework.web.WebApplicationInitializer;
import org.springframework.web.context.support.AnnotationConfigWebApplicationContext;
import org.springframework.web.servlet.DispatcherServlet;
import javax.servlet.ServletException;
import javax.servlet.ServletRegistration;
public class WebInit implements WebApplicationInitializer {
@Override
public void onStartup(javax.servlet.ServletContext servletContext) throws ServletException {
AnnotationConfigWebApplicationContext context = new AnnotationConfigWebApplicationContext();
context.setServletContext(servletContext);
context.register(MvcConfig.class);
ServletRegistration.Dynamic springMVC = servletContext.addServlet("springMVC", new DispatcherServlet(context));
springMVC.addMapping("/");
springMVC.setLoadOnStartup(1);
}
}
|
注意, 该类需要实现WebApplicationInitializer, 需要servlet相关支持, 所以要在pom中添加servlet的依赖, 最终pom.xml:
1
2
3
4
5
6
7
8
9
10
11
12
13
14
15
16
17
18
19
20
21
22
23
24
25
26
27
28
| <?xml version="1.0" encoding="UTF-8"?>
<project xmlns="http://maven.apache.org/POM/4.0.0"
xmlns:xsi="http://www.w3.org/2001/XMLSchema-instance"
xsi:schemaLocation="http://maven.apache.org/POM/4.0.0 http://maven.apache.org/xsd/maven-4.0.0.xsd">
<modelVersion>4.0.0</modelVersion>
<groupId>com.lee</groupId>
<artifactId>annotationSSM</artifactId>
<version>1.0-SNAPSHOT</version>
<packaging>war</packaging>
<dependencies>
<dependency>
<groupId>org.springframework</groupId>
<artifactId>spring-webmvc</artifactId>
<version>5.1.16.RELEASE</version>
</dependency>
<dependency>
<groupId>javax.servlet</groupId>
<artifactId>javax.servlet-api</artifactId>
<version>4.0.1</version>
<scope>provided</scope>
</dependency>
</dependencies>
</project>
|
创建controller类并配置
1
2
3
4
5
6
7
8
9
10
11
12
13
14
| package com.lee.controller;
import org.springframework.web.bind.annotation.GetMapping;
import org.springframework.web.bind.annotation.RestController;
@RestController
public class HiController {
@GetMapping(value = "/hi",produces = "text/html;charset=utf-8")
public String hi(){
return "注解构建Spring成功!";
}
}
|
本地tomcat
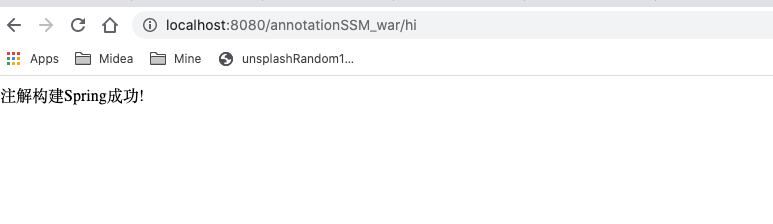
启动项目进行测试结果如下:
注解方式构建的补充
上面已经用最简单的方式进行了注解方式构建spring项目, 但是, 如果要一些其他的附加功能又该如何整合呢? 下面对几种常见功能进行了简要介绍, 更具体的细节会在后续章节进行详细展开.
静态资源访问
让MvcConfig类继承WebMvcConfigurationSupport, 重写addResourceHandlers方法,如下:
1
2
3
4
5
| @Override
protected void addResourceHandlers(ResourceHandlerRegistry registry) {
registry.addResourceHandler("/static/**").addResourceLocations("classpath:/static/");
super.addResourceHandlers(registry);
}
|
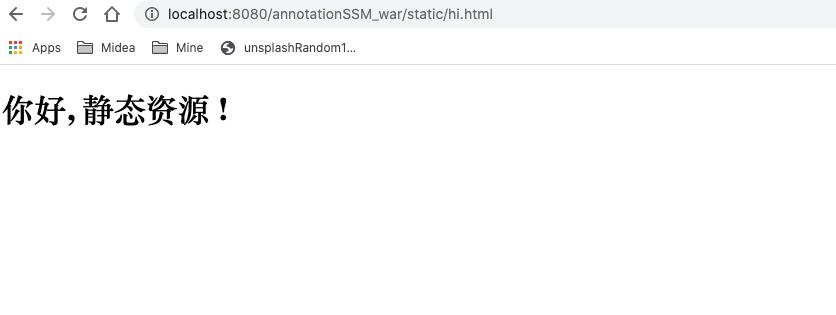
然后在resources目录下创建静态资源
1
2
3
4
5
6
7
8
9
10
| <!DOCTYPE html>
<html lang="en">
<head>
<meta charset="UTF-8">
<title>Hello</title>
</head>
<body>
<h1>你好, 静态资源 !</h1>
</body>
</html>
|
重启应用访问, 测试结果如下:
拦截器
新建一个类MyInterceptor实现HandlerInterceptor
1
2
3
4
5
6
7
8
9
10
11
12
13
14
15
16
17
18
19
20
21
22
23
24
25
| package com.lee.interceptor;
import org.springframework.web.servlet.HandlerInterceptor;
import org.springframework.web.servlet.ModelAndView;
import javax.servlet.http.HttpServletRequest;
import javax.servlet.http.HttpServletResponse;
public class MyInterceptor implements HandlerInterceptor{
@Override
public boolean preHandle(HttpServletRequest request, HttpServletResponse response, Object handler) throws Exception {
System.out.println("pre");
return true;
}
@Override
public void postHandle(HttpServletRequest request, HttpServletResponse response, Object handler, ModelAndView modelAndView) throws Exception {
System.out.println("post");
}
@Override
public void afterCompletion(HttpServletRequest request, HttpServletResponse response, Object handler, Exception ex) throws Exception {
System.out.println("after");
}
}
|
然后在MvcConfig类中注册该拦截器
1
2
3
4
5
6
| @Override
protected void addInterceptors(InterceptorRegistry registry) {
MyInterceptor myInterceptor = new MyInterceptor();
registry.addInterceptor(myInterceptor).addPathPatterns("/**");
super.addInterceptors(registry);
}
|
在controller中添加一个方法进行测试:
1
2
3
4
| @GetMapping(value = "/interceptor",produces = "text/html;charset=utf-8")
public String interceptor(){
return "Anthing";
}
|
前端测试访问后发现控制台输出结果如下 :

Json数据访问
添加FastJson依赖
1
2
3
4
| <groupId>com.alibaba</groupId>
<artifactId>fastjson</artifactId>
<version>1.2.49</version>
</dependency>
|
添加controller方法进行测试:
1
2
3
4
5
6
7
8
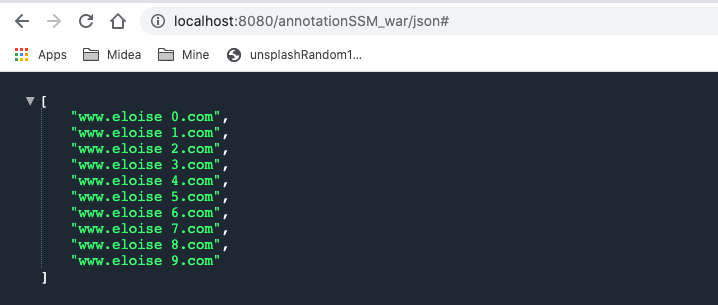
| @GetMapping(value = "/json",produces = "text/html;charset=utf-8")
public List<String> json(){
ArrayList<String> strings = new ArrayList<>();
for (int i=0;i<10;i++){
strings.add("www.eloise ".concat(String.valueOf(i)).concat(".com"));
}
return strings;
}
|
在MvcConfig类中重写方法配置JSON:
1
2
3
4
5
6
7
8
9
10
| @Override
protected void configureMessageConverters(List<HttpMessageConverter<?>> converters) {
FastJsonHttpMessageConverter fastJsonHttpMessageConverter = new FastJsonHttpMessageConverter();
FastJsonConfig config=new FastJsonConfig();
config.setCharset(Charset.defaultCharset());
config.setDateFormat(new SimpleDateFormat("yyyy-MM-dd").format(new Date()));
fastJsonHttpMessageConverter.setFastJsonConfig(config);
converters.add(fastJsonHttpMessageConverter);
super.configureMessageConverters(converters);
}
|
config相关的配置不是必须的, 这里仅仅只是列出来做展示而已.
测试结果如下:
更多整合教程请继续浏览springboot系列博客 .