本章将具体讲解如何用Spring Security进行授权操作, 如何让具有对应角色的用户拥有指定权限。并且实现角色继承的方式让上级具有下级的操作权限。
1.授权
所谓的授权,就是用户如果要访问某一个资源,我们要去检查用户是否具备这样的权限,如果具备就允许访问,如果不具备,则不允许访问。
2.准备测试用户
因为z暂时还没有连接数据库,所以测试用户还是基于内存来配置。
基于内存配置测试用户有两种方式,前一篇文章介绍了第一种,如下:
1
2
3
4
5
6
7
8
9
10
| @Override
protected void configure(AuthenticationManagerBuilder auth) throws Exception {
auth.inMemoryAuthentication()
.withUser("admin")
.password("123").roles("admin")
.and()
.withUser("user")
.password("456")
.roles("user");
}
|
本章节将介绍第二种方式:
由于 Spring Security 支持多种数据源,例如内存、数据库、LDAP 等,这些不同来源的数据被共同封装成了一个 UserDetailService 接口,任何实现了该接口的对象都可以作为认证数据源。
因此我们还可以通过重写 WebSecurityConfigurerAdapter 中的 userDetailsService 方法来提供一个 UserDetailService 实例进而配置多个用户:
1
2
3
4
5
6
7
| @Bean
protected UserDetailsService userDetailsService() {
InMemoryUserDetailsManager manager = new InMemoryUserDetailsManager();
manager.createUser(User.withUsername("Alex").password("123").roles("admin").build());
manager.createUser(User.withUsername("Brooks").password("456").roles("user").build());
return manager;
}
|
建好用户后准备测试接口
1
2
3
4
5
6
7
8
9
10
11
12
13
14
15
16
17
| @RestController
public class HelloController {
@GetMapping("/hello")
public String hello() {
return "hello";
}
@GetMapping("/admin/hello")
public String admin() {
return "hello admin";
}
@GetMapping("/user/hello")
public String user() {
return "hello user";
}
}
|
规划
对上面的三个测试接口,我们的规划是这样的:
- /hello 是任何人都可以访问的接口
- /admin/hello 是具有 admin 身份的人才能访问的接口
- /user/hello 是具有 user 身份的人才能访问的接口
- 所有 user 能够访问的资源,admin 都能够访问 (上级自动拥有下级权限。)
注意第四条规范意味着所有具备 admin 身份的人自动具备 user 身份。
拦截规则准备
- 接下来我们来配置权限的拦截规则,在 Spring Security 的 configure(HttpSecurity http) 方法中,代码如下:
1
2
3
4
5
6
7
| http.authorizeRequests()
.antMatchers("/admin/**").hasRole("admin")
.antMatchers("/user/**").hasRole("user")
.anyRequest().authenticated()
.and()
...
...
|
Ant风格简介
这里的匹配规则我们采用了 Ant 风格的路径匹配符,Ant 风格的路径匹配符在 Spring 家族中使用非常广泛,它的匹配规则也非常简单:
| tongpei |
含义 |
| ** |
匹配多层路径 |
| * |
匹配一层路径 |
| ? |
匹配人意单个字符 |
补充
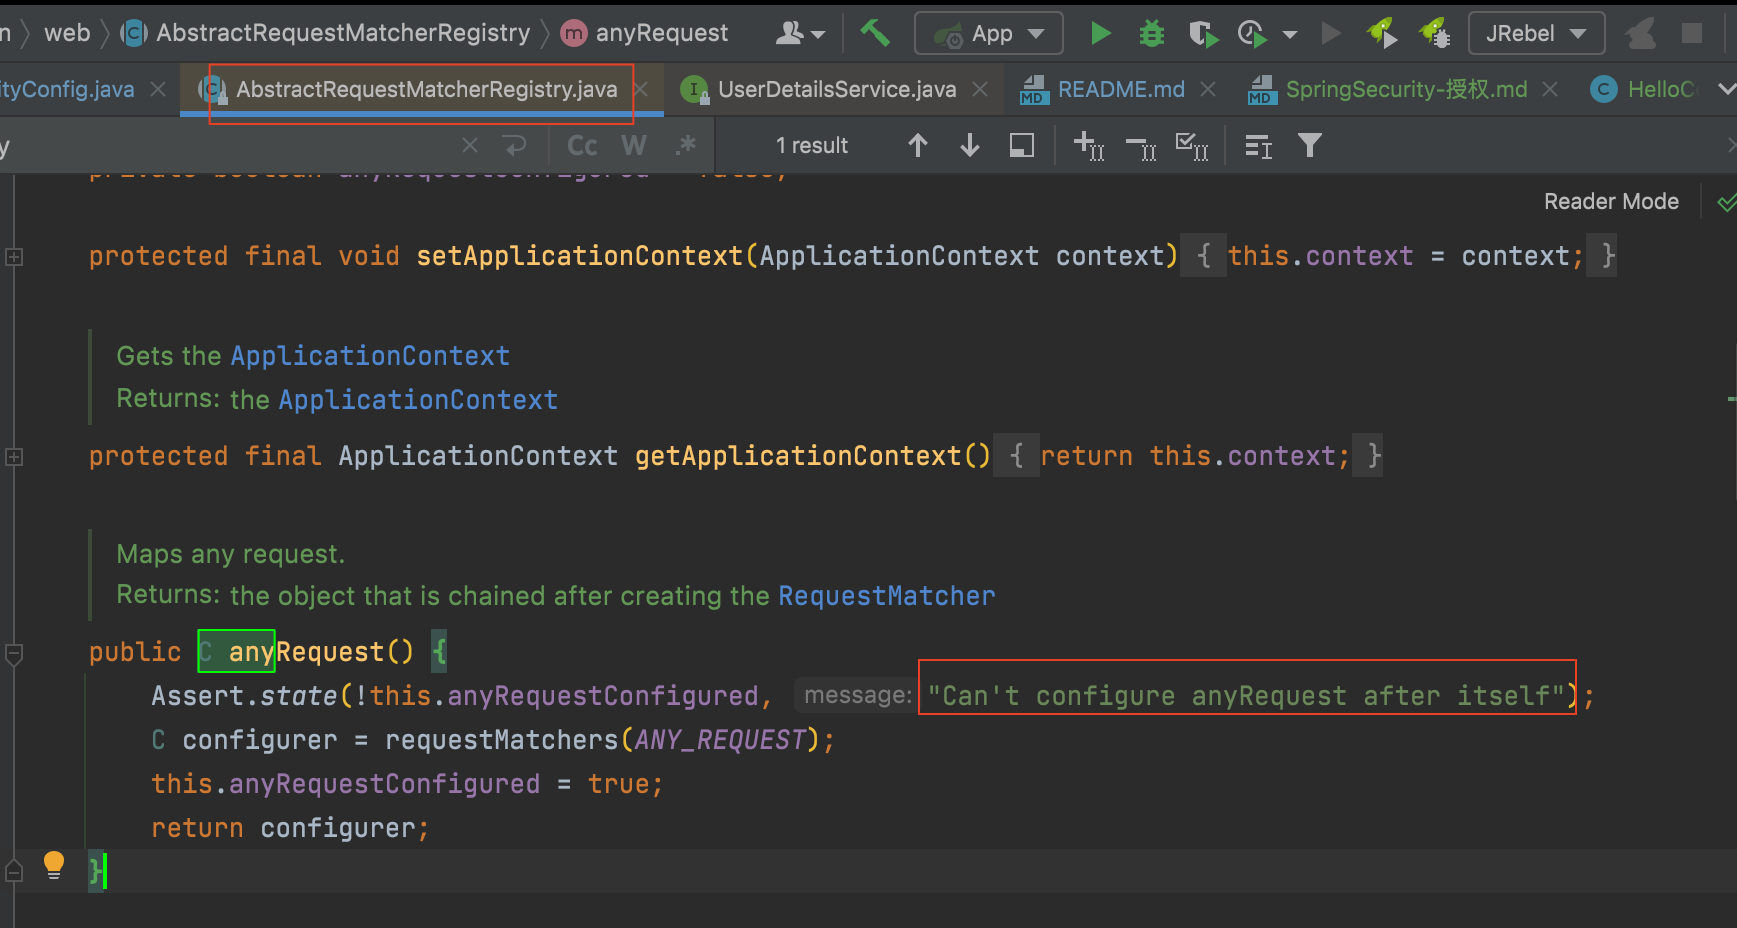
如果拦截规则里配置顺序antMatchers 在anyRequest 之后则会报错:
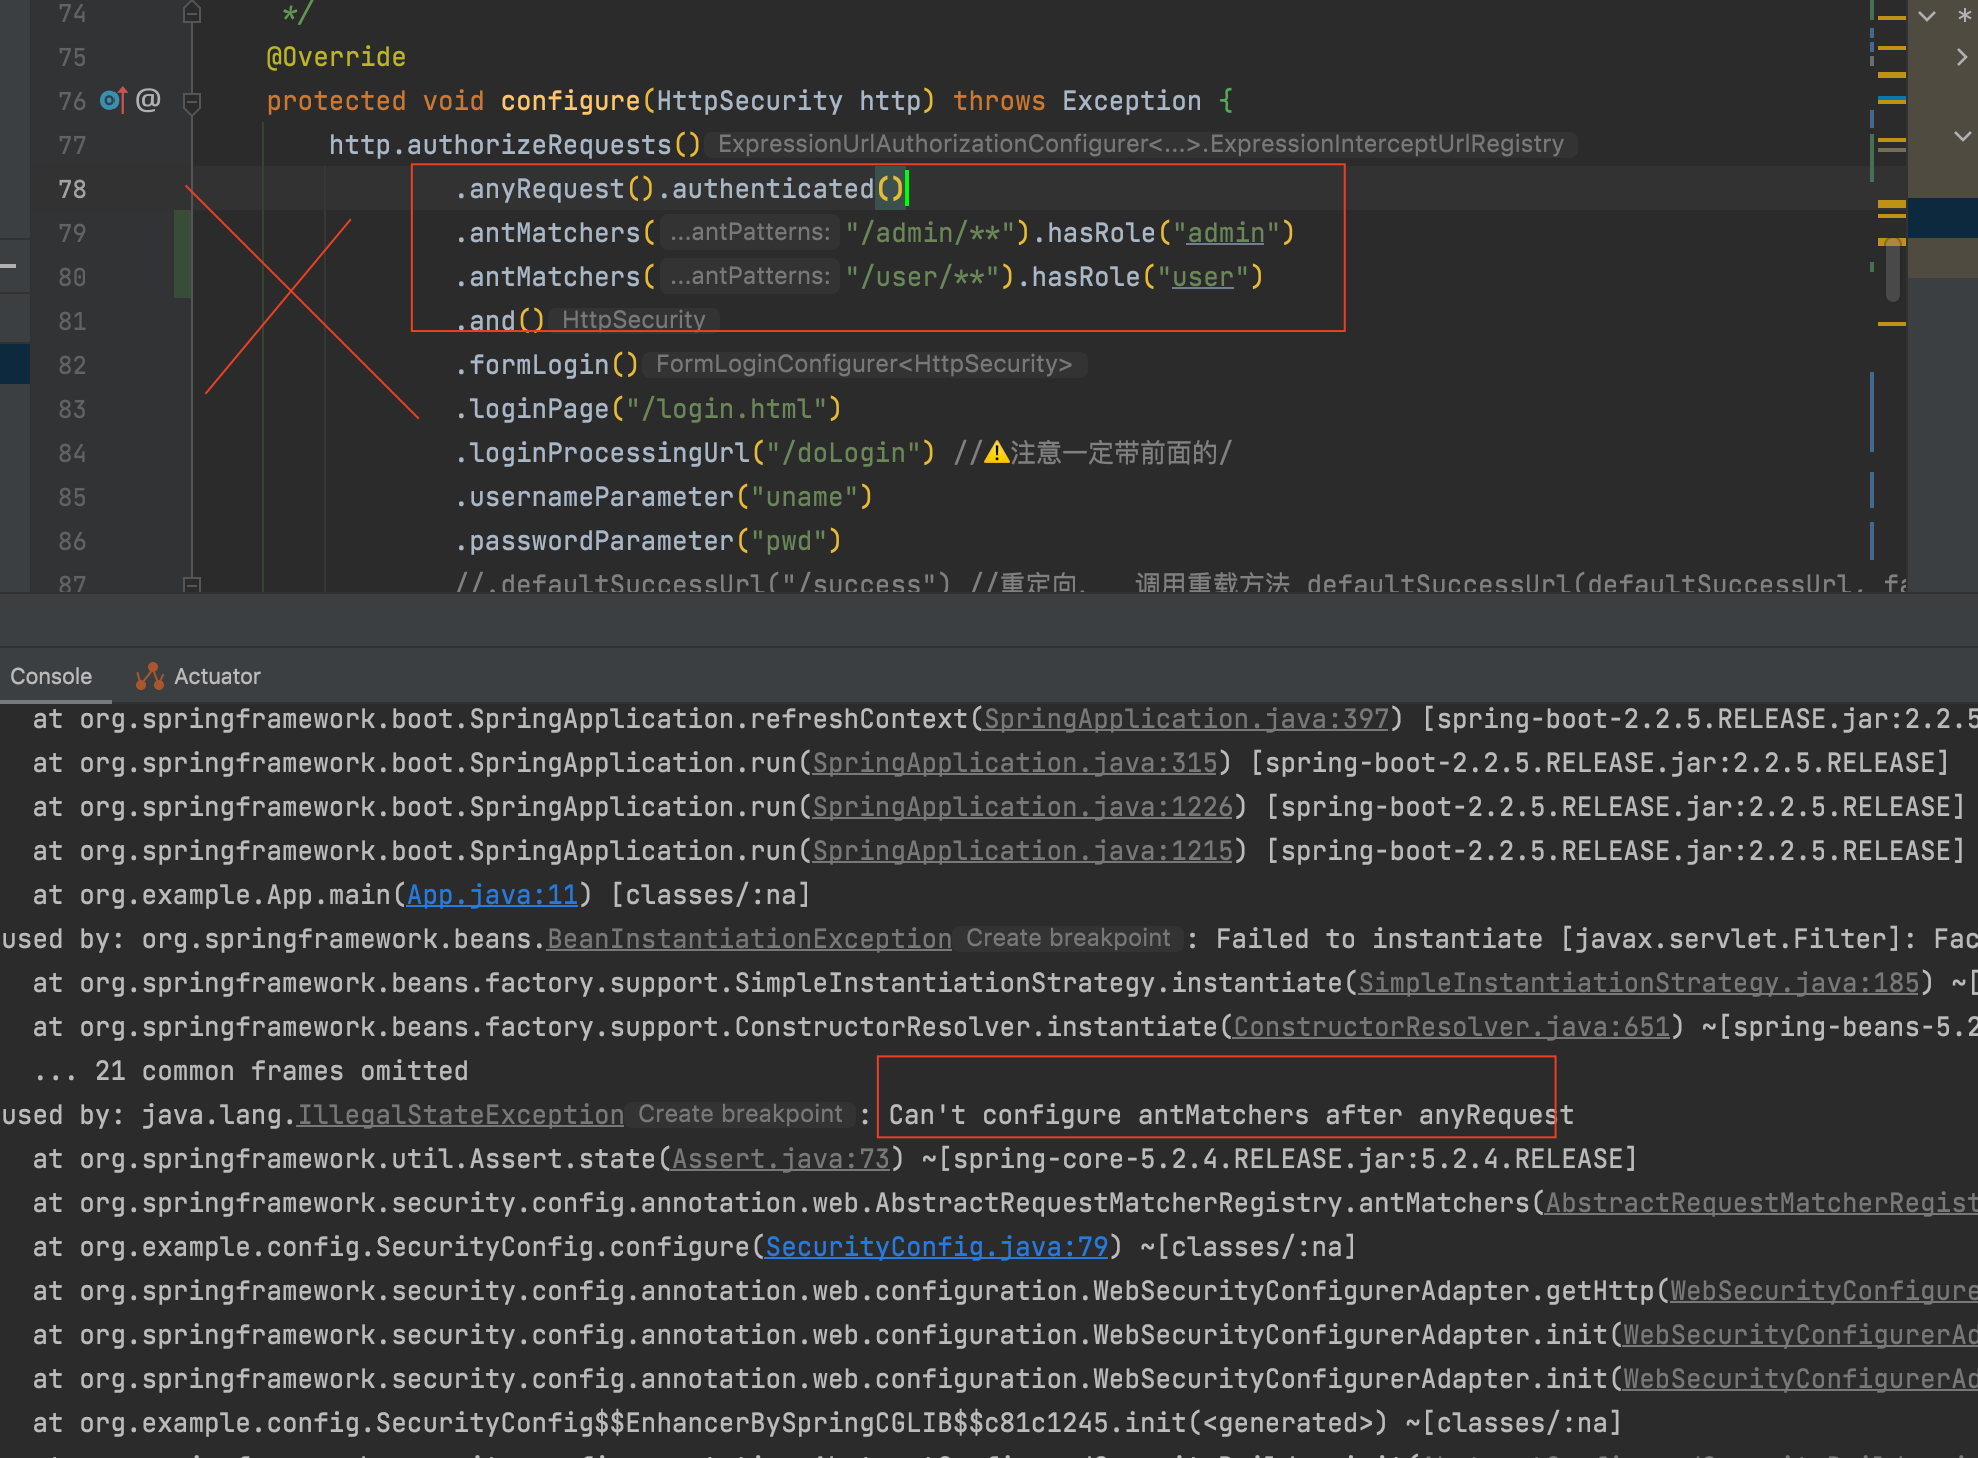
其原理是,在org.springframework.security.config.annotation.web.AbstractRequestMatcherRegistry类中, 定义anyRequest()方法时, 在第一行断言, 如果之后还有拦截规则就报错
然后启动项目,
user登陆测试
用user角色用户Brooks / 456 登陆。
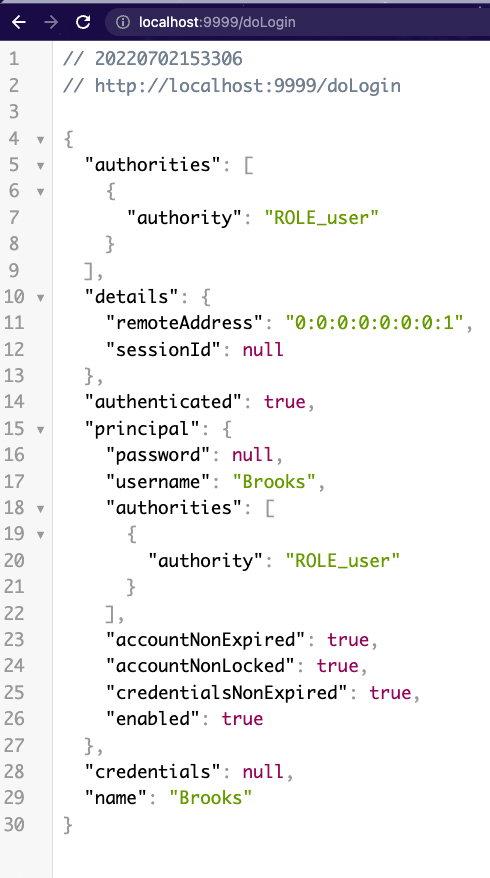
分别访问上述三个接口:
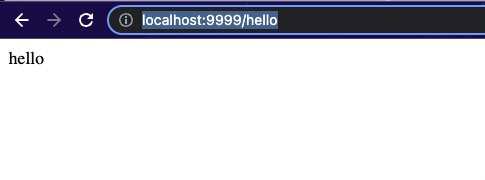
/hello接口正常
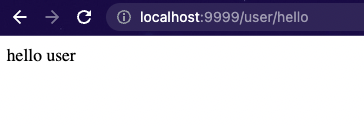
/user/hello接口正常
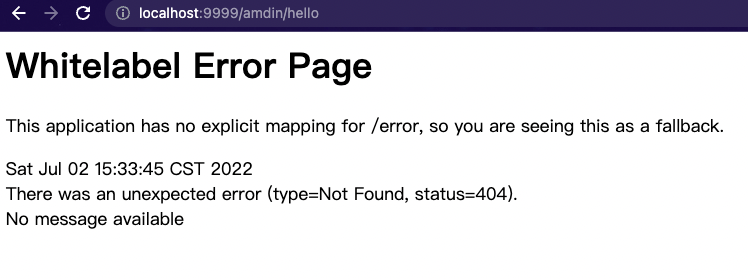
/admin/hello接口404
admin登陆测试
logout后用admin角色用户 Alex / 123 重新登陆访问上述三个接口, 发现
/hello接口正常
/user/hello接口正常
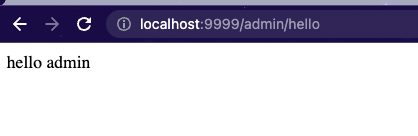
/admin/hello接口访问正常
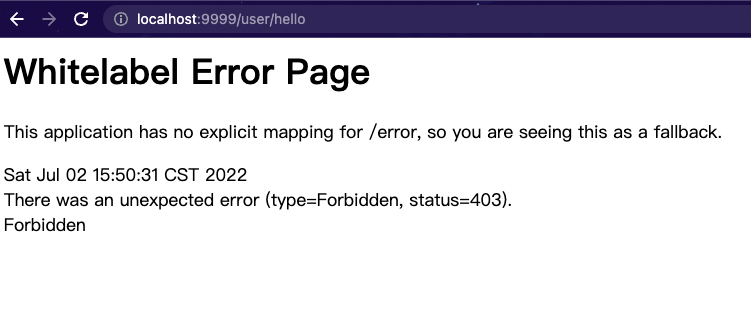
测试完反观前面的规划, 前三跳满足了, 但是第4条:所有 user 能够访问的资源,admin 都能够访问 (上级自动拥有下级权限。) 显然还没有实现(/user/hello接口403错误可以看出。)
要实现所有 user 能够访问的资源,admin 都能够访问,这涉及到另外一个知识点,叫做角色继承。 这在实际开发中非常有用。
上级可能具备下级的所有权限,如果使用角色继承,这个功能就很好实现,我们只需要在 SecurityConfig 中添加如下代码来配置角色继承关系即可:
1
2
3
4
5
6
| @Bean
RoleHierarchy roleHierarchy() {
RoleHierarchyImpl hierarchy = new RoleHierarchyImpl();
hierarchy.setHierarchy("ROLE_admin > ROLE_user");
return hierarchy;
}
|
注意,在配置时,需要给角色手动加上 ROLE_ 前缀。上面的配置表示 ROLE_admin 自动具备 ROLE_user 的权限。
为了方便测试观察对Controller做了修改:
1
2
3
4
5
6
7
8
9
10
11
12
13
14
15
16
17
18
19
20
21
22
23
24
25
26
27
28
29
30
31
32
33
34
35
36
37
38
39
40
41
42
43
44
45
46
47
| package org.example.controller;
import org.springframework.security.core.AuthenticatedPrincipal;
import org.springframework.security.core.Authentication;
import org.springframework.security.core.GrantedAuthority;
import org.springframework.security.core.context.SecurityContextHolder;
import org.springframework.security.core.userdetails.UserDetails;
import org.springframework.util.StringUtils;
import org.springframework.web.bind.annotation.GetMapping;
import org.springframework.web.bind.annotation.RestController;
import javax.annotation.Resource;
@RestController
public class HelloController {
@GetMapping("/hello")
public String hello() {
return "hello";
}
@GetMapping("/admin/hello")
public String admin() {
return "admin hello接口, 角色用户: \t" + getRoleAndUsername();
}
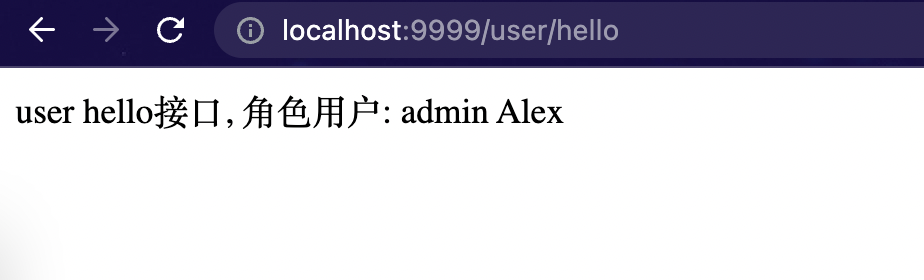
@GetMapping("/user/hello")
public String user() {
return "user hello接口, 角色用户: \t" + getRoleAndUsername();
}
String getRoleAndUsername() {
Authentication authentication = SecurityContextHolder.getContext().getAuthentication();
String role = authentication.getAuthorities().stream().skip(0).findFirst().orElseThrow(() -> new RuntimeException("Empty Collection")).getAuthority();
if (role.startsWith("ROLE_")) {
role = role.substring("ROLE_".length(), role.length());
}
String username = authentication.getName();
return role + "\t" + username;
}
}
|
测试:
配置完成后,重启项目测试,此时我们发现 admin 也能访问 /user/hello 这个接口了。