So in this Chapter, we will discuss the topics related to AWS ***
IAM introduction
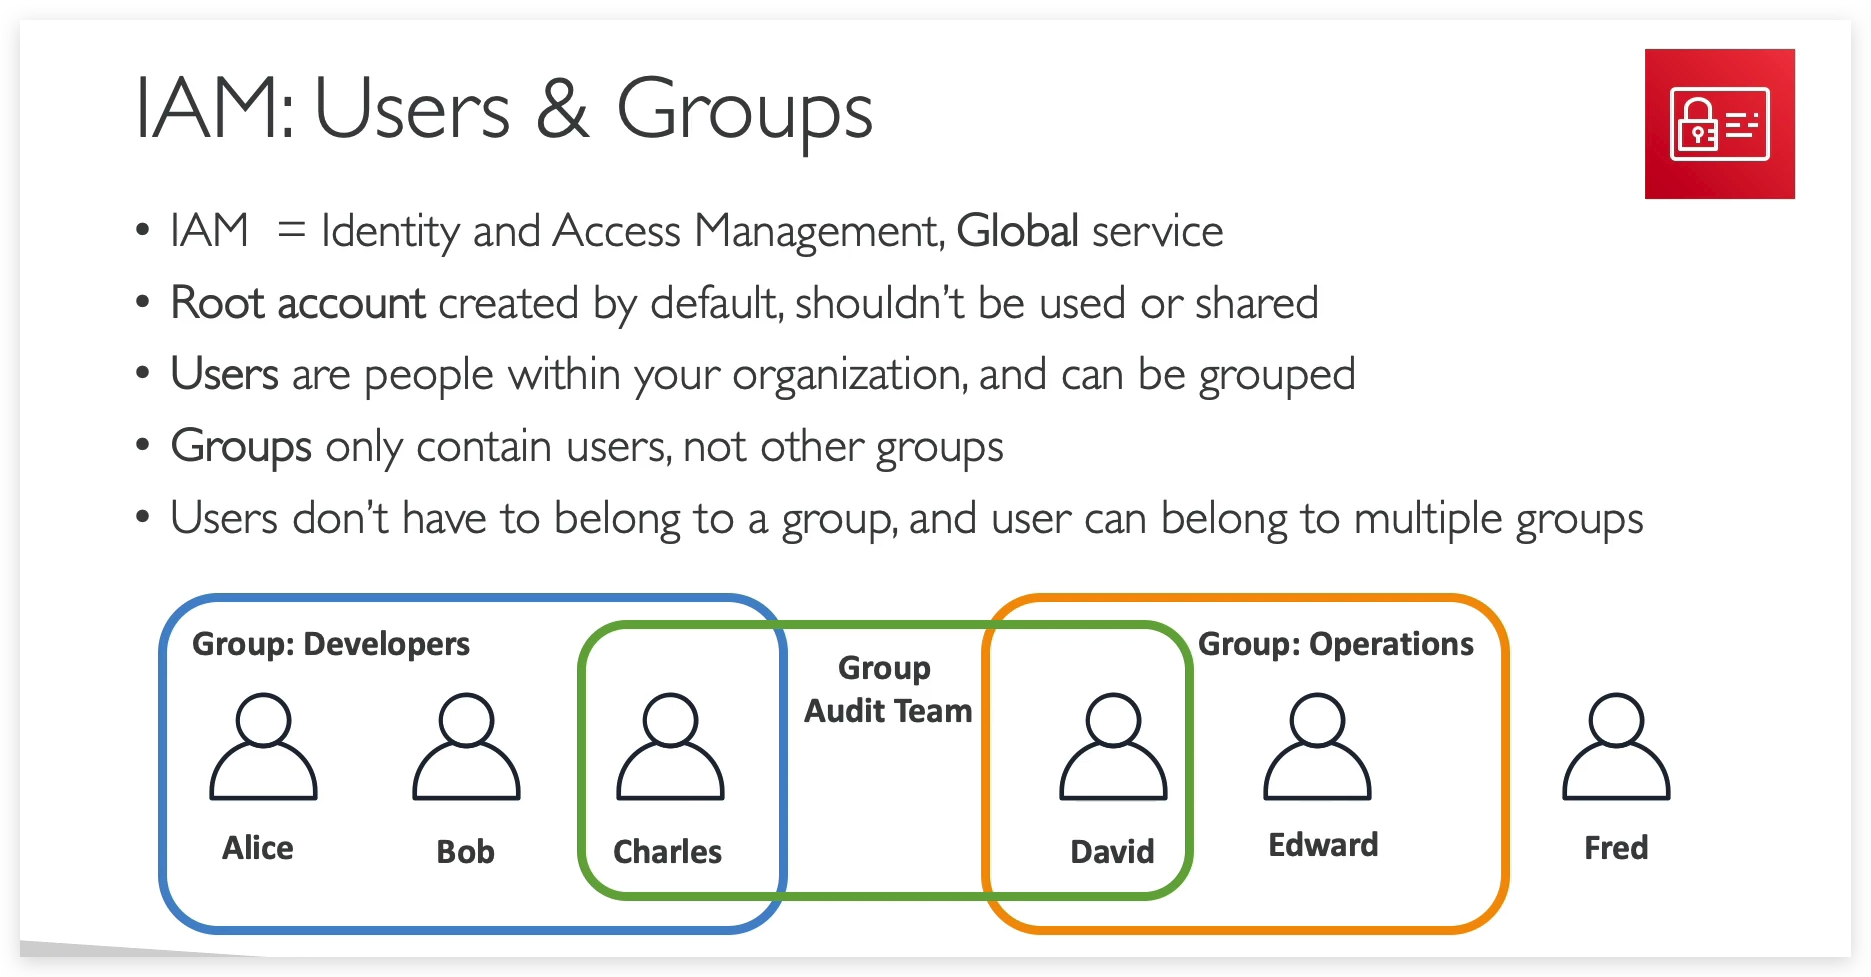
- IAM = Identity and Access Management, Global service
- Root account created by default, shouldn’t be used or shared
- Users are people within your organization, and can be grouped
- Groups only contain users, not other groups
- Users don’t have to belong to a group, and user can belong to multiple groups
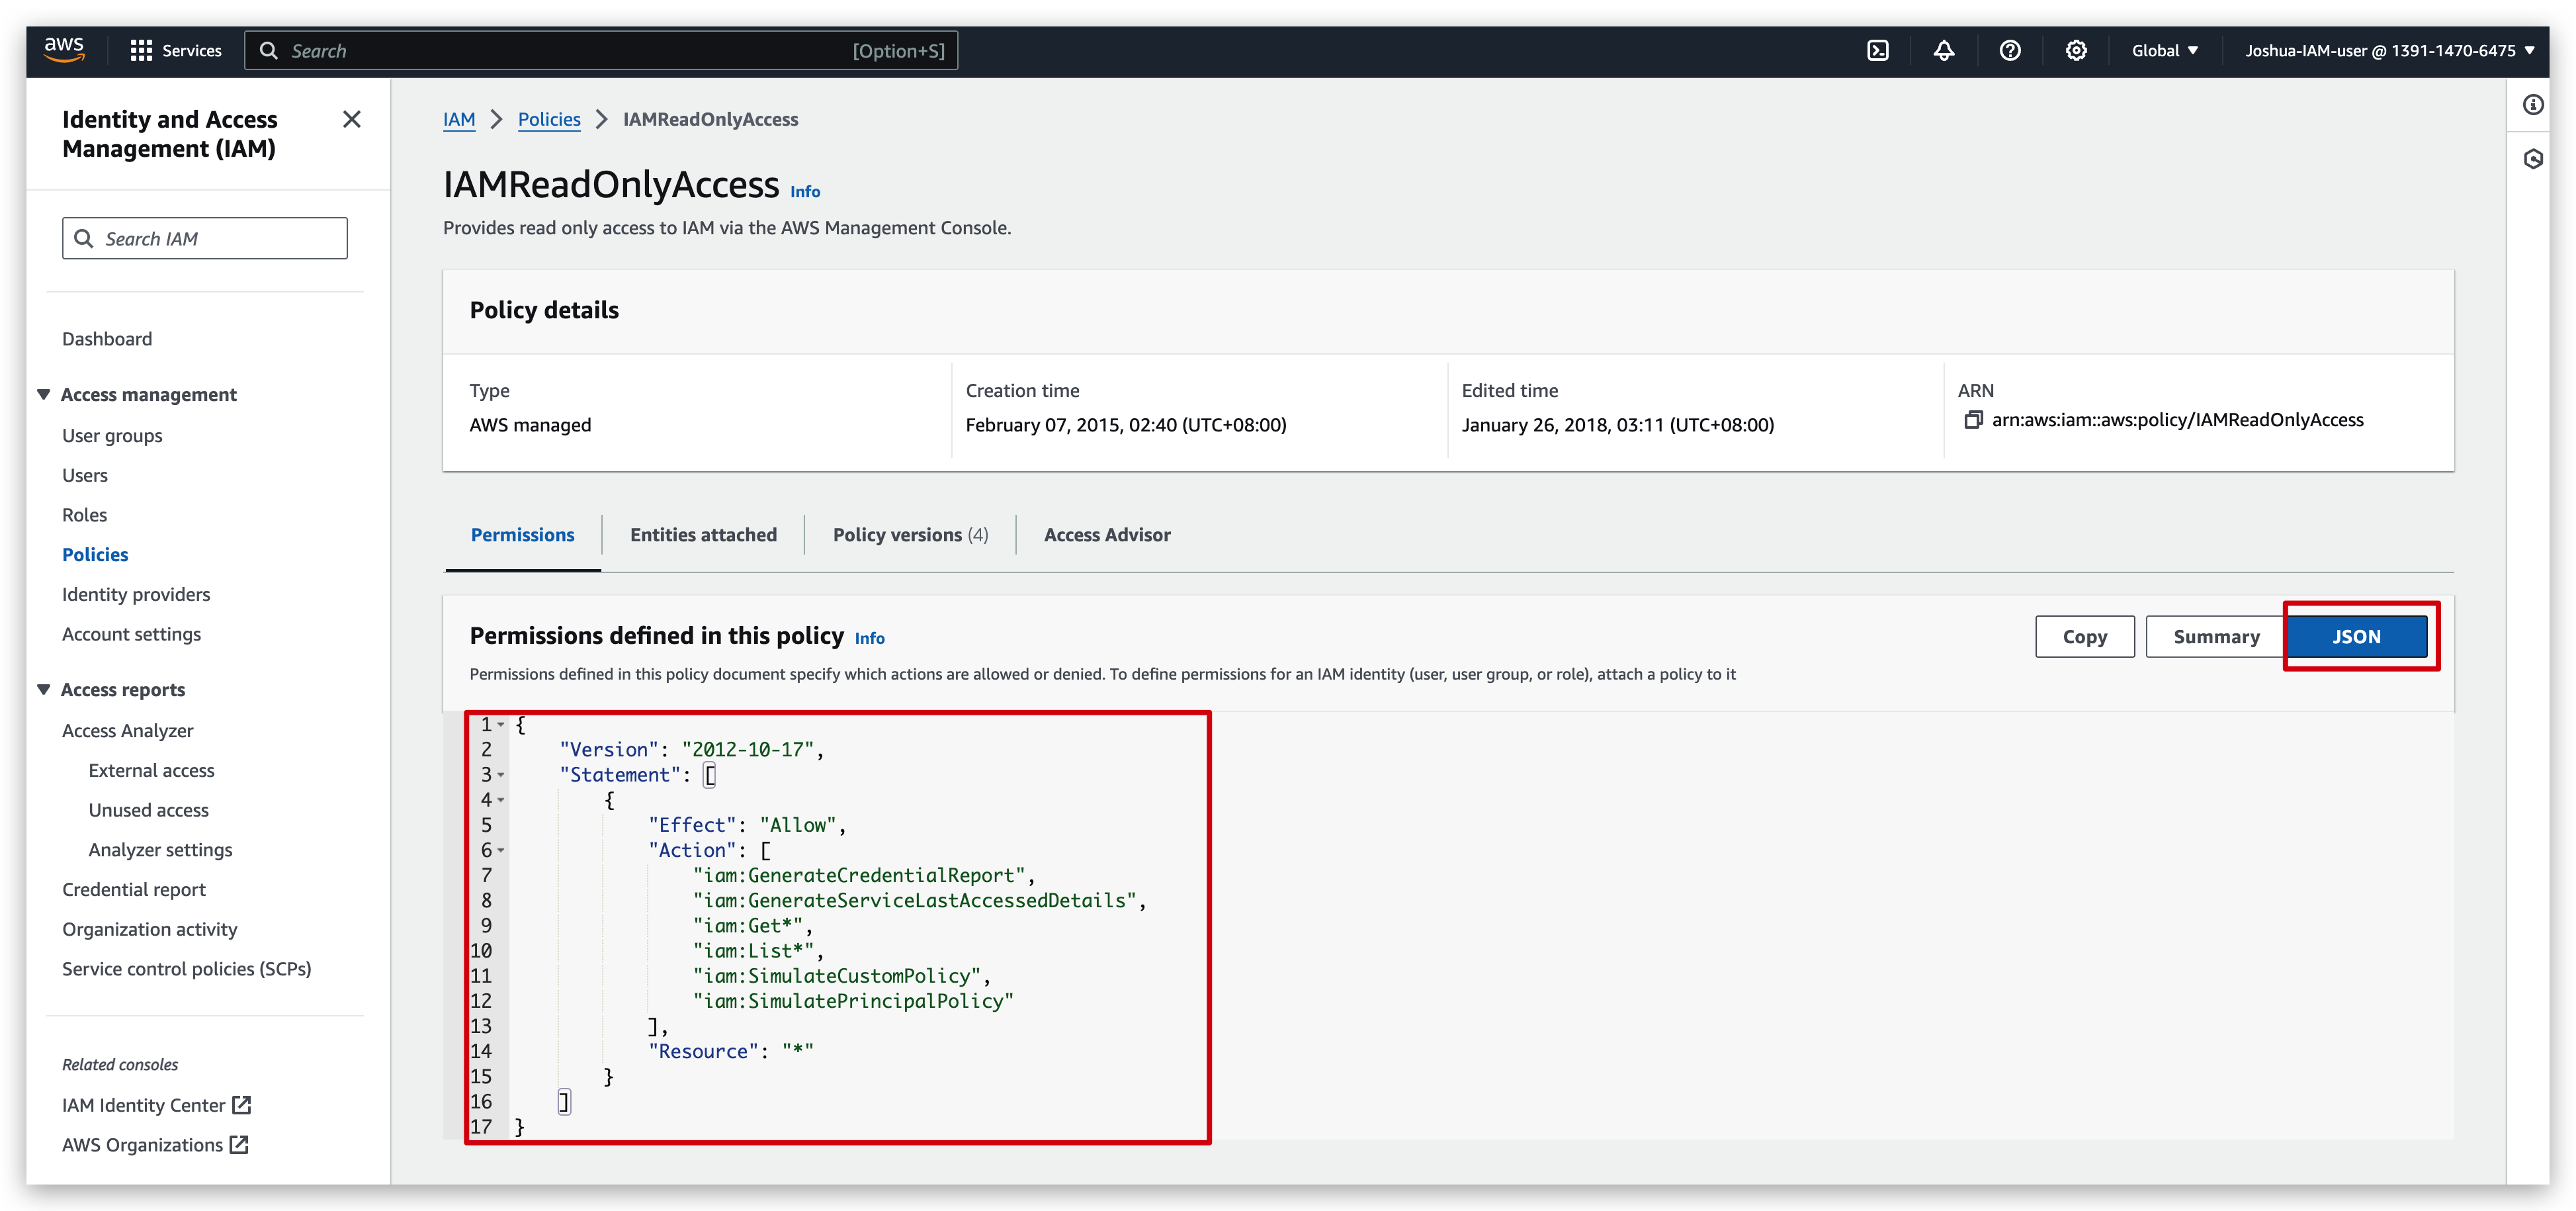
By defining such IAM Policy, we are allowing our users to use some services in AWS.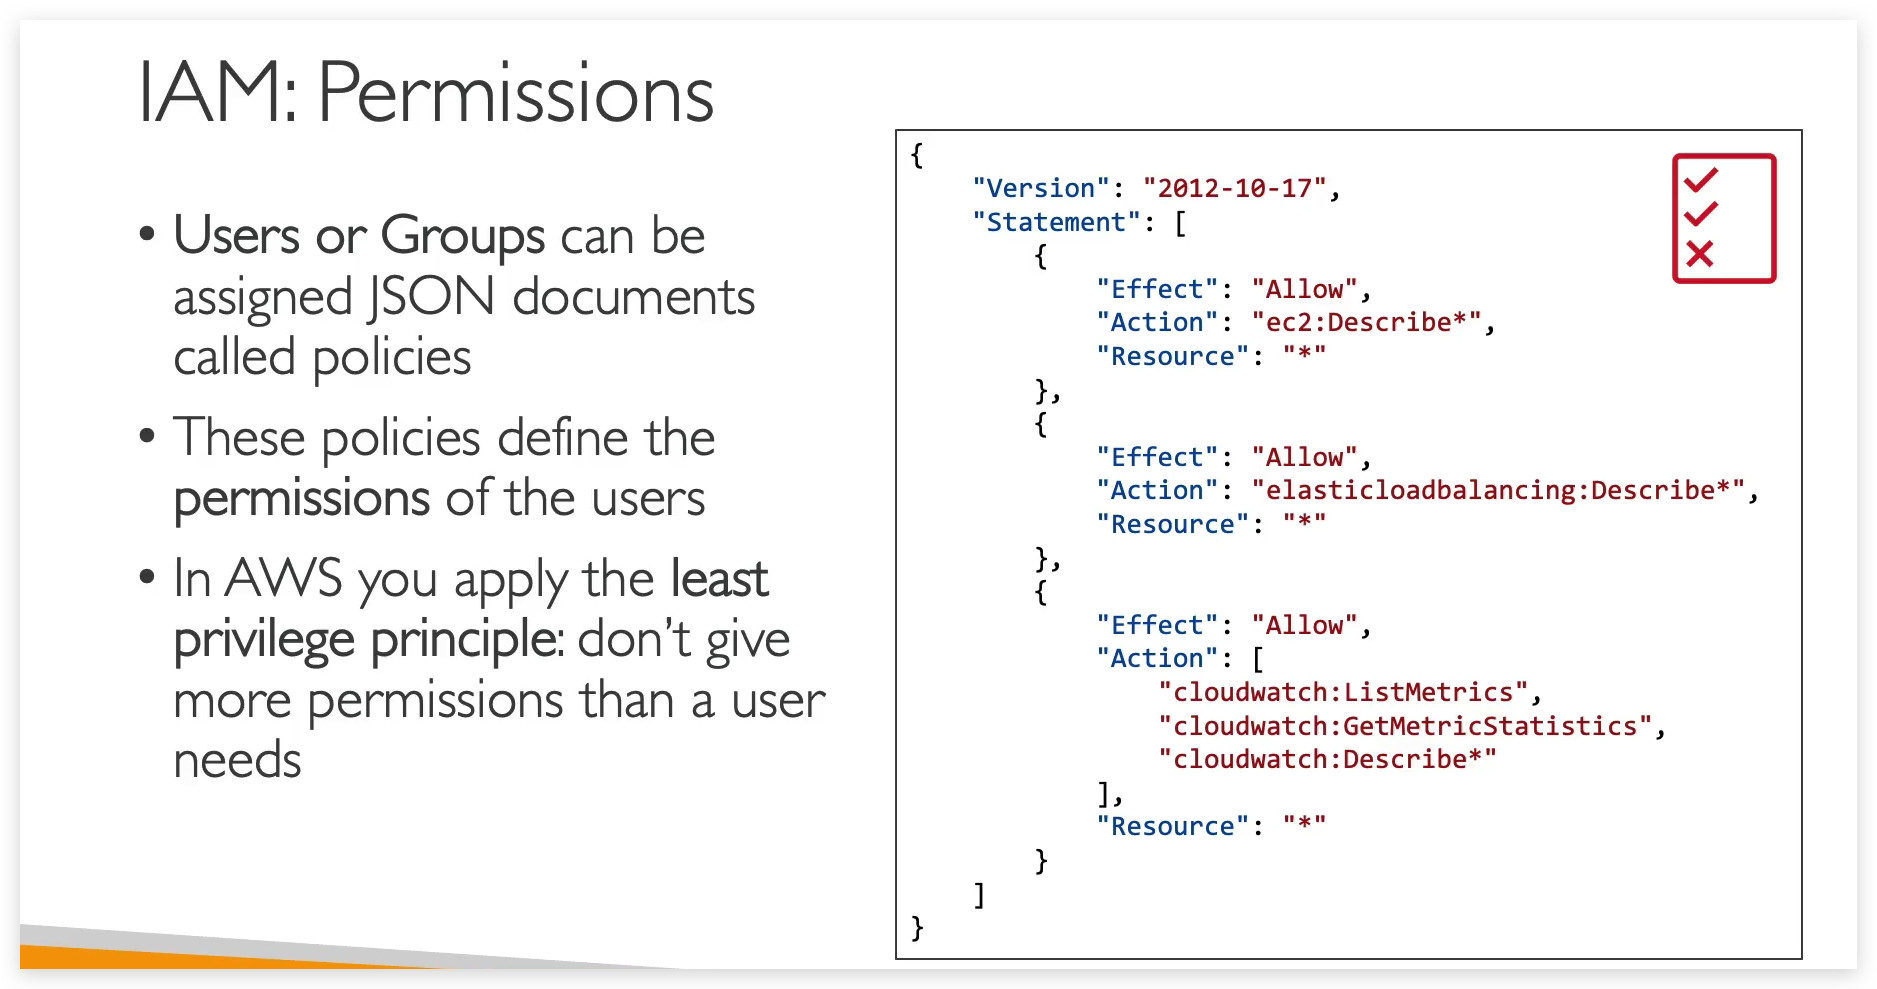
Least Privileged Permission basically means that do not give permission more than a user need.
Notes:
Permission can be granted via Group Inheritance and Direct attaching.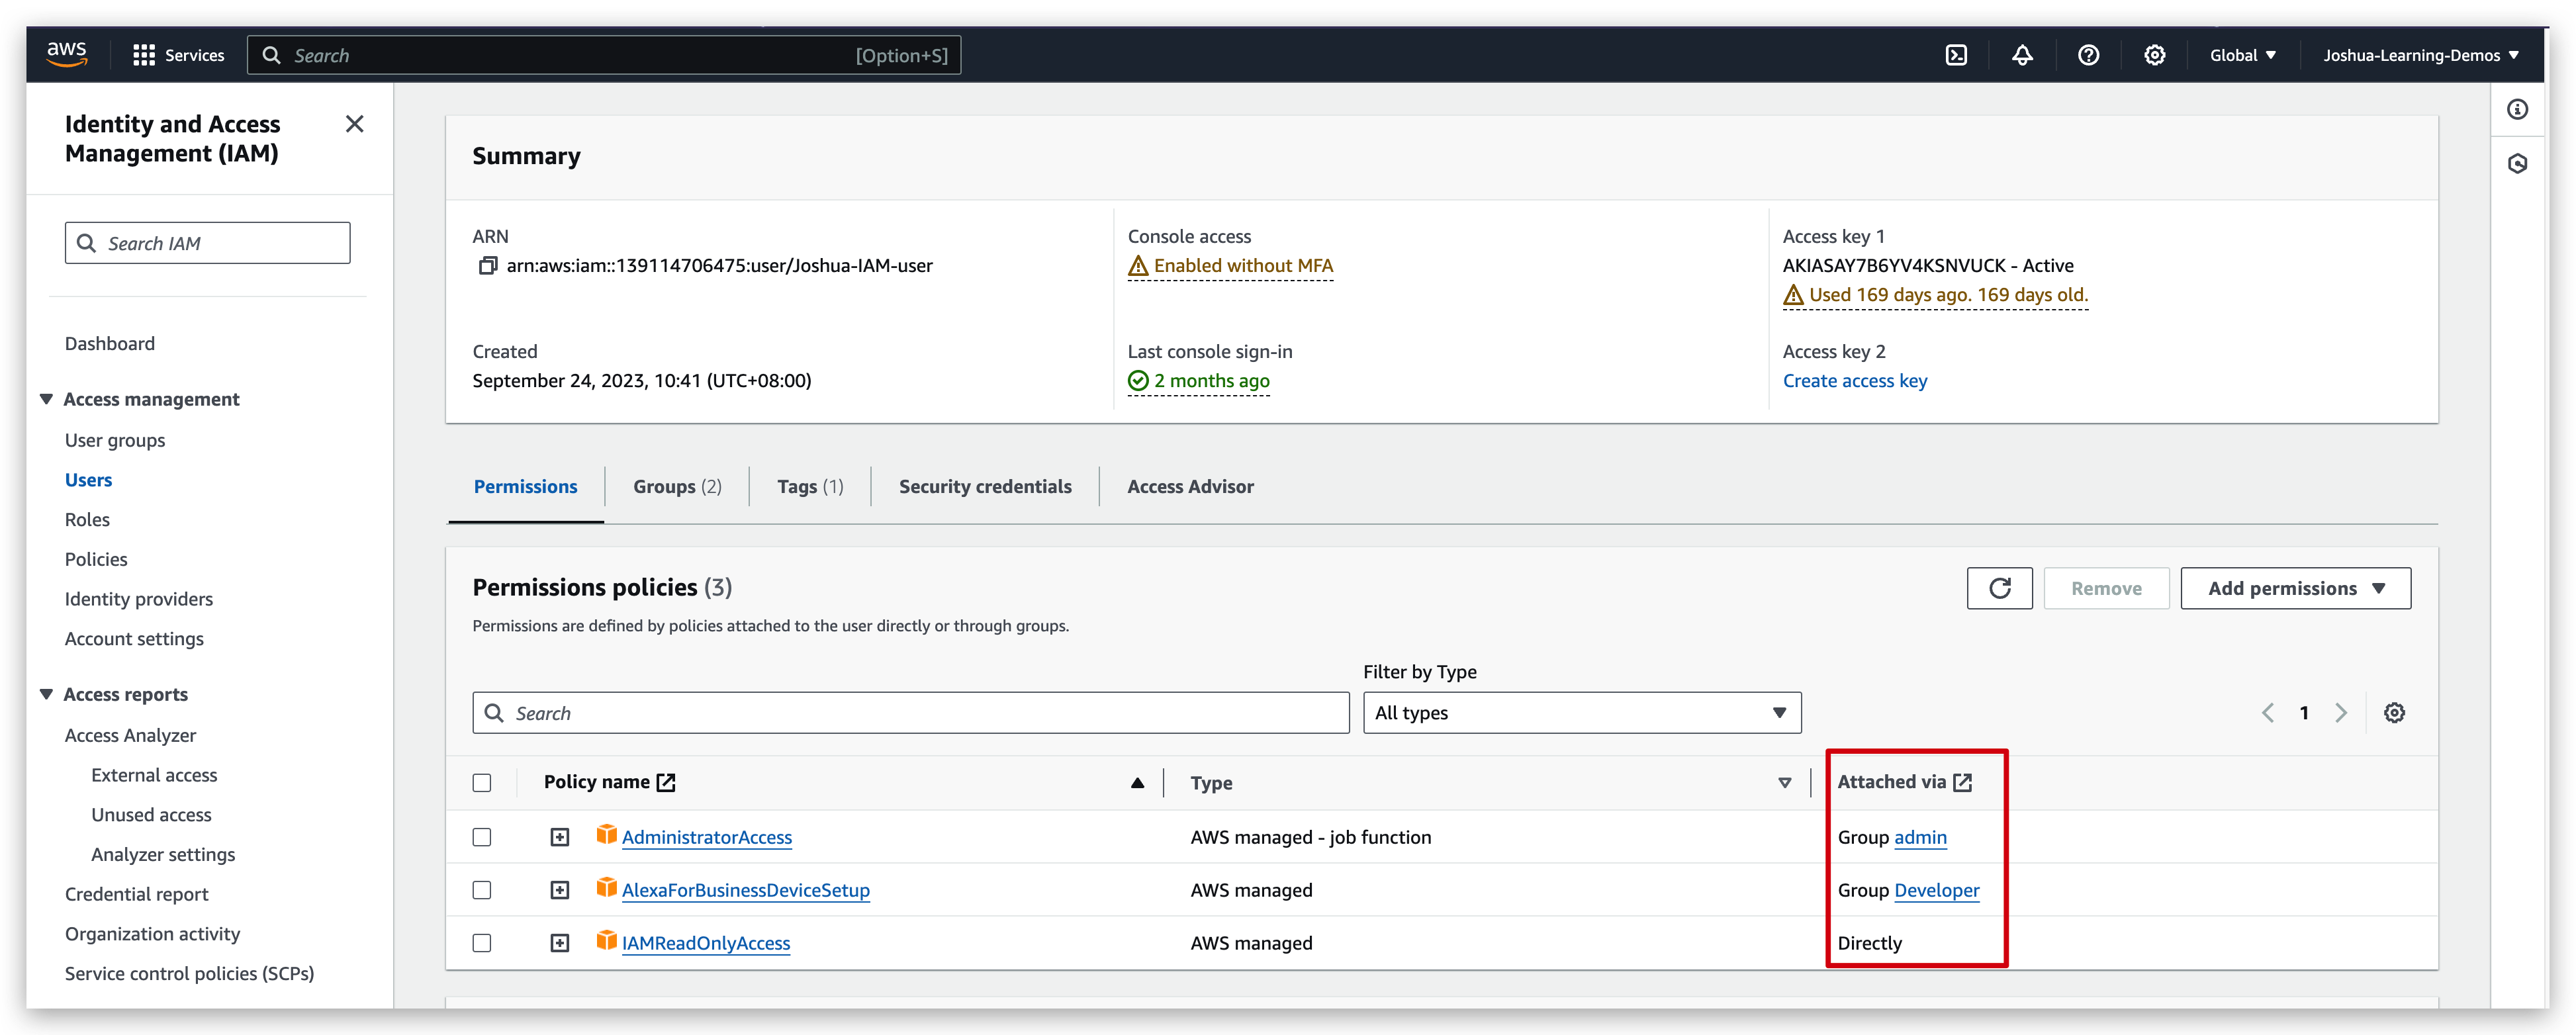

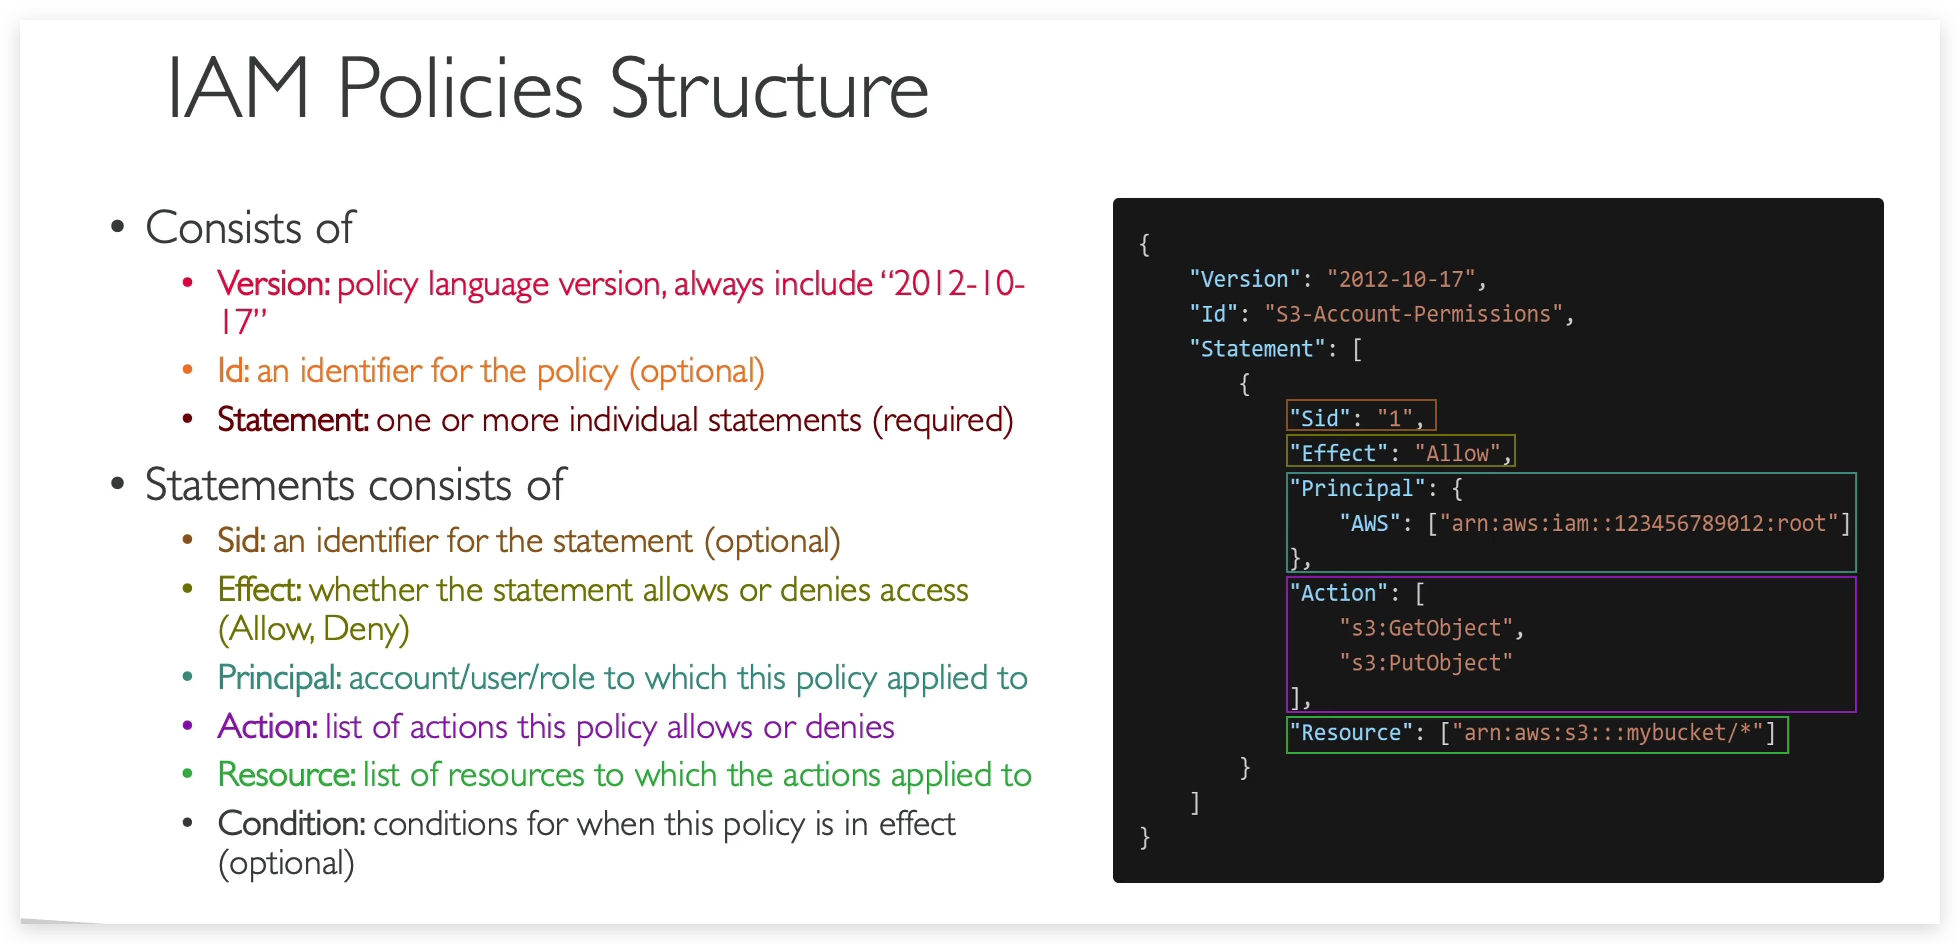
In above policy screenshot, please pay attention to which are optional parameters and which are required.
policy json:
1 | { |
IAM Policy Hands-on
From previous tutorials, we have created an IAM user with root account and added it to the admin group. Hence, this IAM user: Joshua-IAM-user is capable of doing anything that admin can do out of the policy inheritance.
We log in aws console in an incognito window with this IAM user: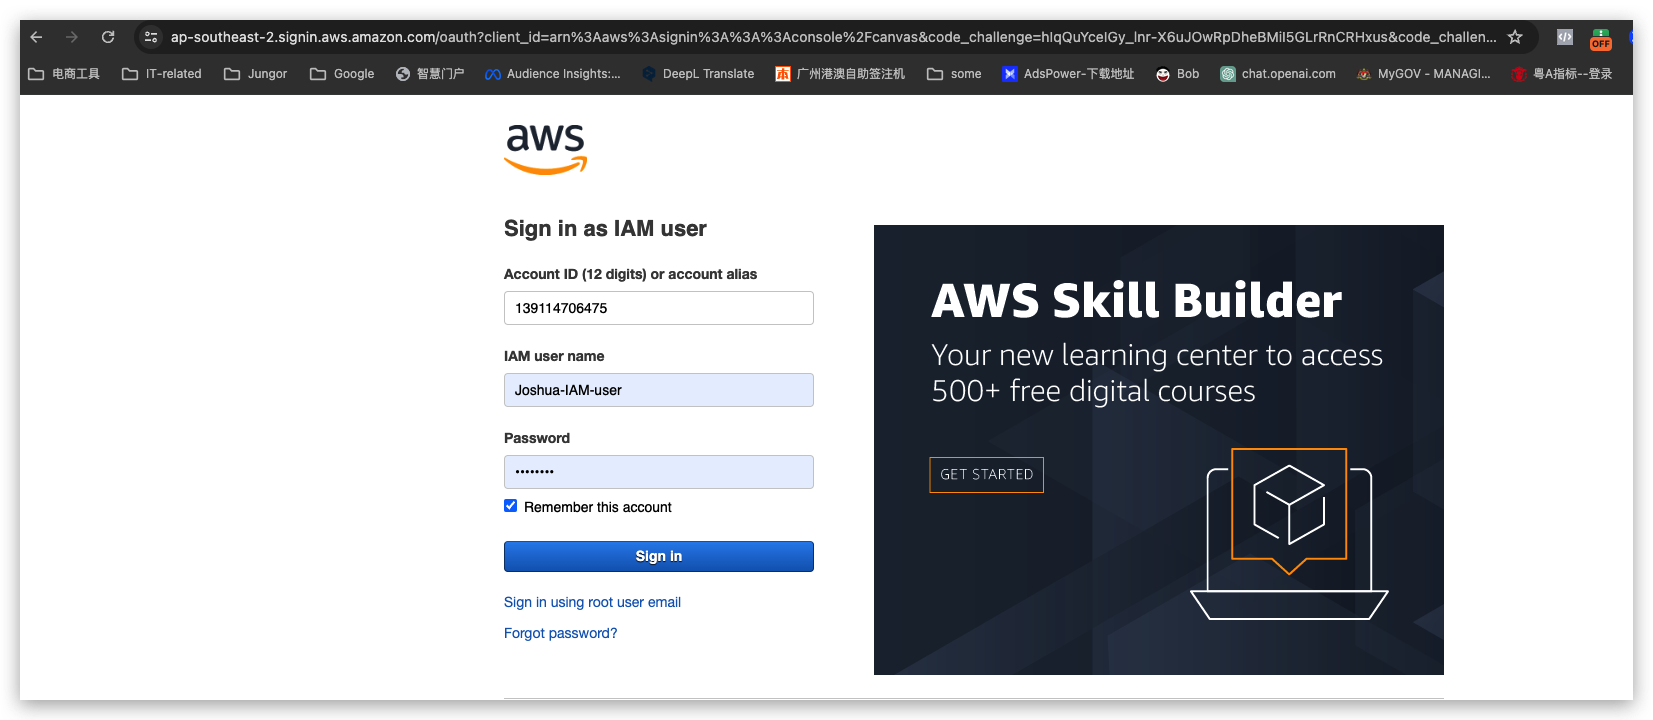
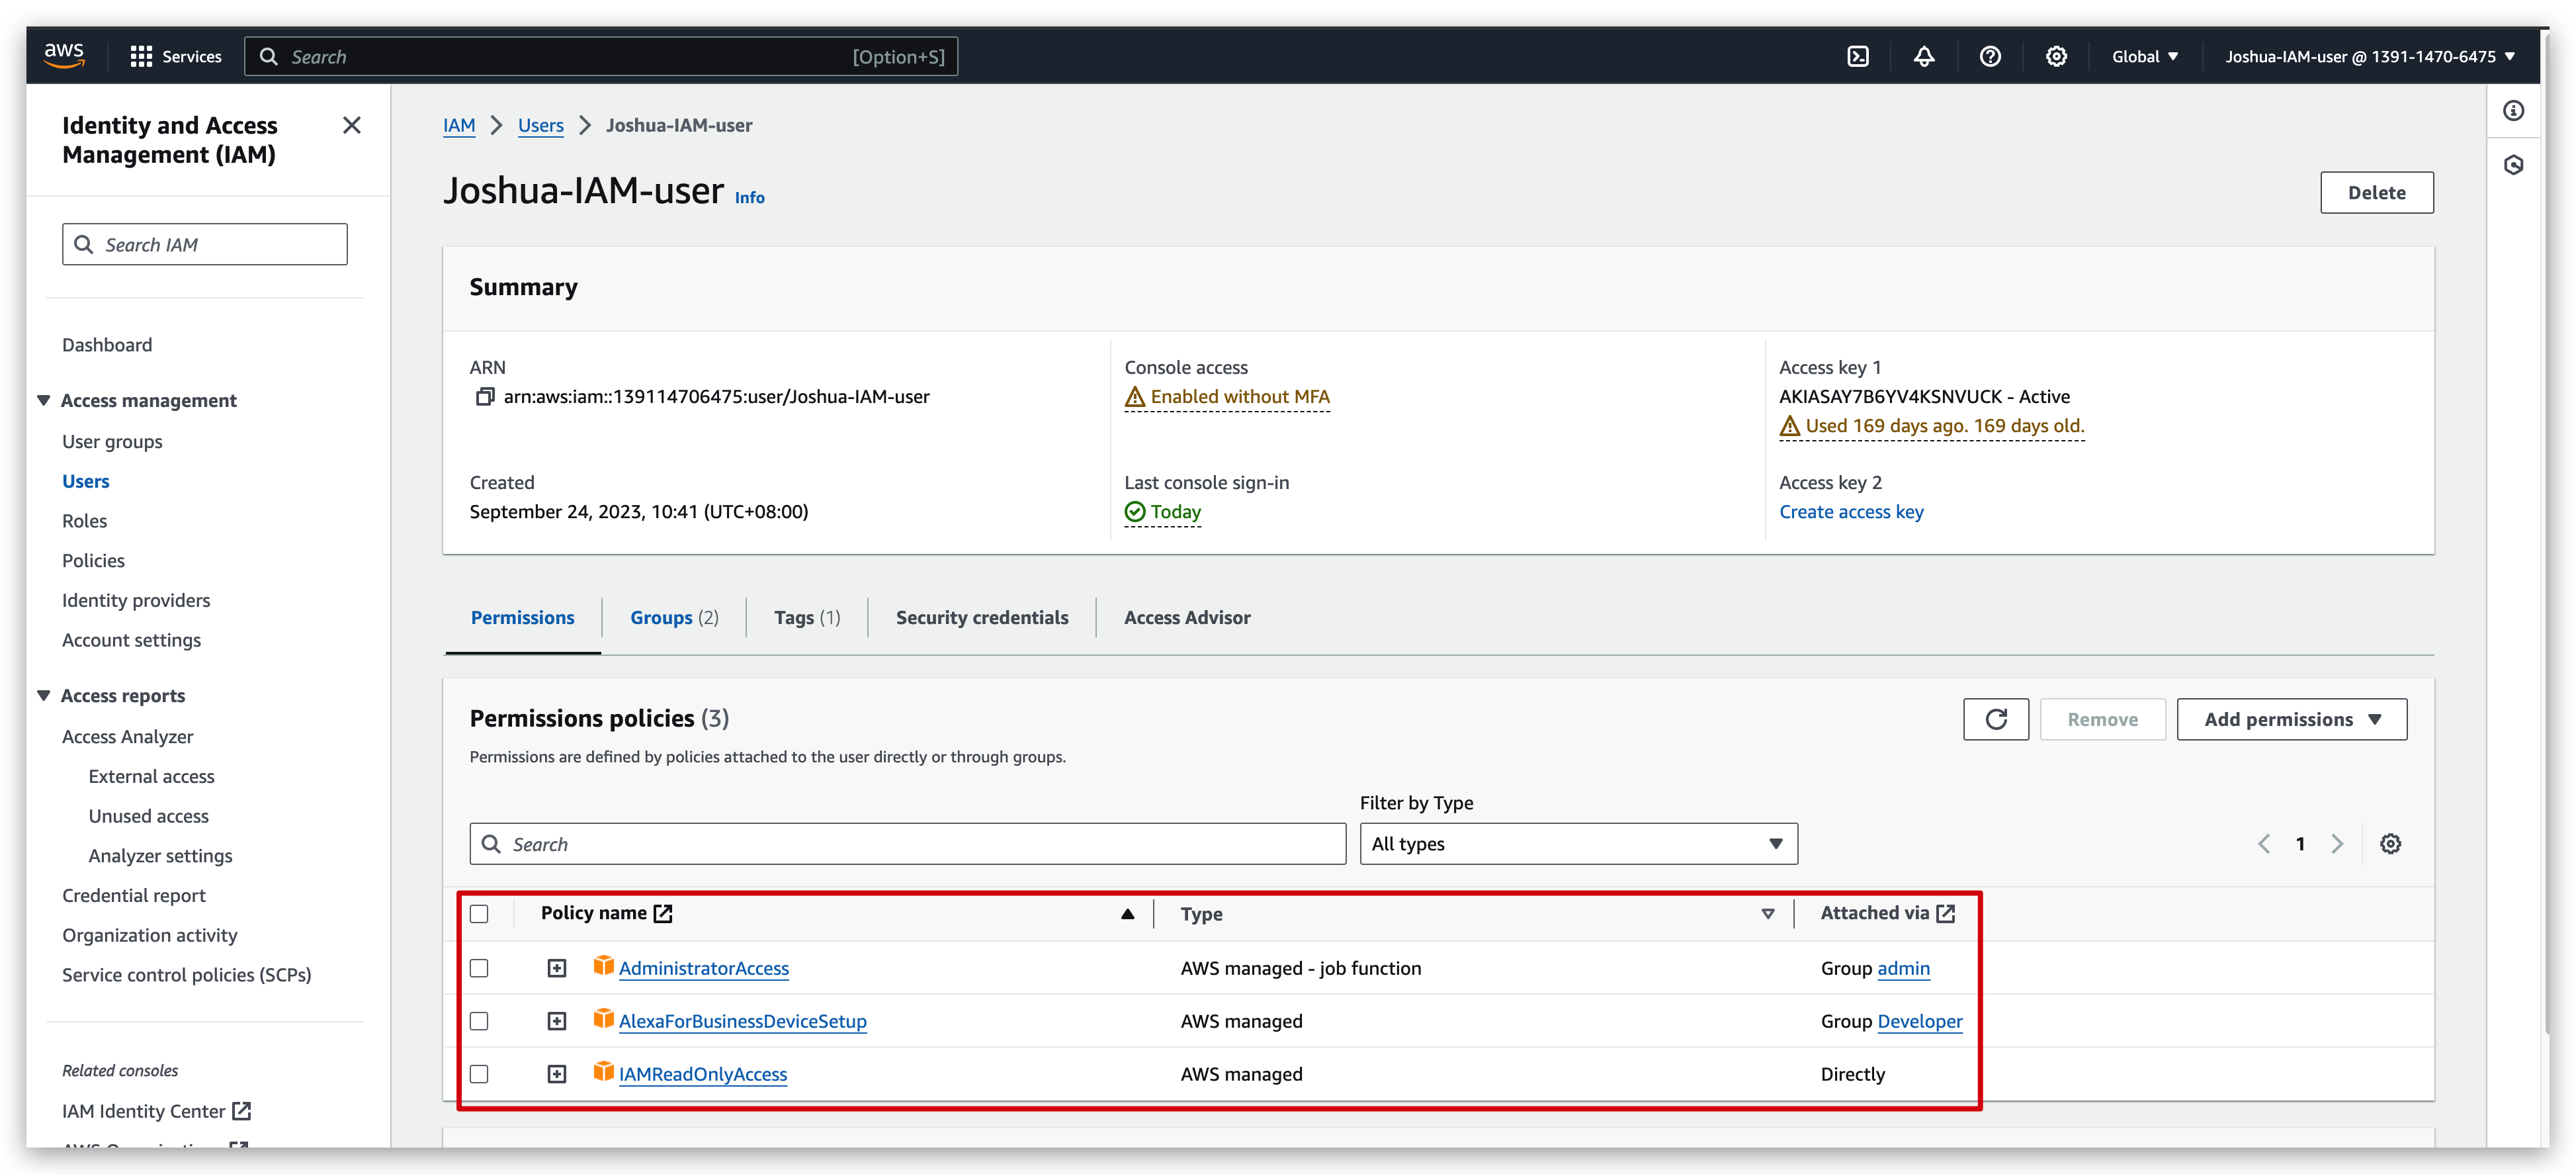
and check its permissions as below: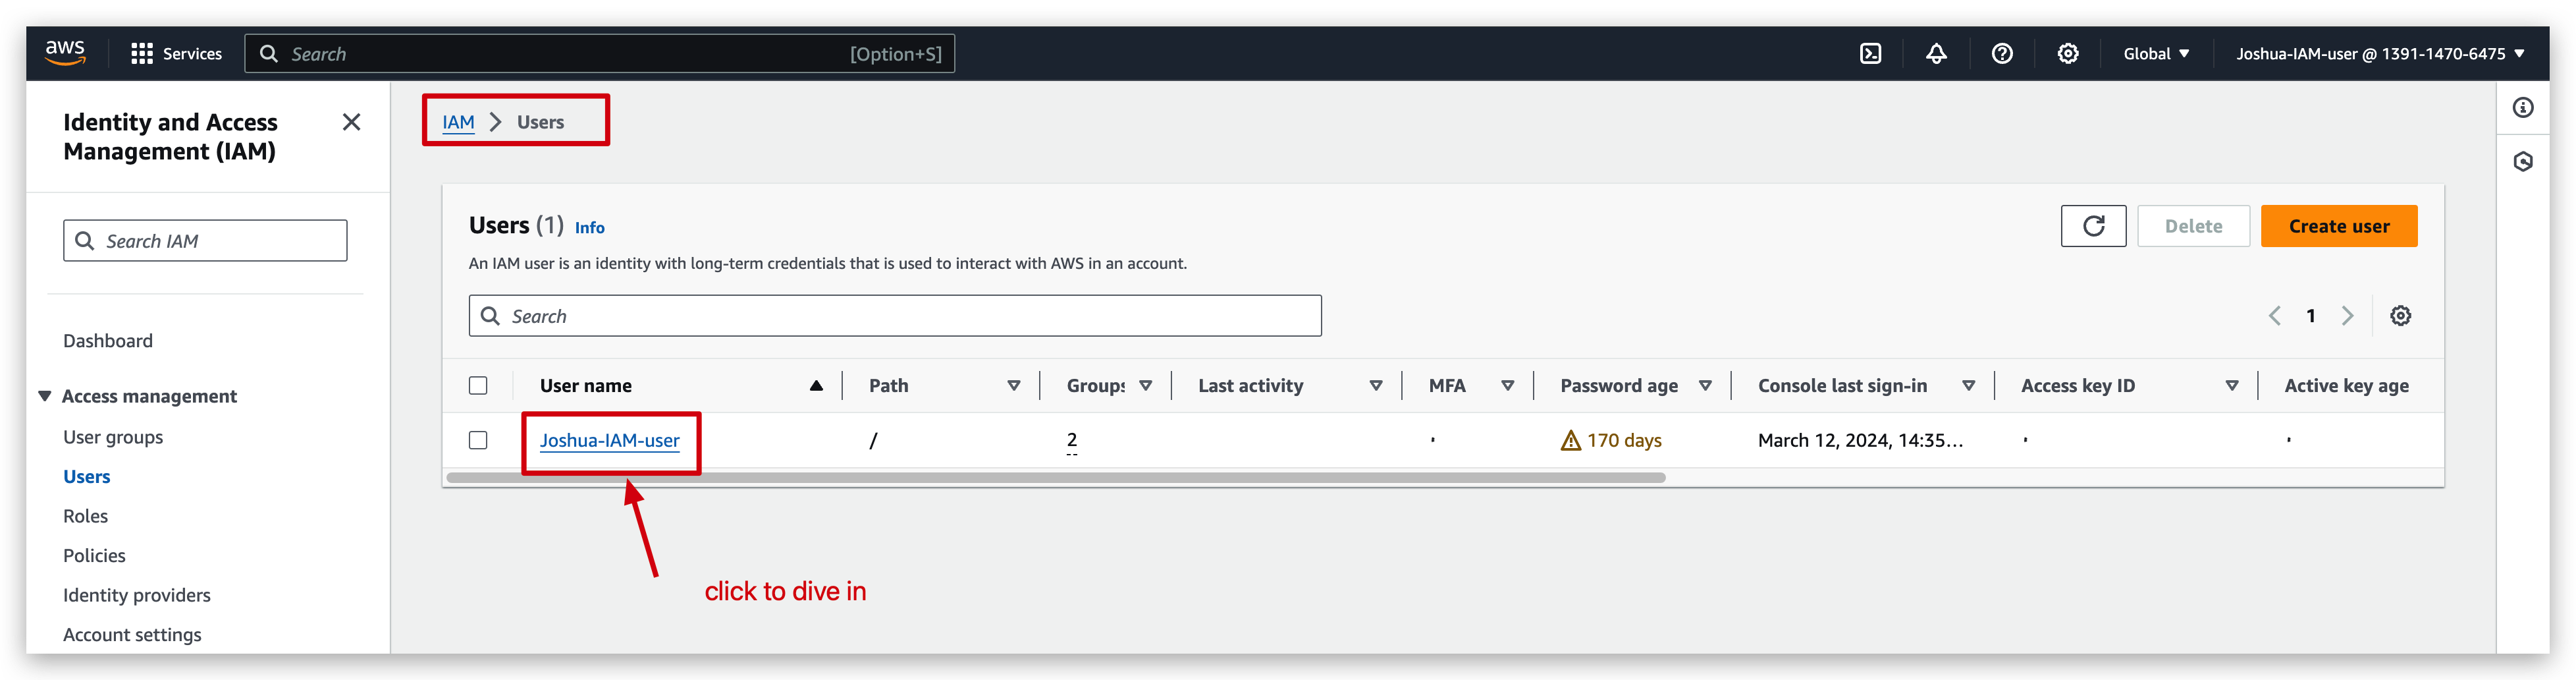
then remove the IAM user from the admin group: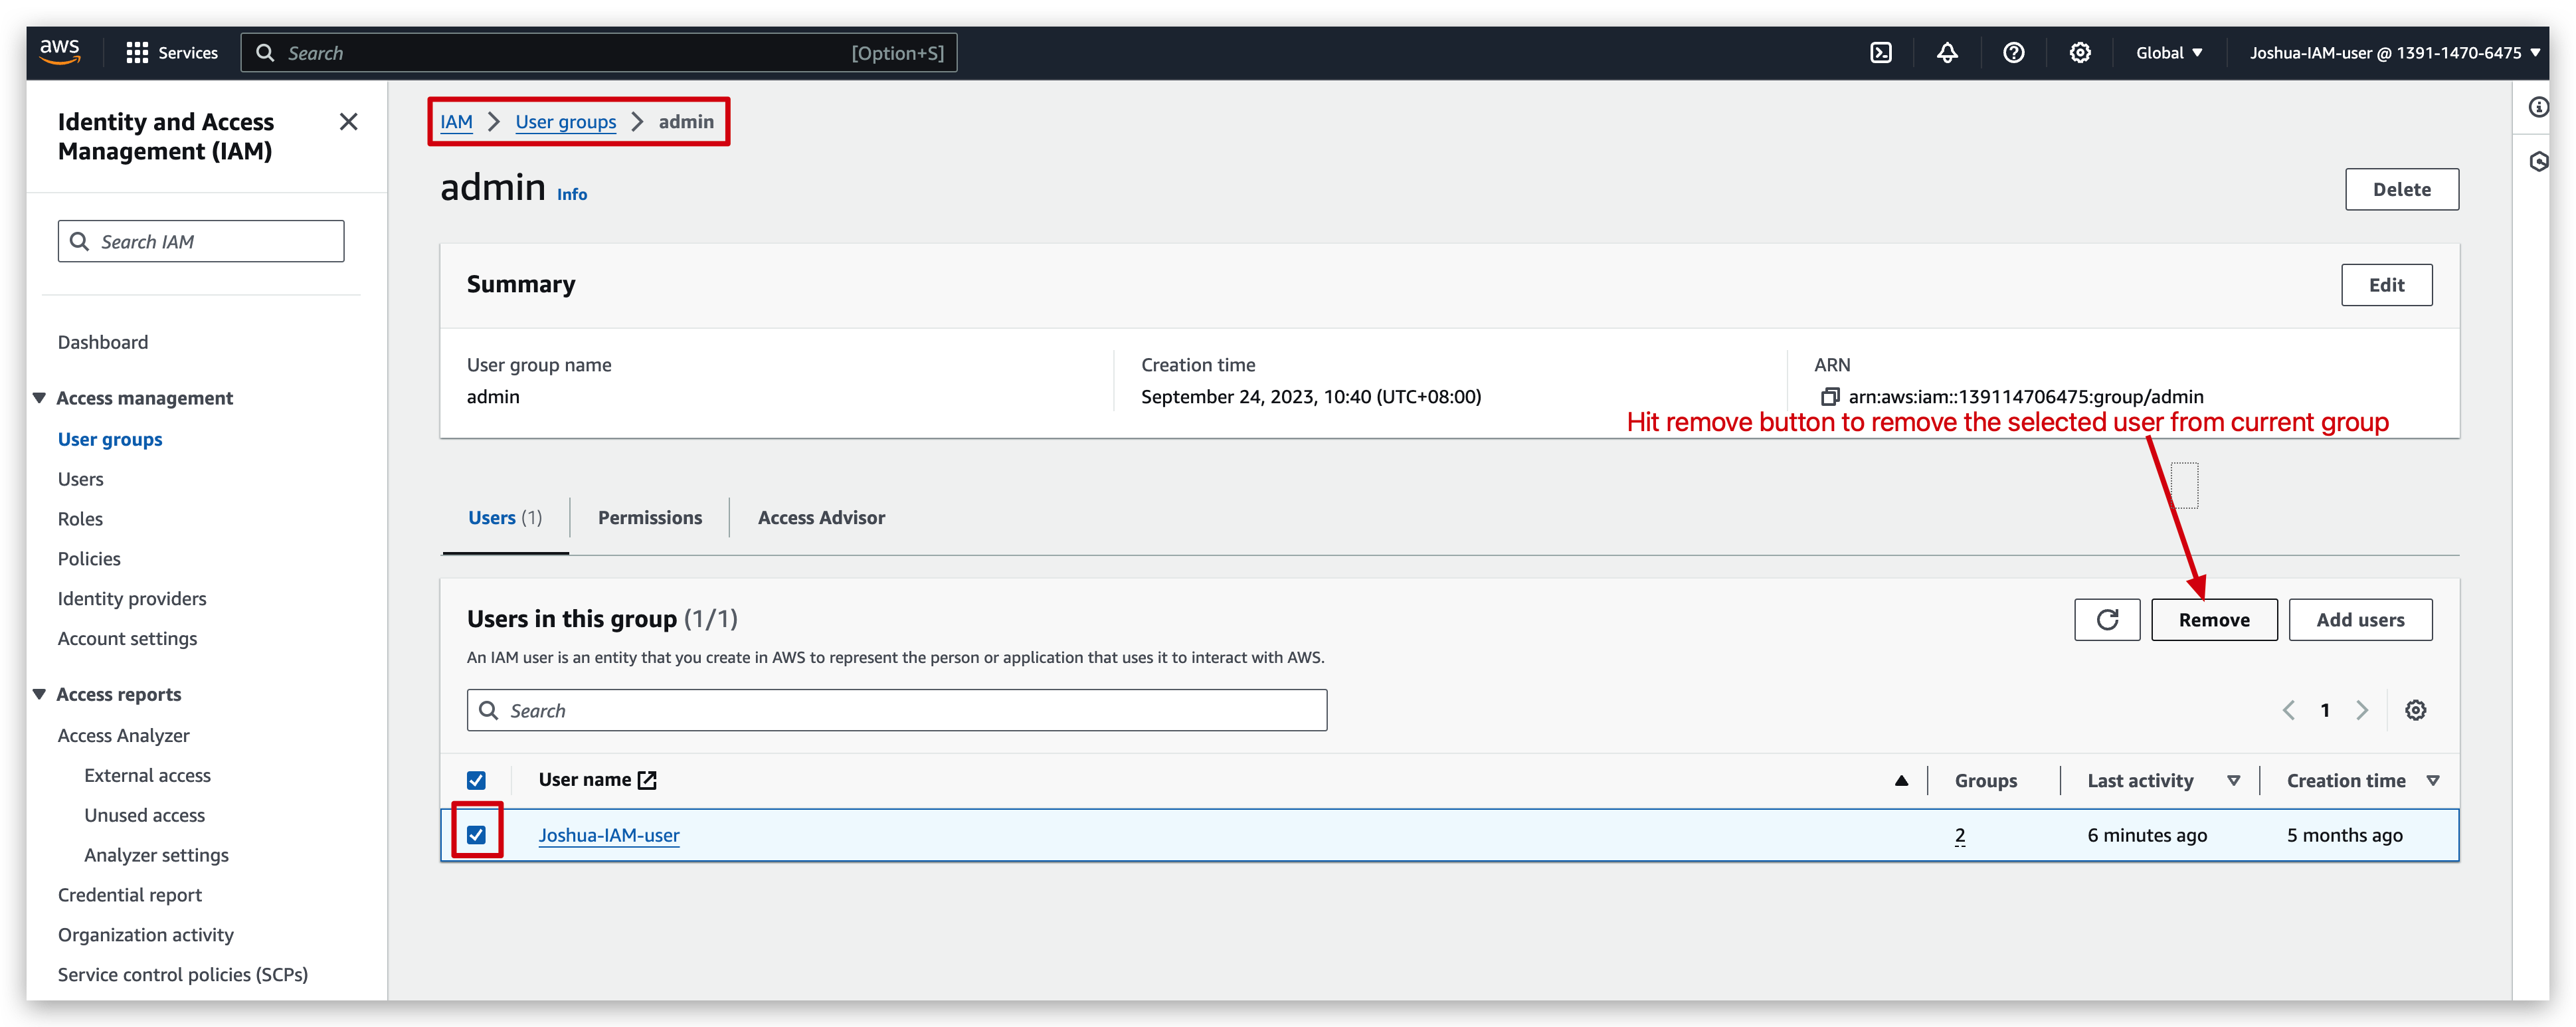

Compare the view of IAM user before & after being removed from the admin group:
before:
after: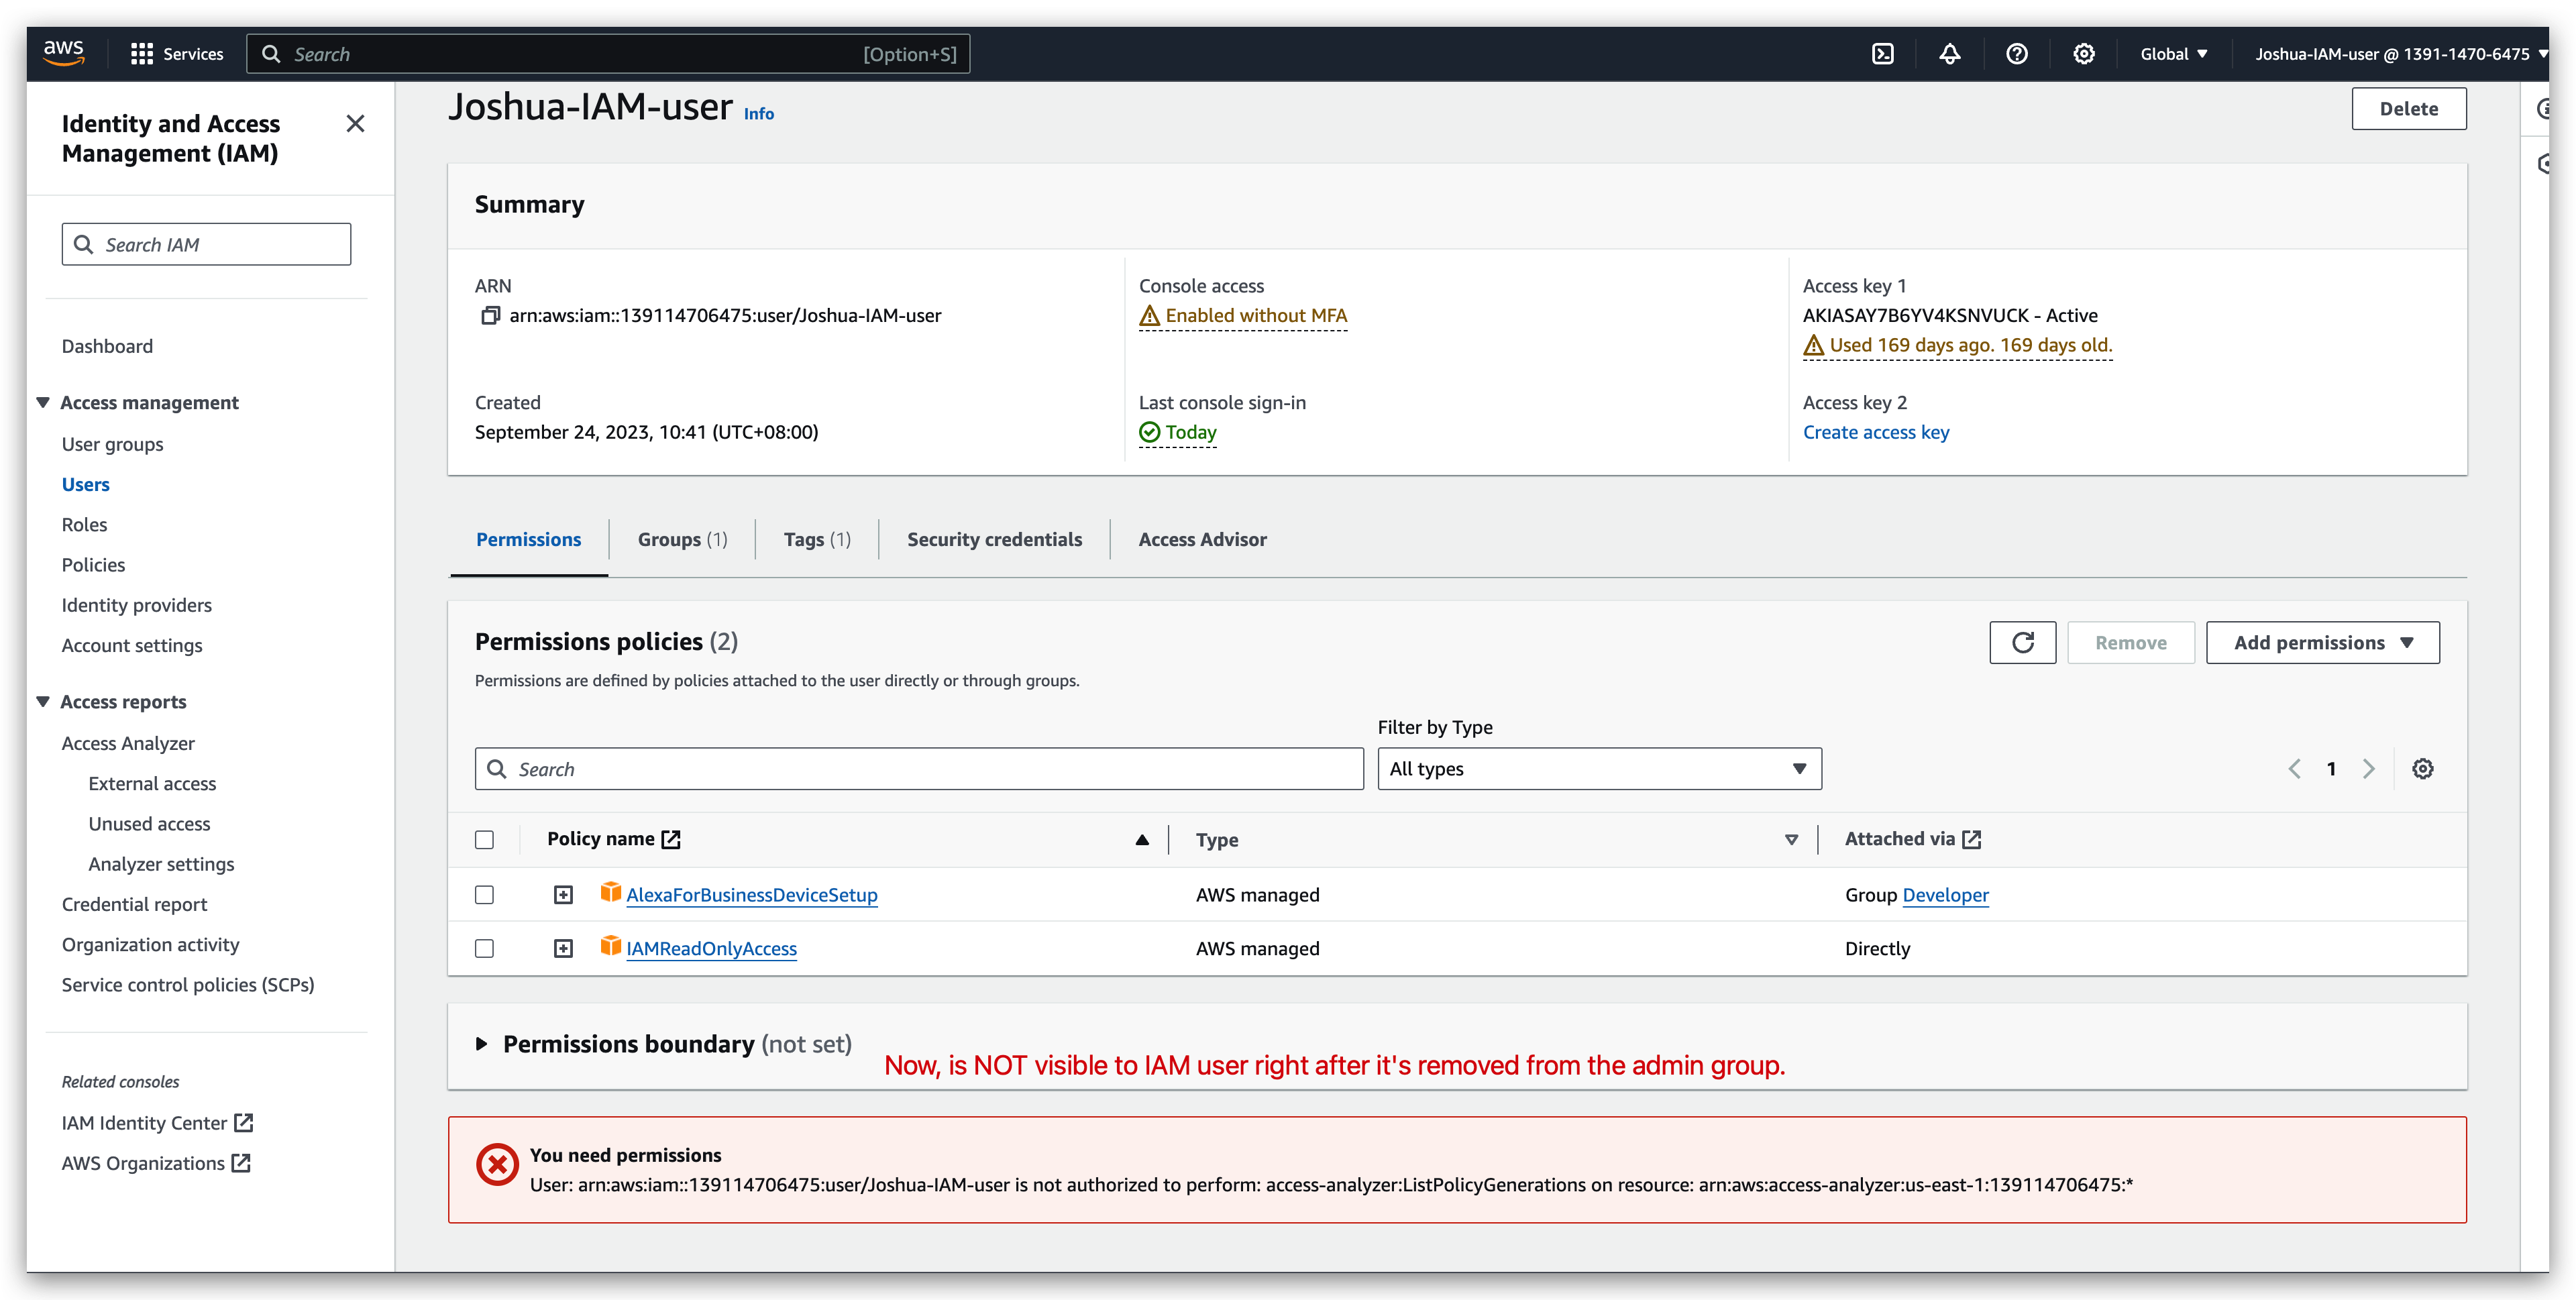
Policy details Check:

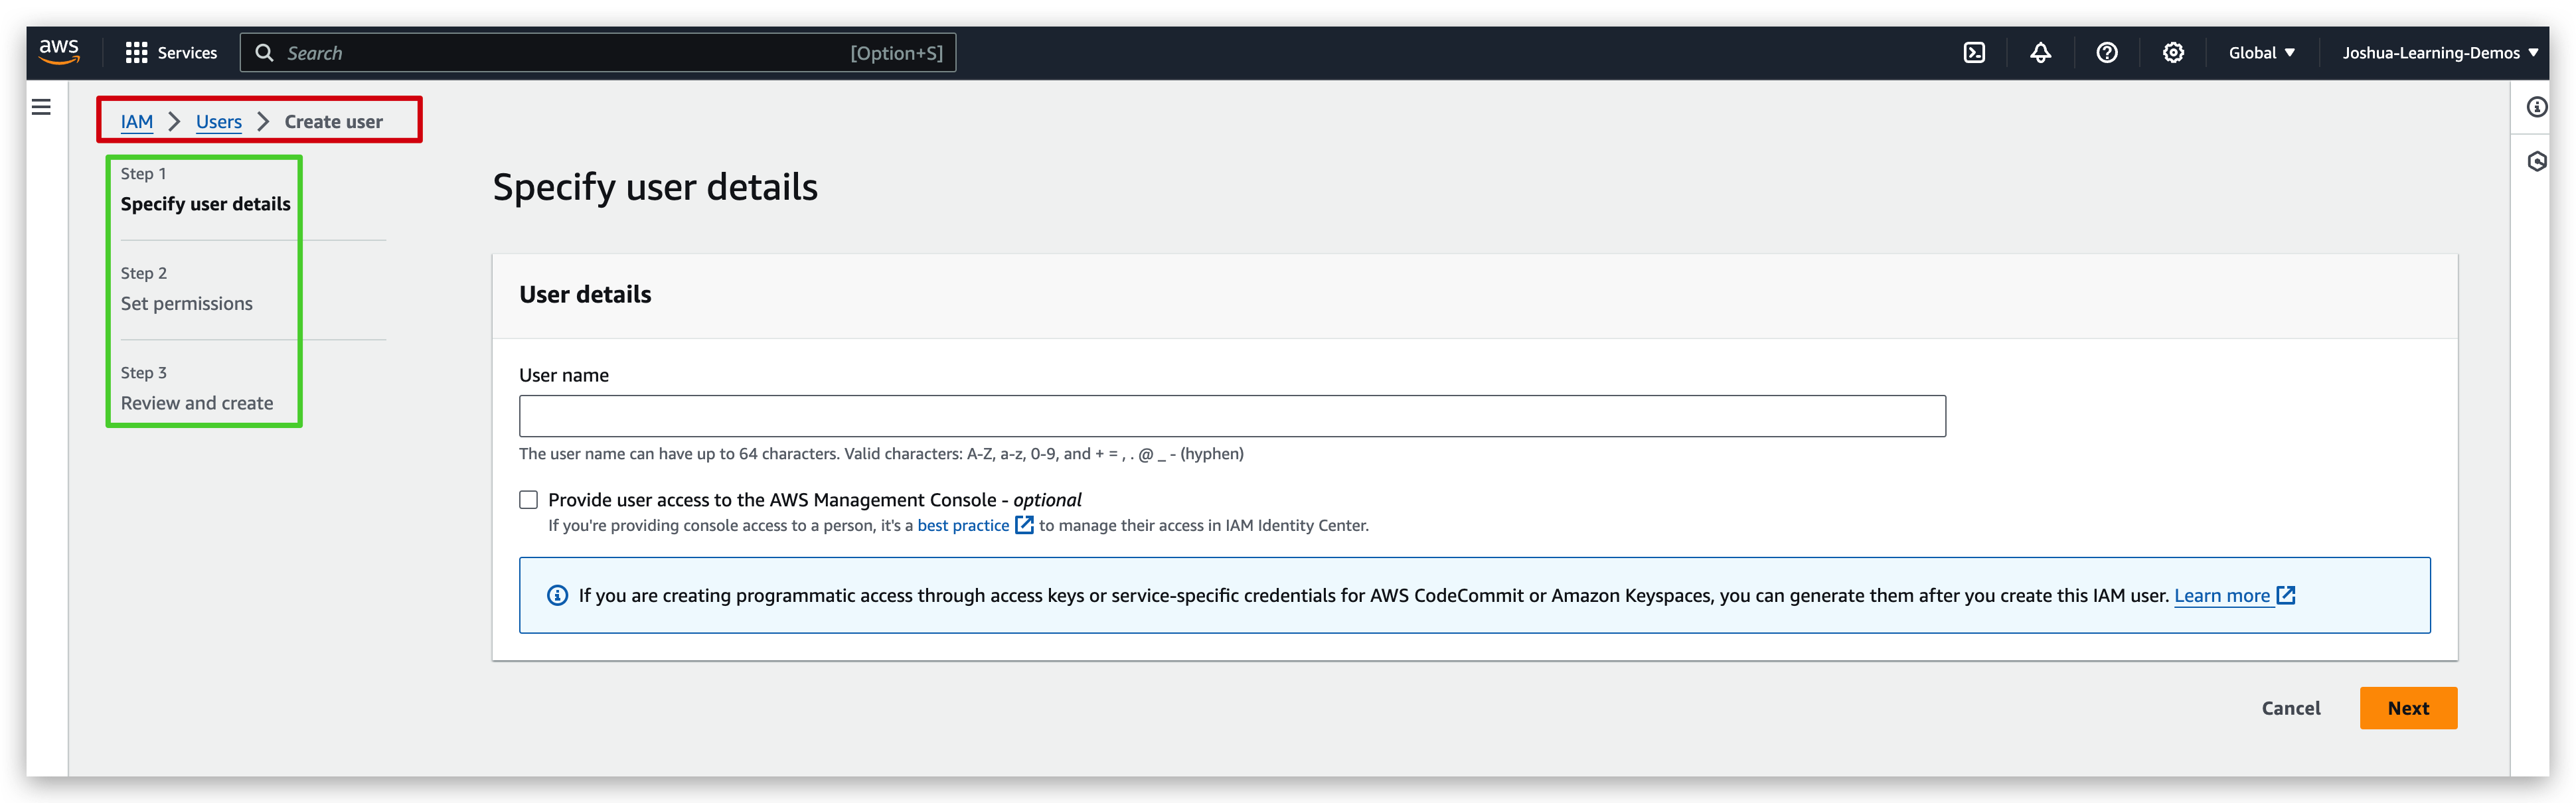
Policy creation:
First redirect to the policy creation page:
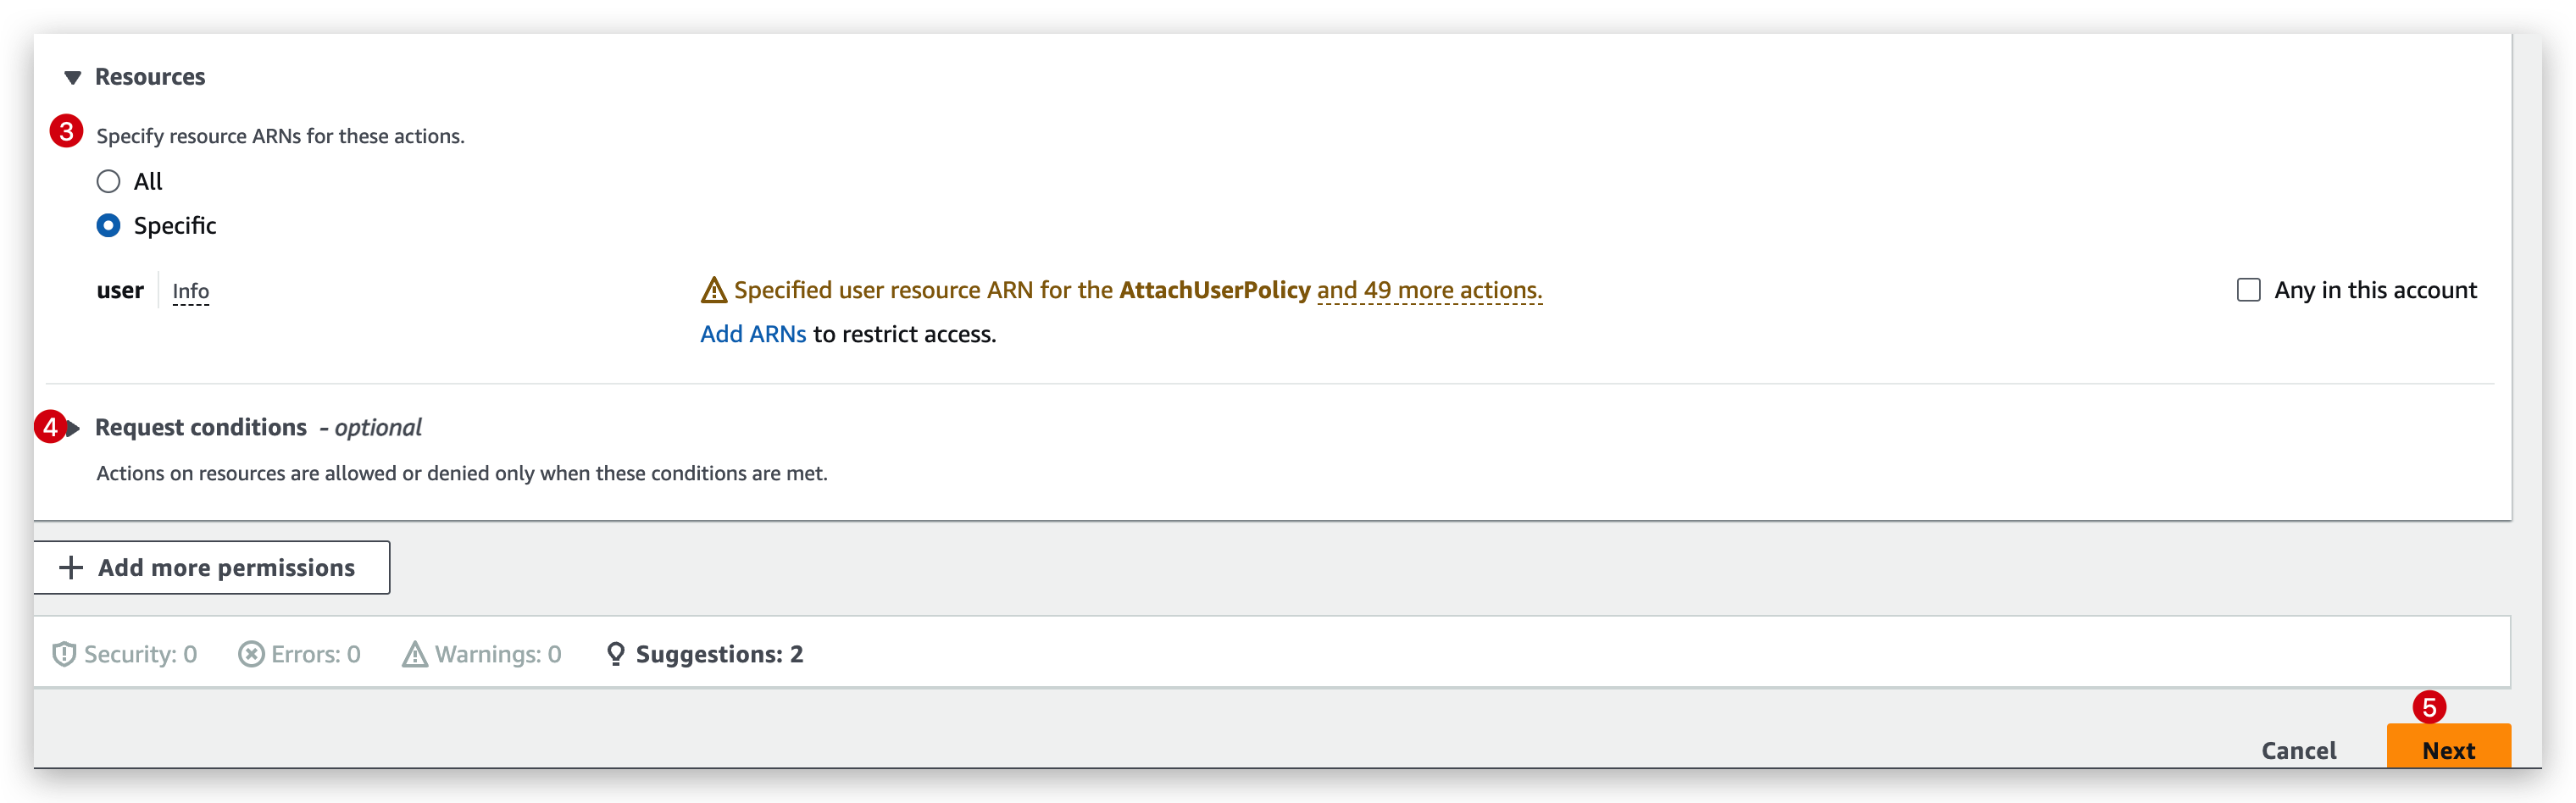
Then you can create step by step from specifying the services, actions, resources and conditions like below by the visual mode: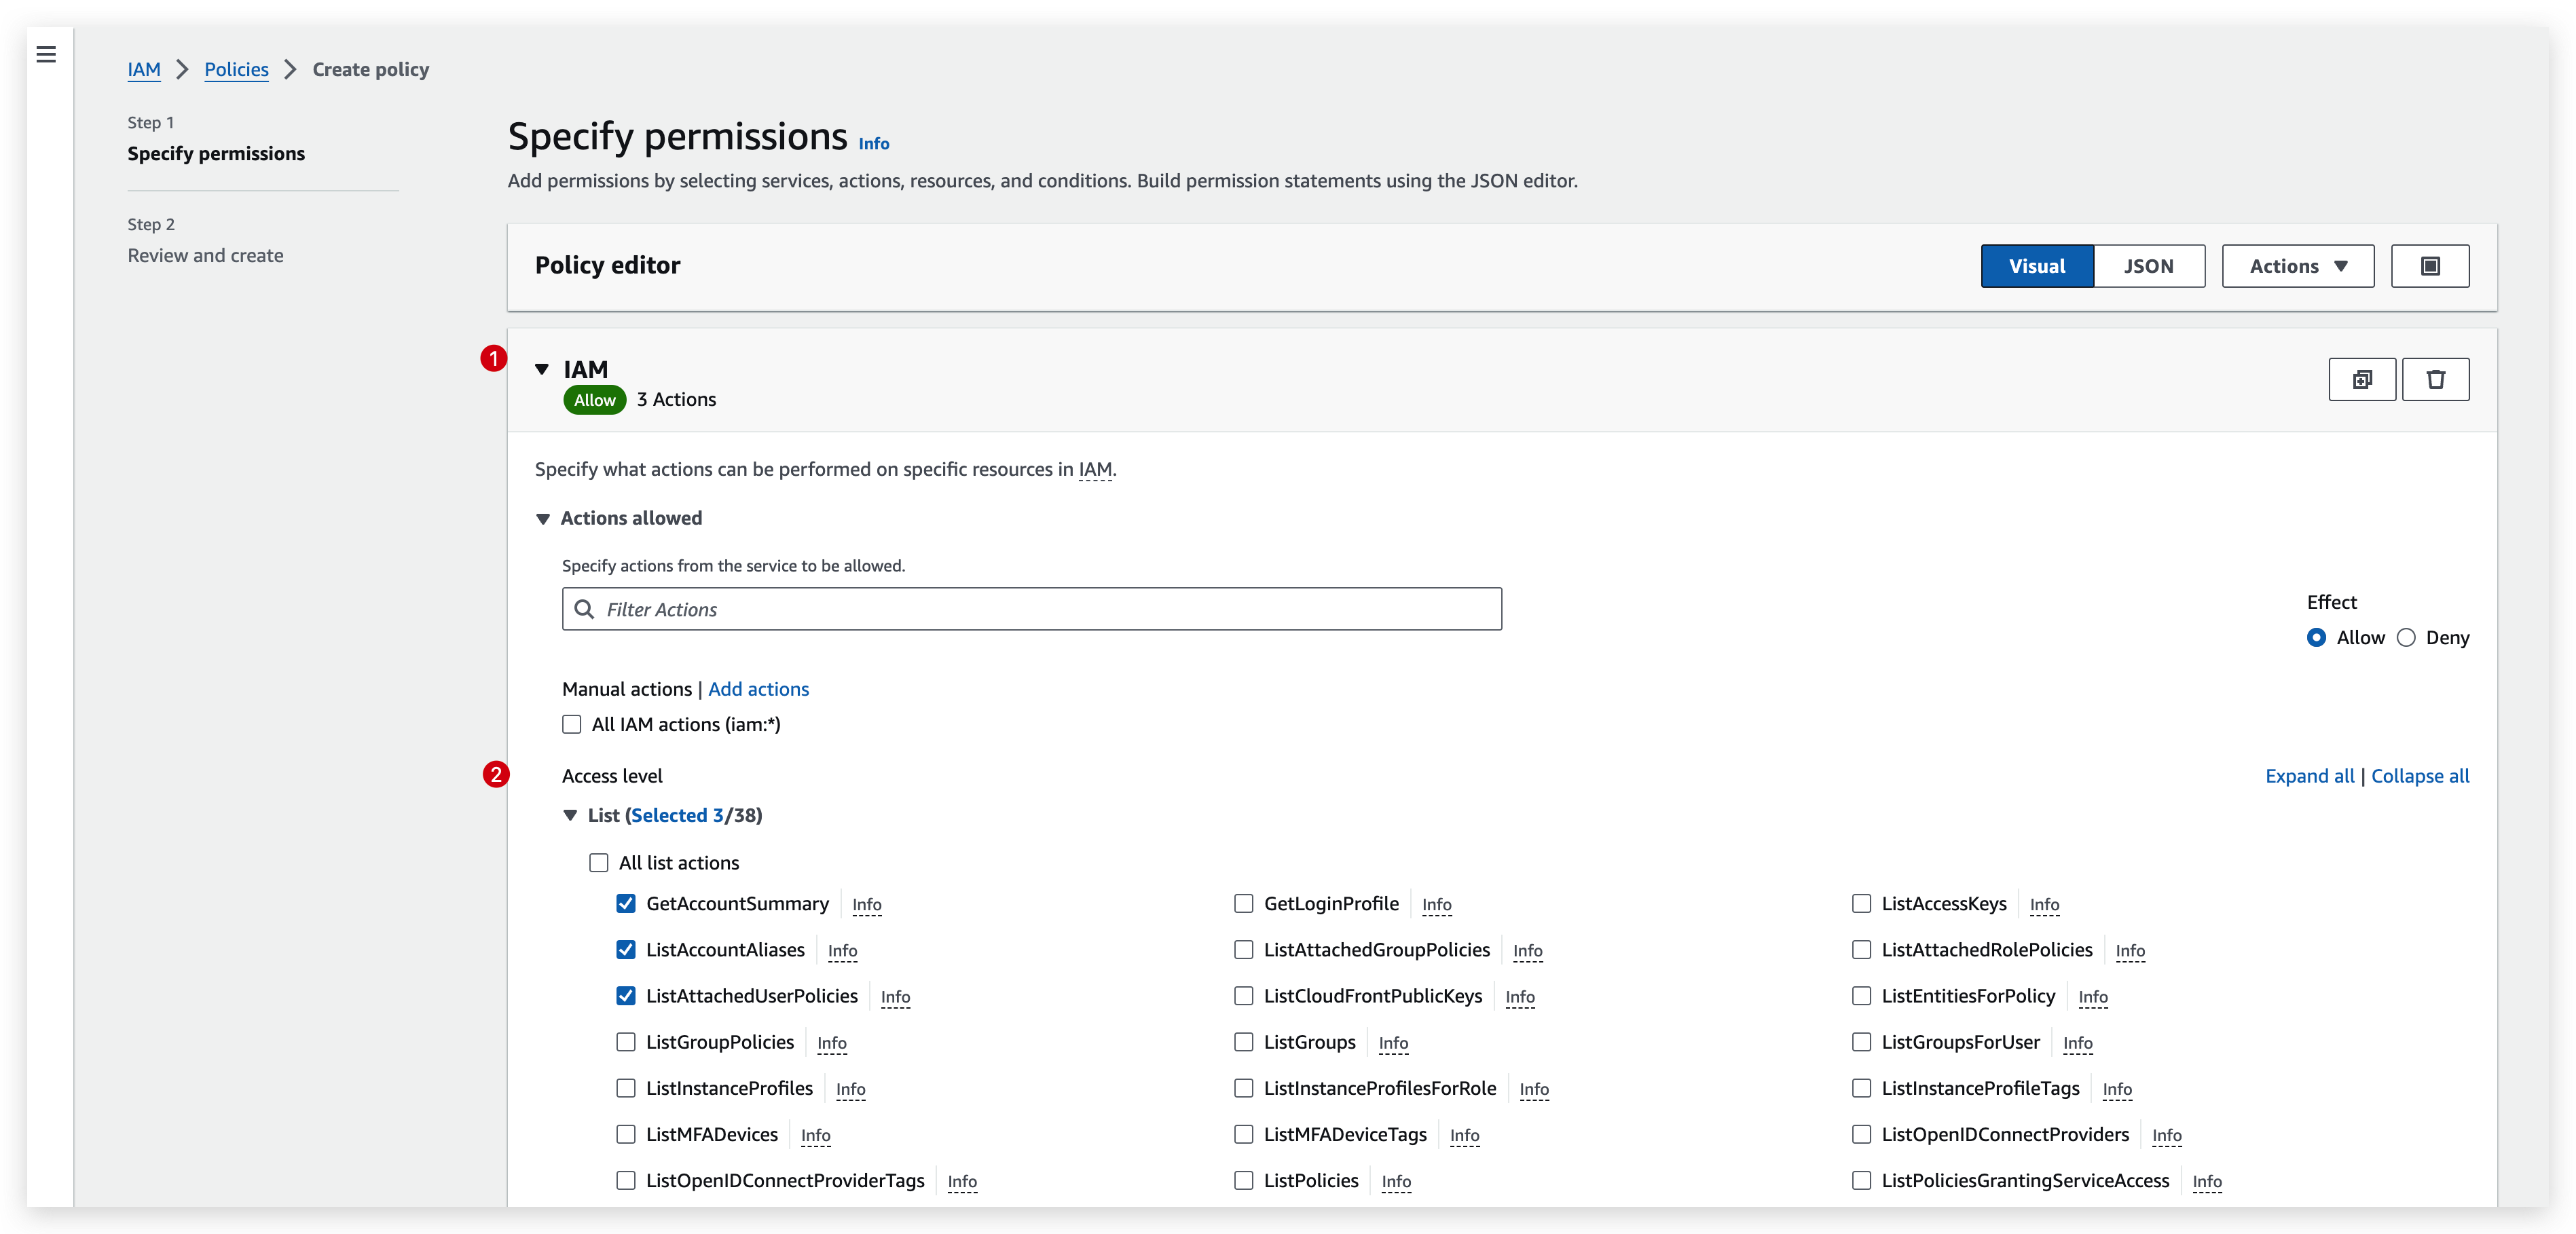
Or paste a JSON block like: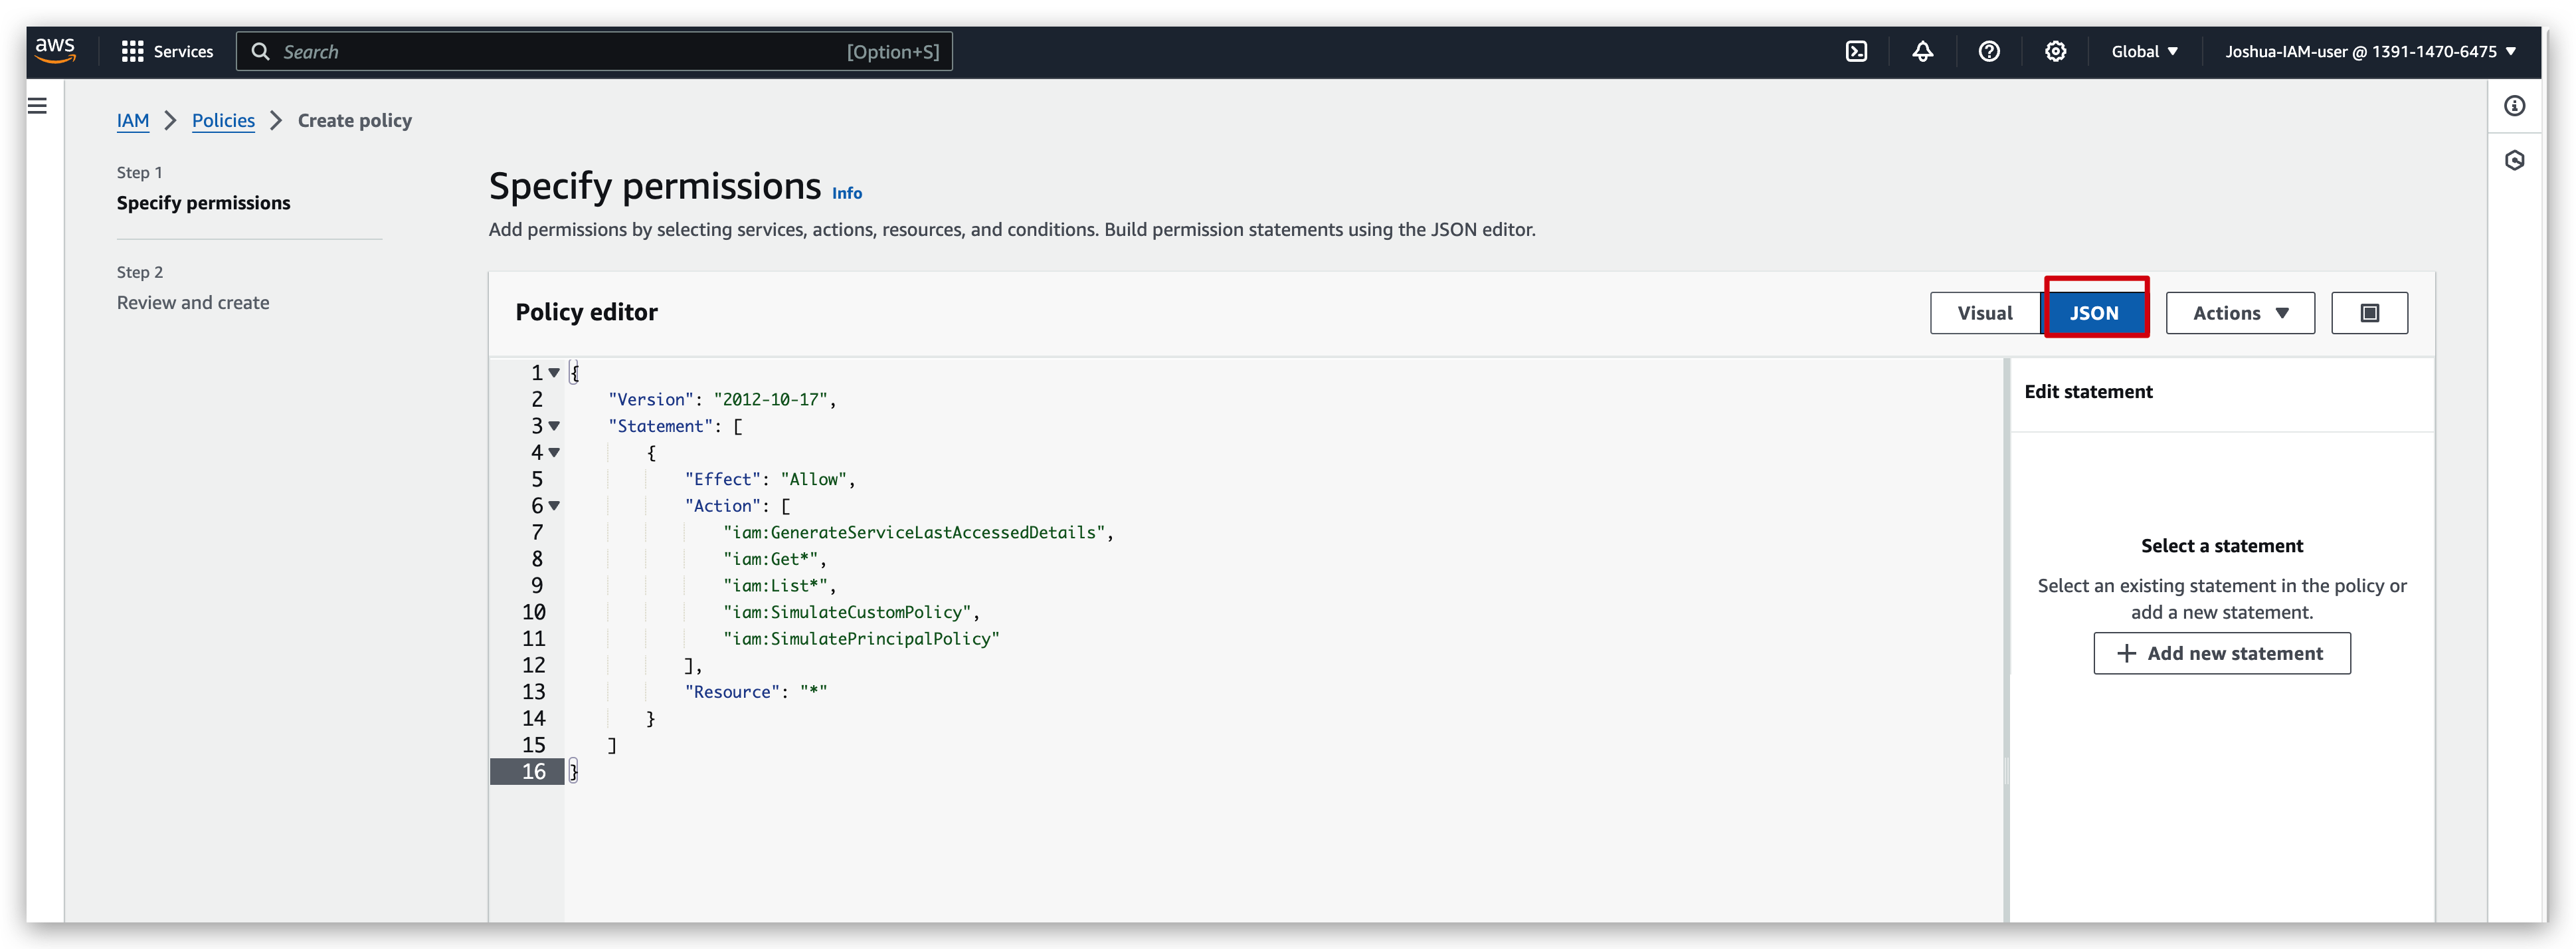
1 | { |
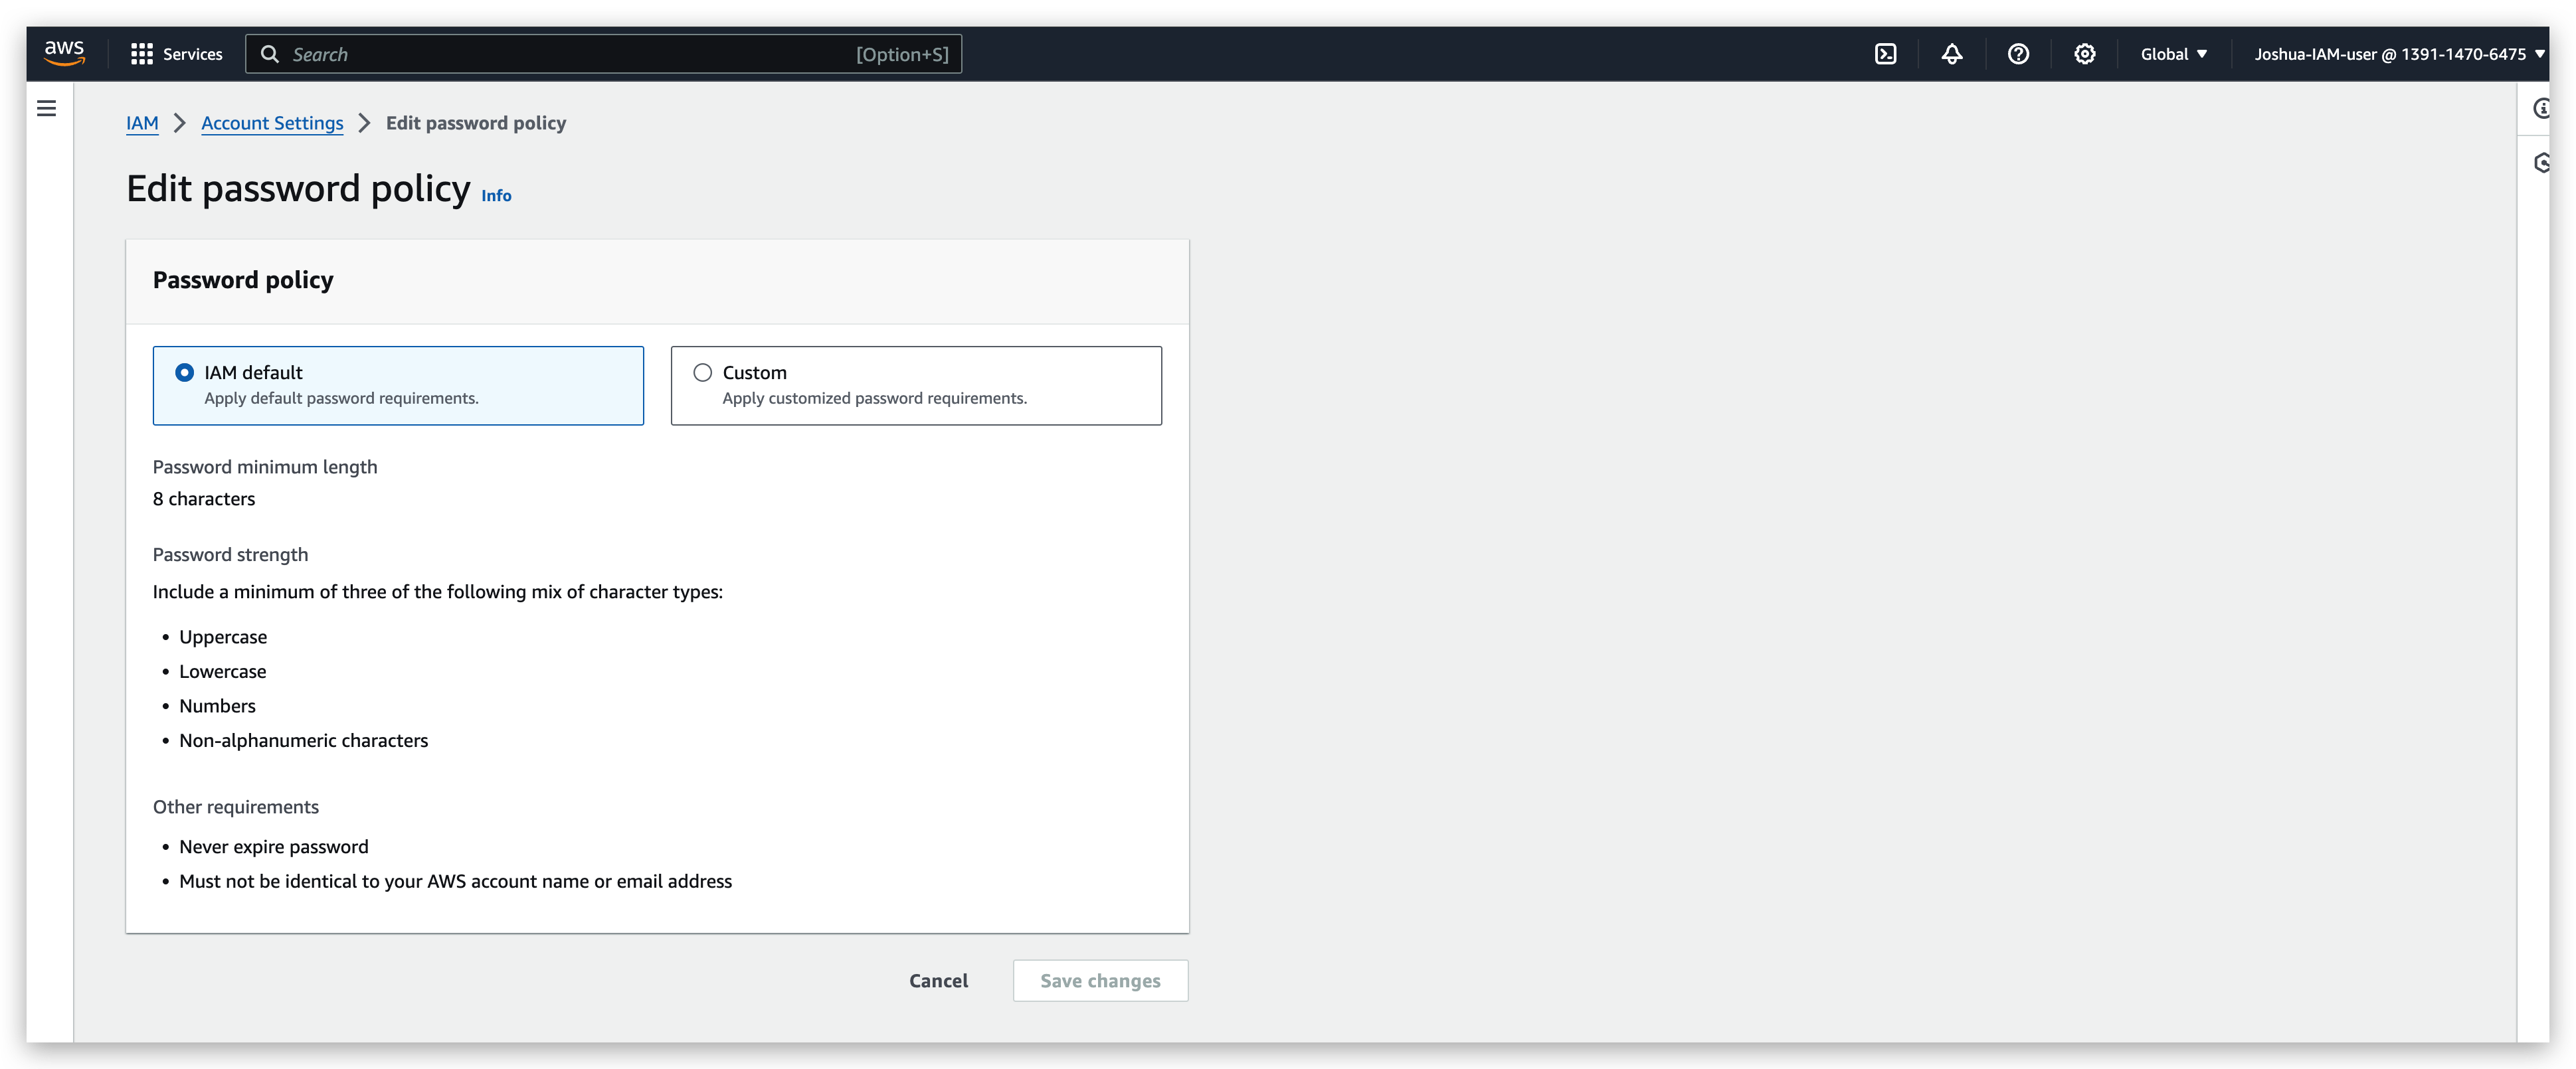
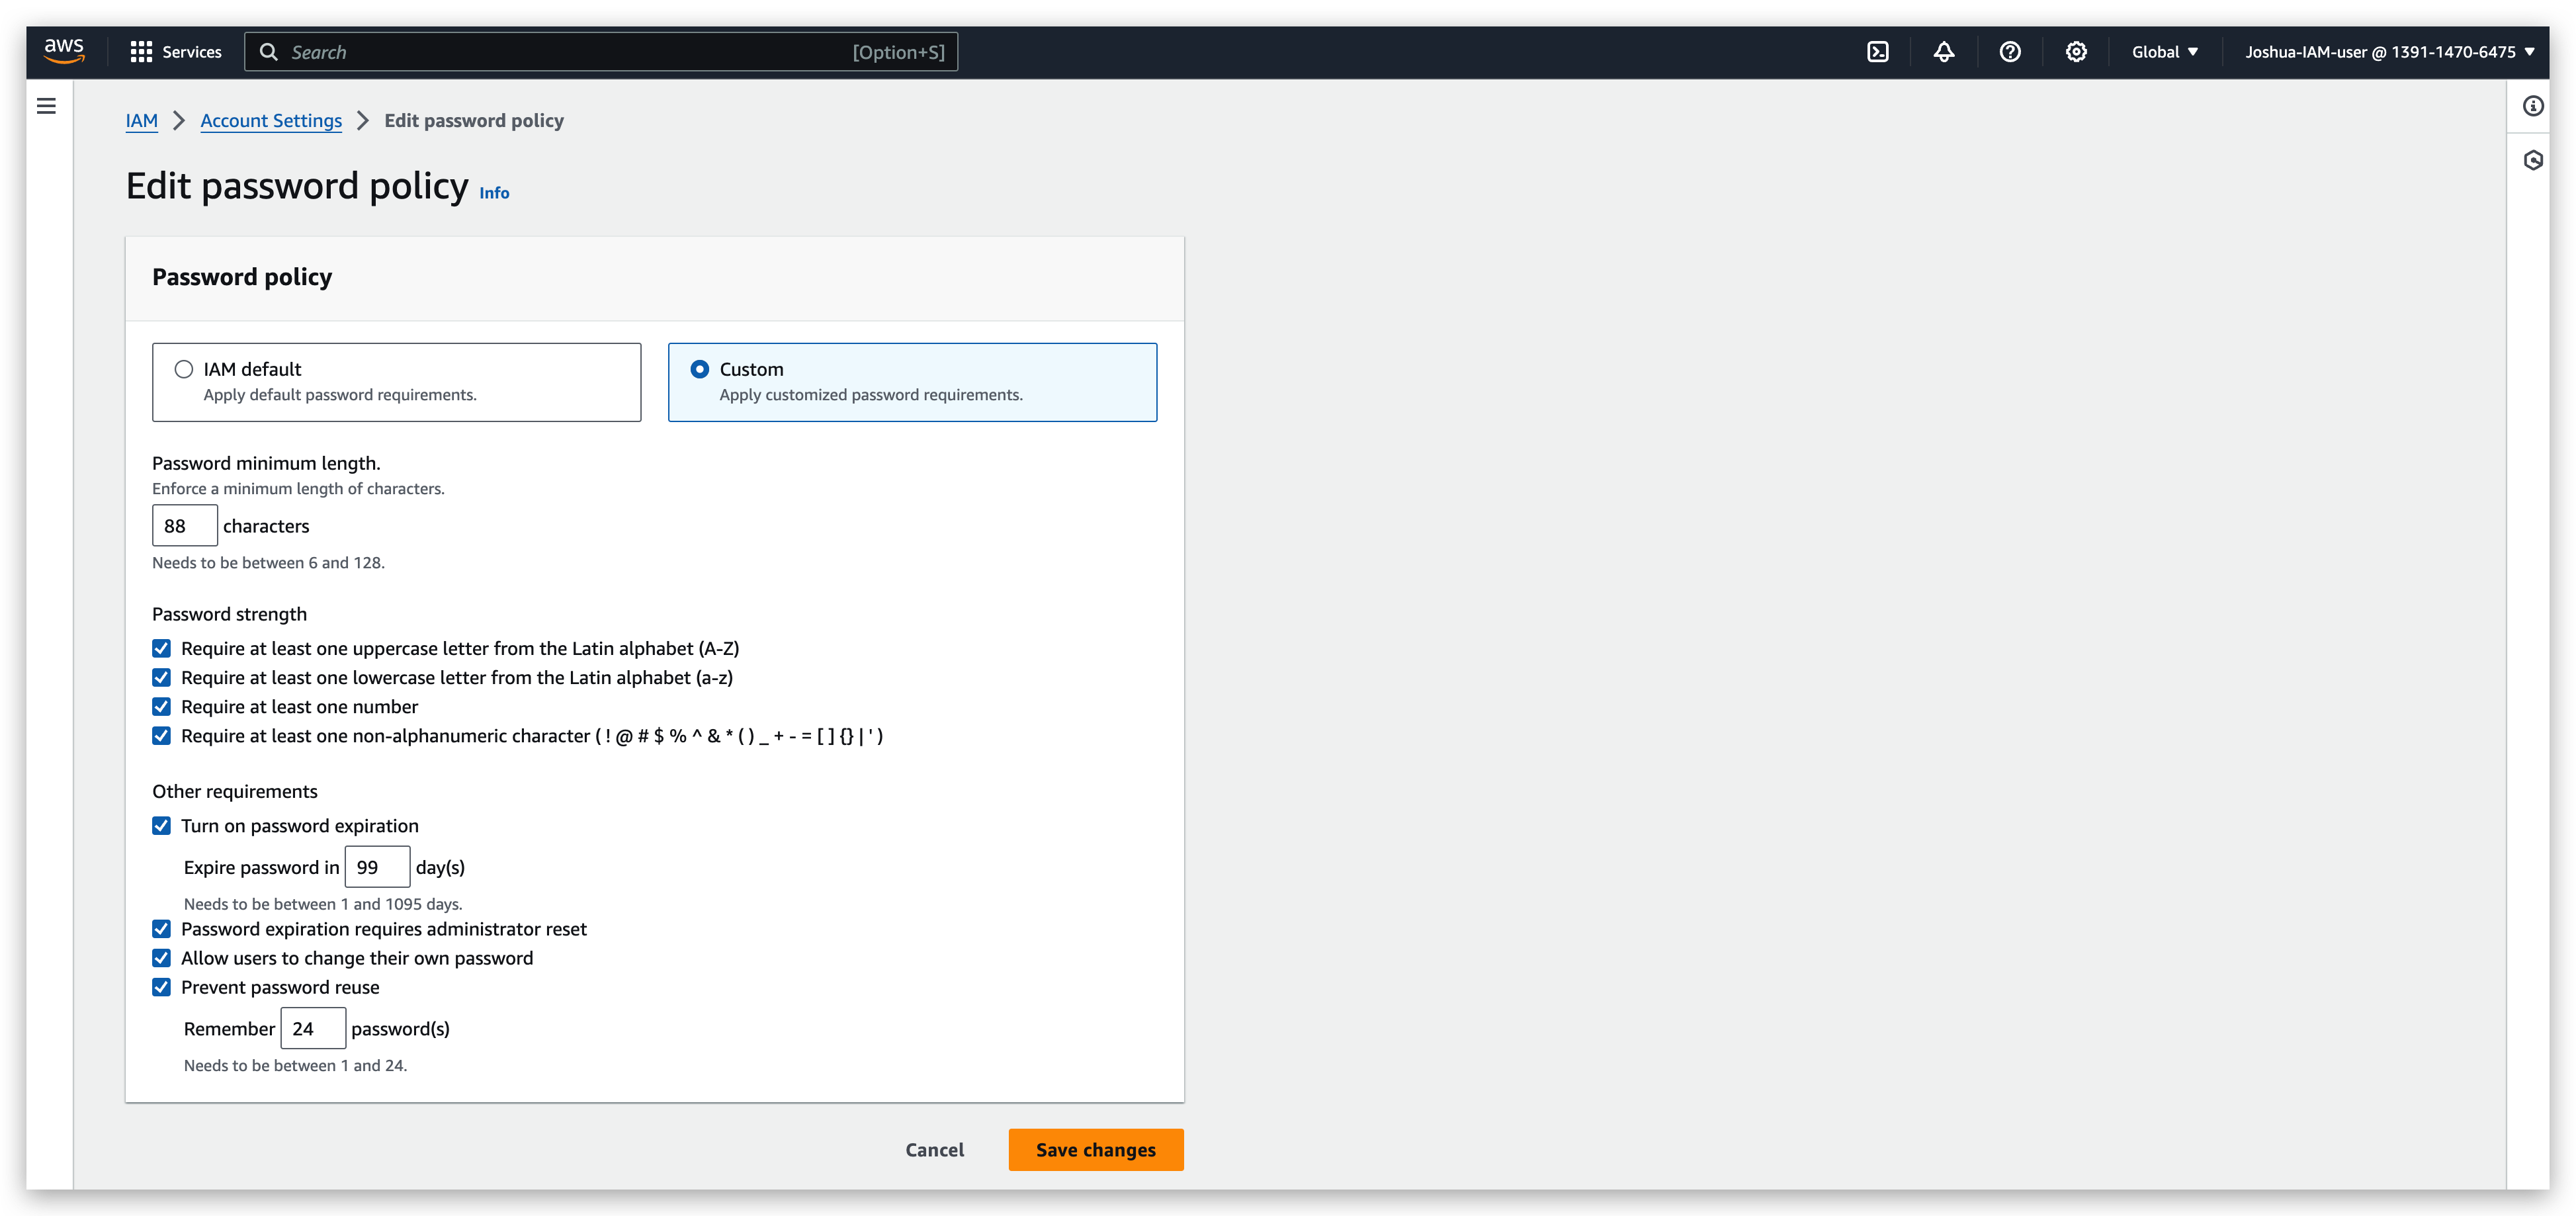
A strong password is really helpful for brute forcing attacks against your account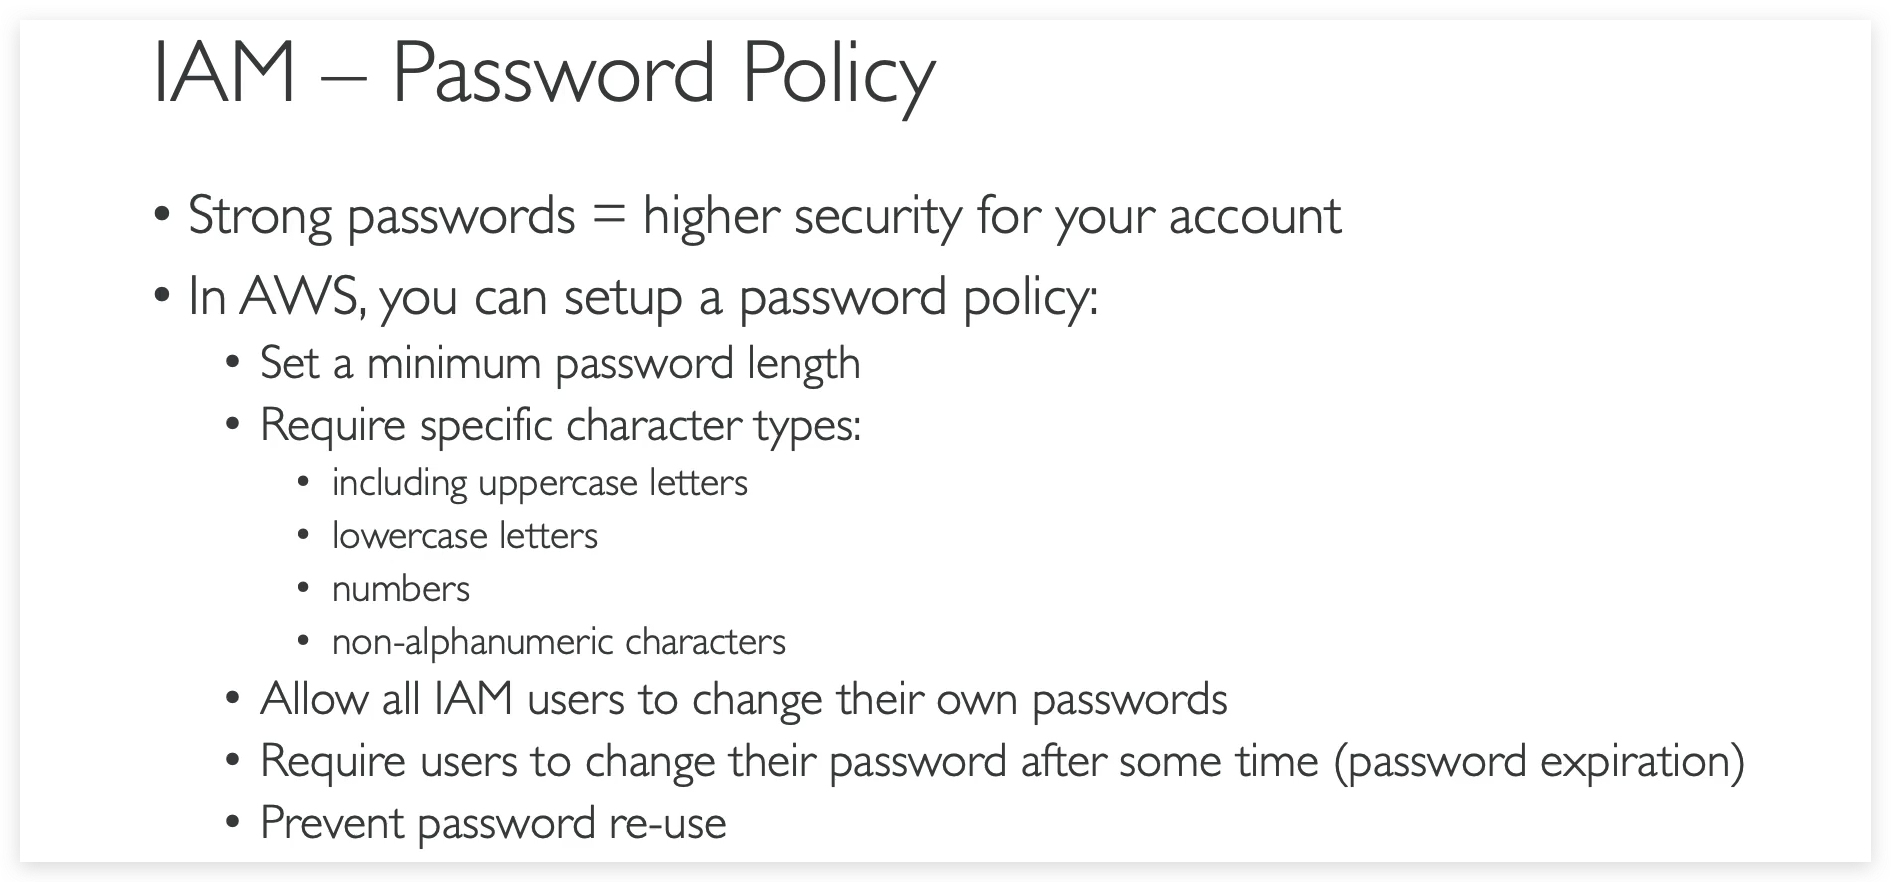
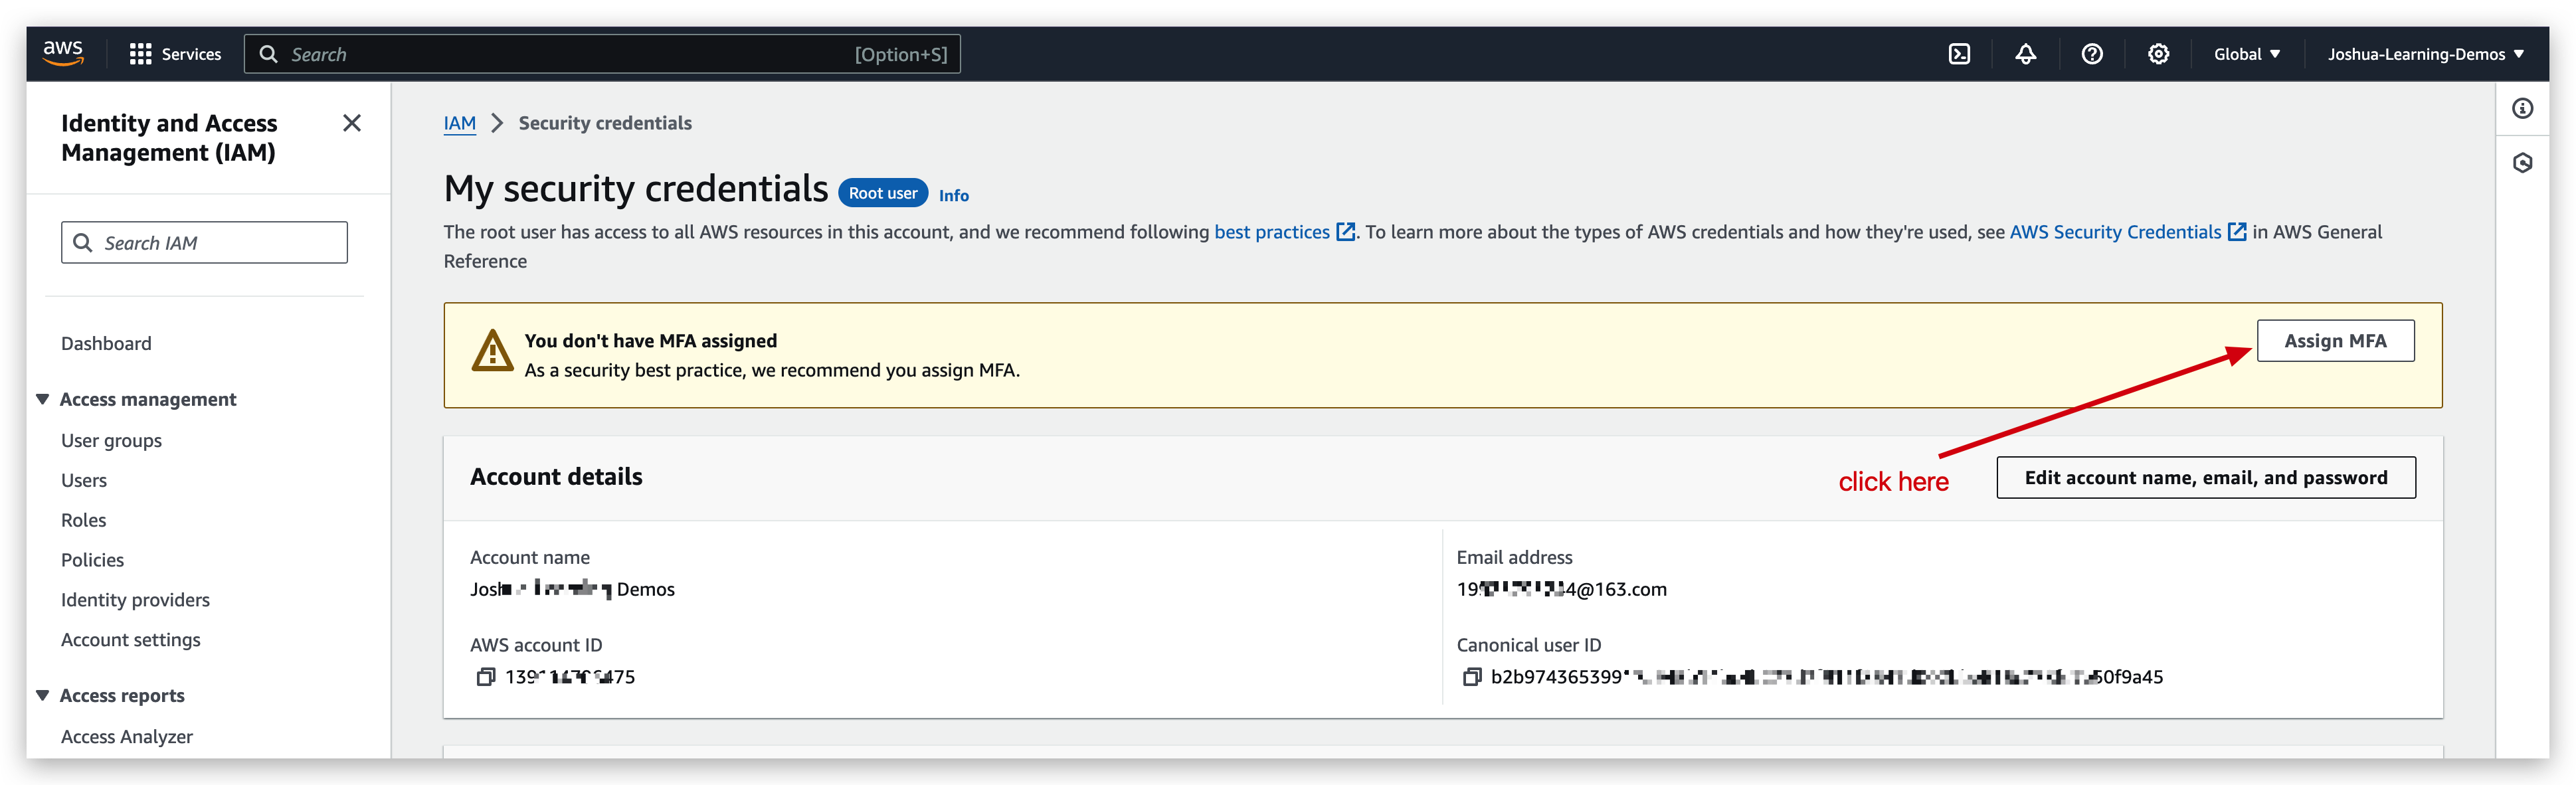
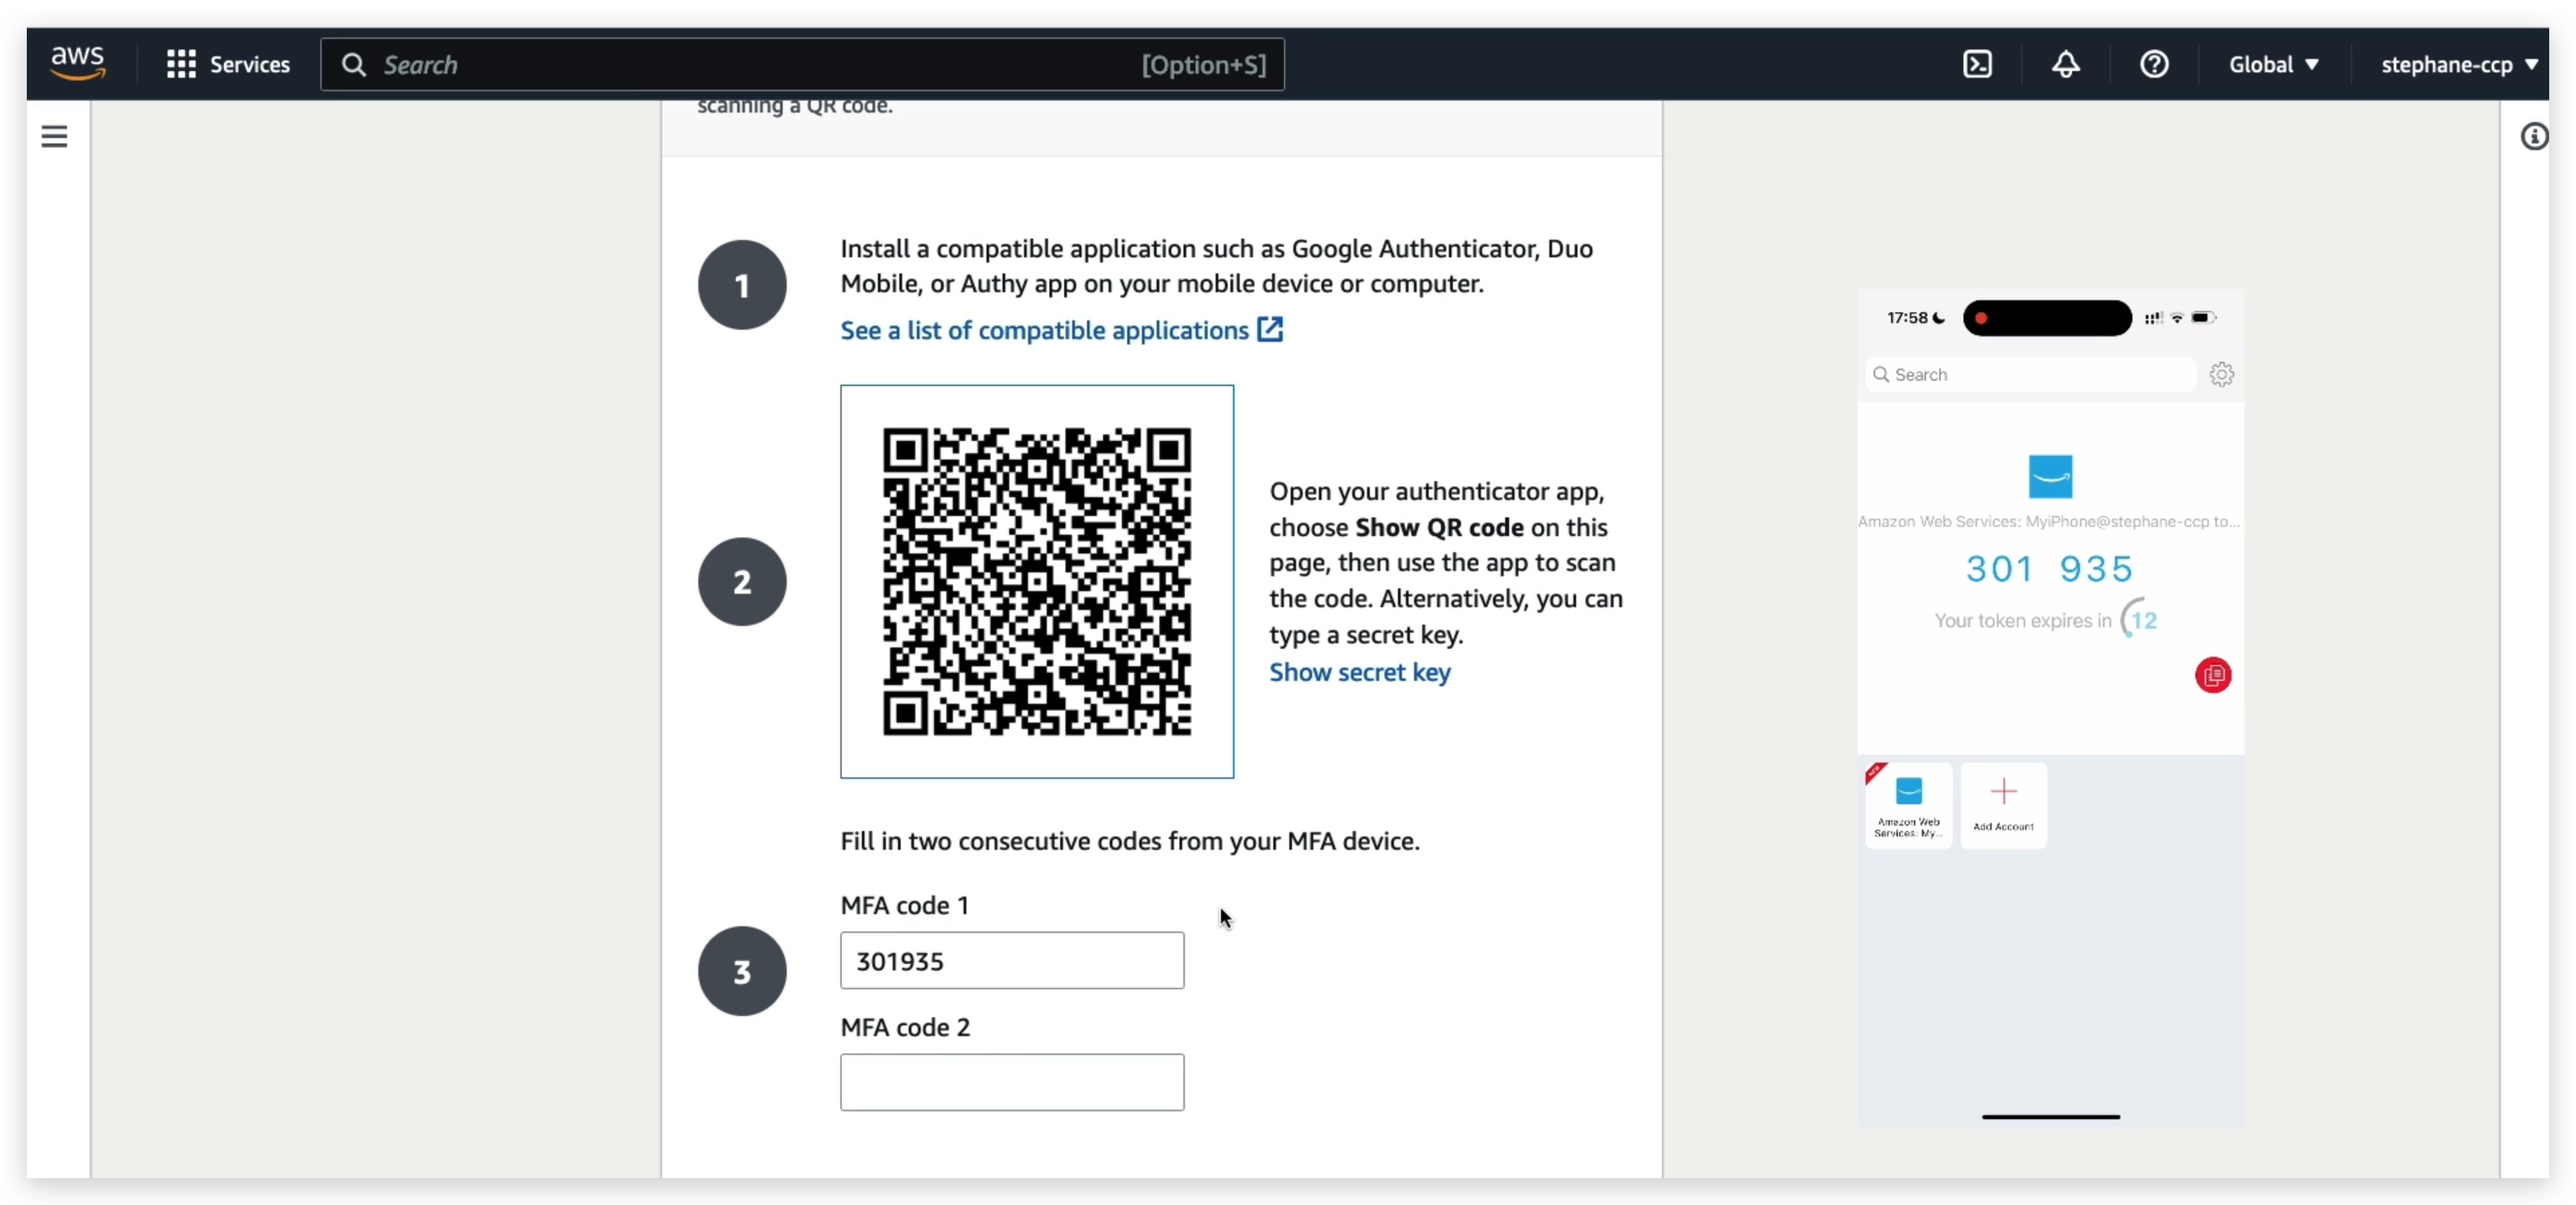
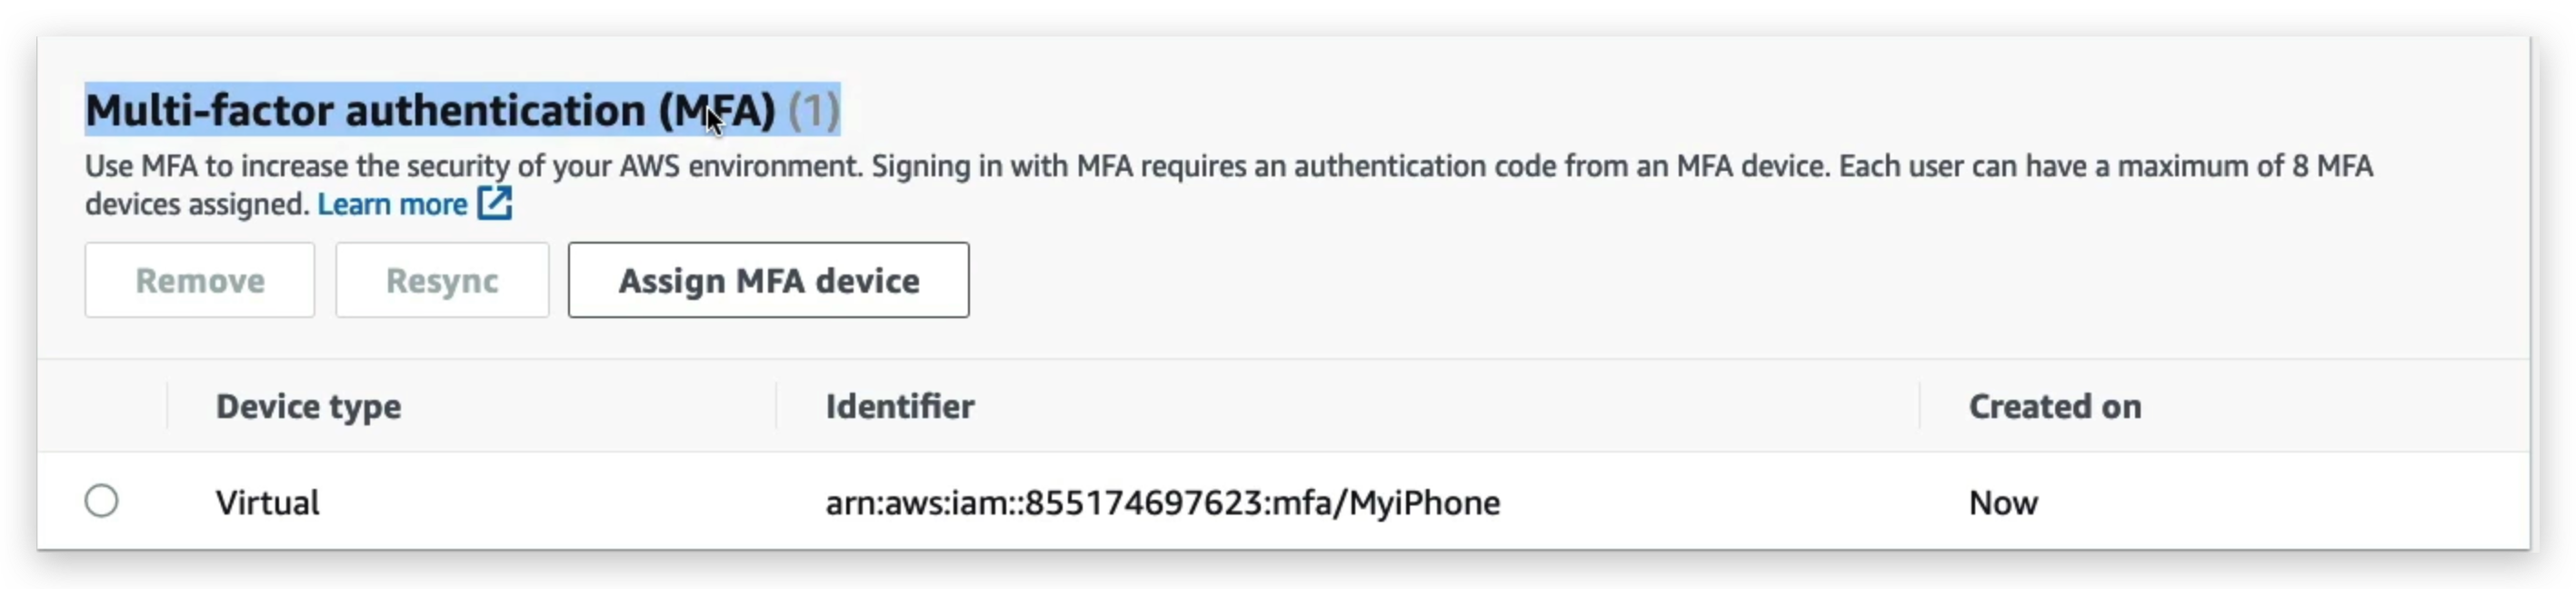
Another security mechanism is MFT: aka multi-factor authentication.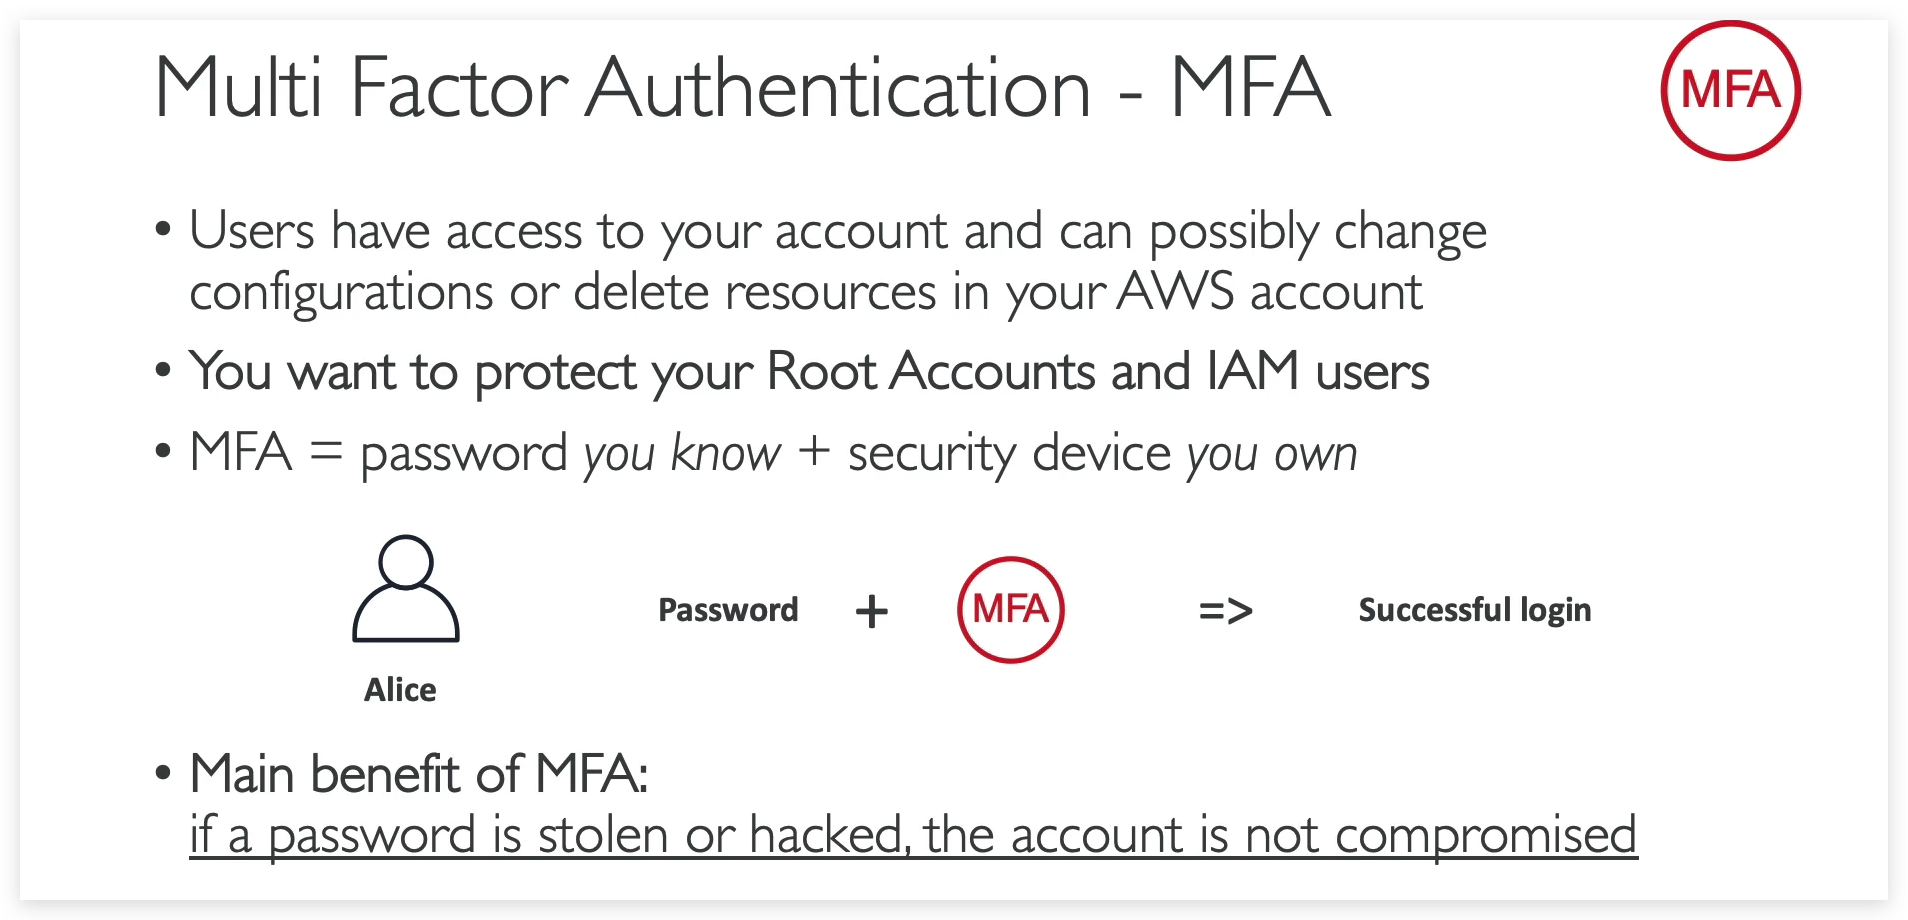
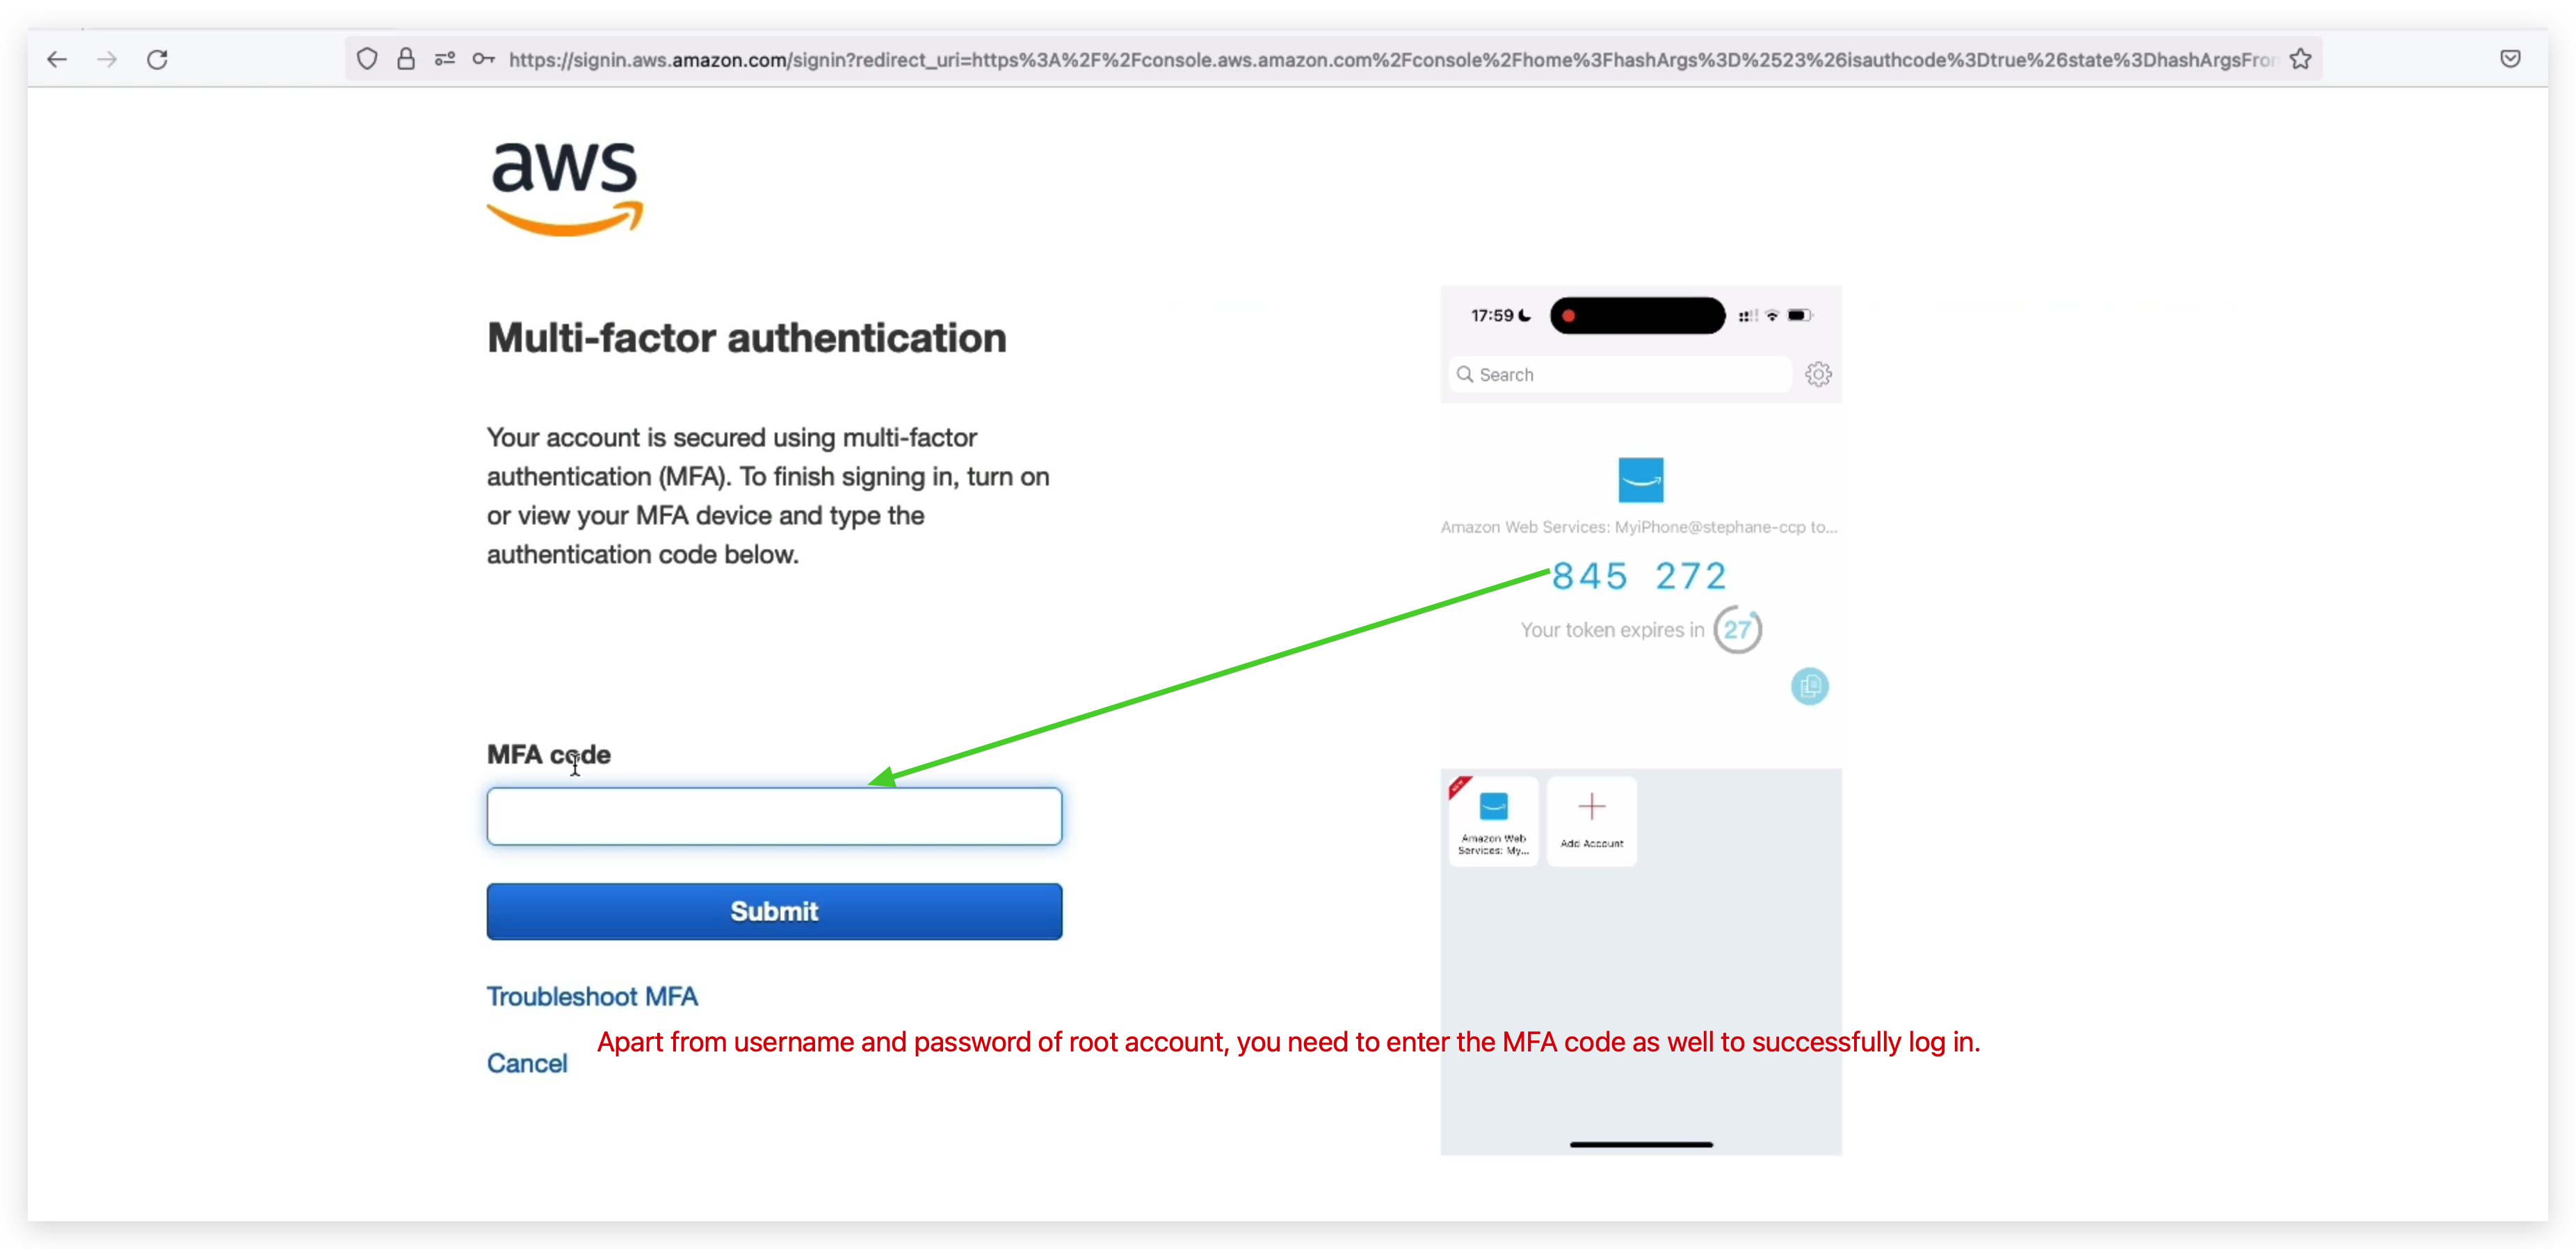
You can turn on the MFA feature for your root account to make it securer. But to do this, you must have your MFA device always available. Otherwise, you might be blocked from logging in again.

How can users access AWS
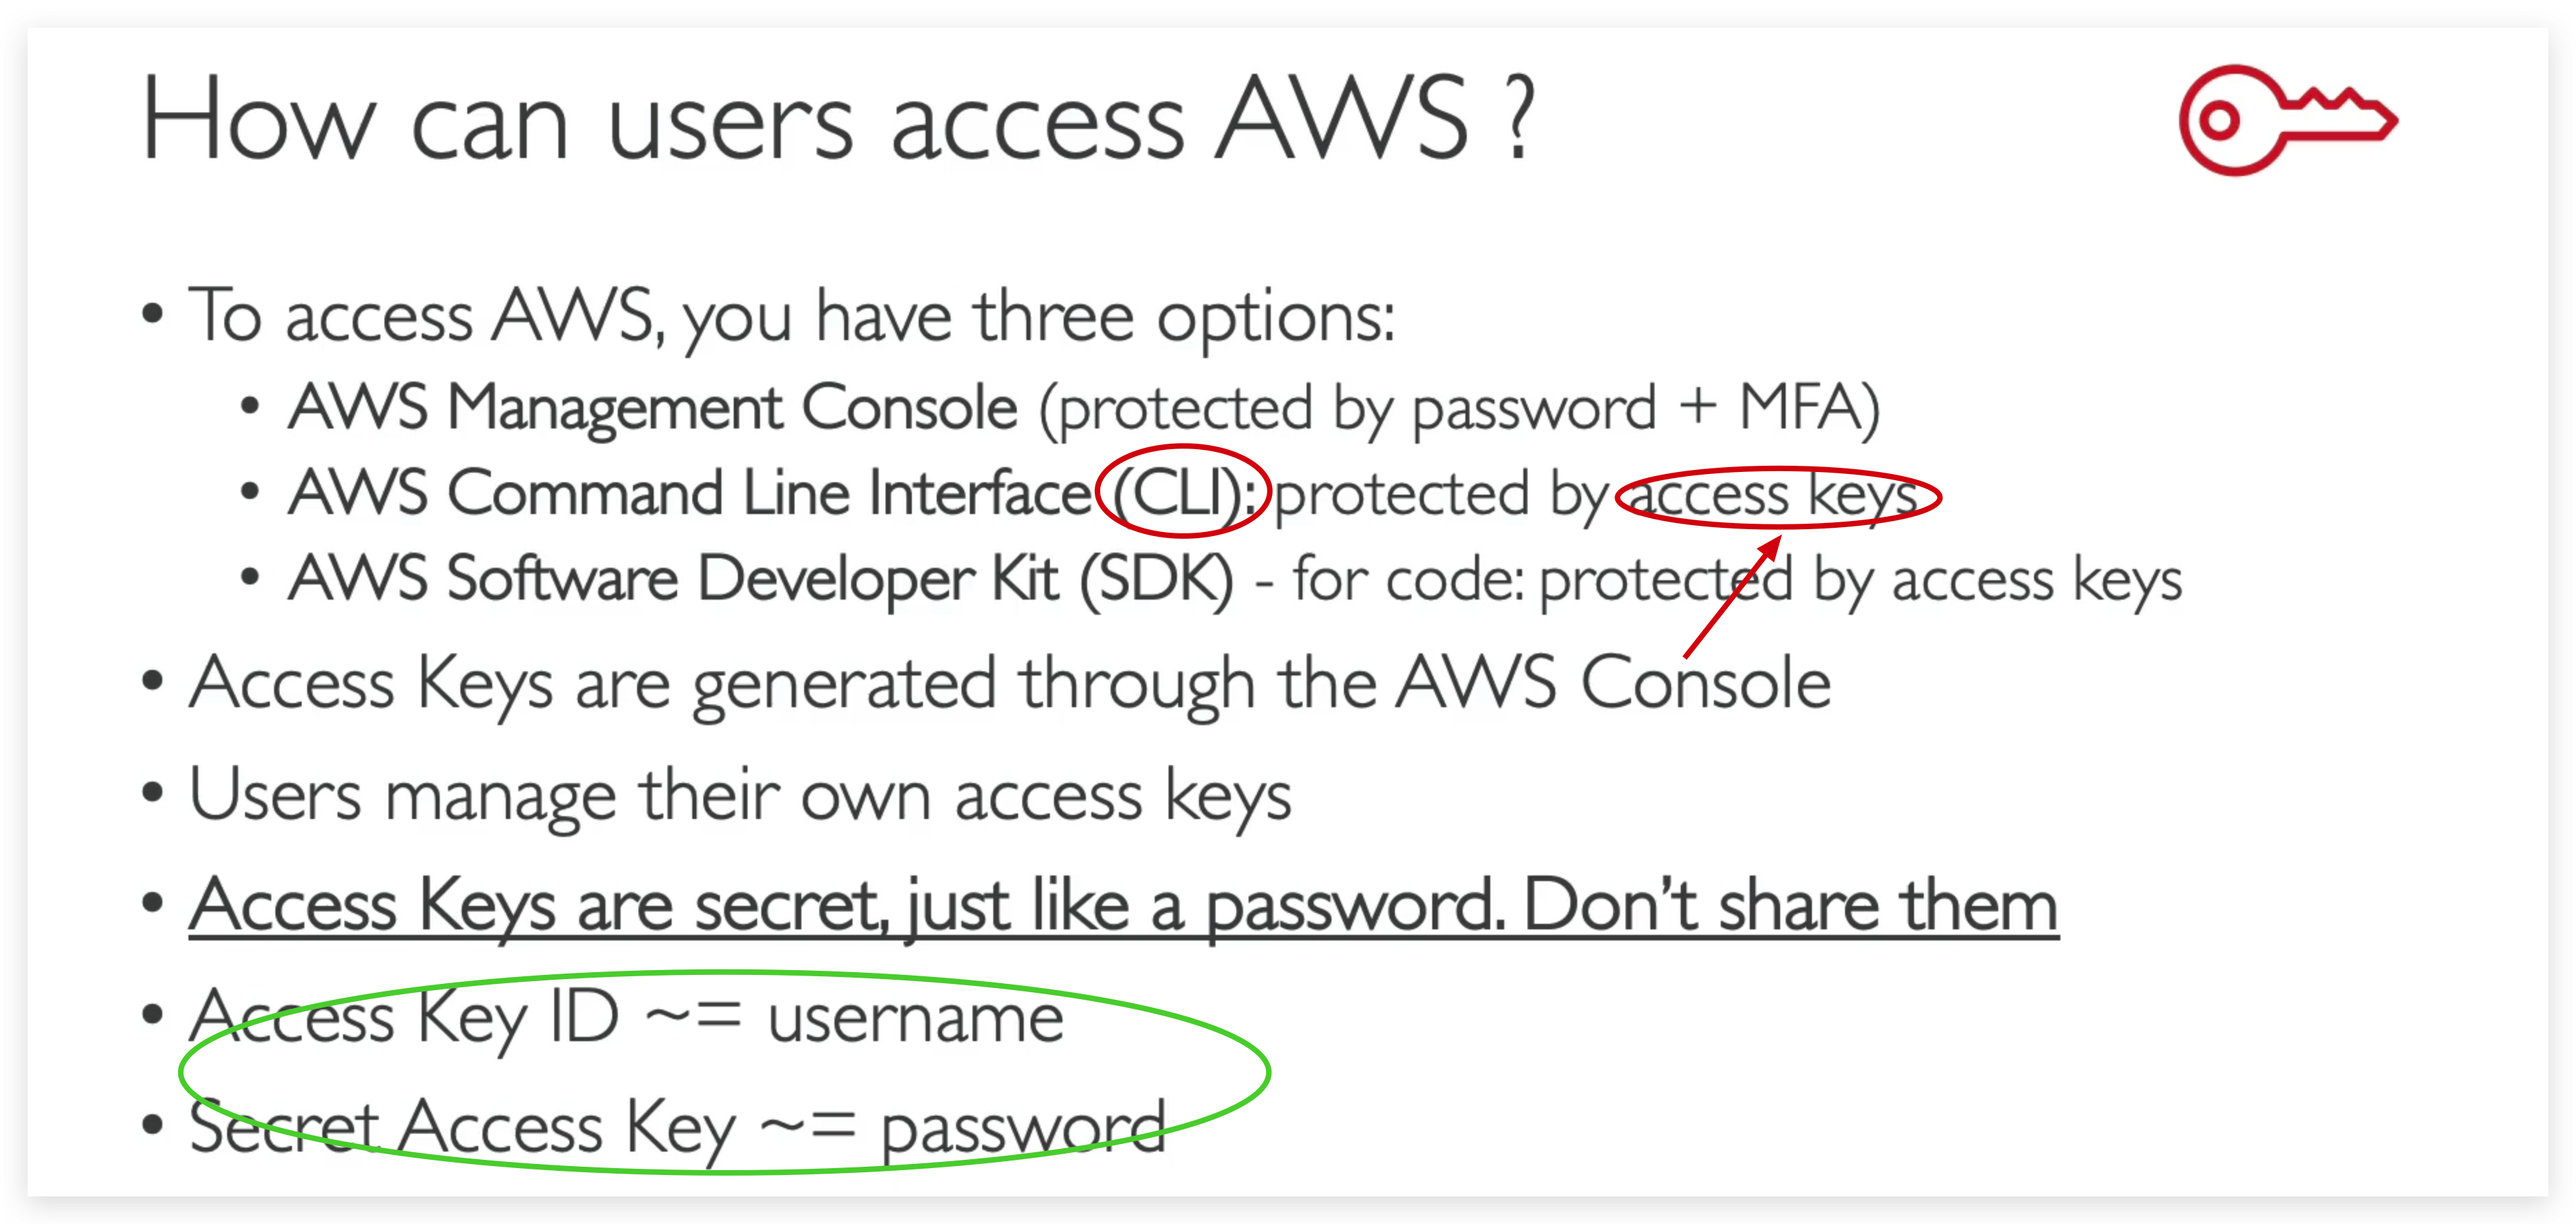
Access keys
Use access keys to make secure REST or HTTP Query protocol requests to AWS service APls. For your protection, you should never share your secret keys with anyone. As a best practice, we recommend frequent key rotation. Learn more
What’s the AWS CLI?
• A tool that enables you to interact with AWS services using commands in your command-line shell
• Direct access to the public APls of AWS services
• You can develop scripts to manage your resources
• It’s open-source, official: https://github.com/aws/aws-cli
• Alternative to using AWS Management Console
What’s the AWS SDK?
• AWS Software Development Kit (AWS SDK) • Language-specific APls (set of libraries)
• Enables you to access and manage AWS services programmatically
• Embedded within your application
• Supports
- SDKs (JavaScript, Python, PHP, NET, Ruby, Java, Go, Node.js, C++)
- Mobile SDKs (Android, iOS, …)
- loT Device SDKs (Embedded C, Arduino, …)
Example: AWS CLI is built on AWS SDK for Python Such as the popular python one: boto
AWS installation (in various environments)
You can refer the official documentation whenever you get an installation issue.
Mac OS X:
Download the PKG file via the official website. (shown above)
Double-click the package file you just downloaded and click “continue” all the way to the end
Open a terminal session and typeshell aws--versionto Verify whether it’s installed successfully.
If yes, it will give you back the version of the AWS CLI just like the illustration below.

Windows:
Exactly same three steps(to Mac version) need taking to install AWS CLI in Windows.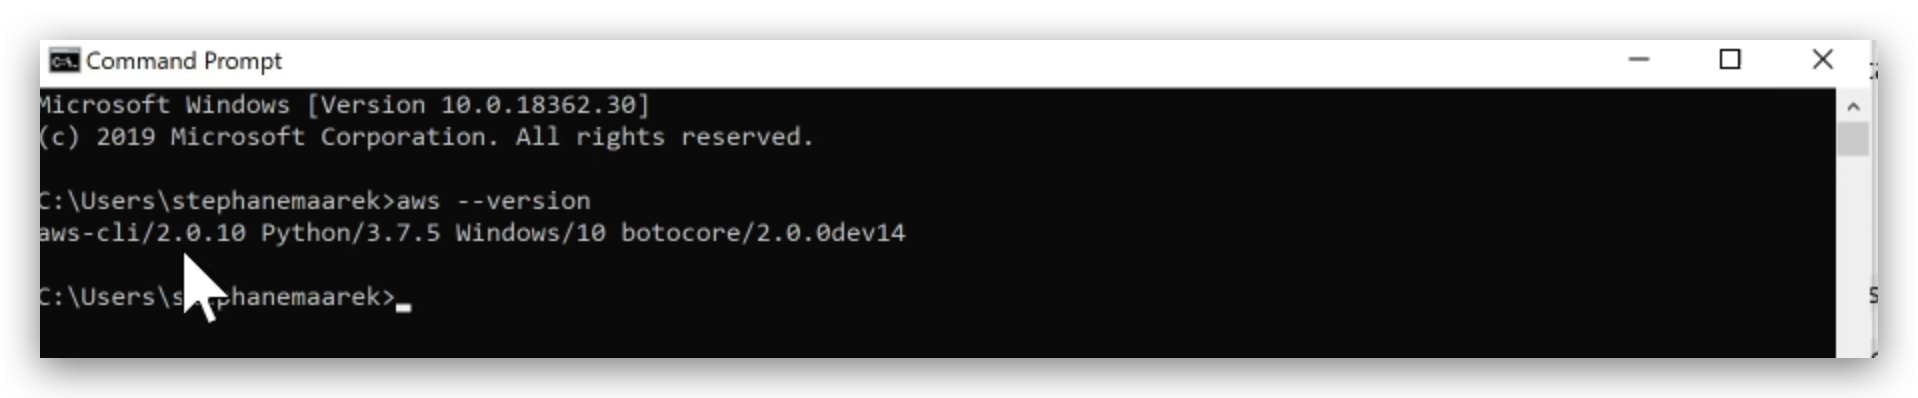
Linux:
To install the AWS CLI, run the following commands.
1 | curl "https://awscli.amazonaws.com/awscli-exe-linux-x86_64.zip" -o "awscliv2.zip" |
To update your current installation of the AWS CLI, add your existing symlink and installer information to construct the install command using the –bin-dir, –install-dir, and –update parameters. The following command block uses an example symlink of /usr/local/bin and example installer location of /usr/local/aws-cli.
1 | curl "https://awscli.amazonaws.com/awscli-exe-linux-x86_64.zip" -o "awscliv2.zip" |
To verify, also run aws --verison.
access key generation & AWS CLI configuration
How to generate access keys (IAM User)
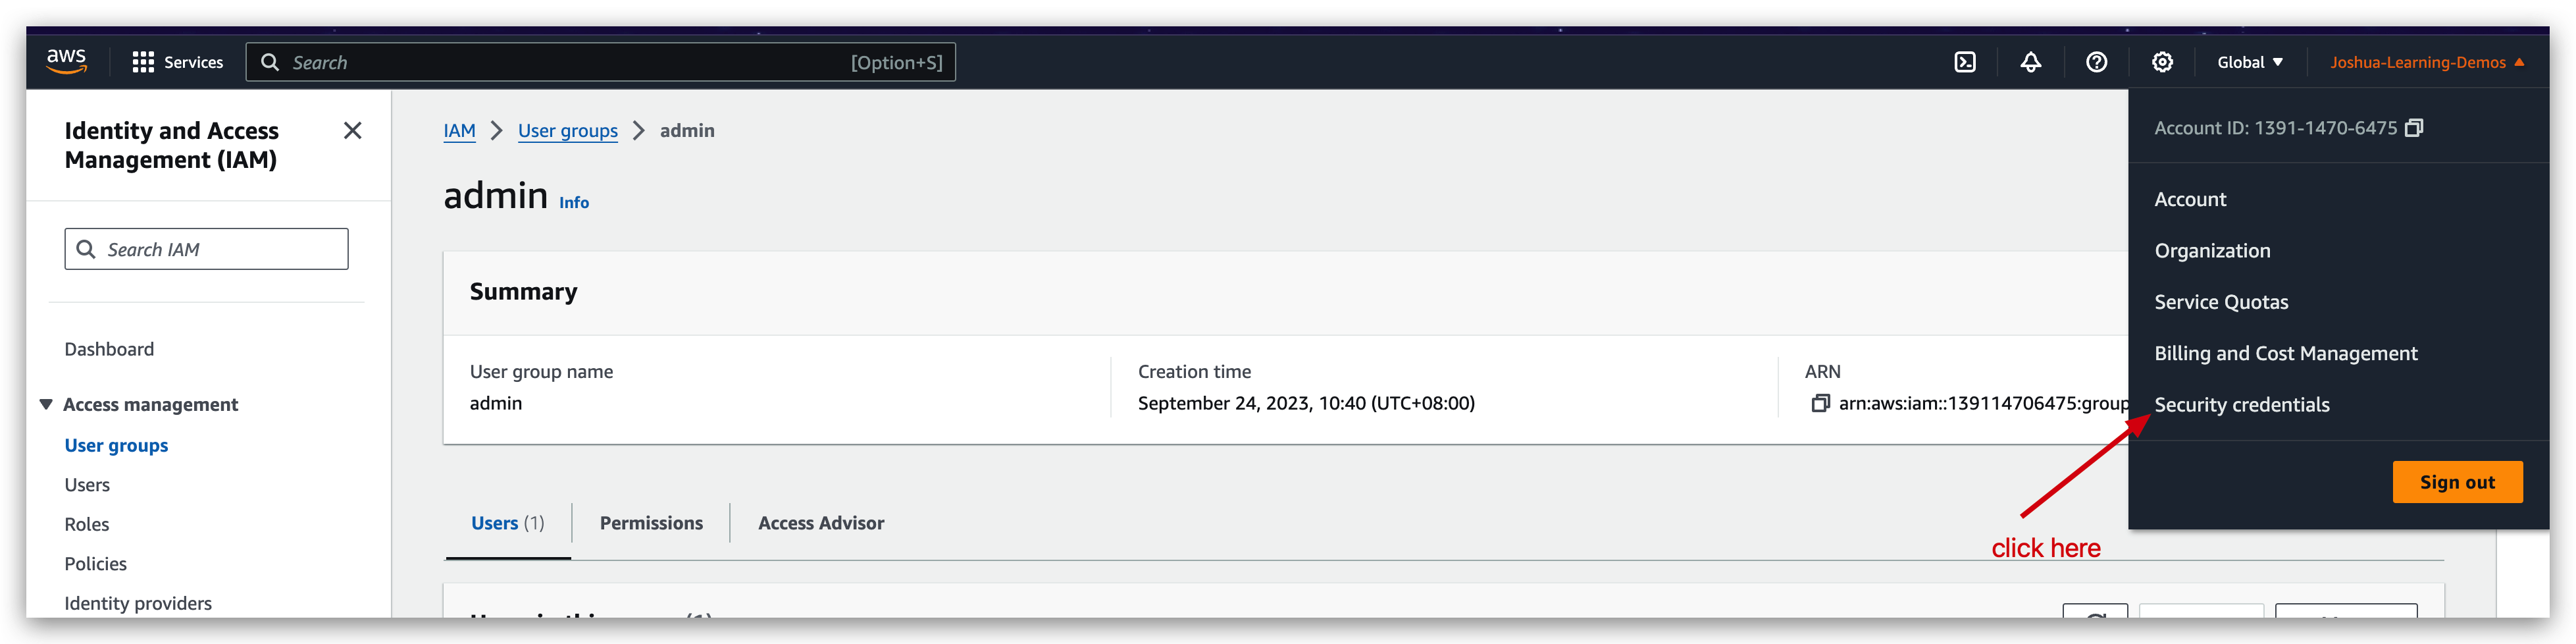
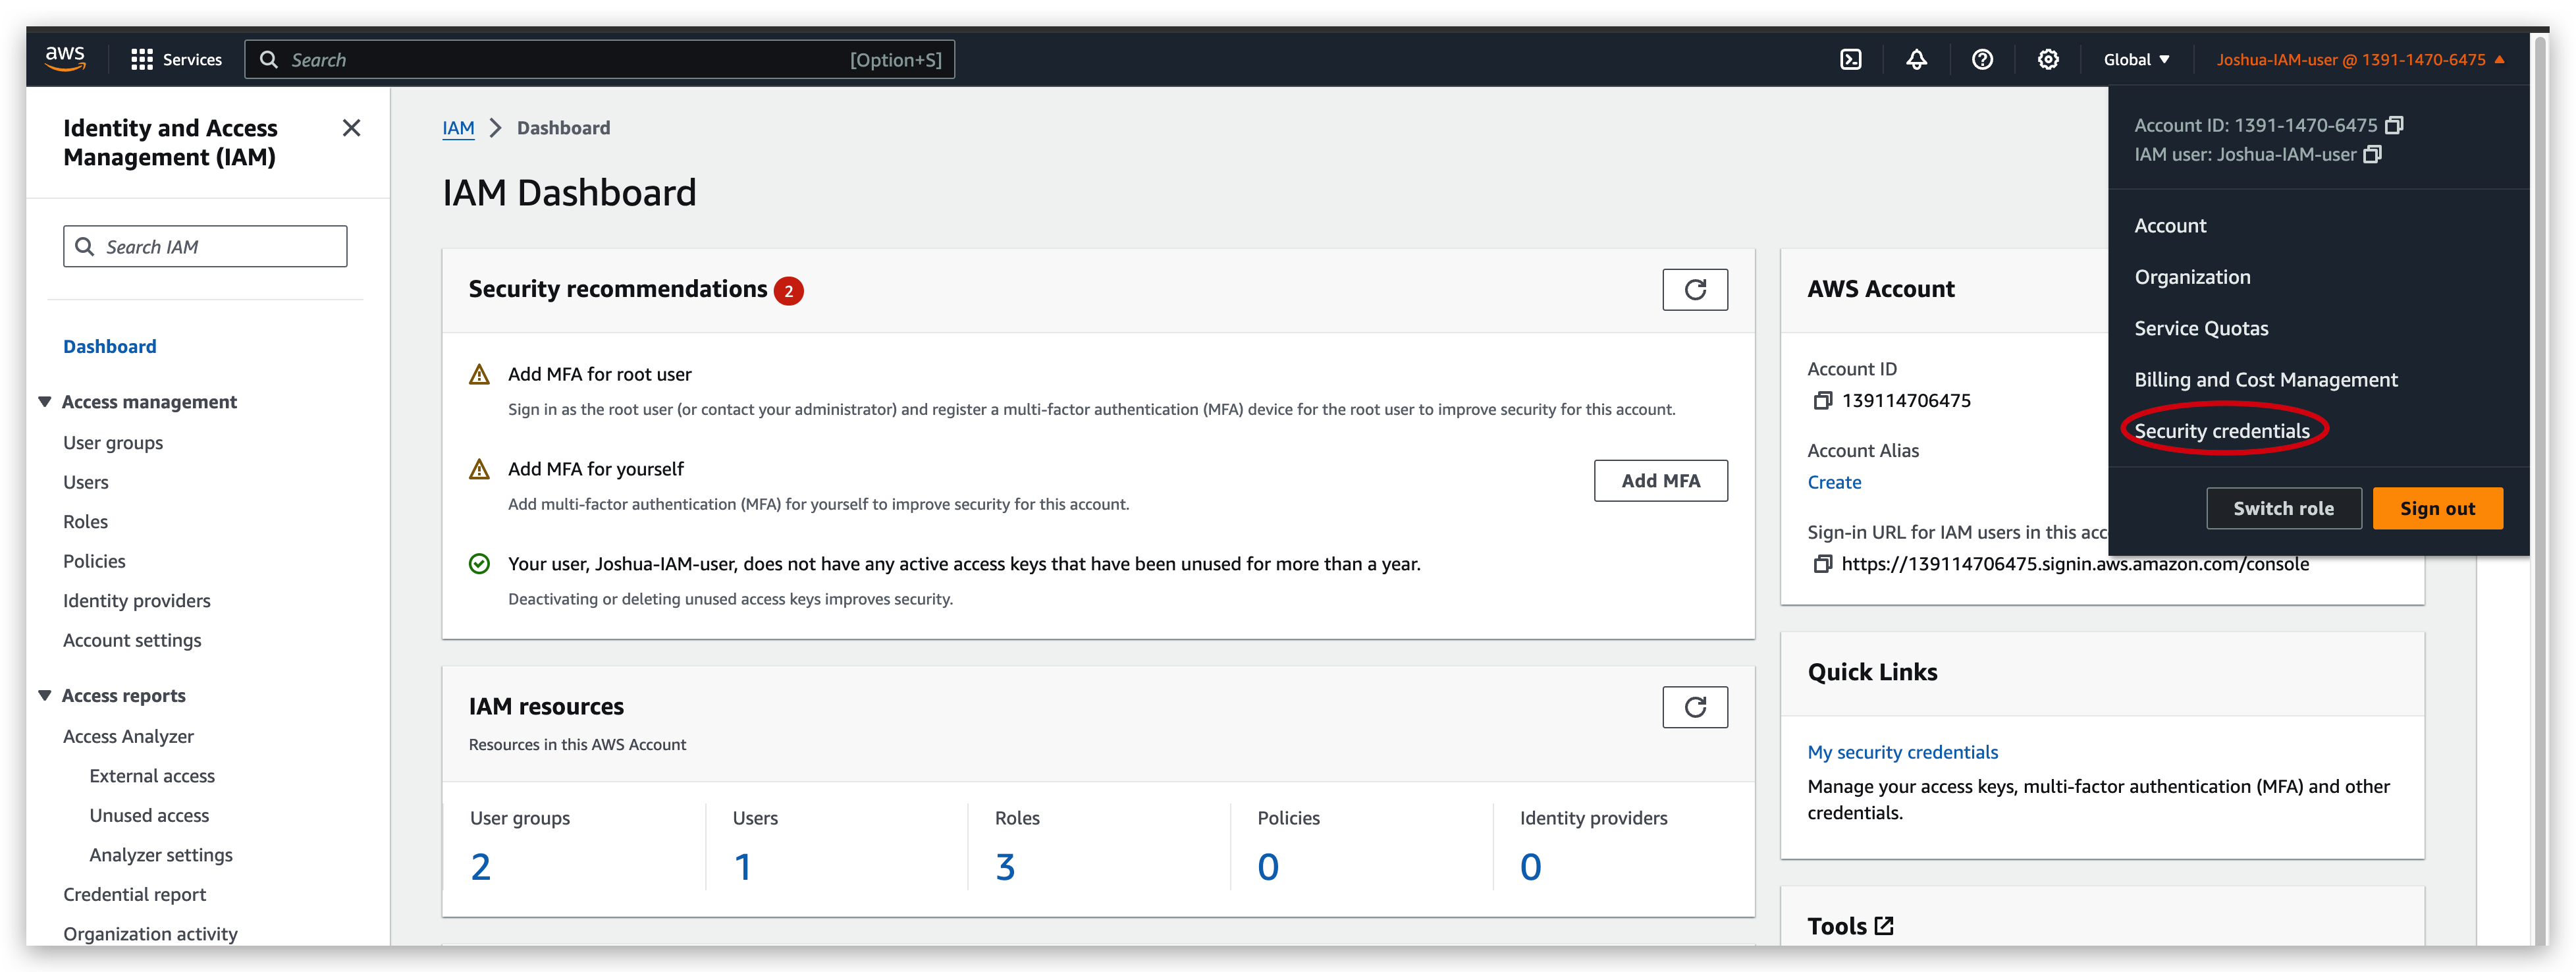
- Direct to the security credentials page
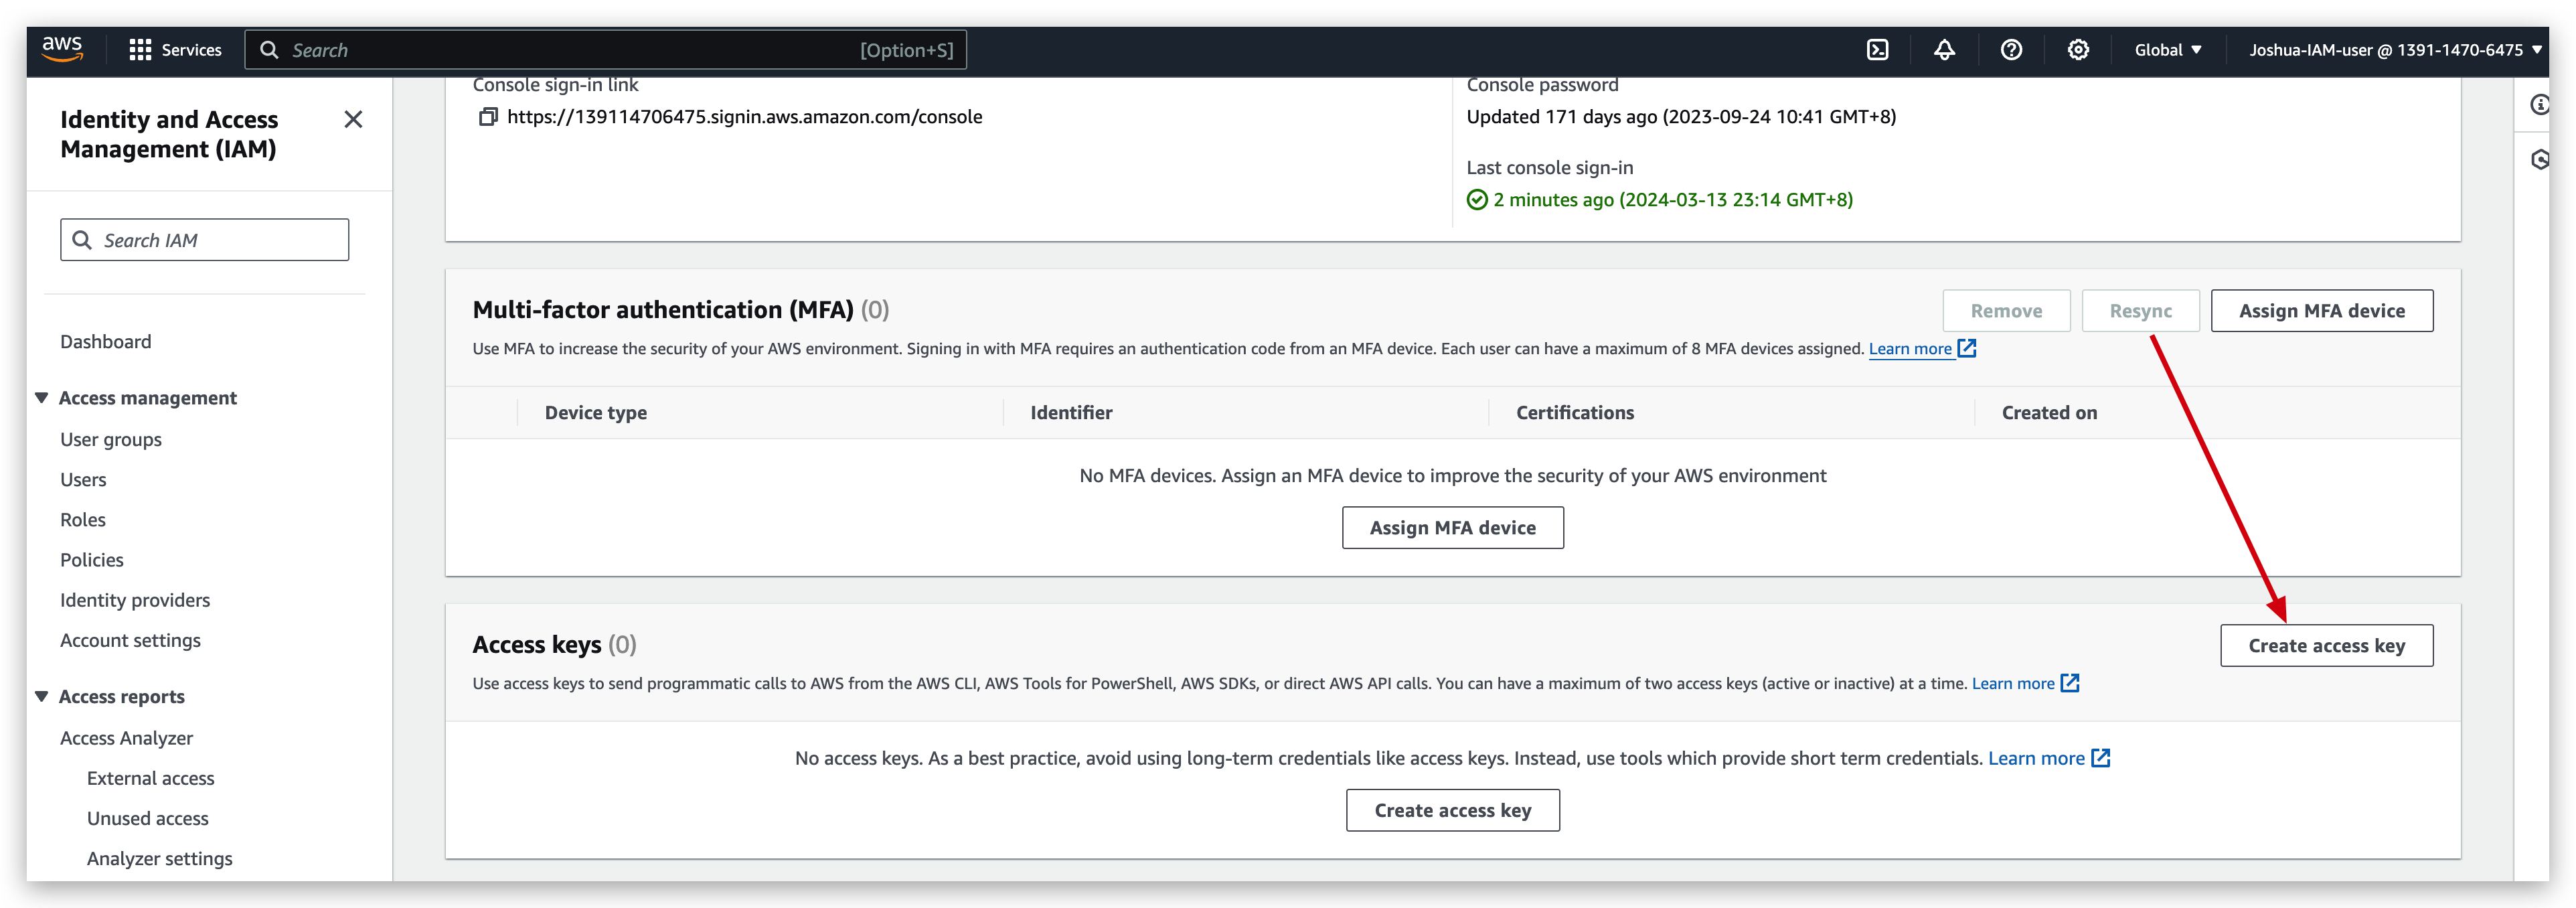
- Click the button to create access key
- select the use case and confirm the agreement and NEXT

- Tag the key as you wish and hit the create button

- Now you will see the successful prompt, PLEASE read it through.

- This is the only time that the secret access key can be viewed or downloaded. You cannot recover it later. However, you can create a new access key any time.
- Given above, one must copy the plain text of the access key and secret access key (you can regard them as username and password) to local note or download the csv file.
- This manual suit for creating a new access key for ROOT user as well.
AWS CLI configuration
Once your access key generated, the first thing you need to do is configure the AWS CLI.
- Open terminal window and execute the command below:
1 | aws configure |
- You will be greeted with the access key, just enter it.
- You will be greeted with the secret access key, just enter it.
- You will be prompted with the Default region name that you want to configure the CLI. Just choose the one close to you. I keep it the same one with the mentor. Just in case of it not in accordance with what’s taught in the course.
- You will be prompted with the Default output format. For this one, you can just hit enter to ignore.
- Access key created successfully, and you need to verify with a sample command
1 | aws iam list-users |
If it’s successful, you will be responded with a JSON block like, information about users that you created with this account:
1 | { |
Illustration of AWS CLI configuration and verification

If we get the user list permission removed from that IAM user via Management condole with the ROOT account, and then check the user list in the management portal, it will throw an error like: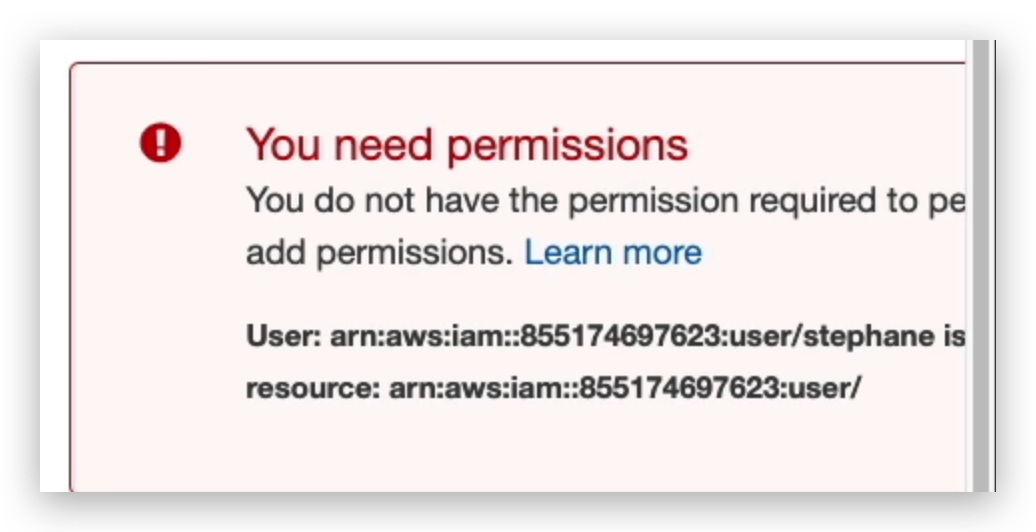
At this moment, if we execute the user list command aws iam list-users in CLI, it will return nothing, neither error.
Delete Access Key (Optional)
- First, deactivate access key
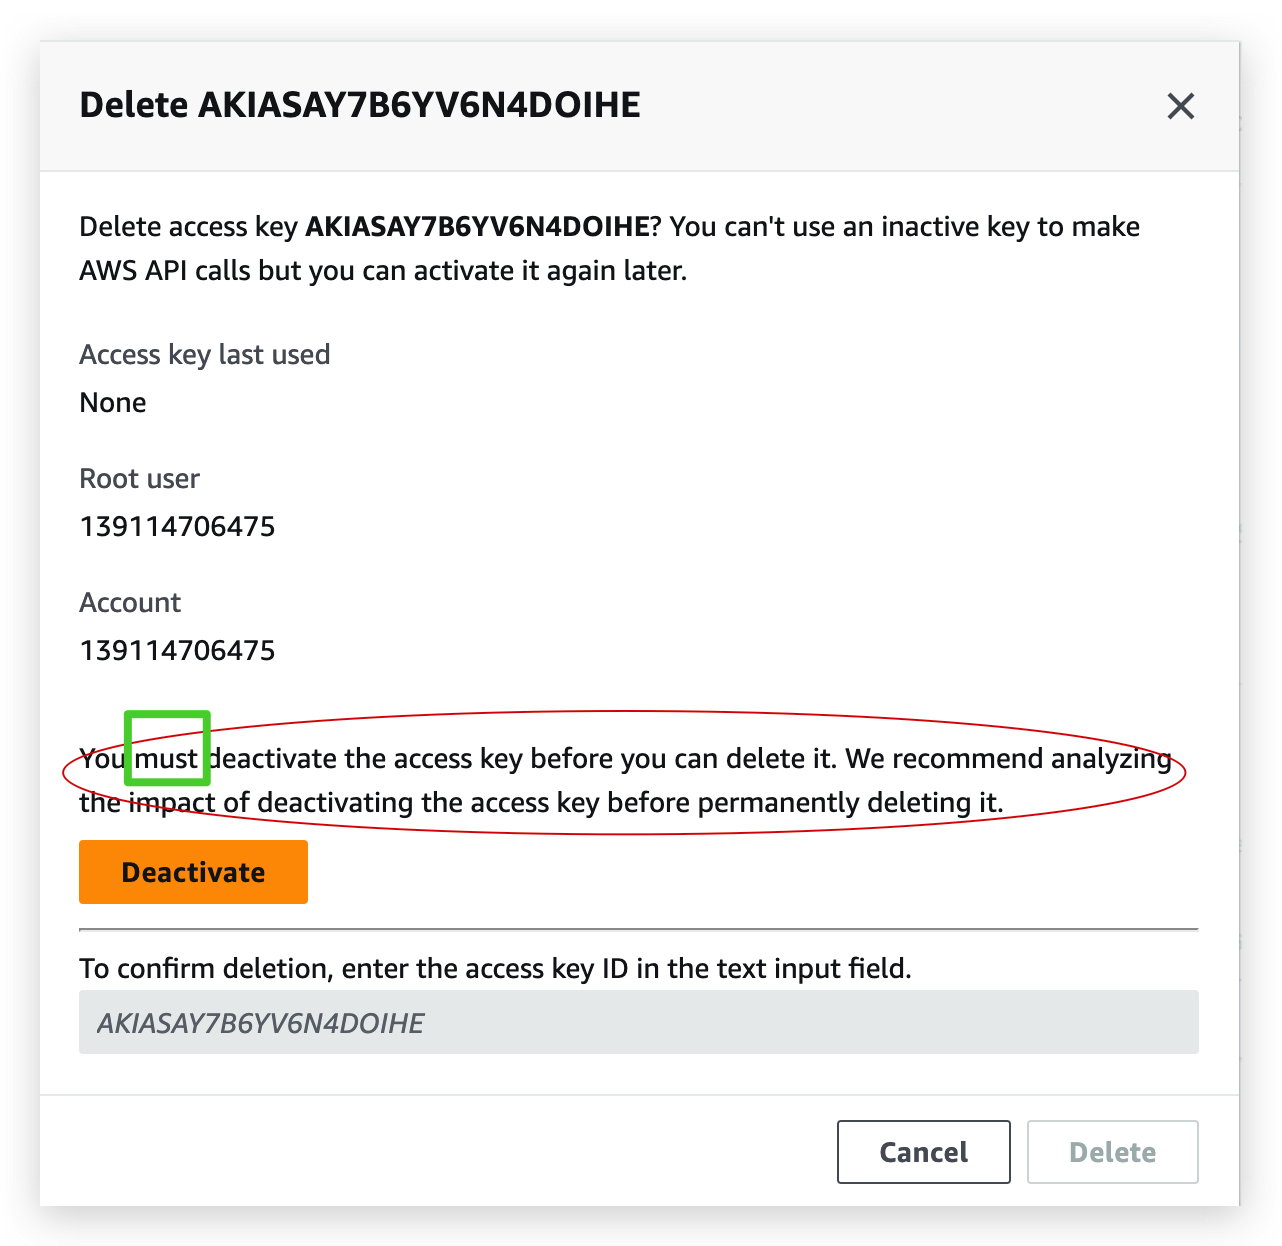
- Refresh and hit delete button, and then type the access key in the box
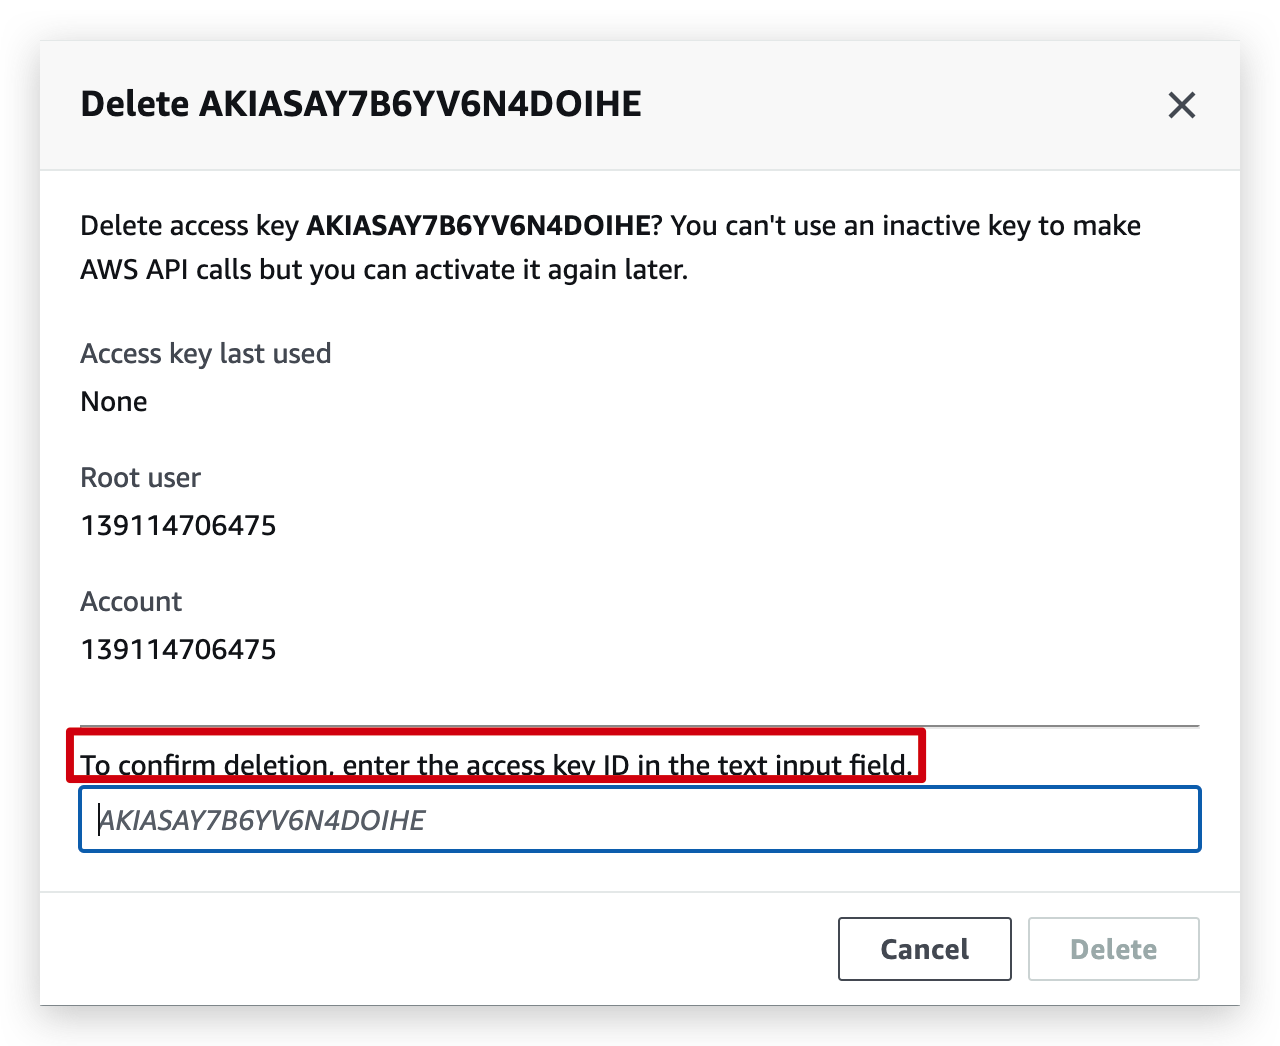
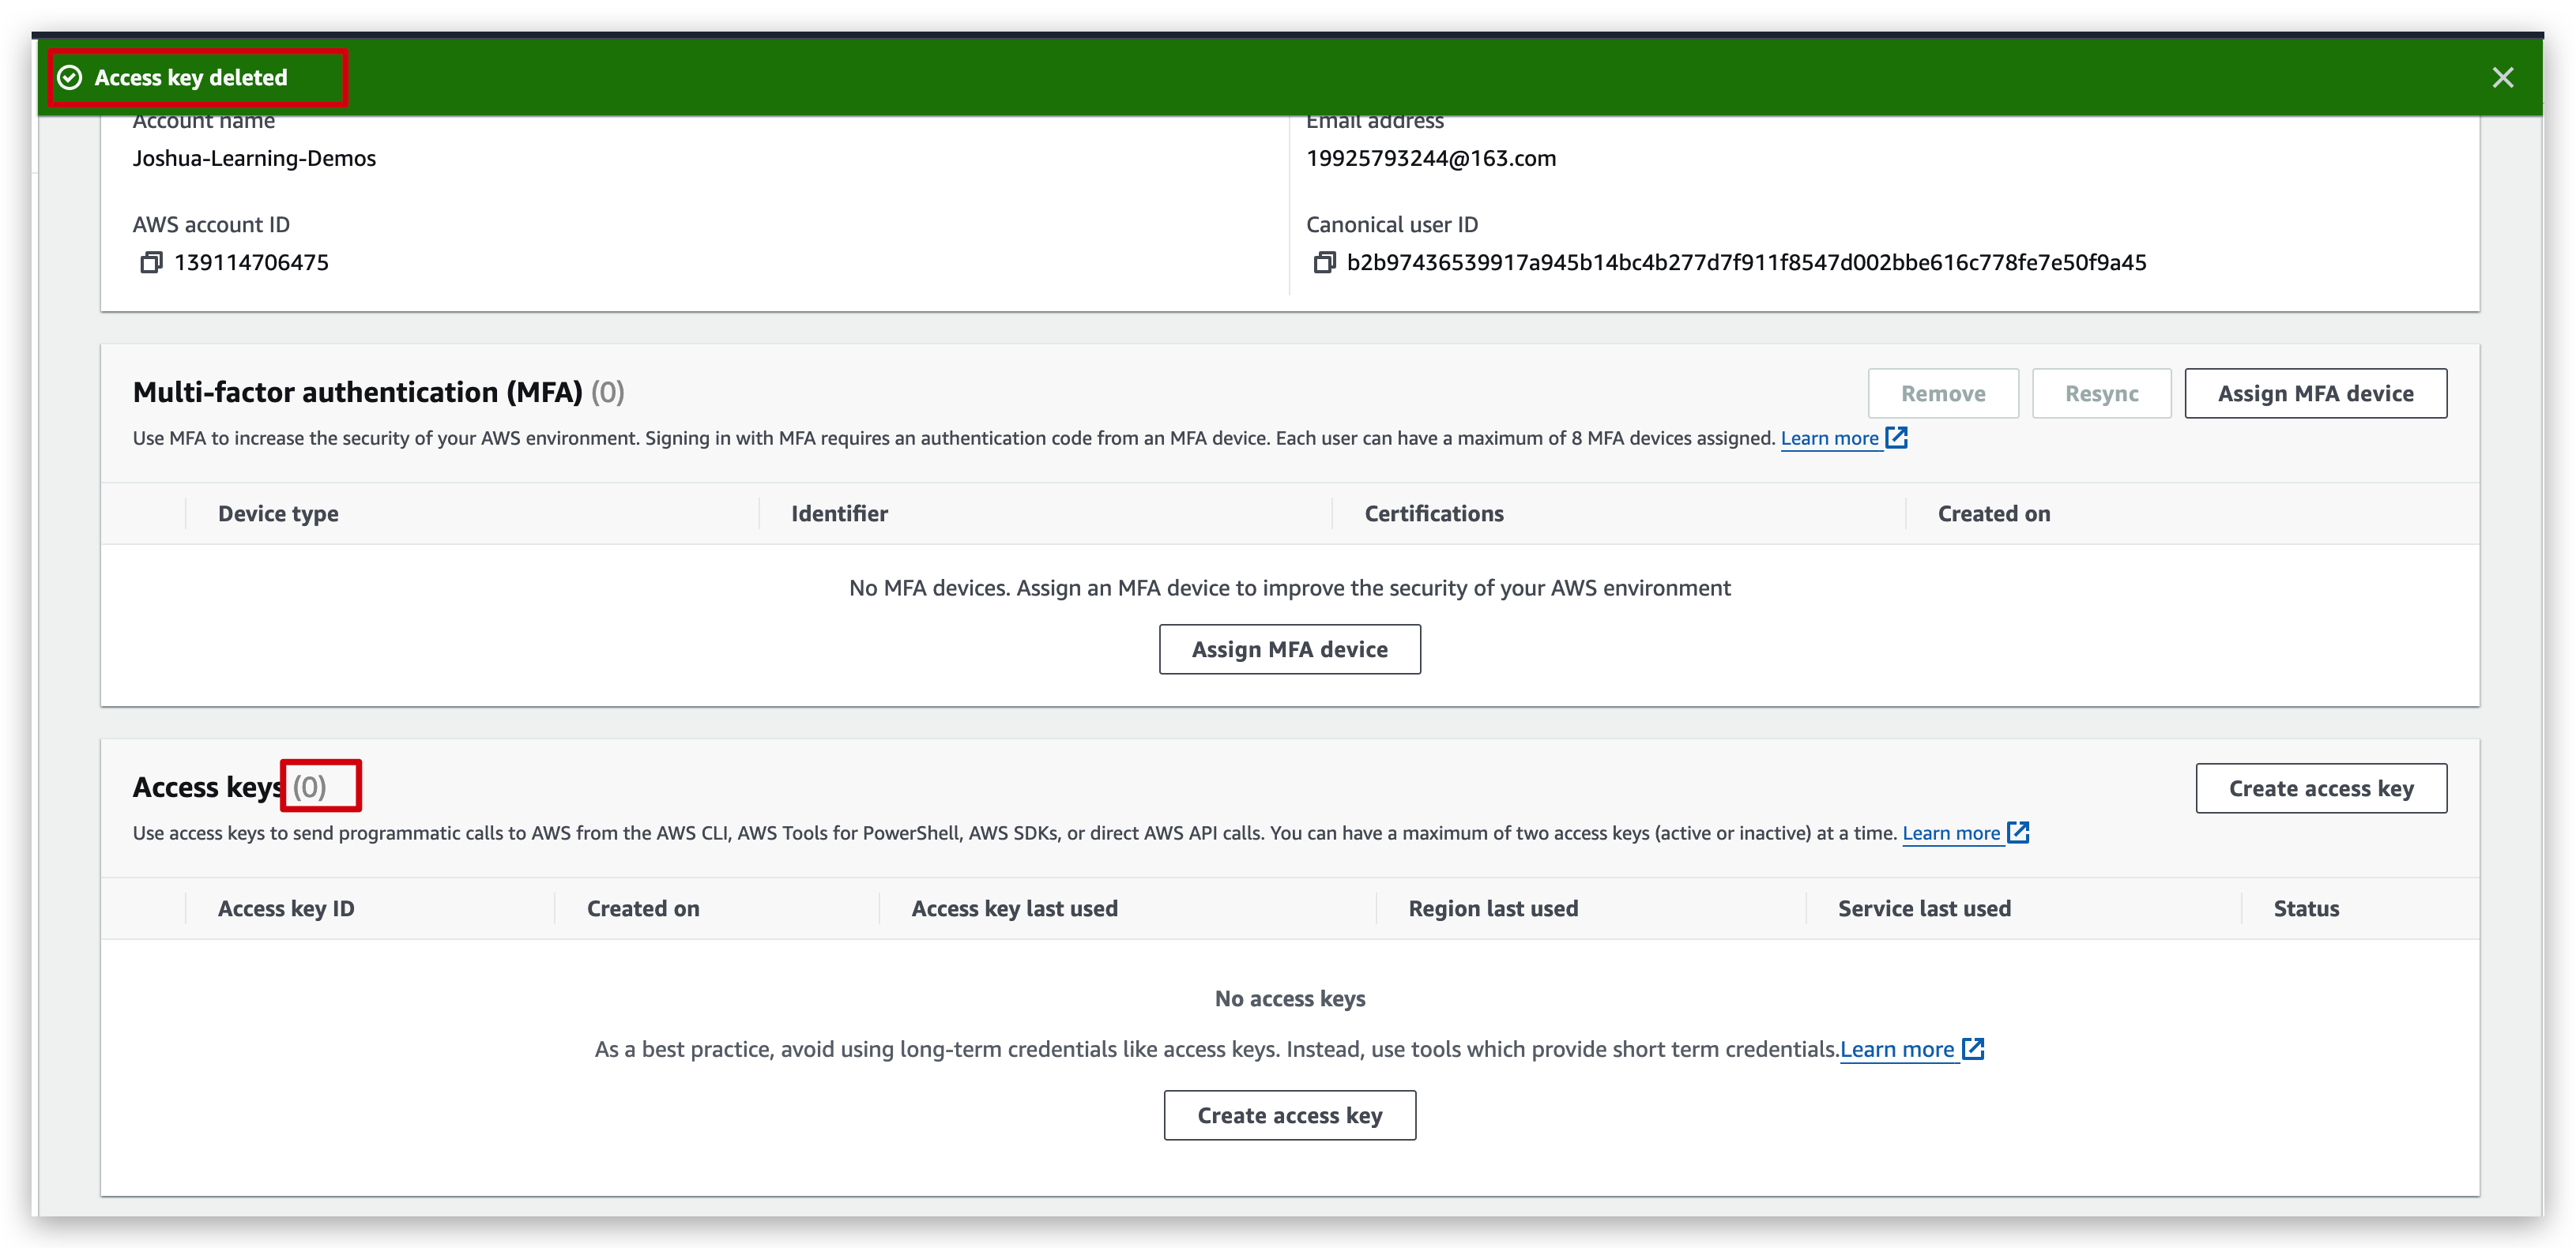
- You can verify from the dashboard that access key is already deleted.
CloudShell
What is AWS CloudShell?
AWS CloudShell is a browser-based, pre-authenticated shell that you can launch directly from the AWS Management Console. You can navigate to CloudShell from the AWS Management Console a few different ways. For more information, see How to get started with AWS CloudShell?
You can run AWS CLI commands using your preferred shell, such as Bash, PowerShell, or Z shell. And you can do this without downloading or installing command line tools.
When you launch AWS CloudShell, a compute environment that’s based on Amazon Linux 2023 is created. Within this environment, you can access an extensive range of pre-installed development tools, options for uploading and downloading files, and file storage that persists between sessions.
Try it now: Getting started with AWS CloudShell
How to get Started with CloudShell
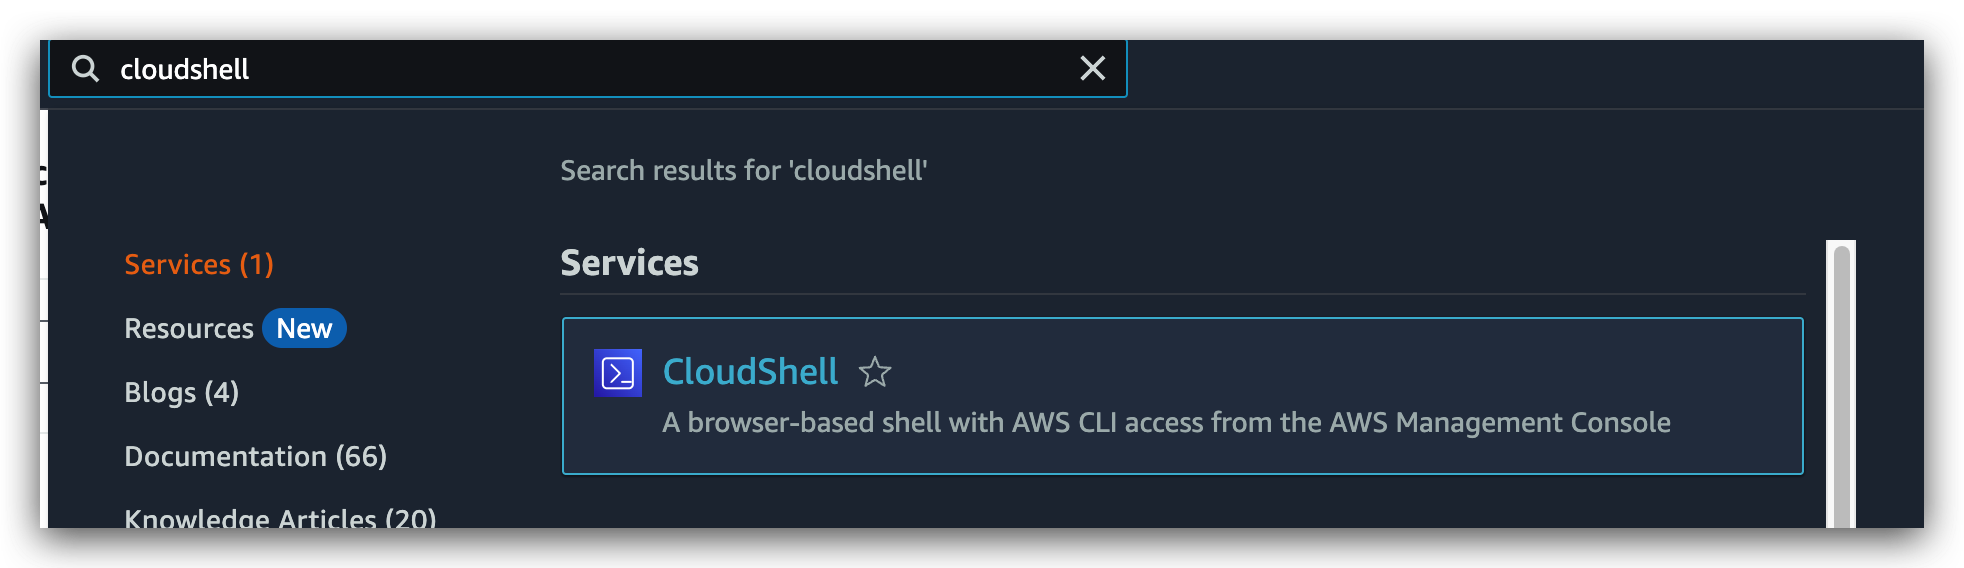
- On the navigation bar, choose the CloudShell icon.
- In the Search box, type “CloudShell”, and then choose CloudShell in the services.
- Choose CloudShell on the Console Toolbar, on the bottom left of the console.


And if you don’t see it, just make sure you check out the cloud shell availability regions because it’s not a global service that’s available in all regions.
Supported AWS Regions for AWS CloudShell, you need to be aware that this list changes dynamically over time:
It’s completely fine that you don’t use CloudShell as long as you configure the aws cli the way we did in previous steps.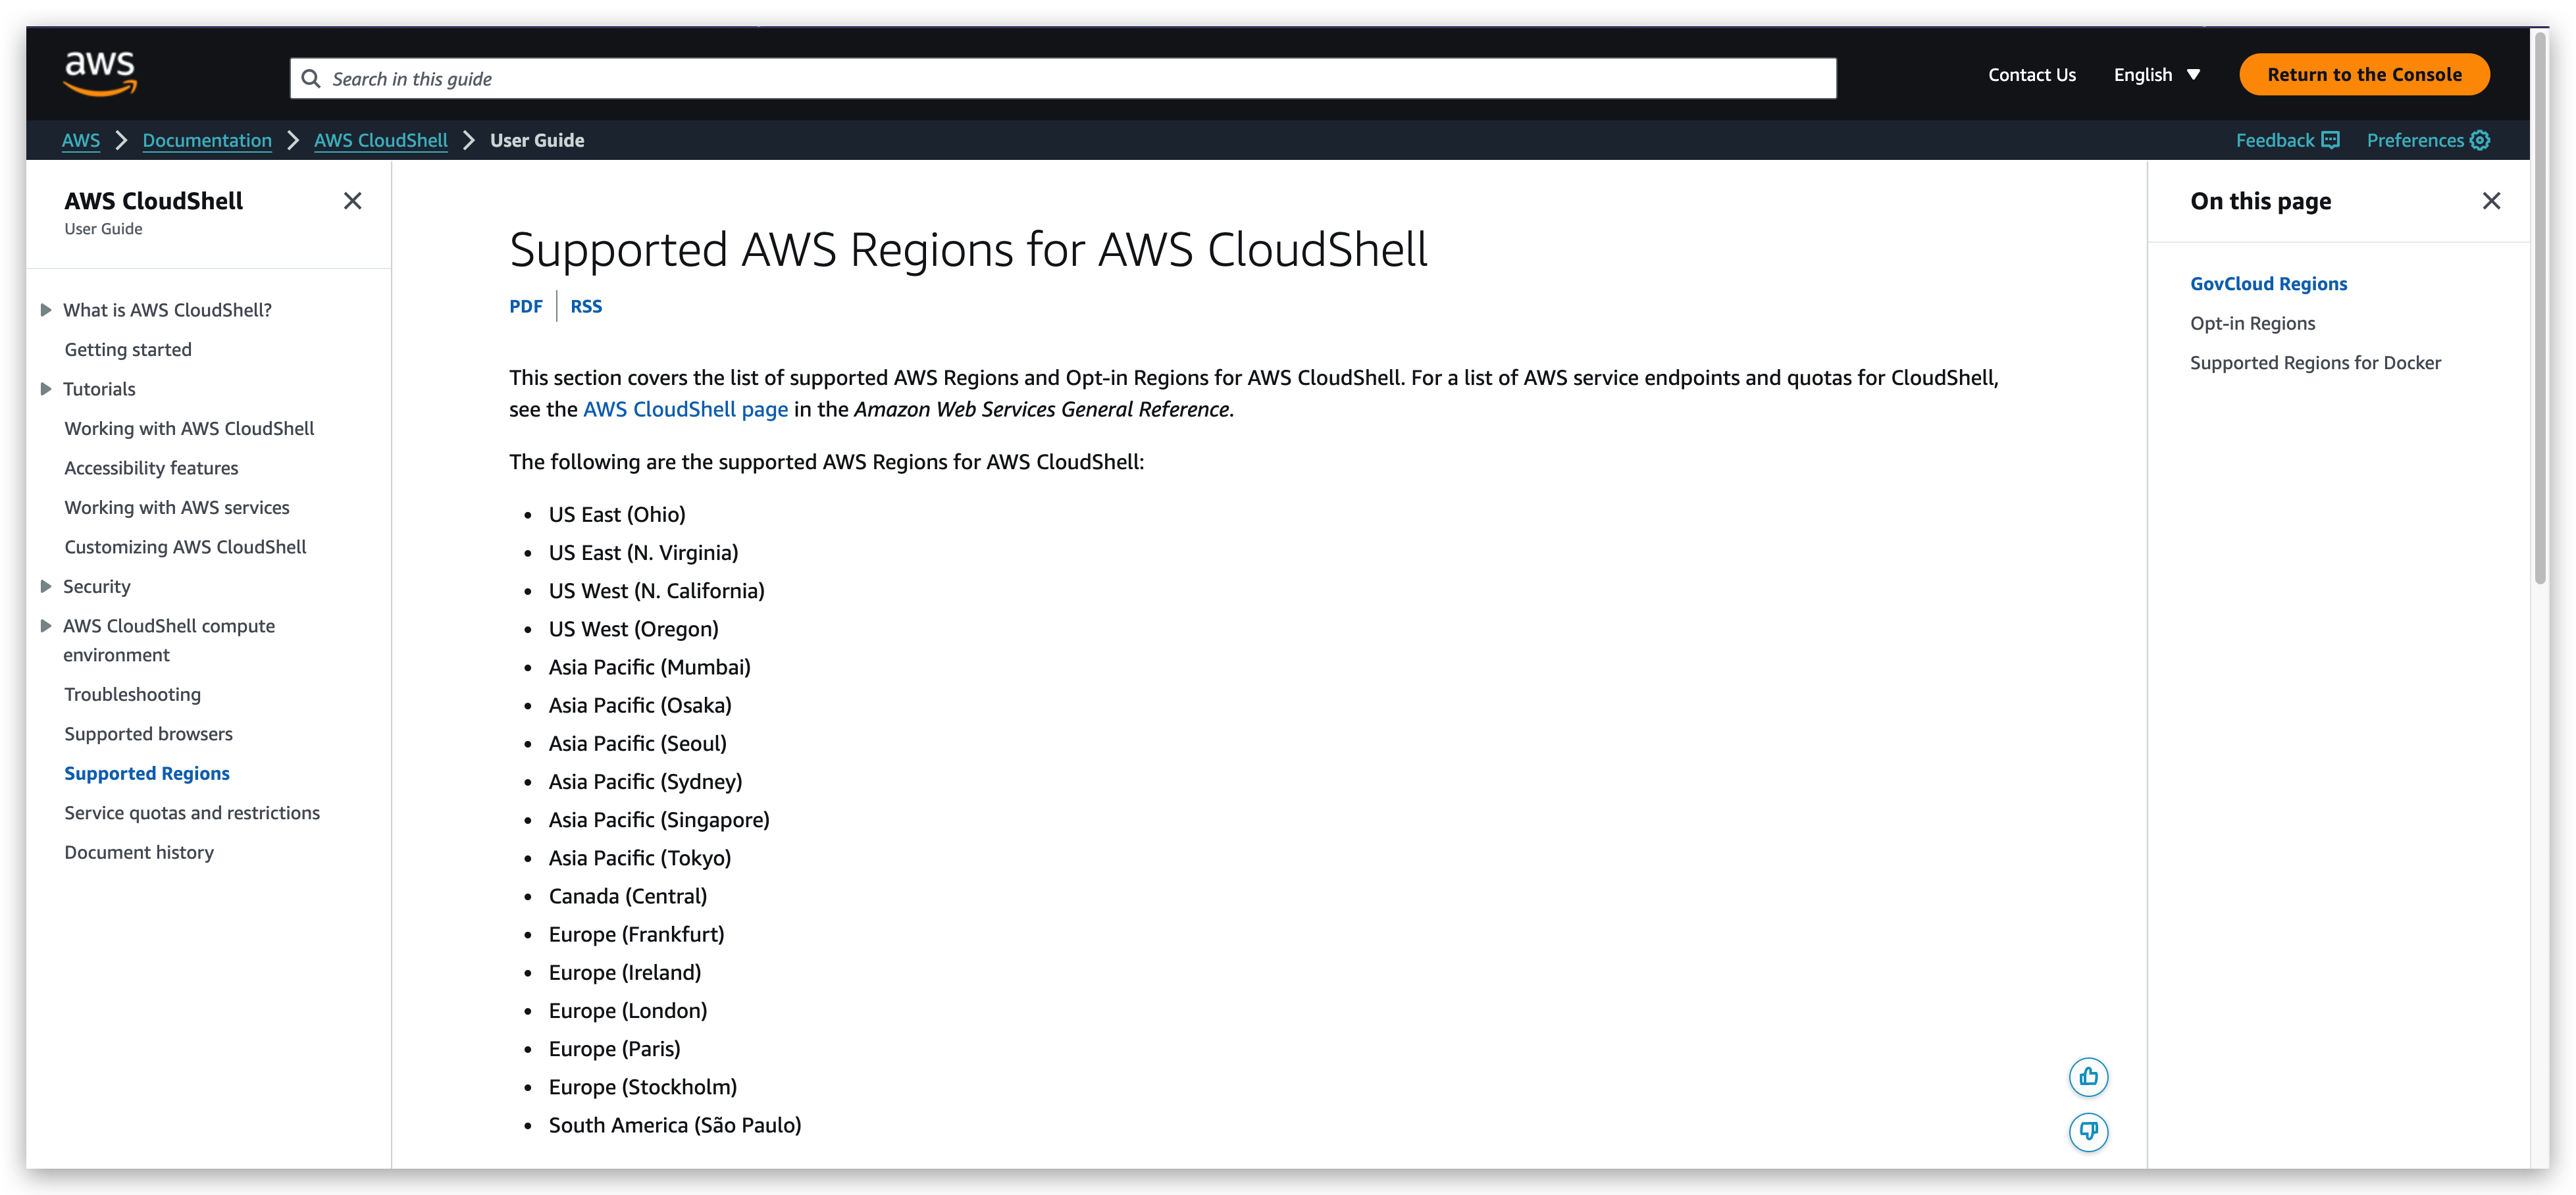
You can adjust the height of your CloudShell session by dragging =.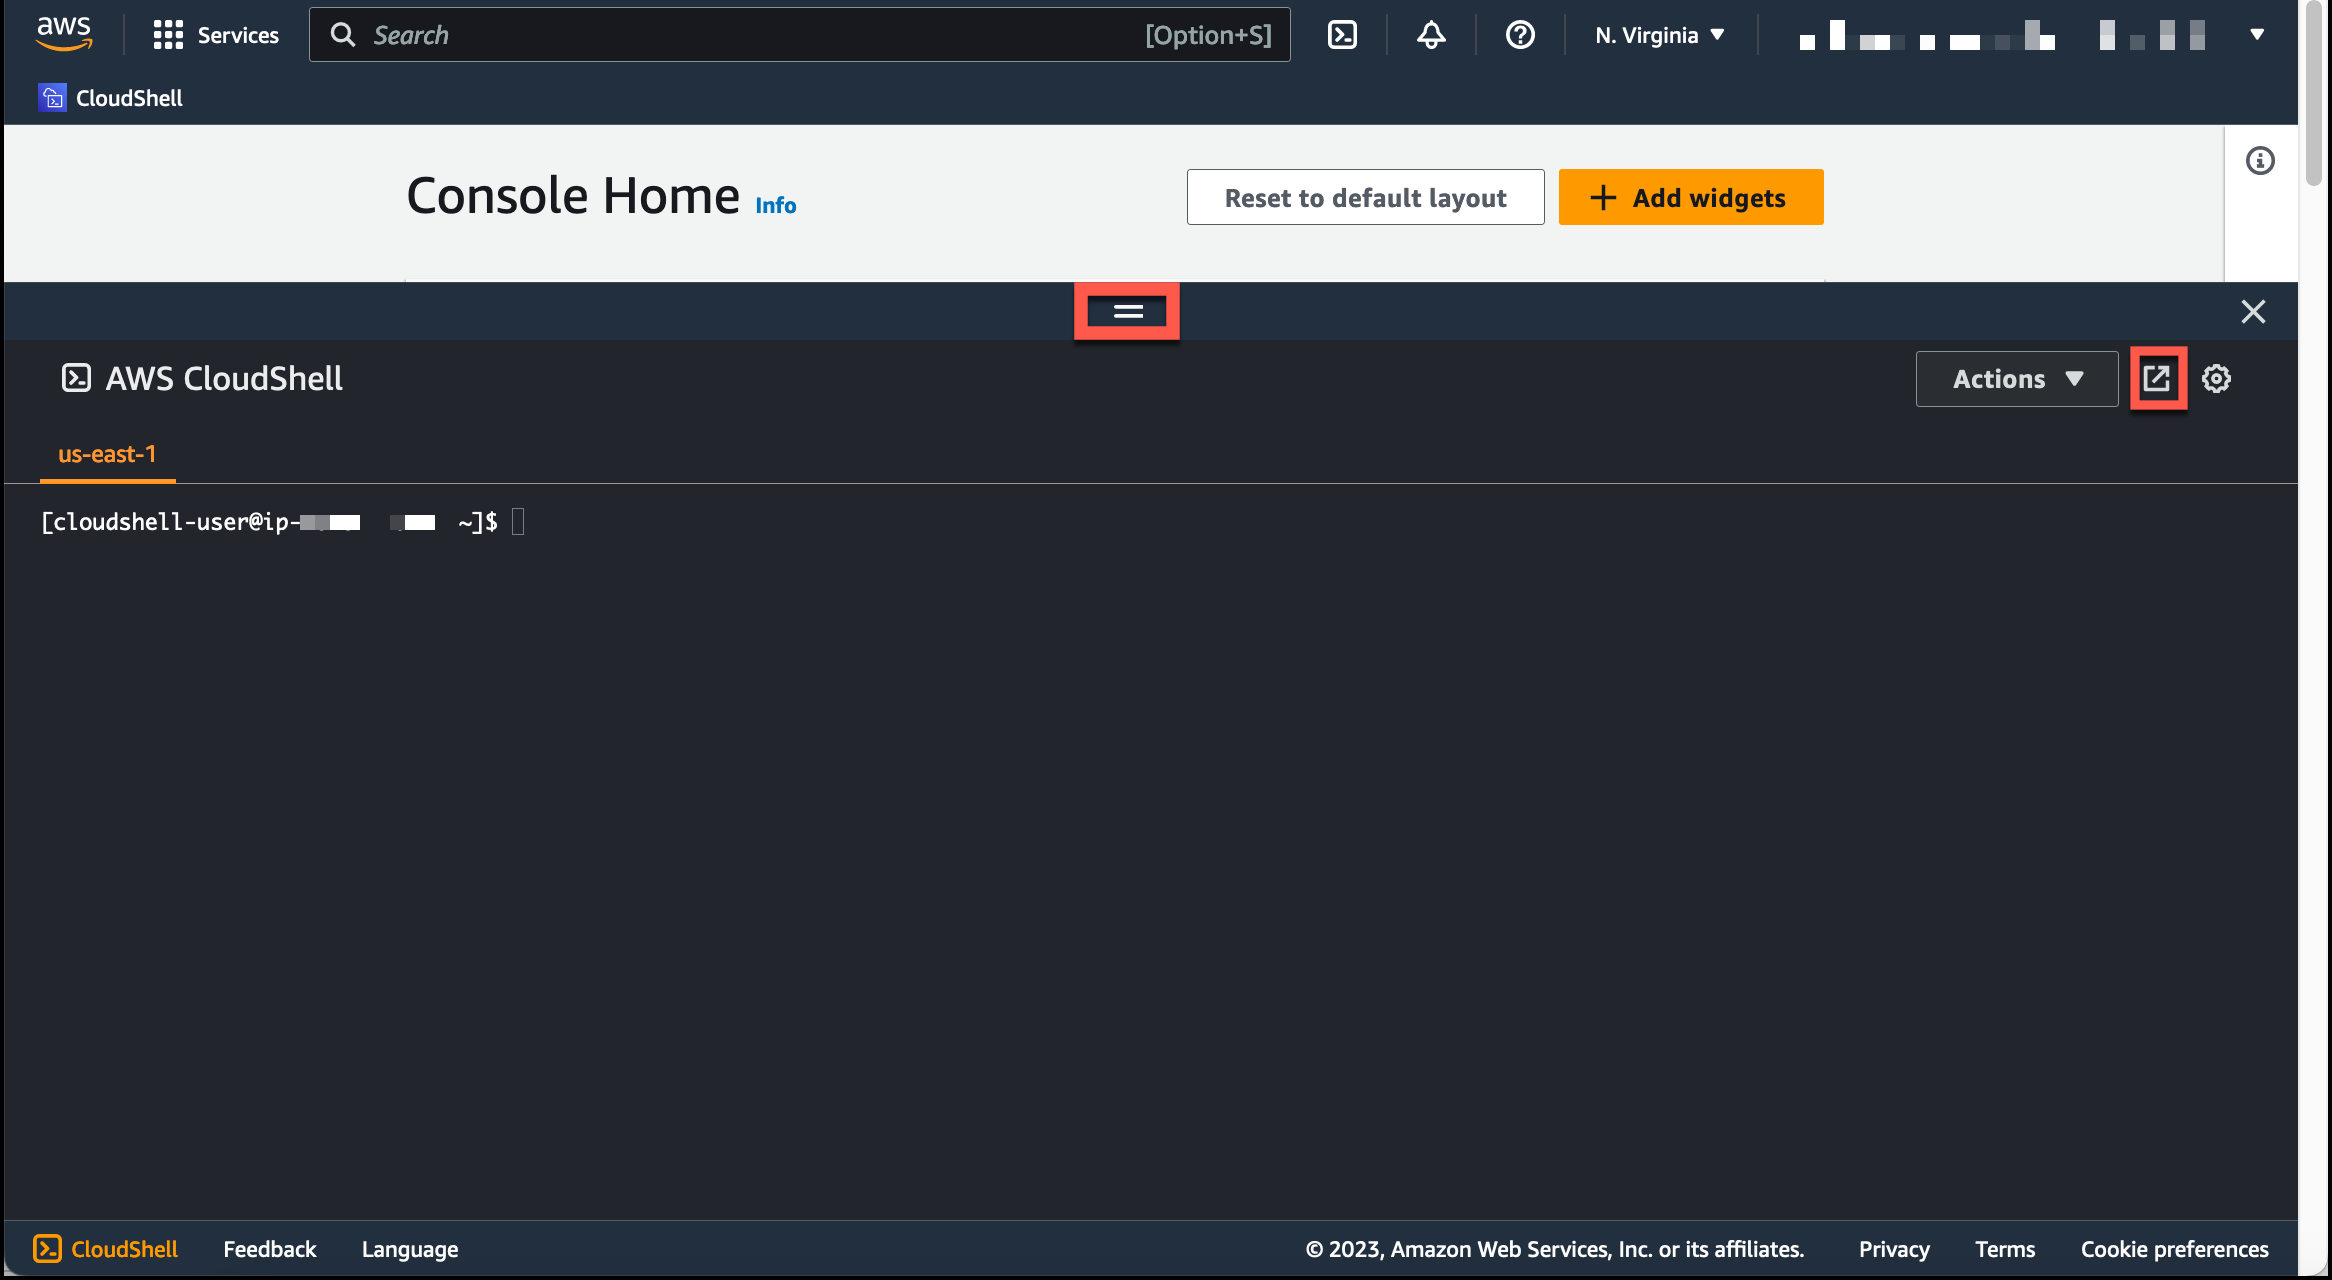
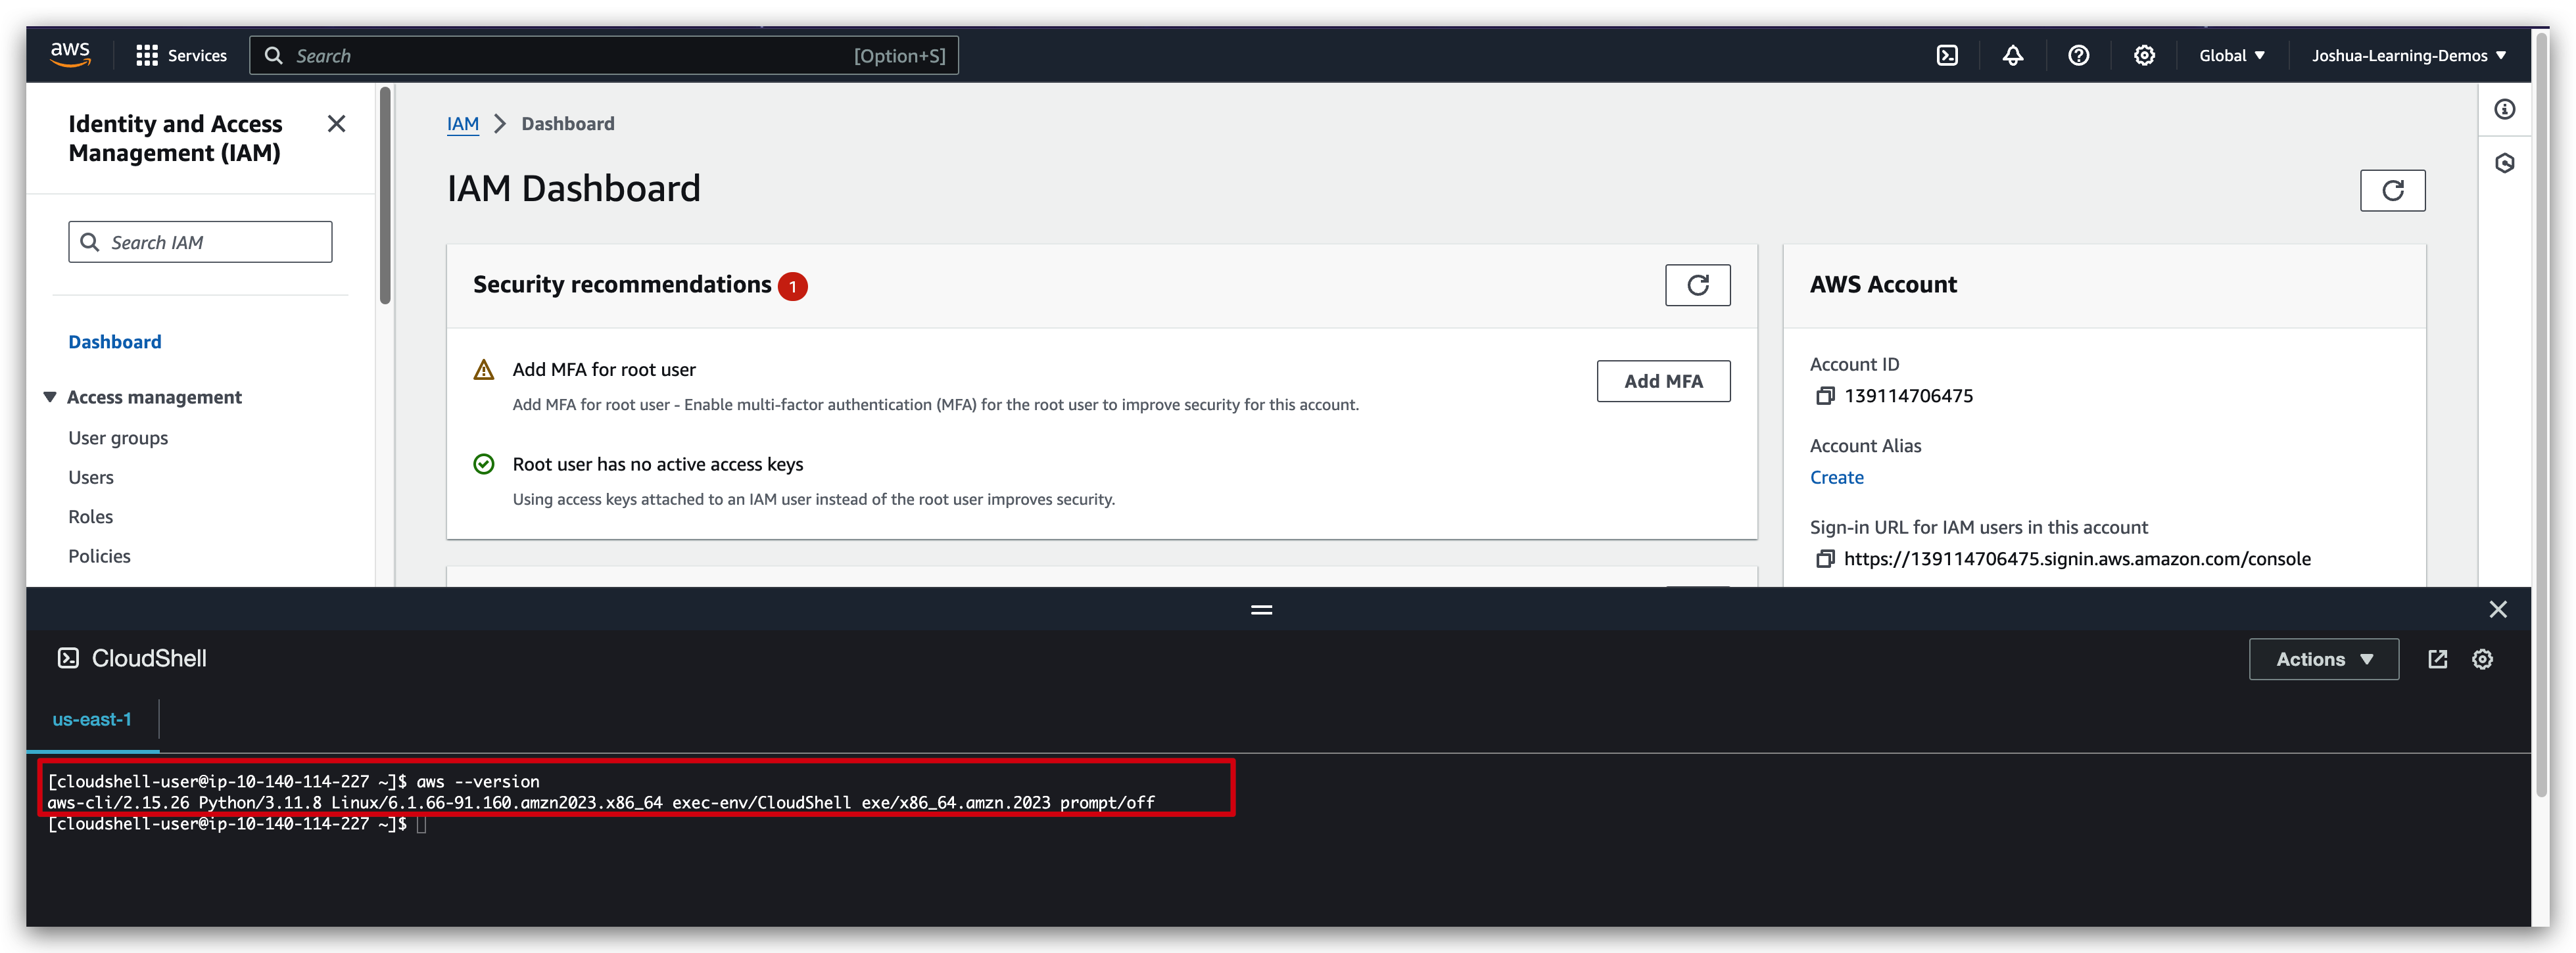
running commands in cloudshell:
IAM Roles
analogy of IAM Roles
when other services wants to access aws with your AWS account, they need to do this on behalf of you. The way this works is through the role assignment.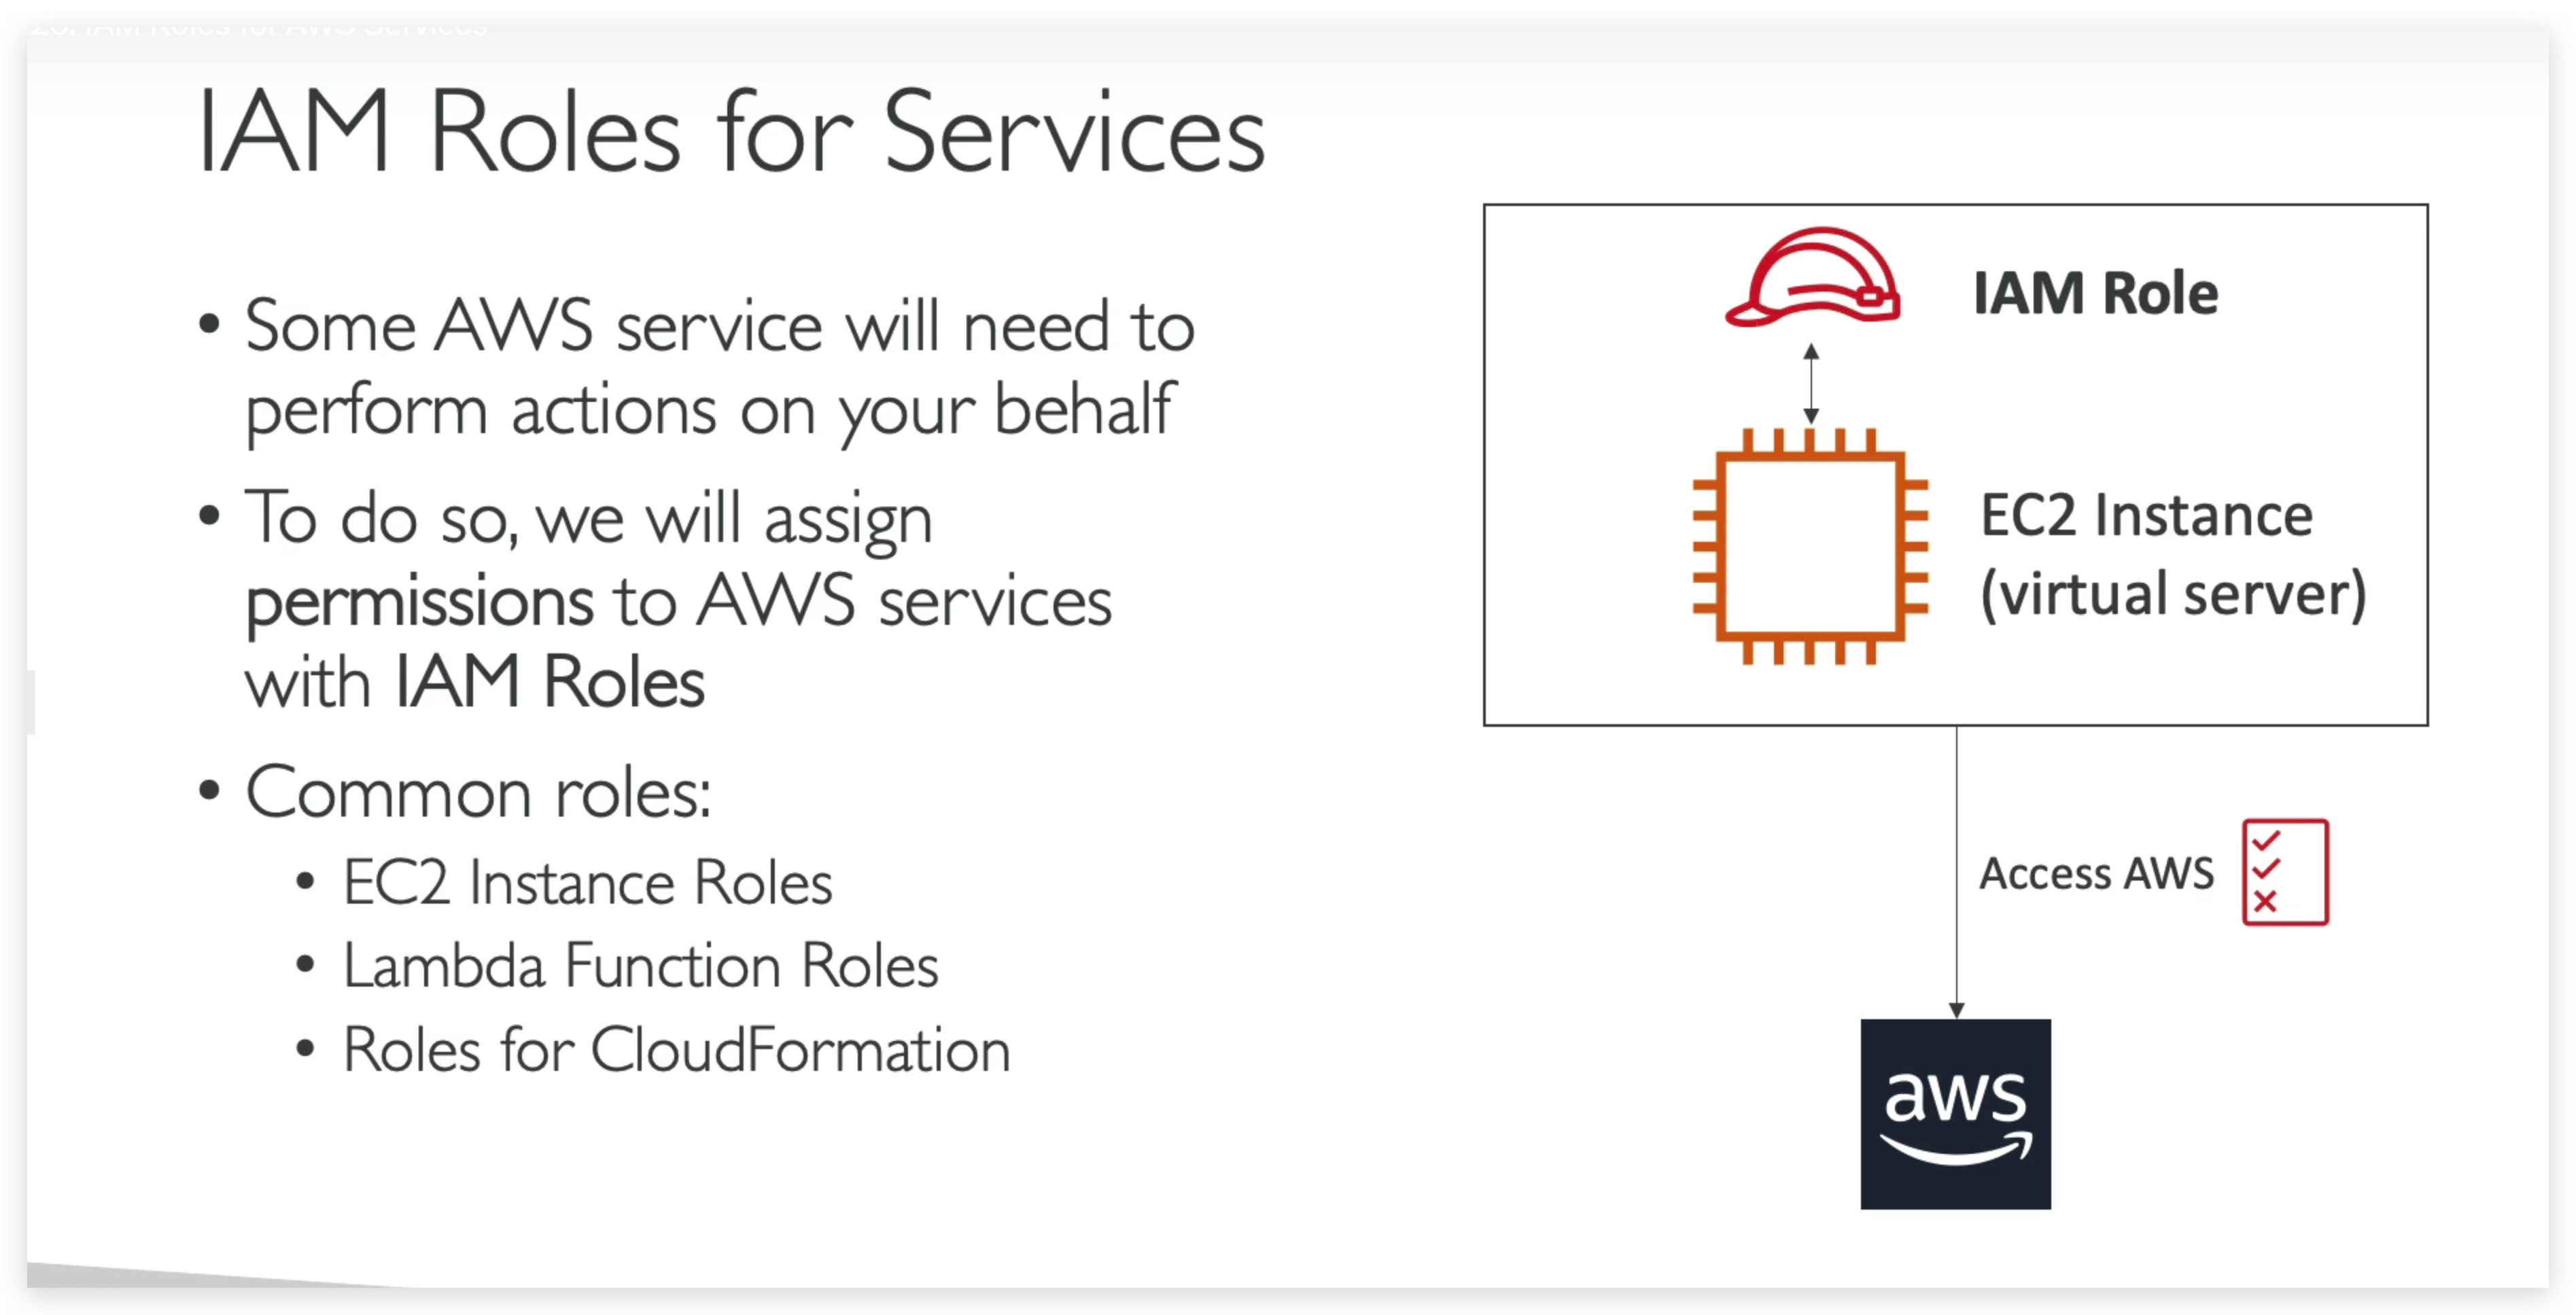
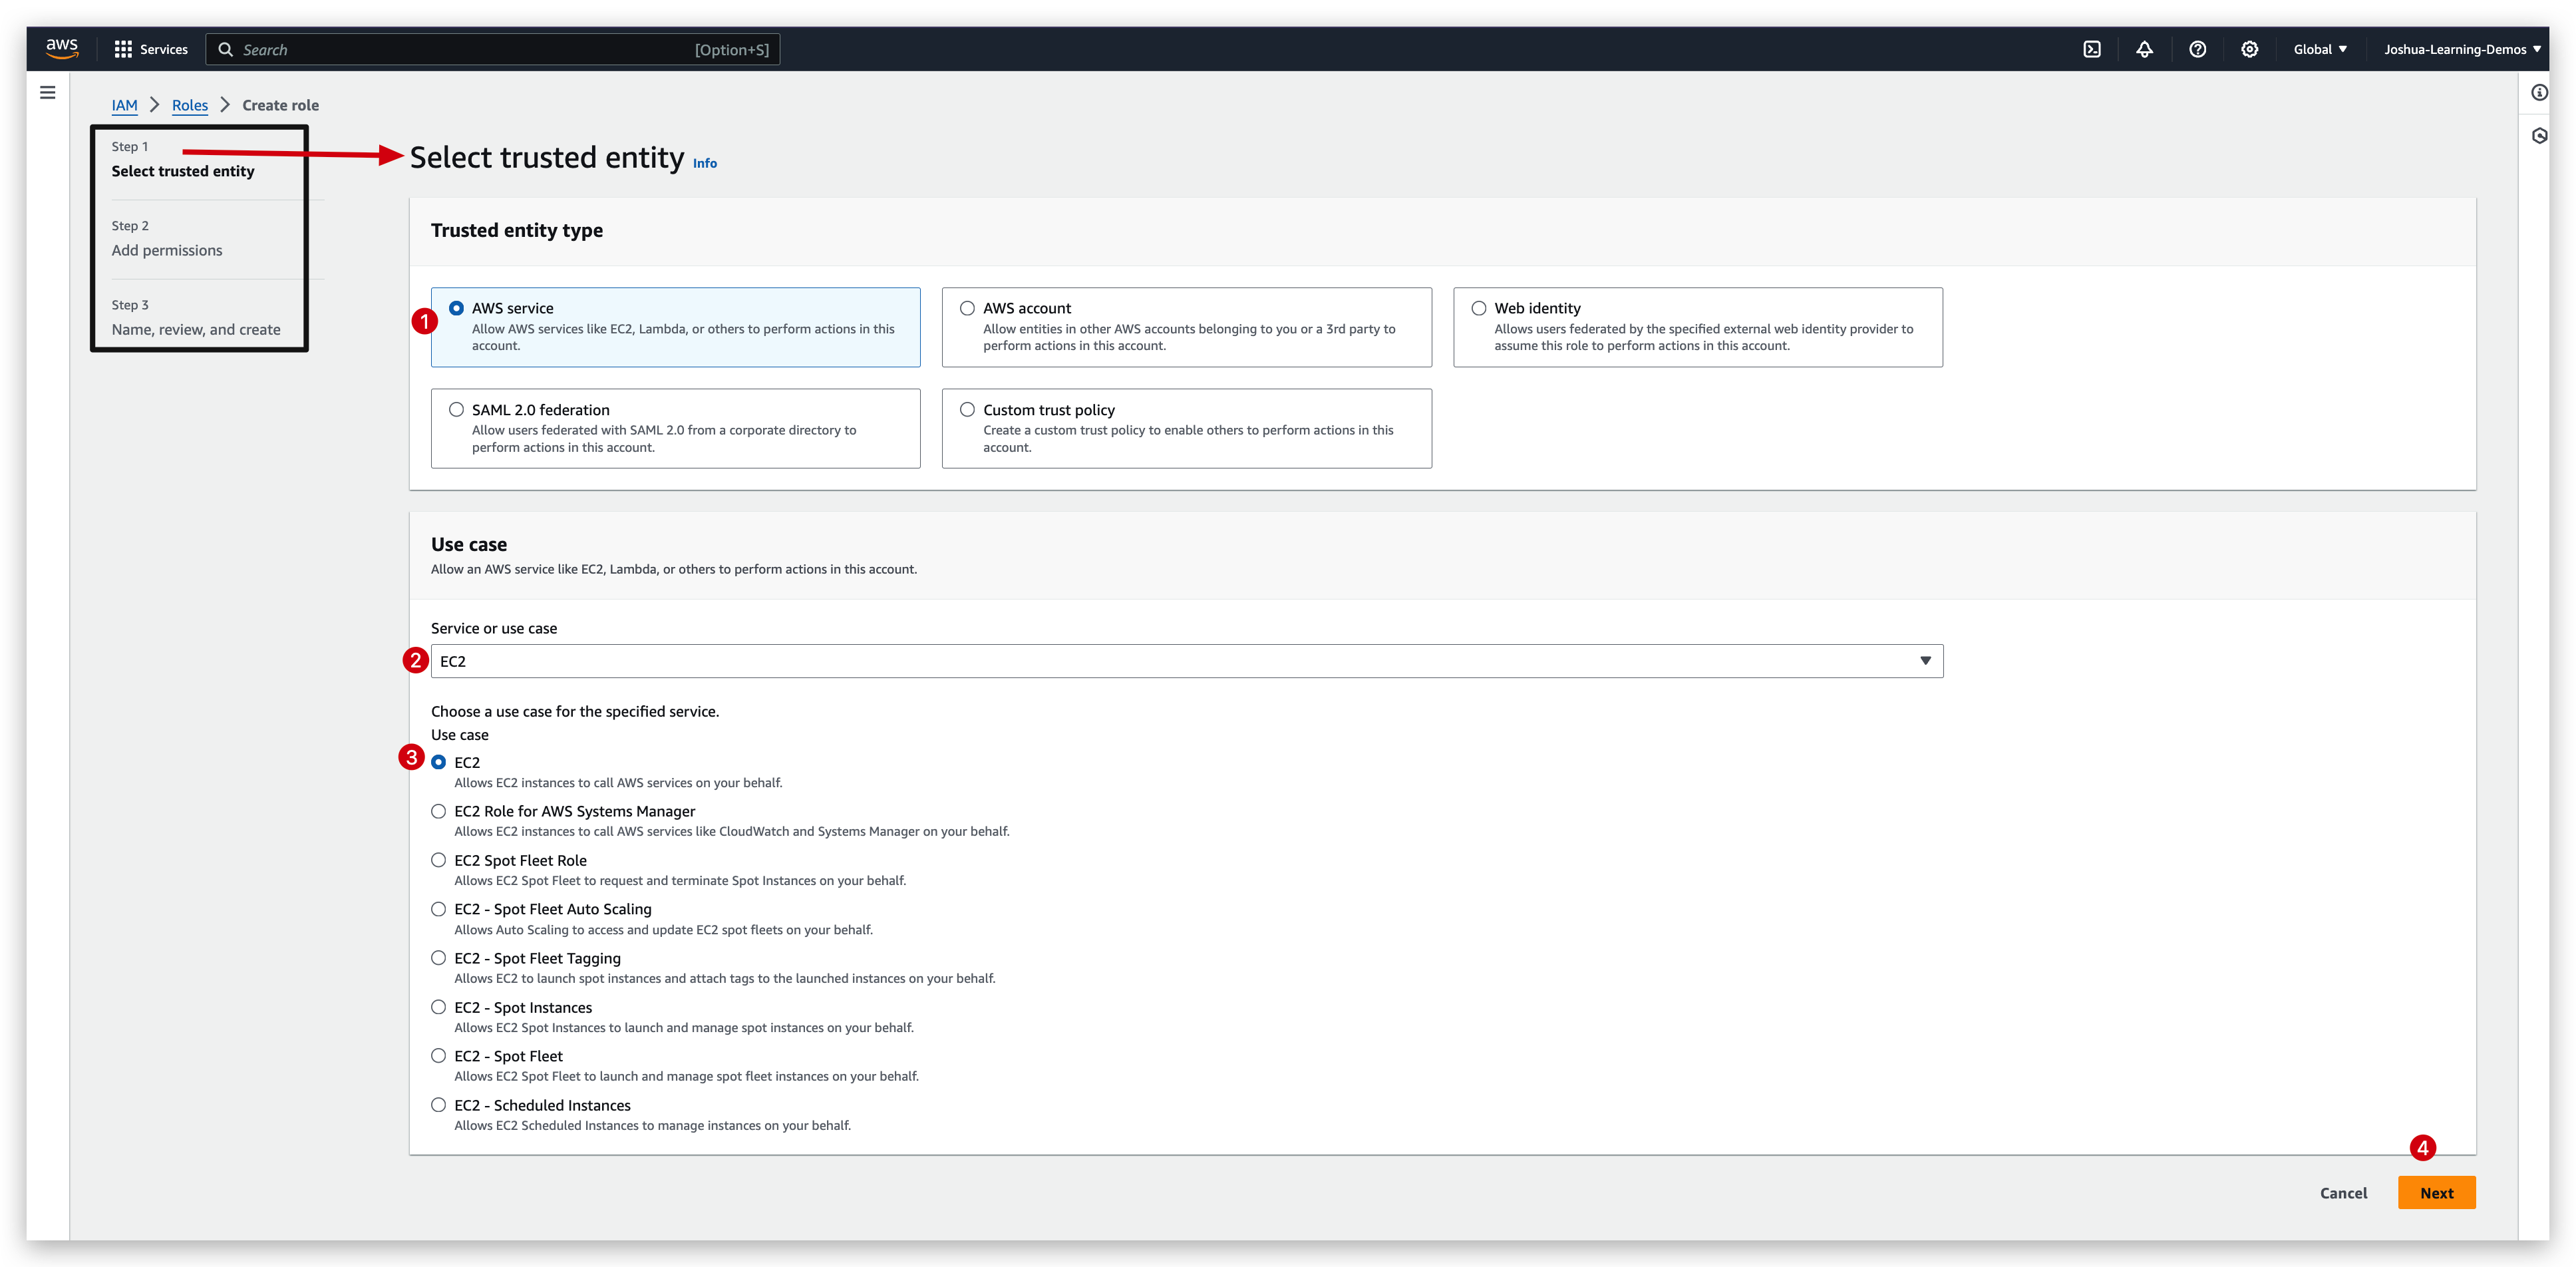
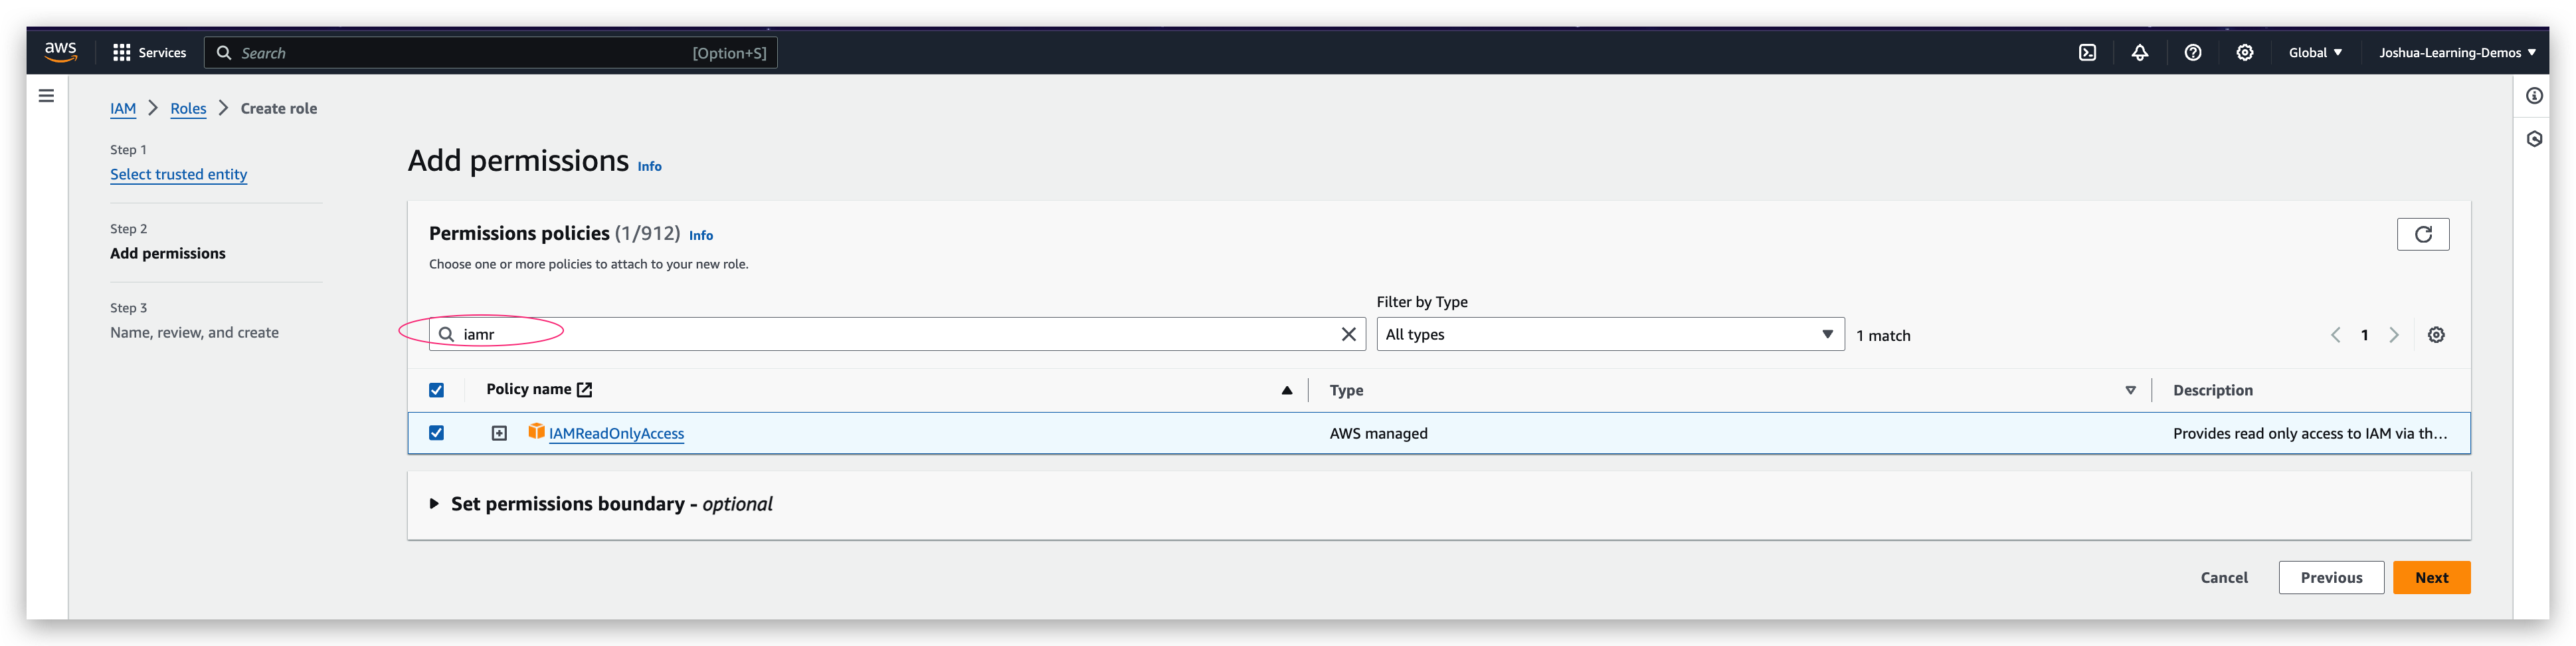
IAM roles hands-on
IAM role creation
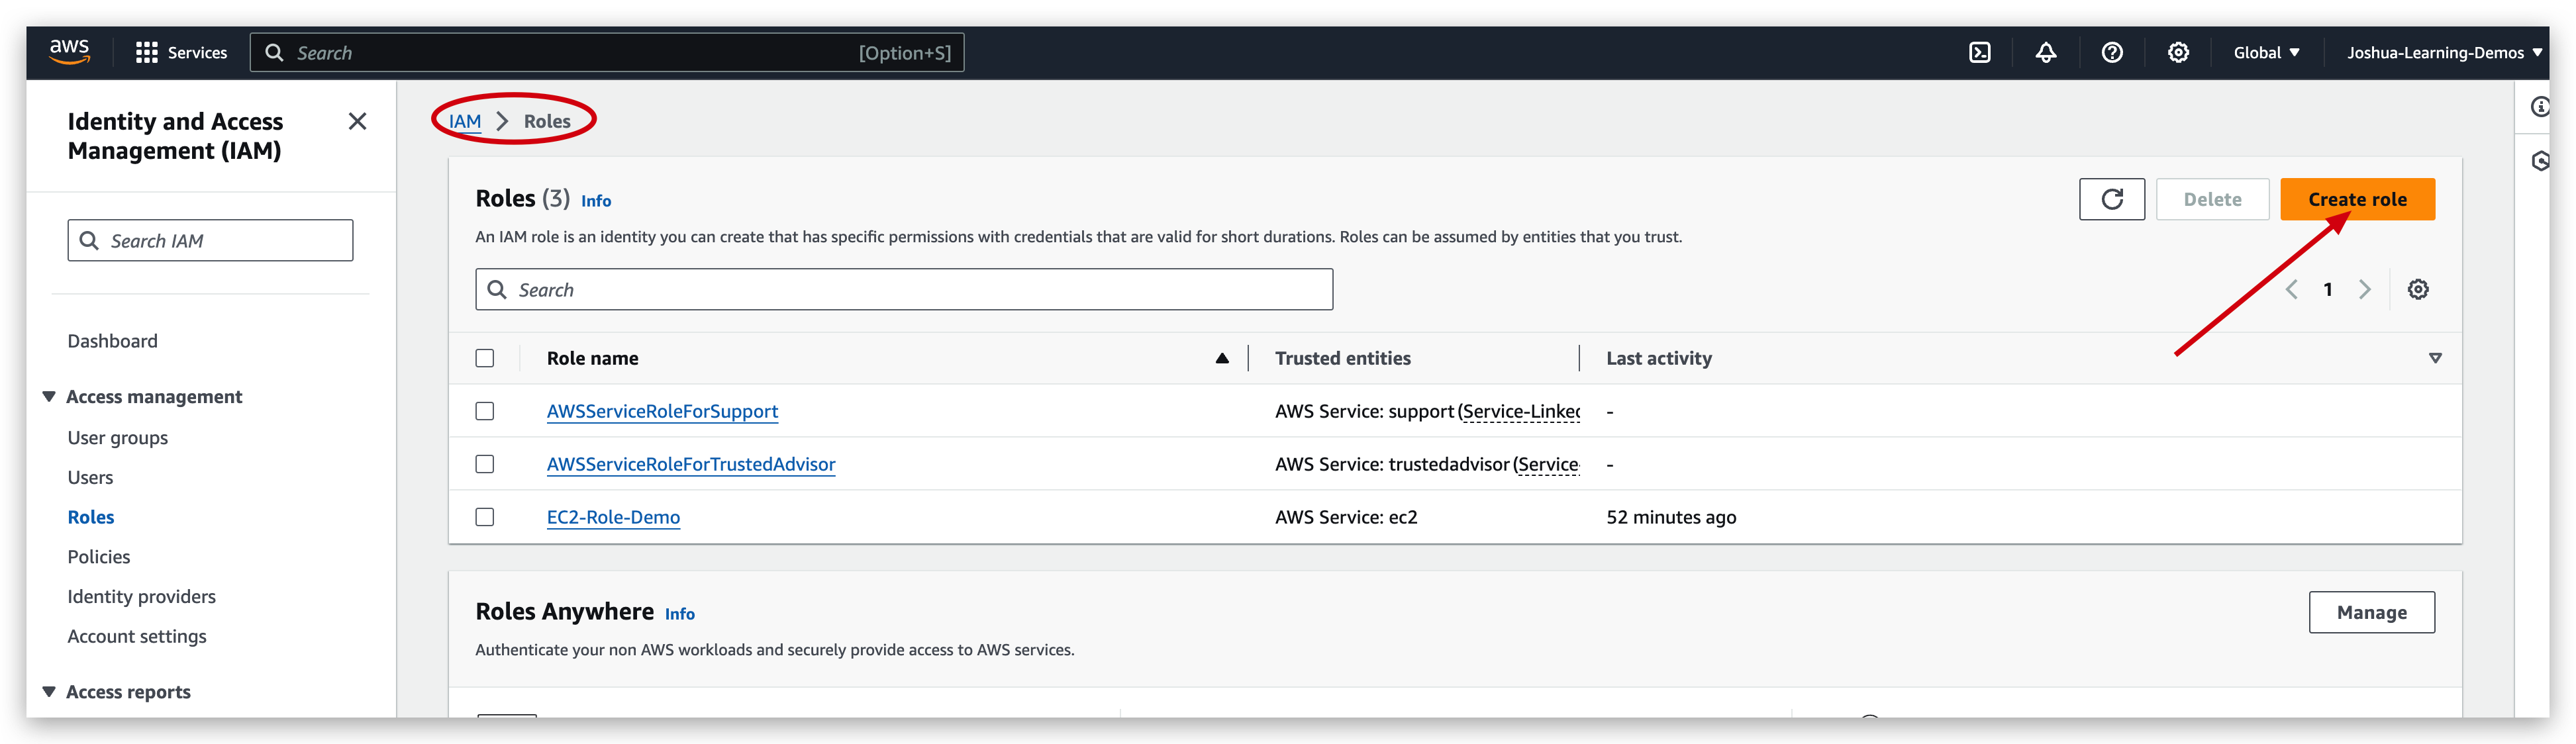
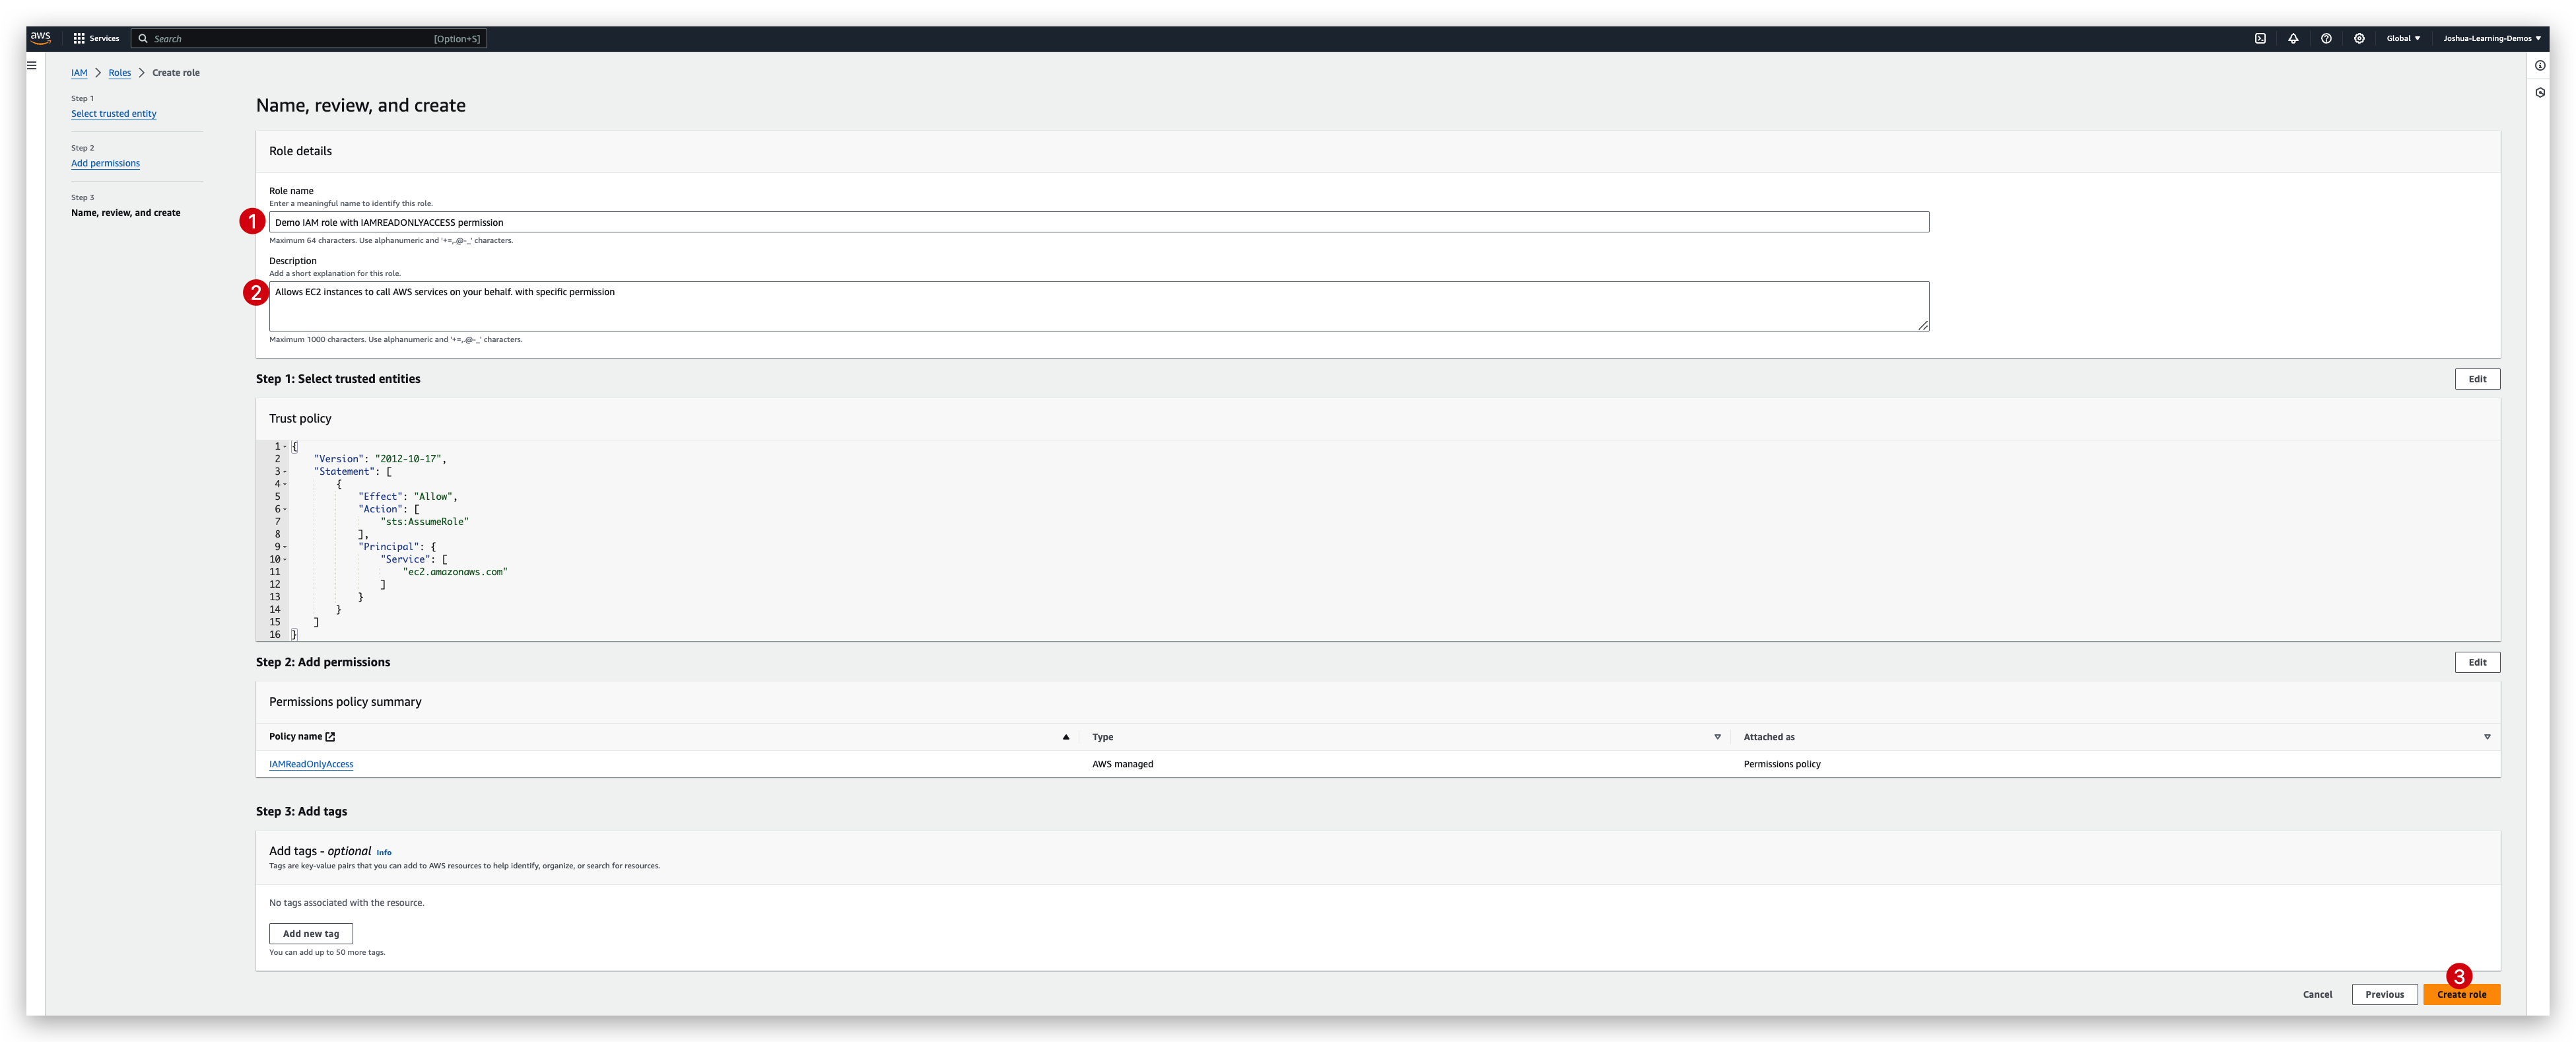
Now you can check the role created and verify its information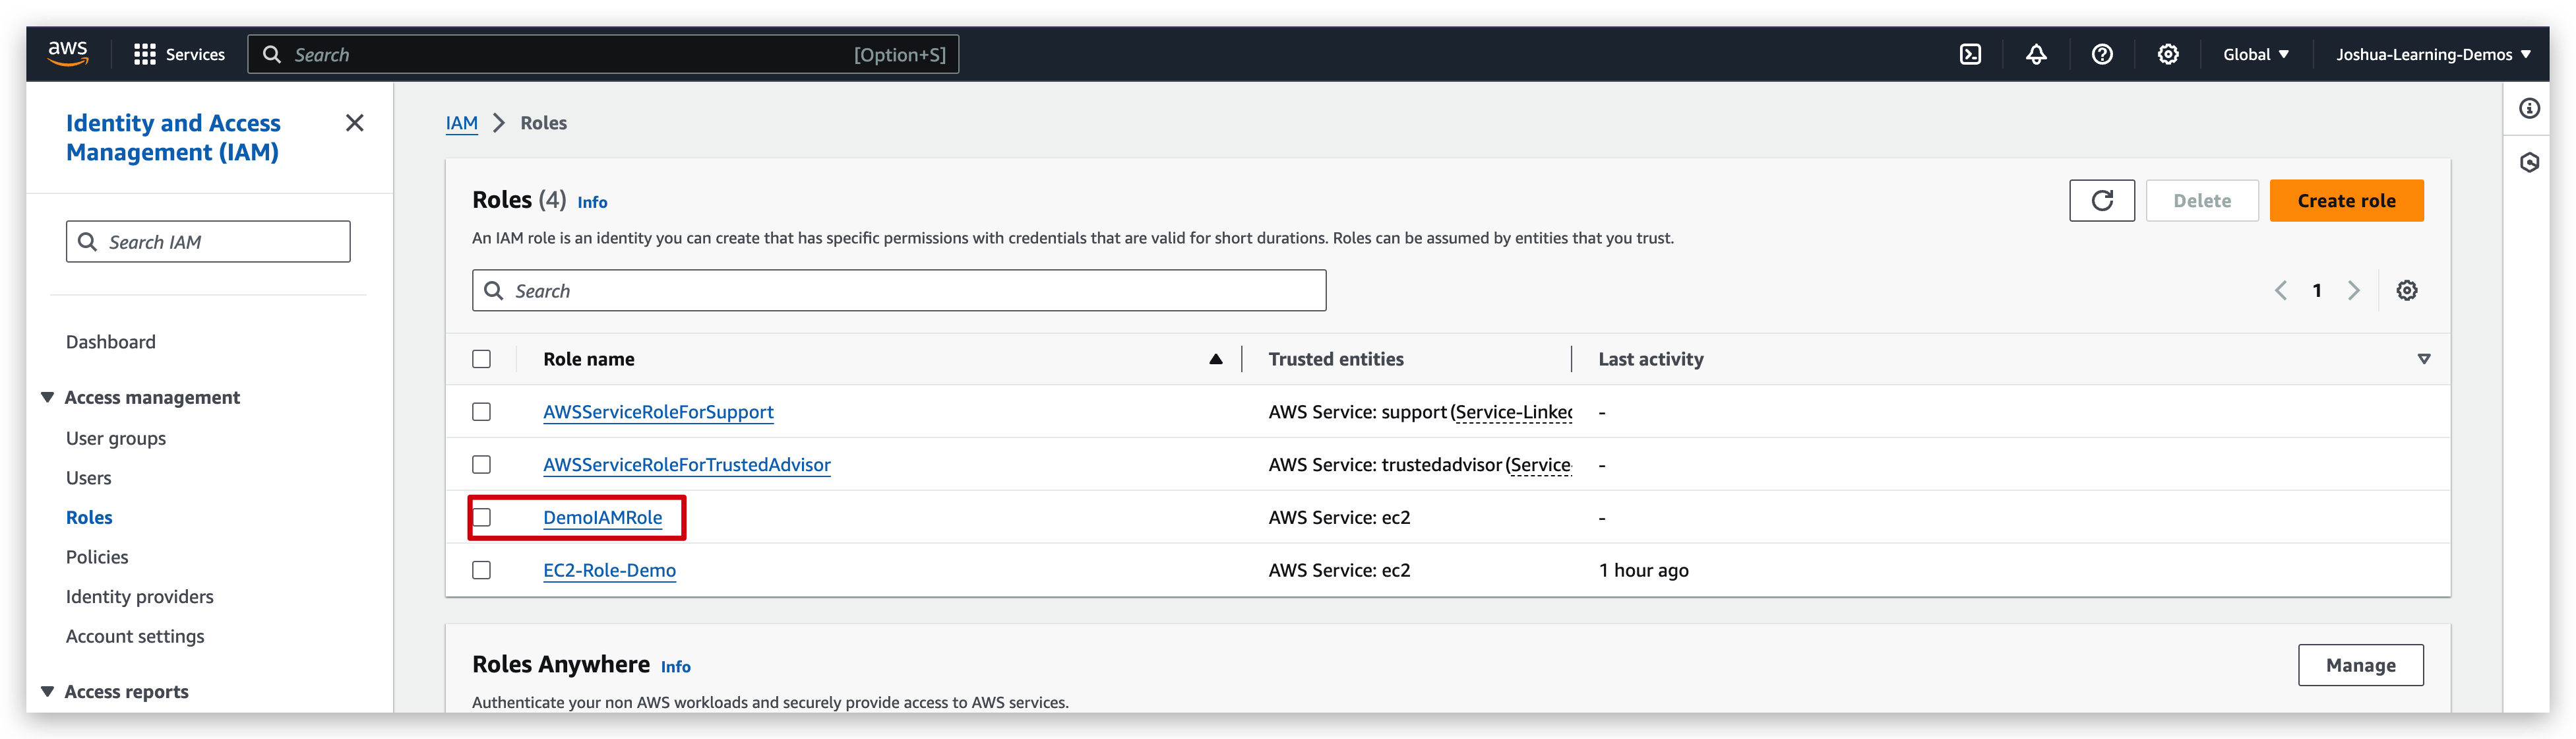

IAM Tools
The credentials report lists all your IAM users in this account and the status of their various credentials. After a report is created, it is stored for up to four hours.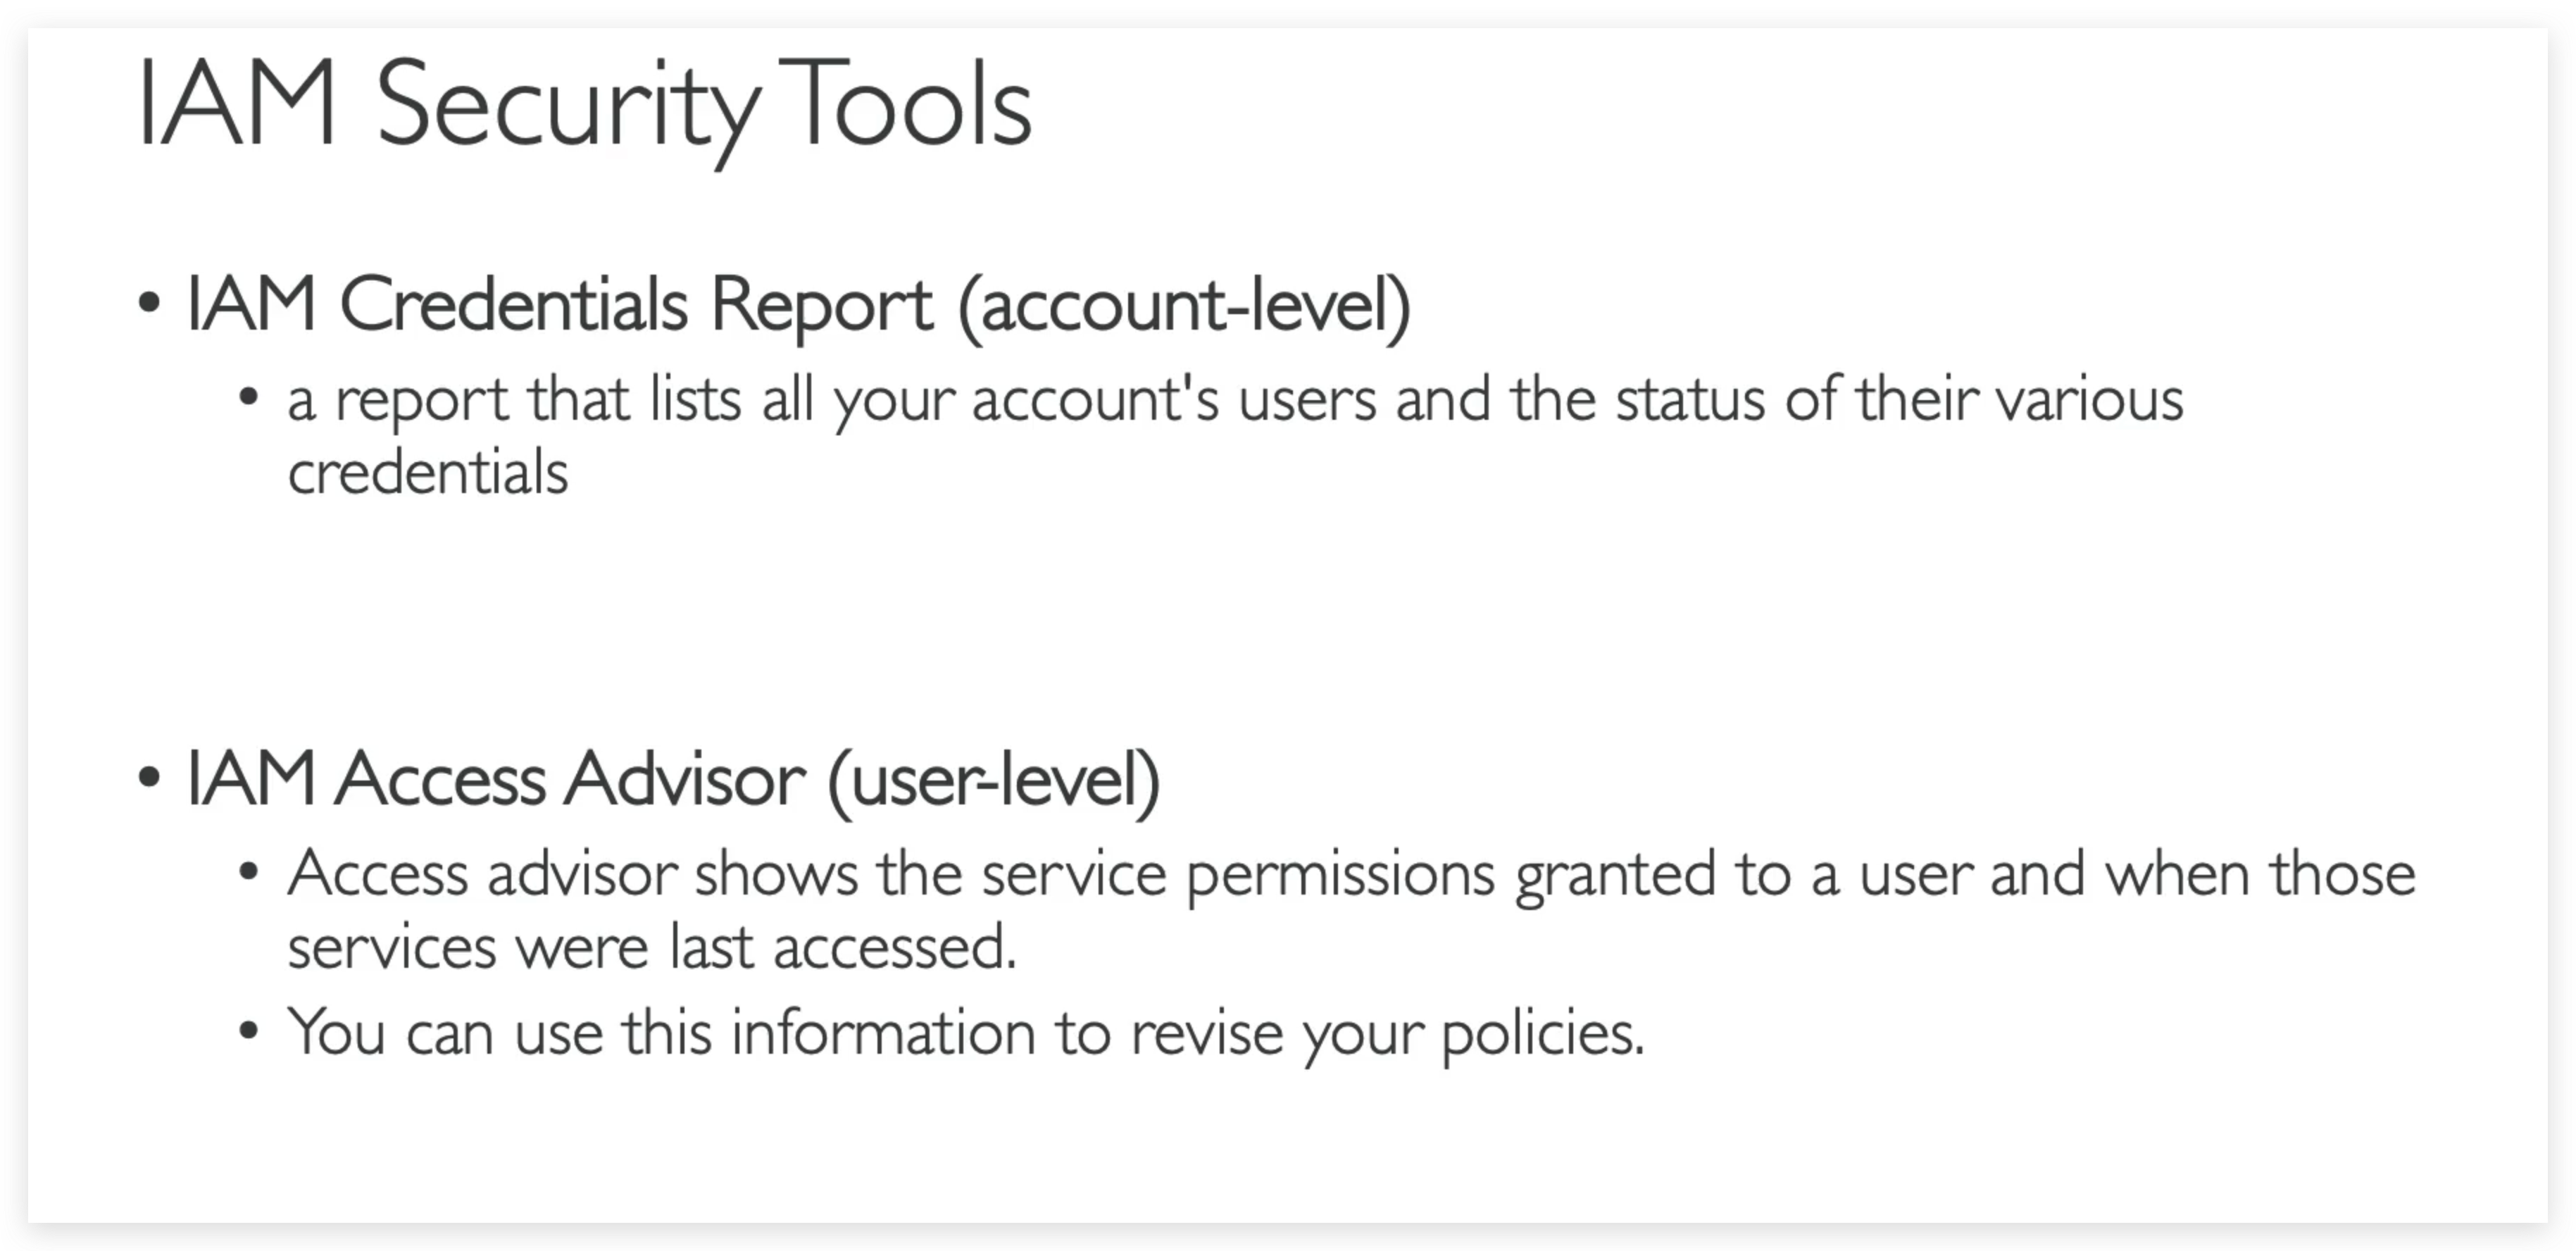
Credential Report
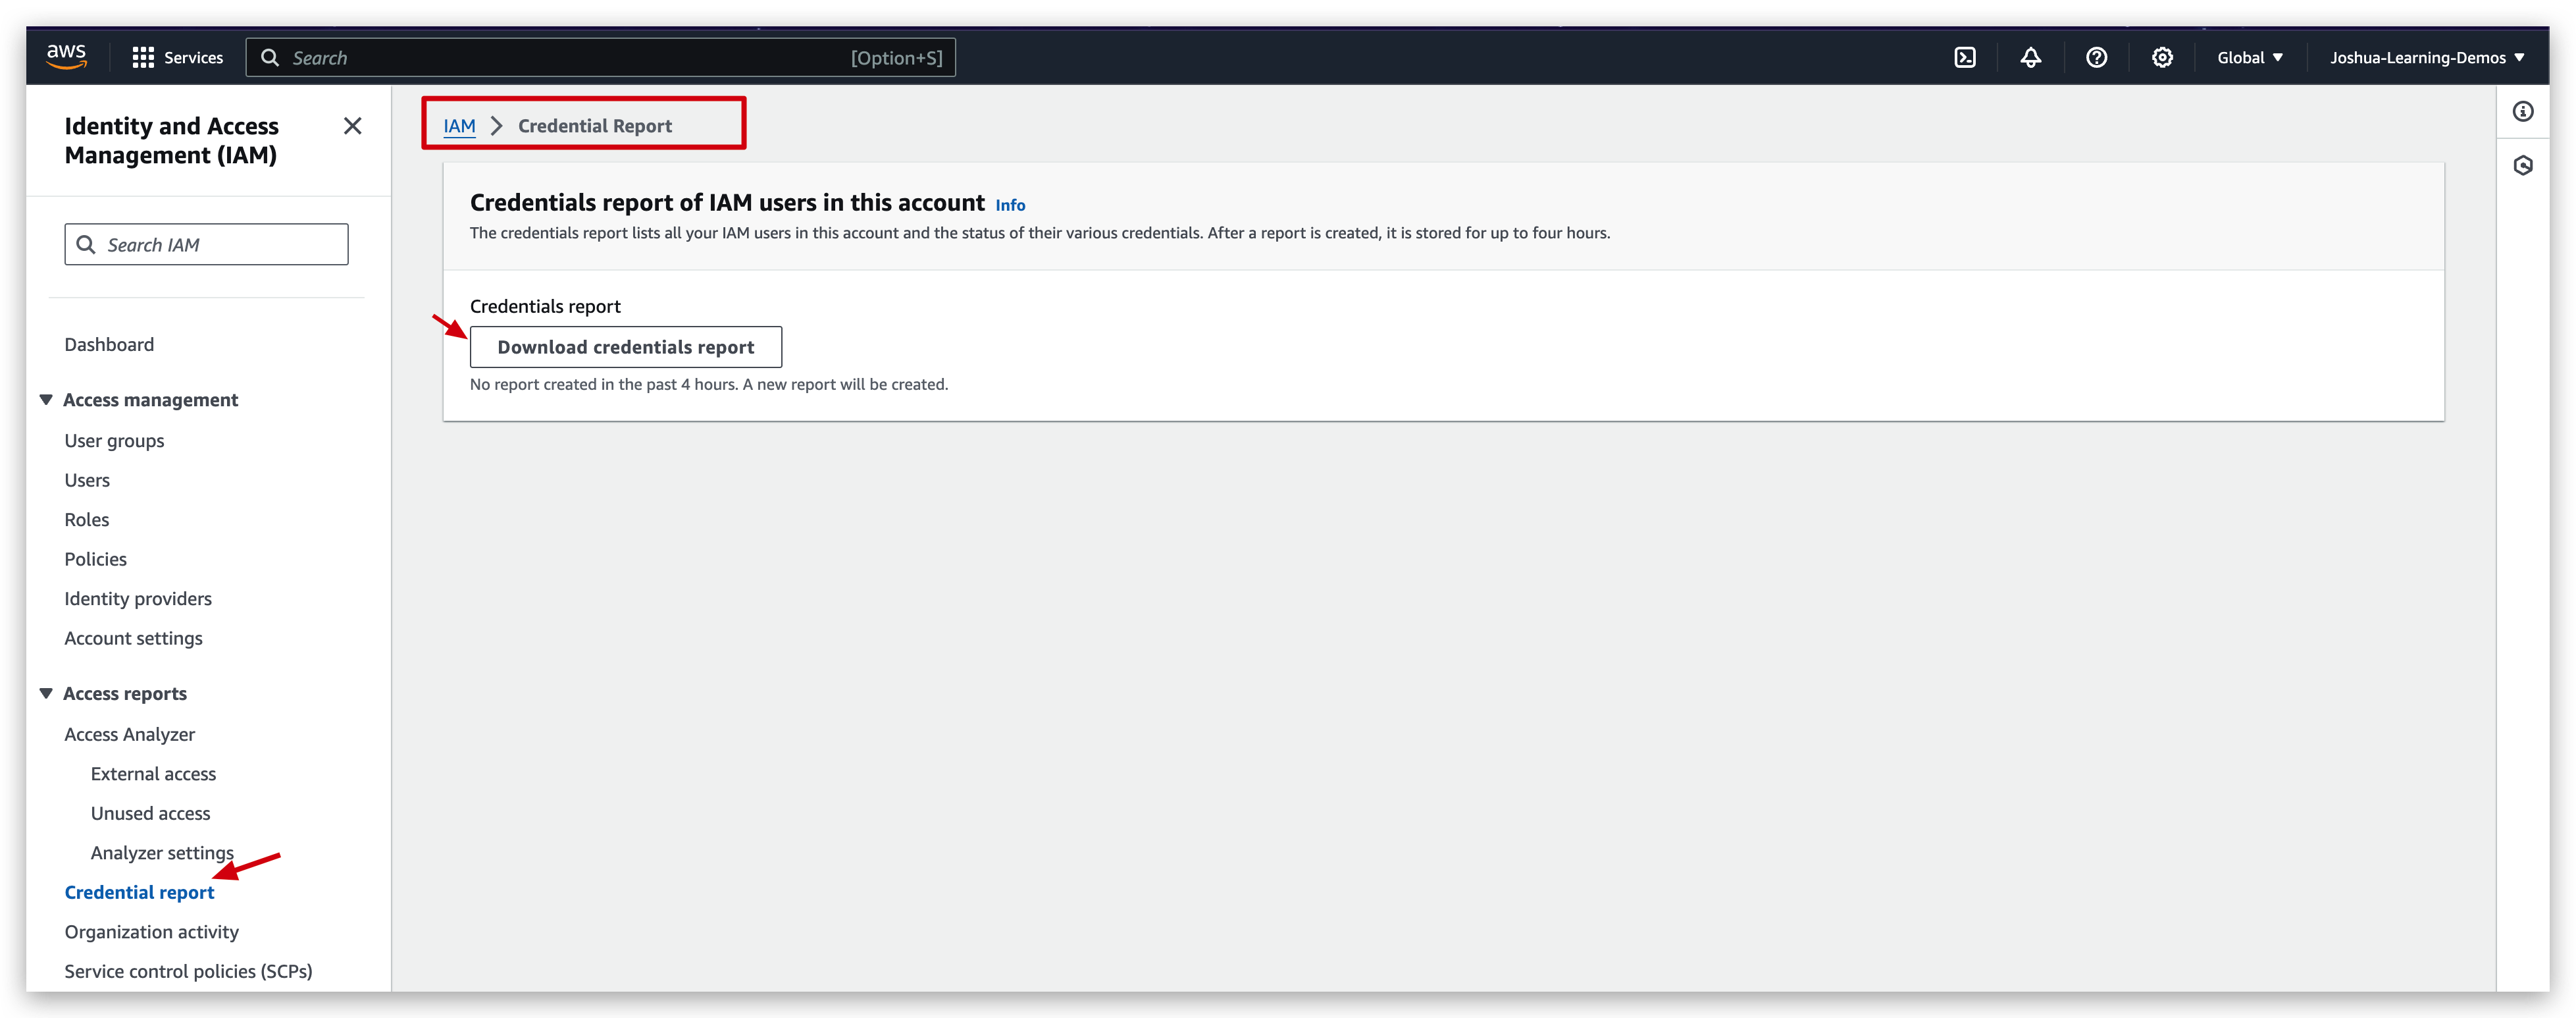
This credential report will download a csv file, in which you can find the user/account information such as mfa_enabled, password_enabled and password_last_changed.
Access Advisor
Access Advisor shows the services that this user can access and when those services were last accessed and by whom. Review this data to remove unused permissions.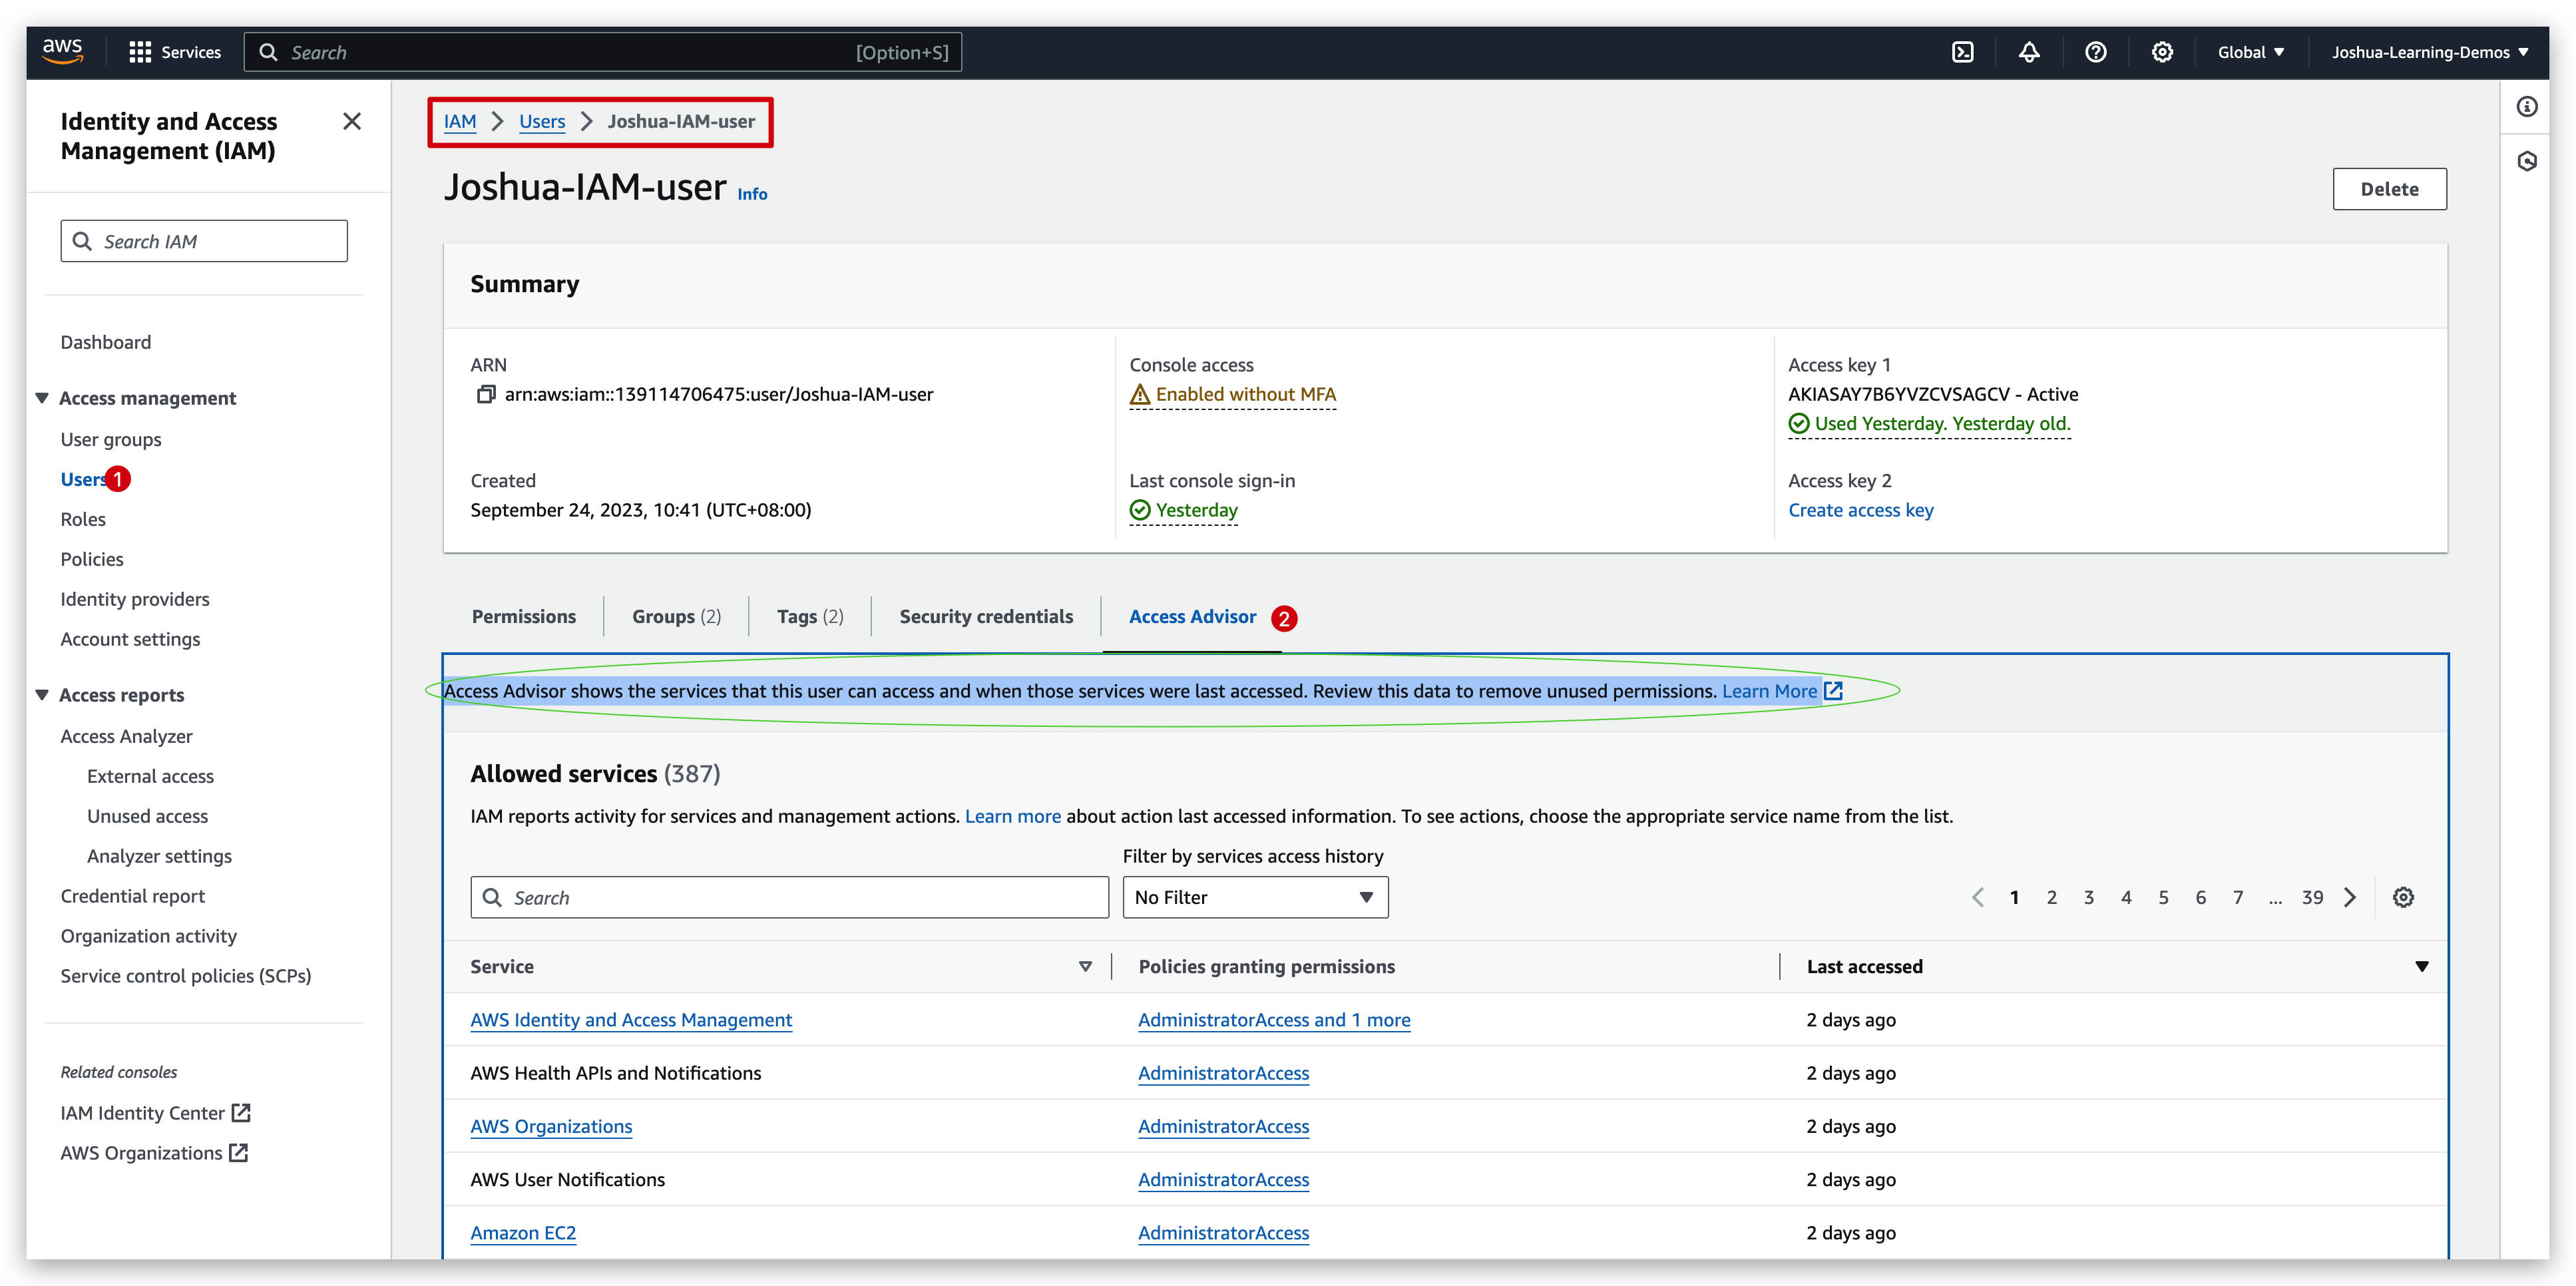
IAM Guidelines & Best Practices
- Don’t use the root account except for AWS account setup
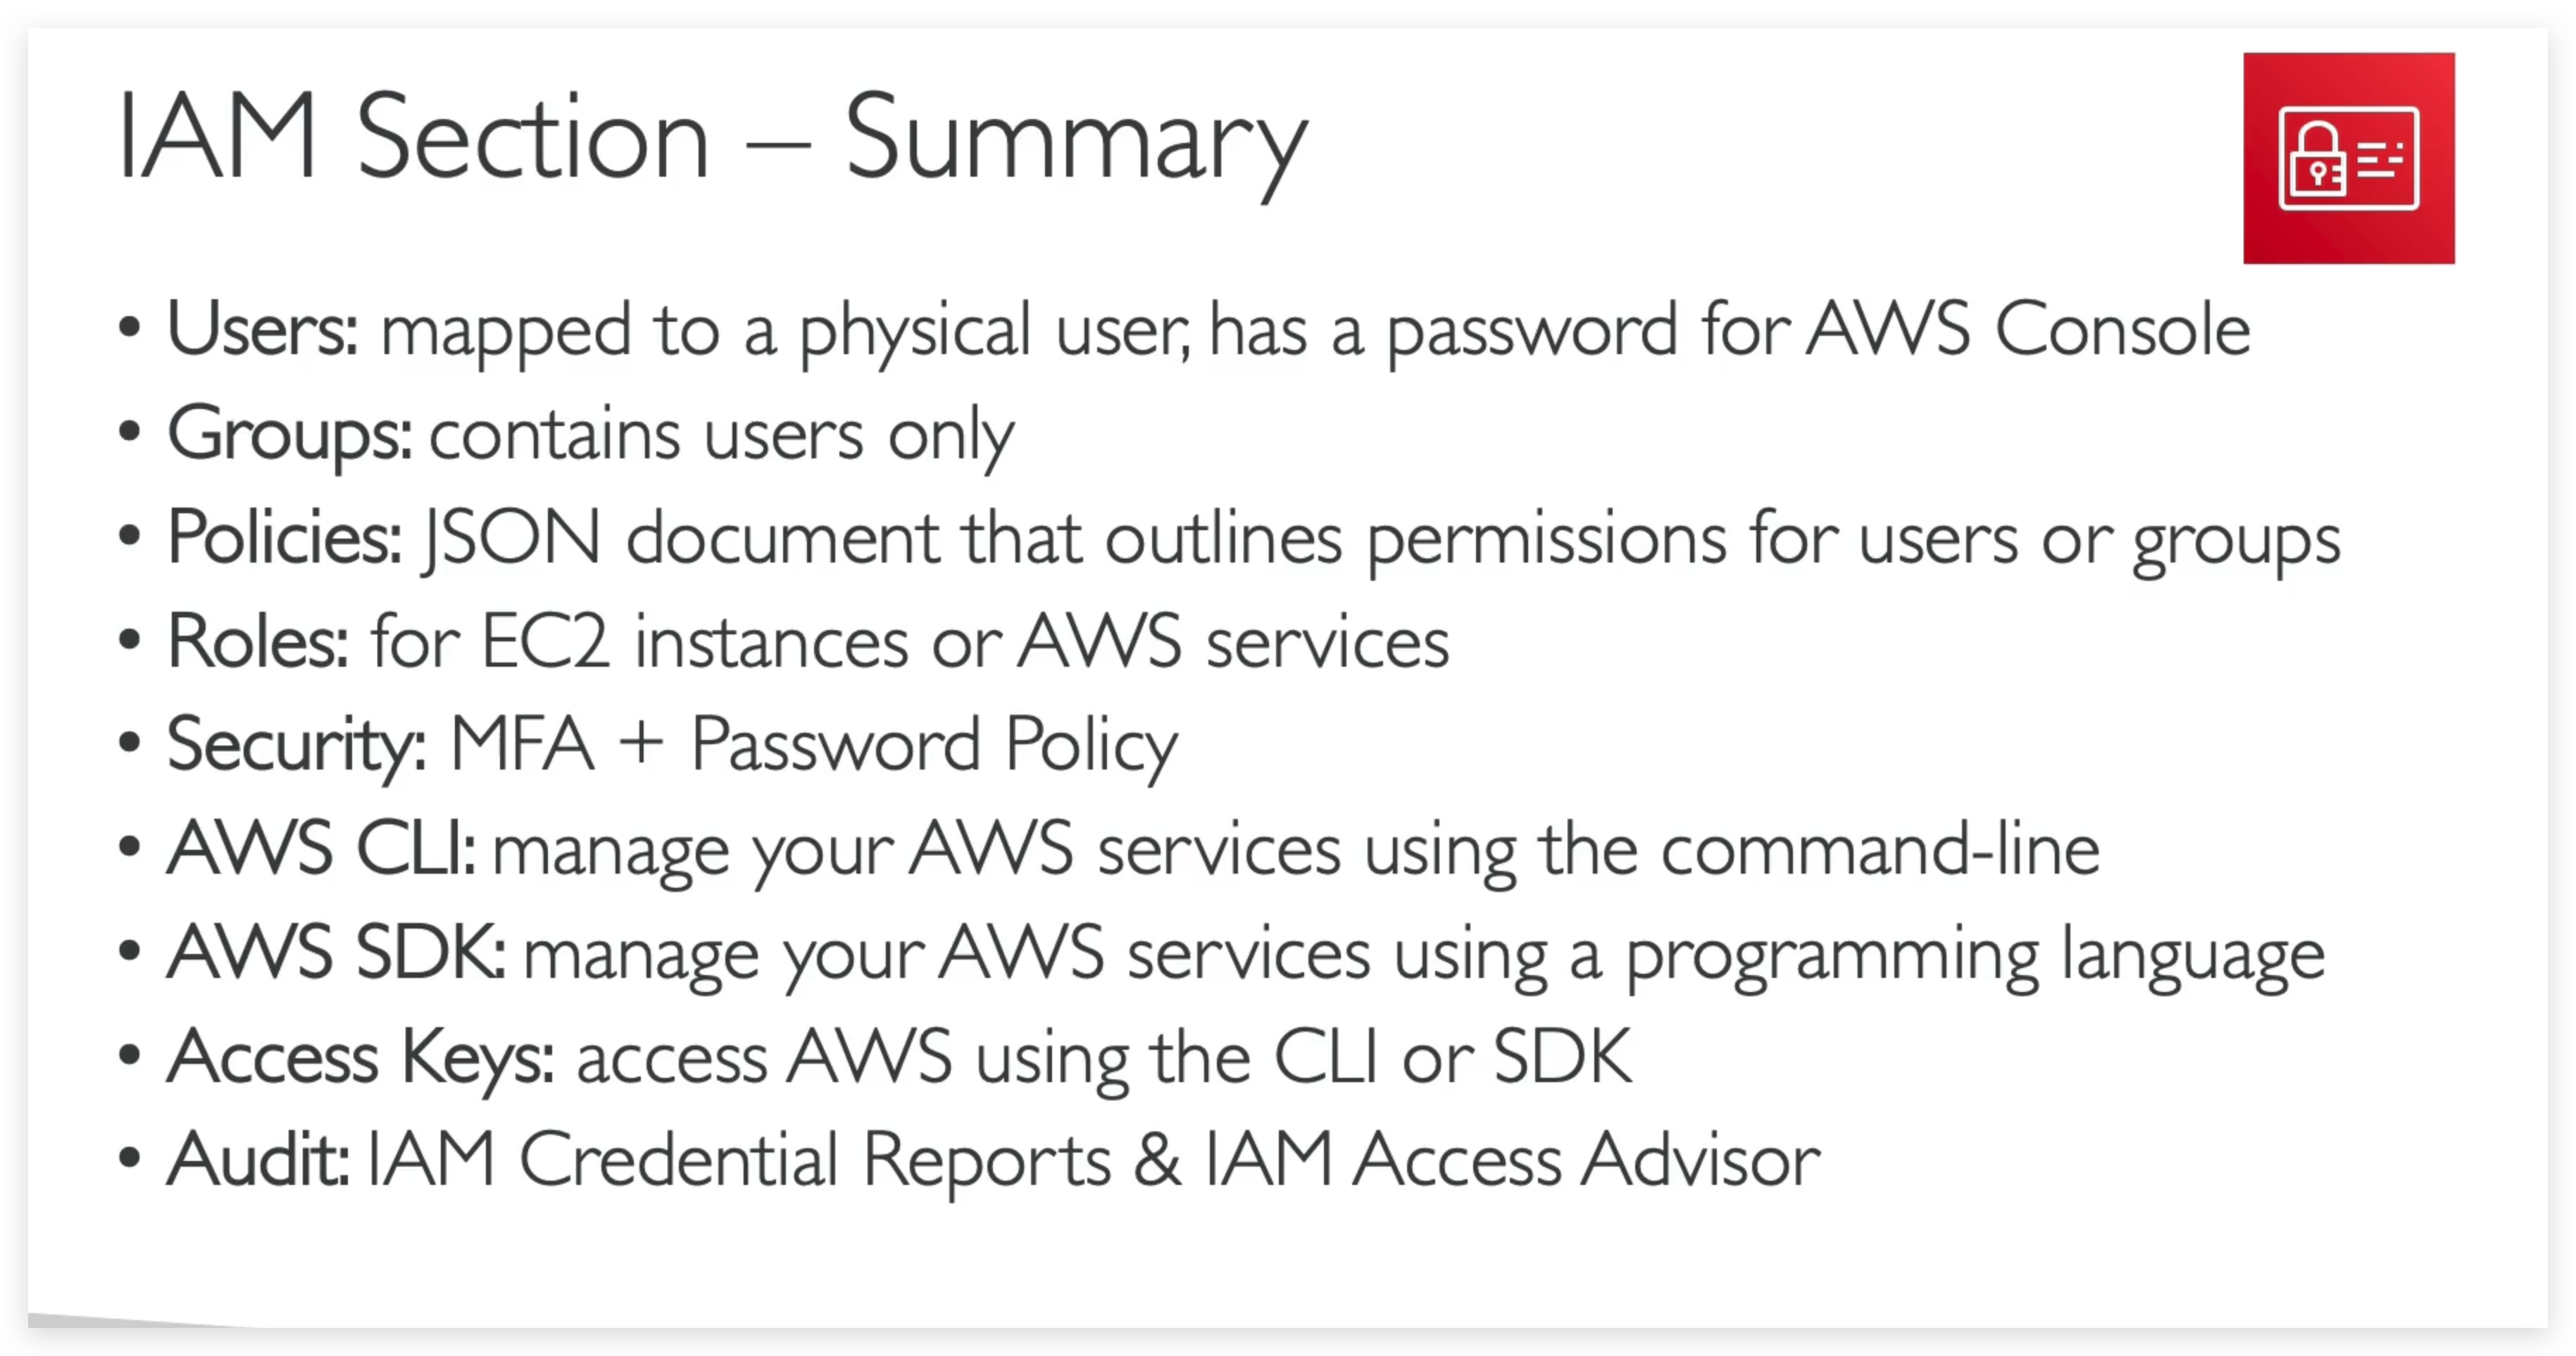
- One physical user = One AWS user
- Assign users to groups and assign permissions to groups
- Create a strong password policy
- Use and enforce the use of Multi-Factor Authentication (MFA)
- Create and use Roles for giving permissions to AWS services
- Use Access Keys for Programmatic Access (CLI / SDK)
- Audit permissions of your account using IAM Credentials Report & IAM Access Advisor
- Never share IAM users & Access Keys
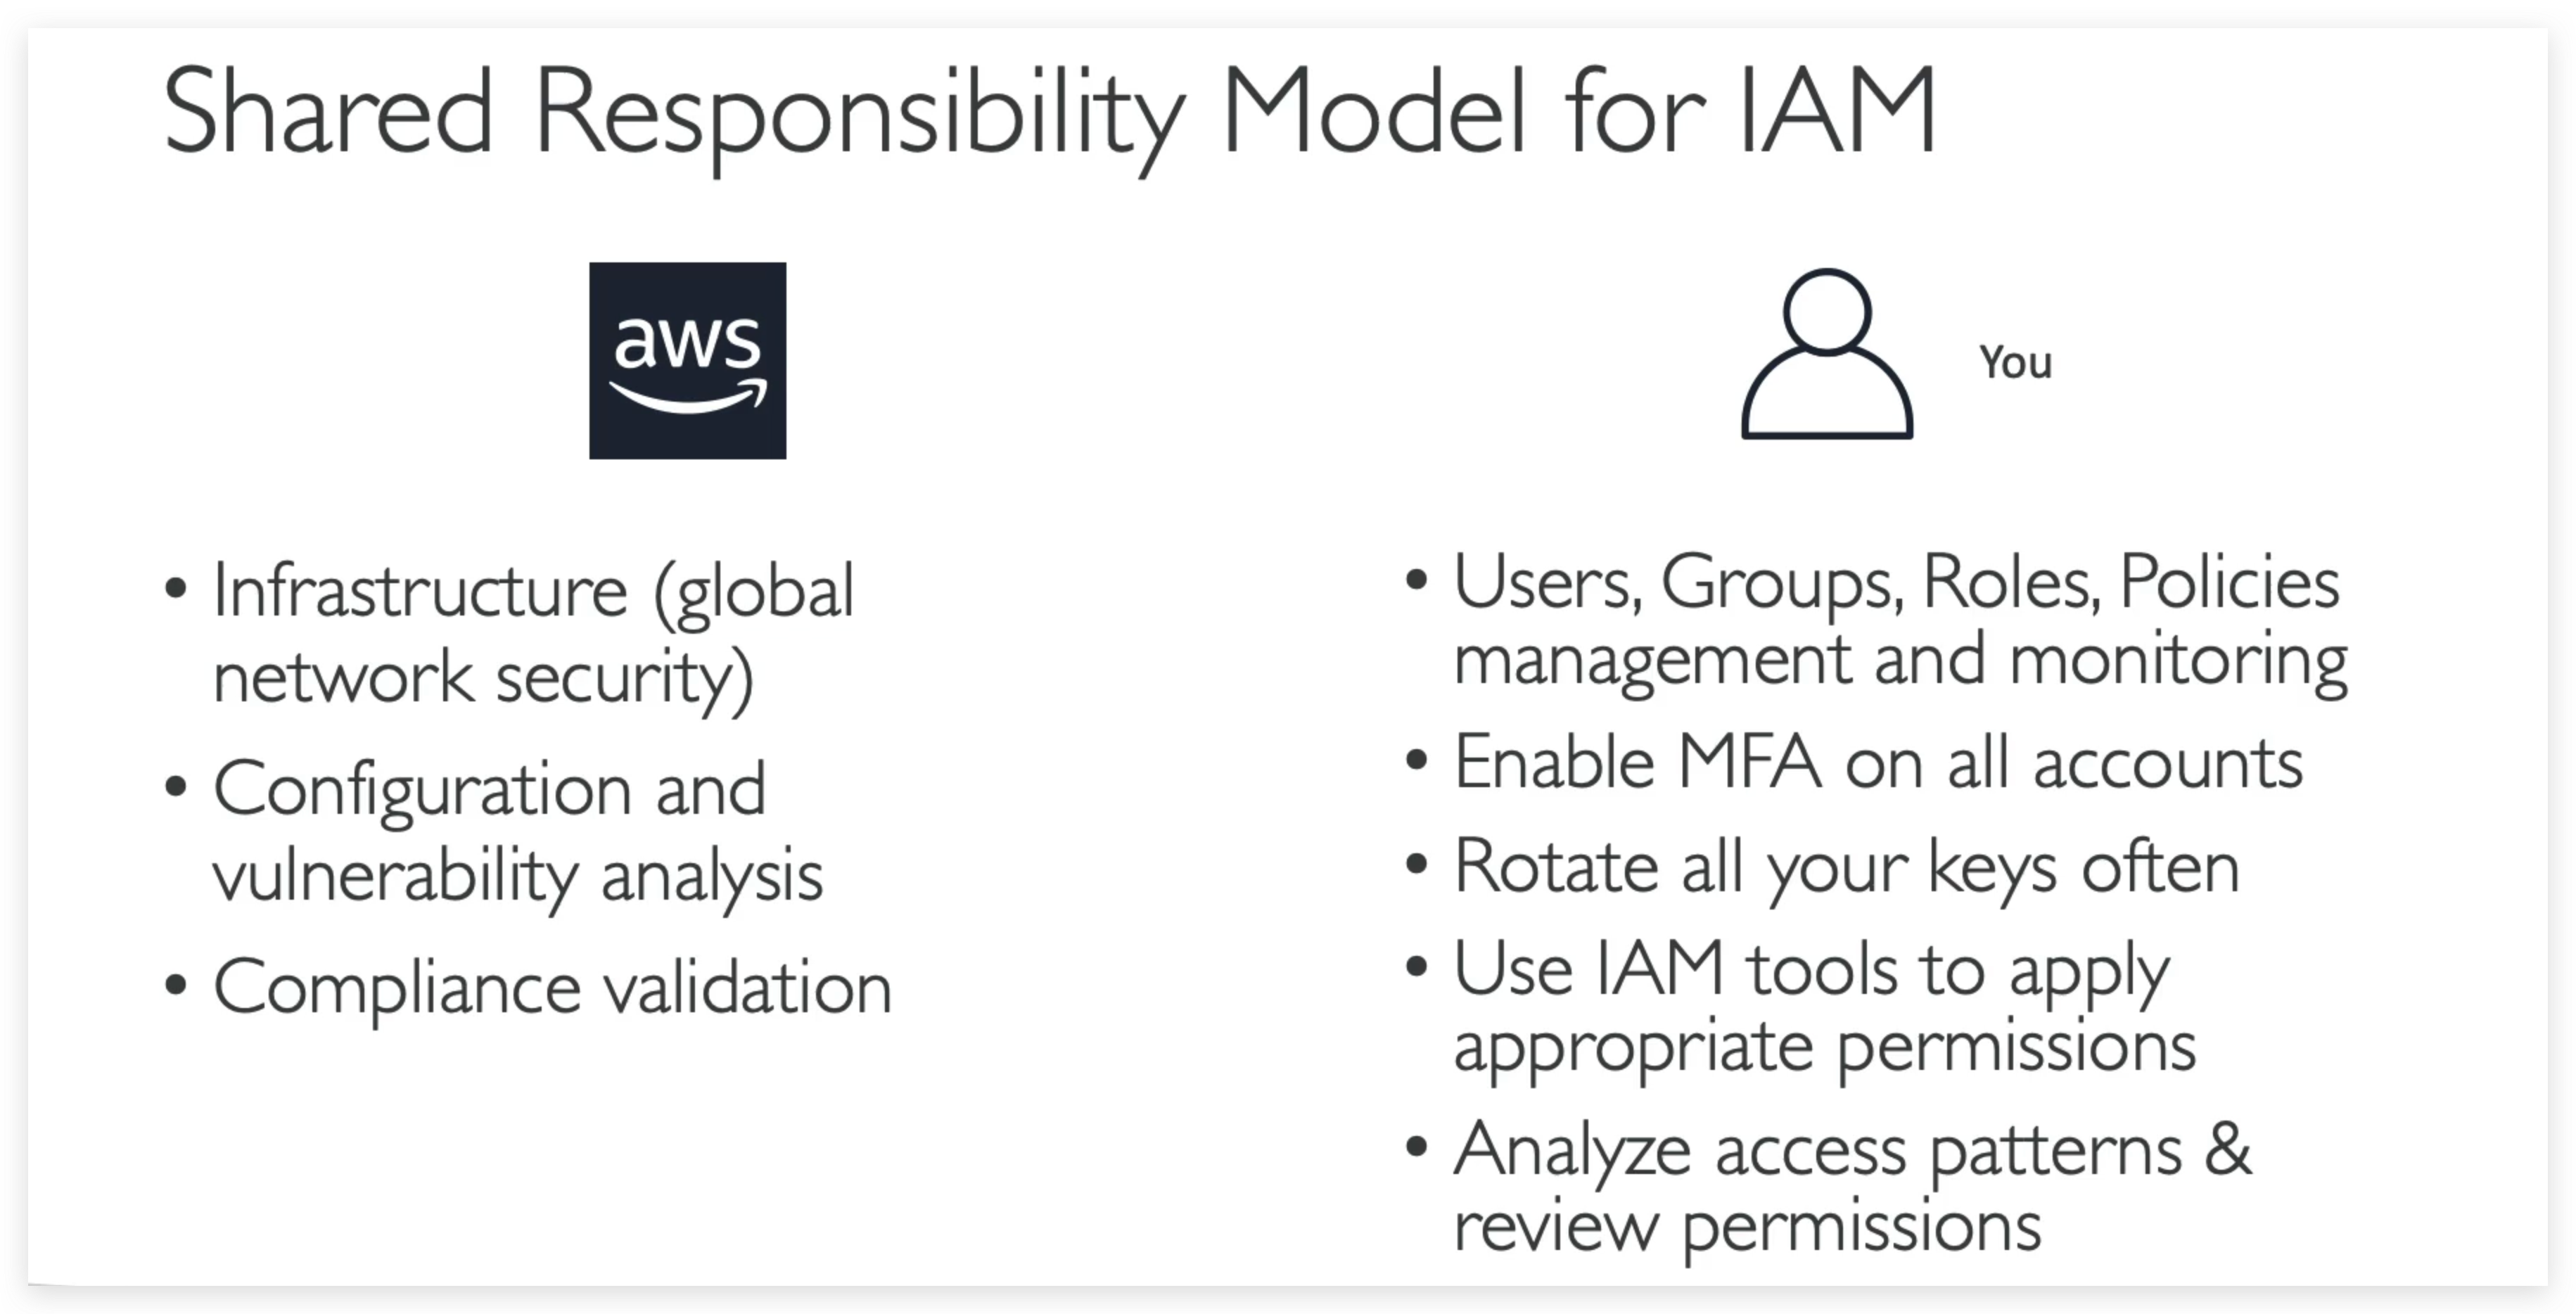
Shared Responsibility Model for IAM
Put simply, Shared Responsibility means that AWS is responsible for all the infrastructure and you are responsible for how you use and manage them.