So in this Chapter, we will discuss the topics related to AWS ***
Billing Setup
Before we move on to the next section for this aws course, we need to first set the right budget plan to avoid unnecessary charge.
By default, the billing information is inaccessible to IAM users, hence, you need to enable this via the root account.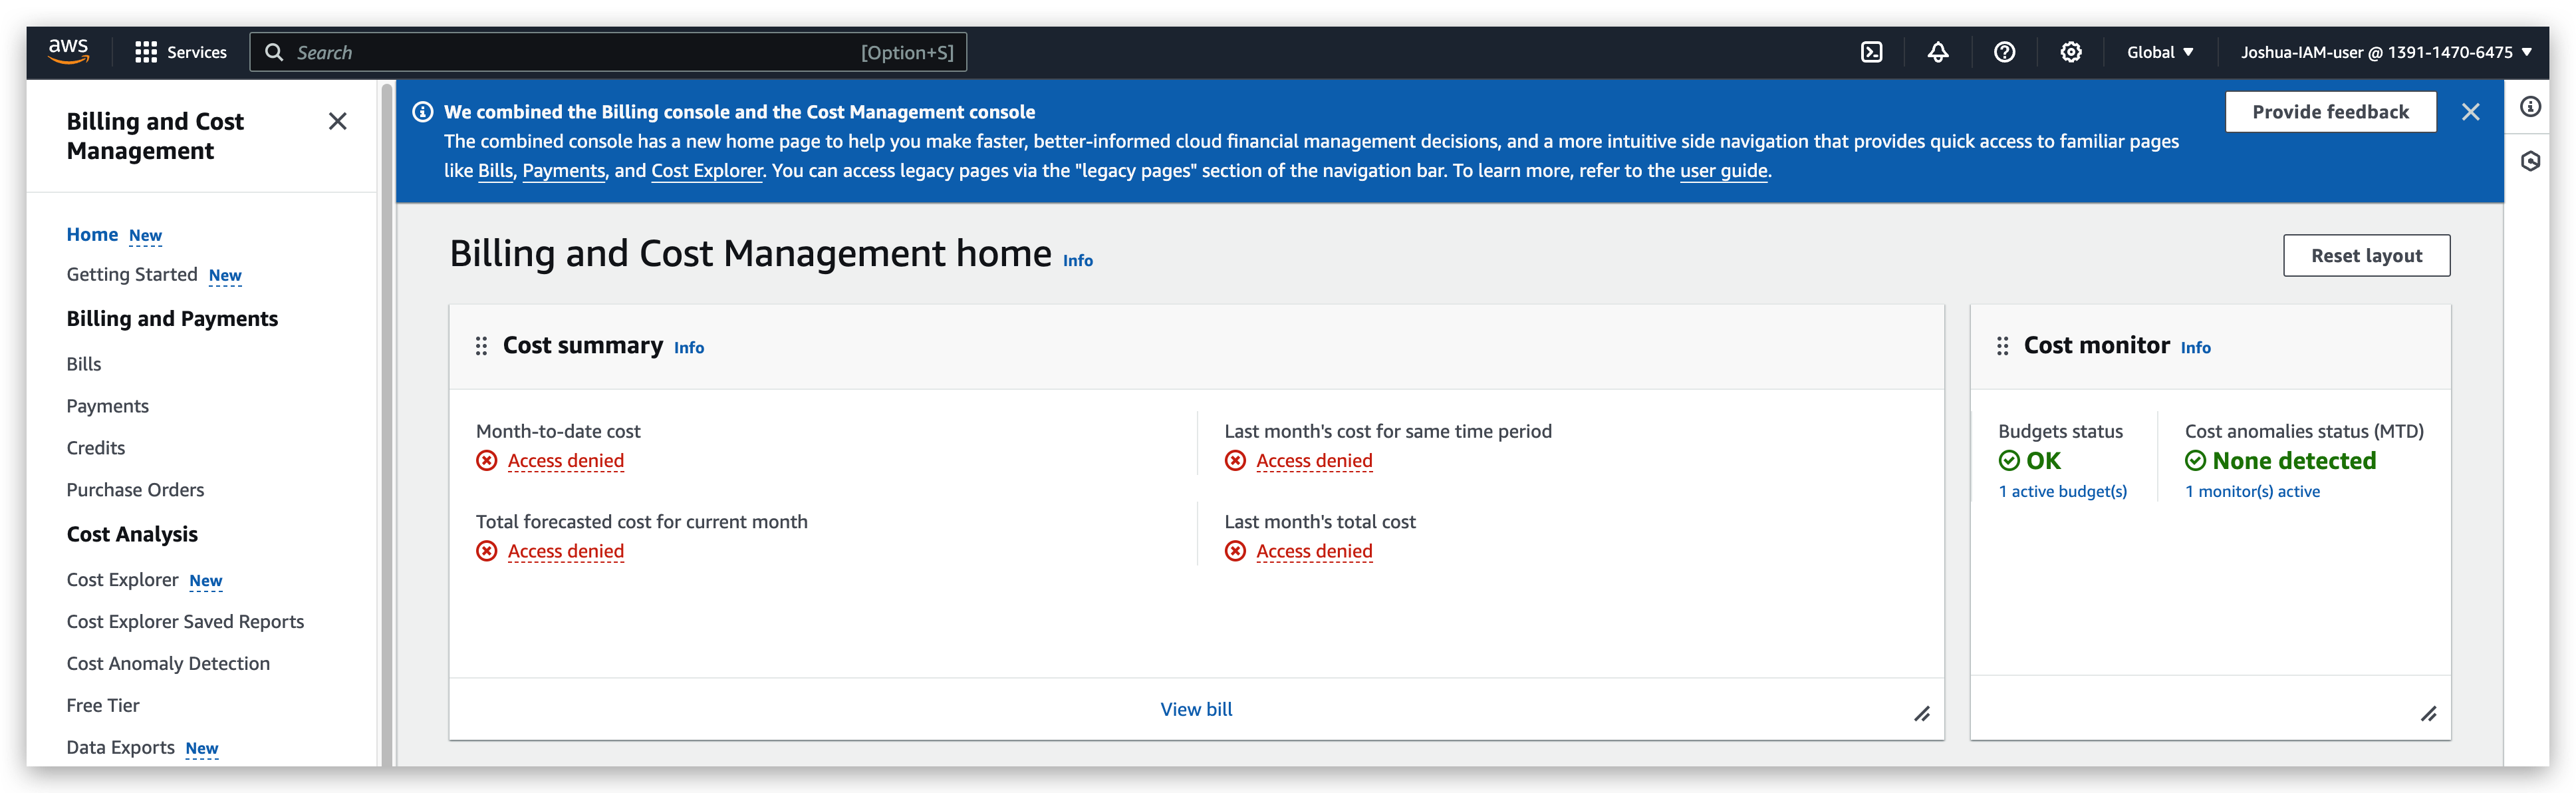
enable IAM user to check billing info
Go to the setting menu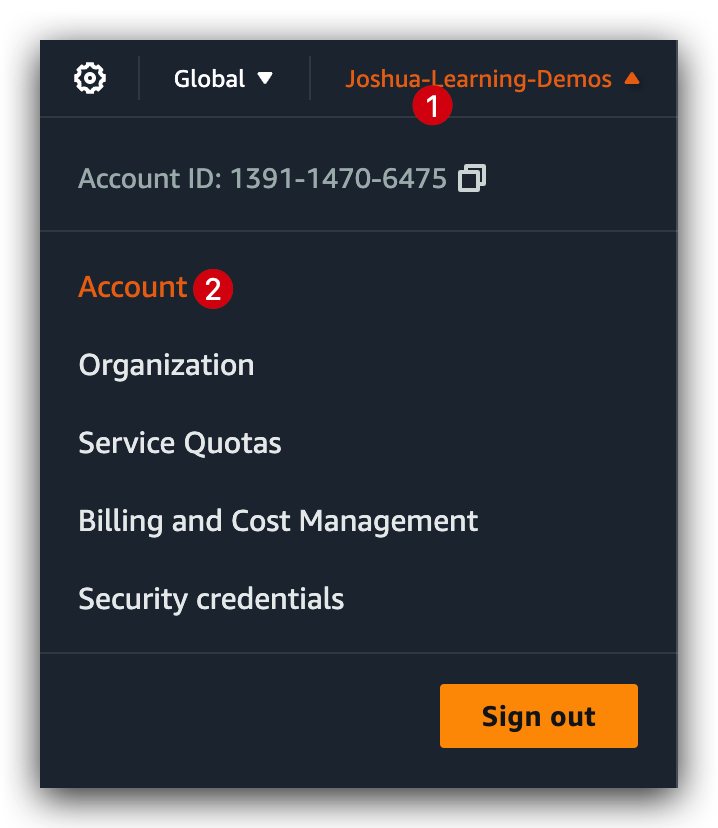
enable IAM User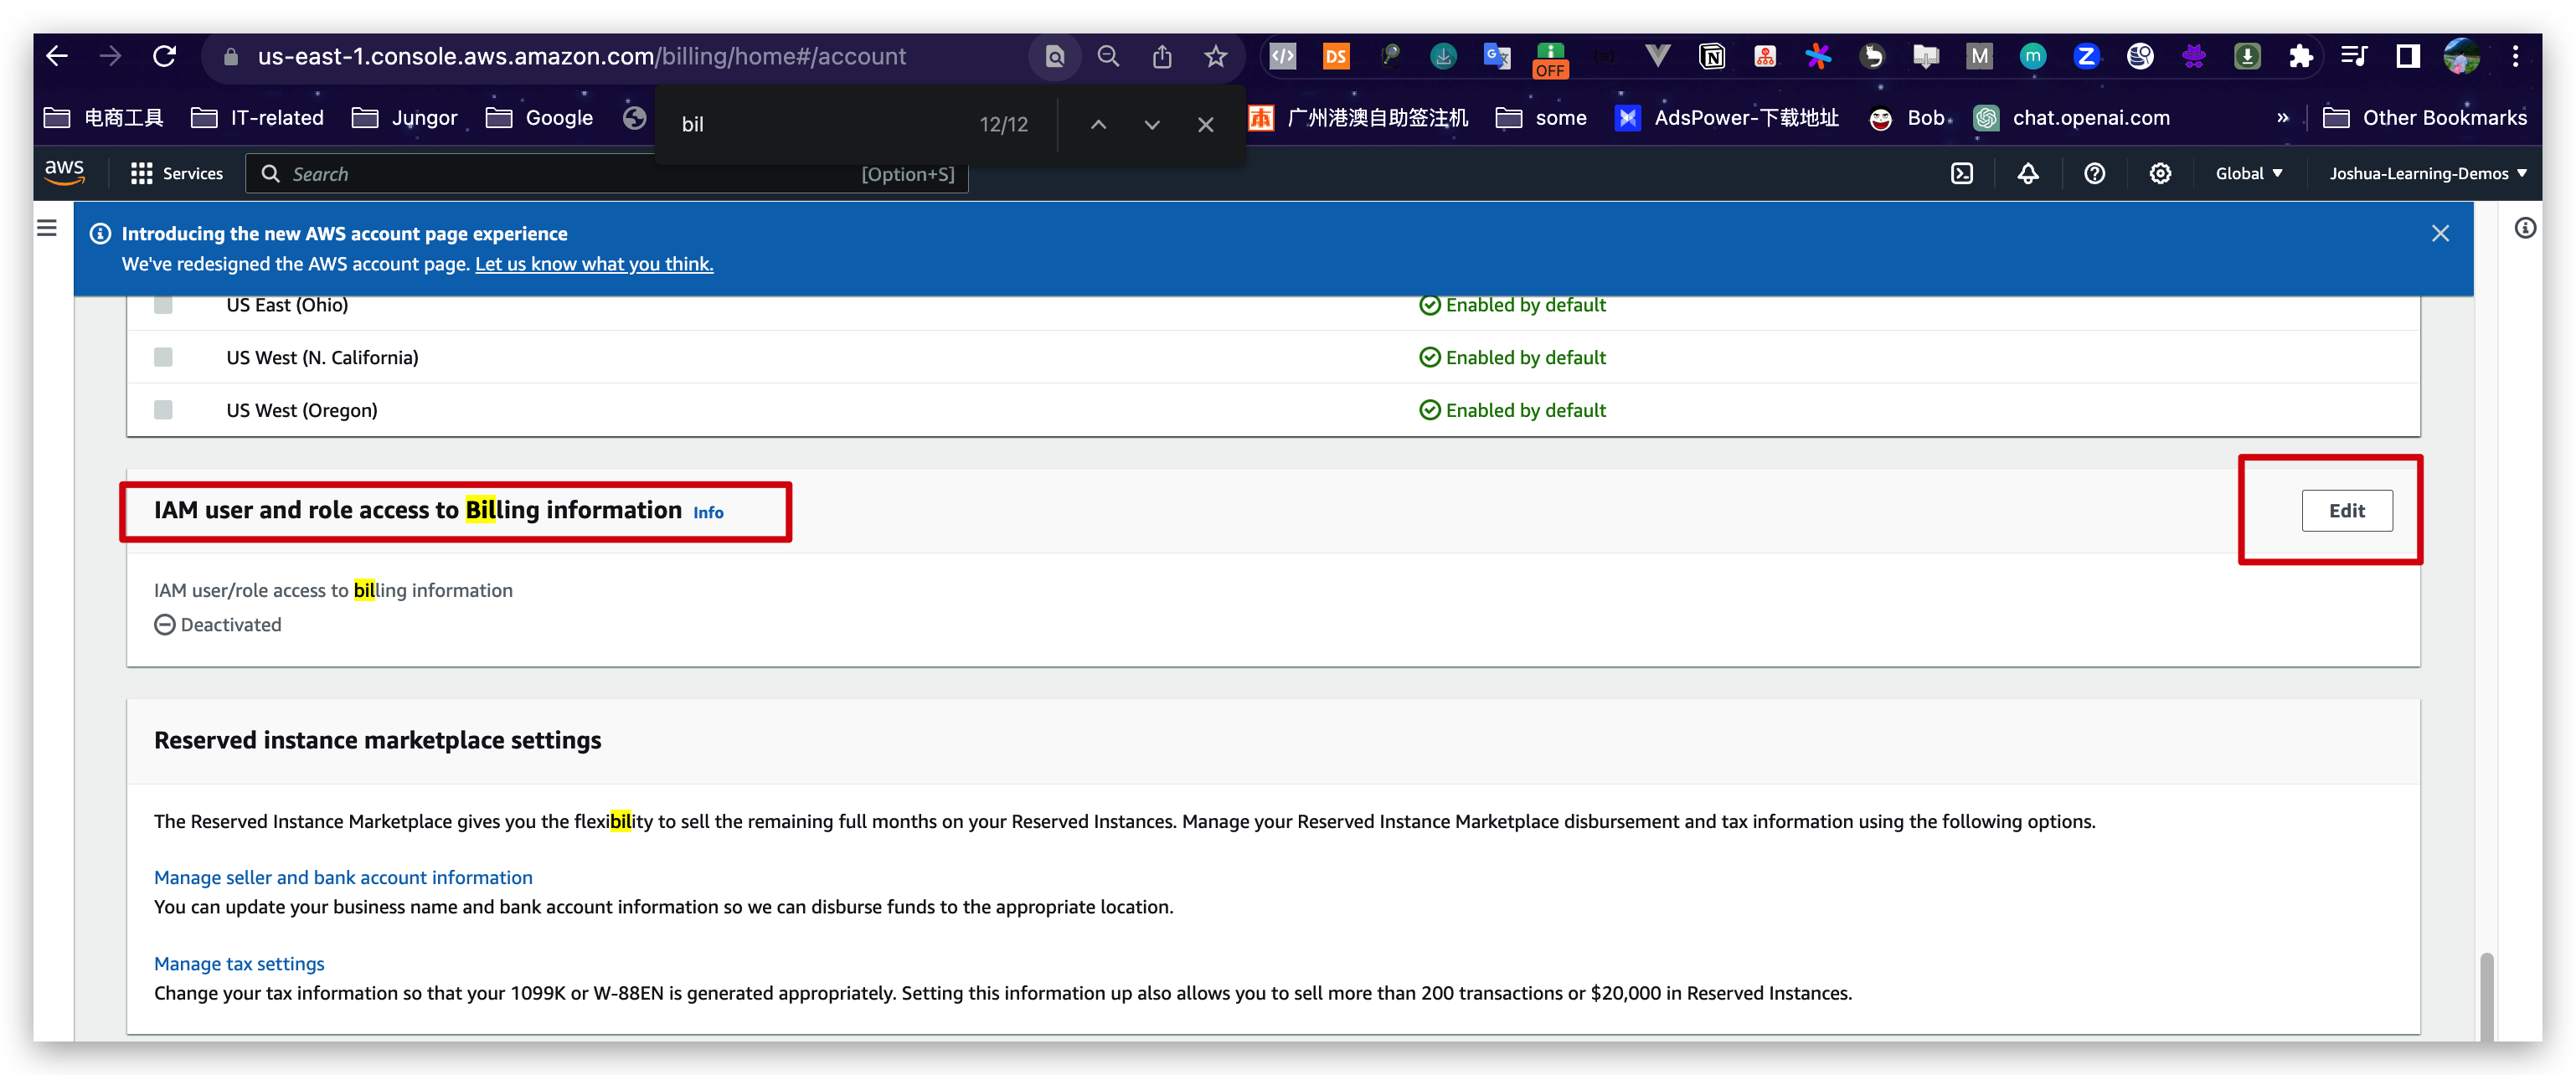

post verification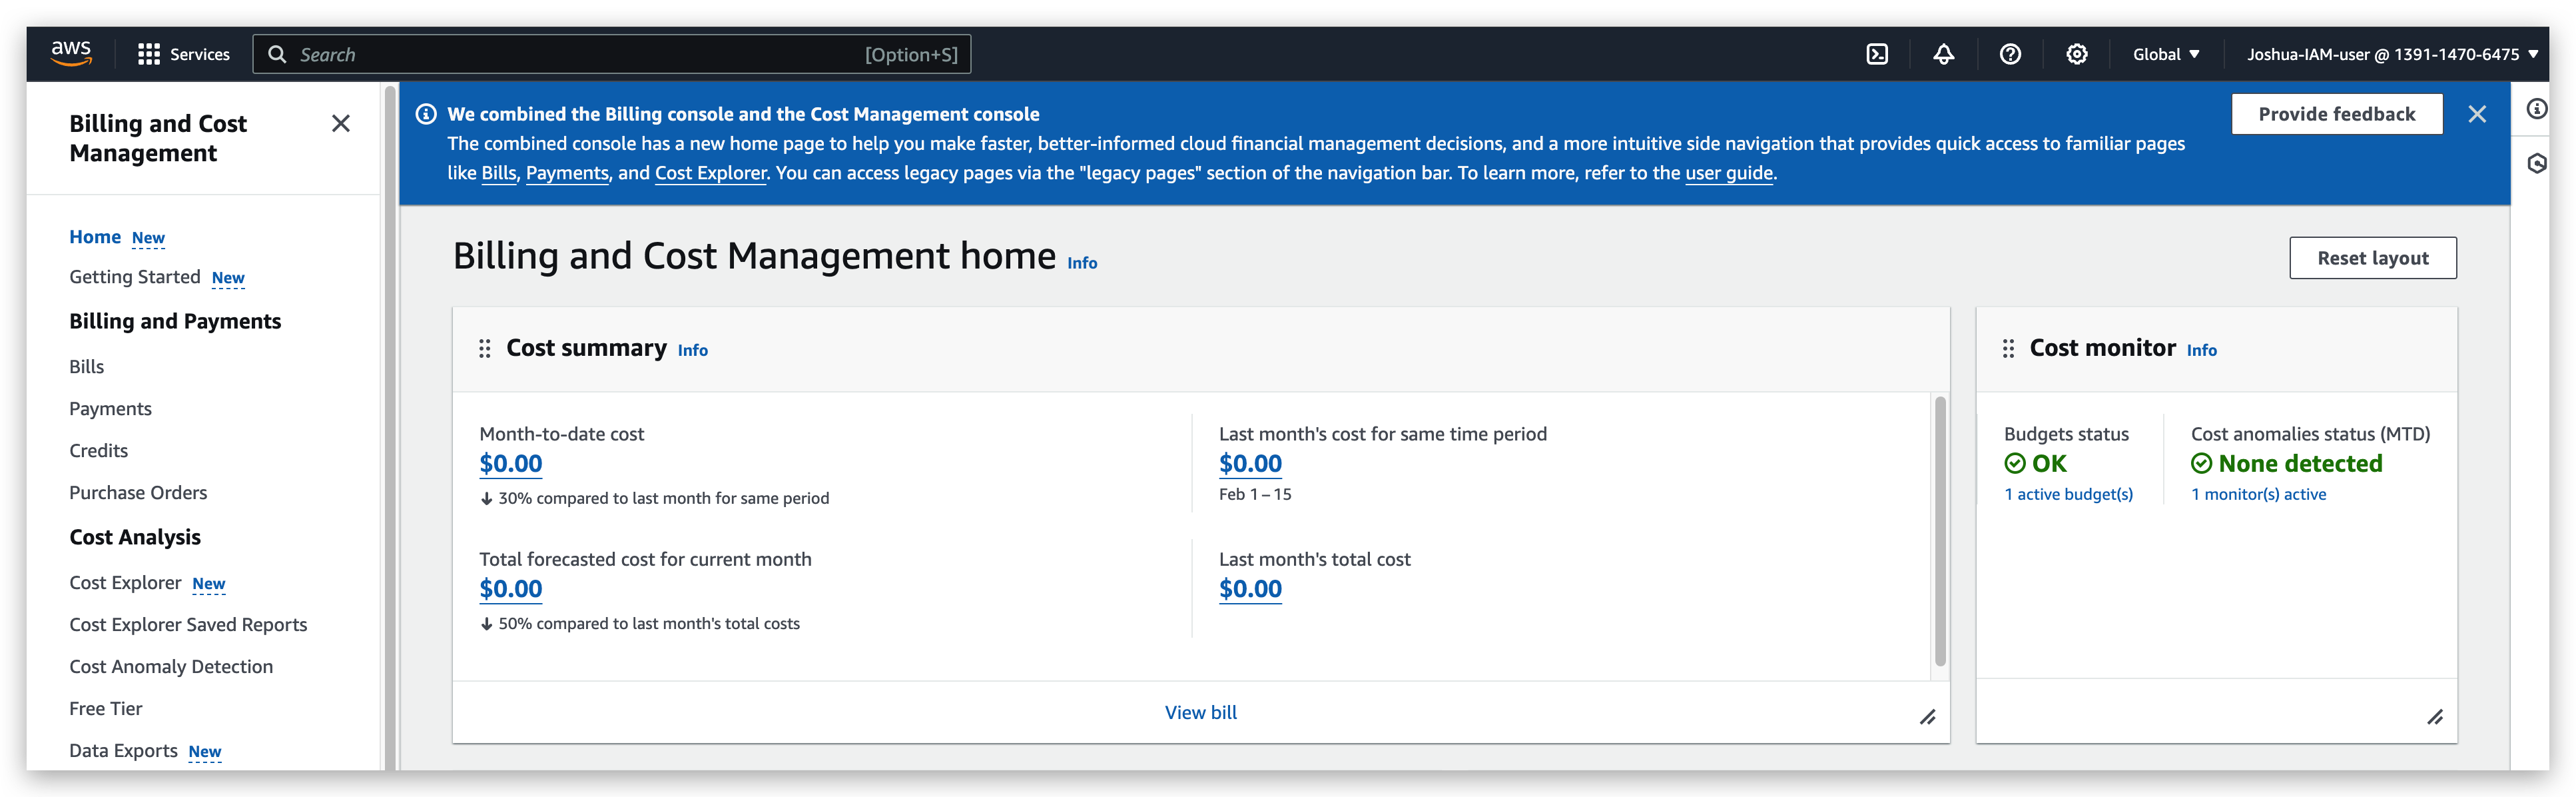
But this is just for learning purposes. To follow the best practices, we recommend to keep the IAM user and role access to billing information feature deactivated.
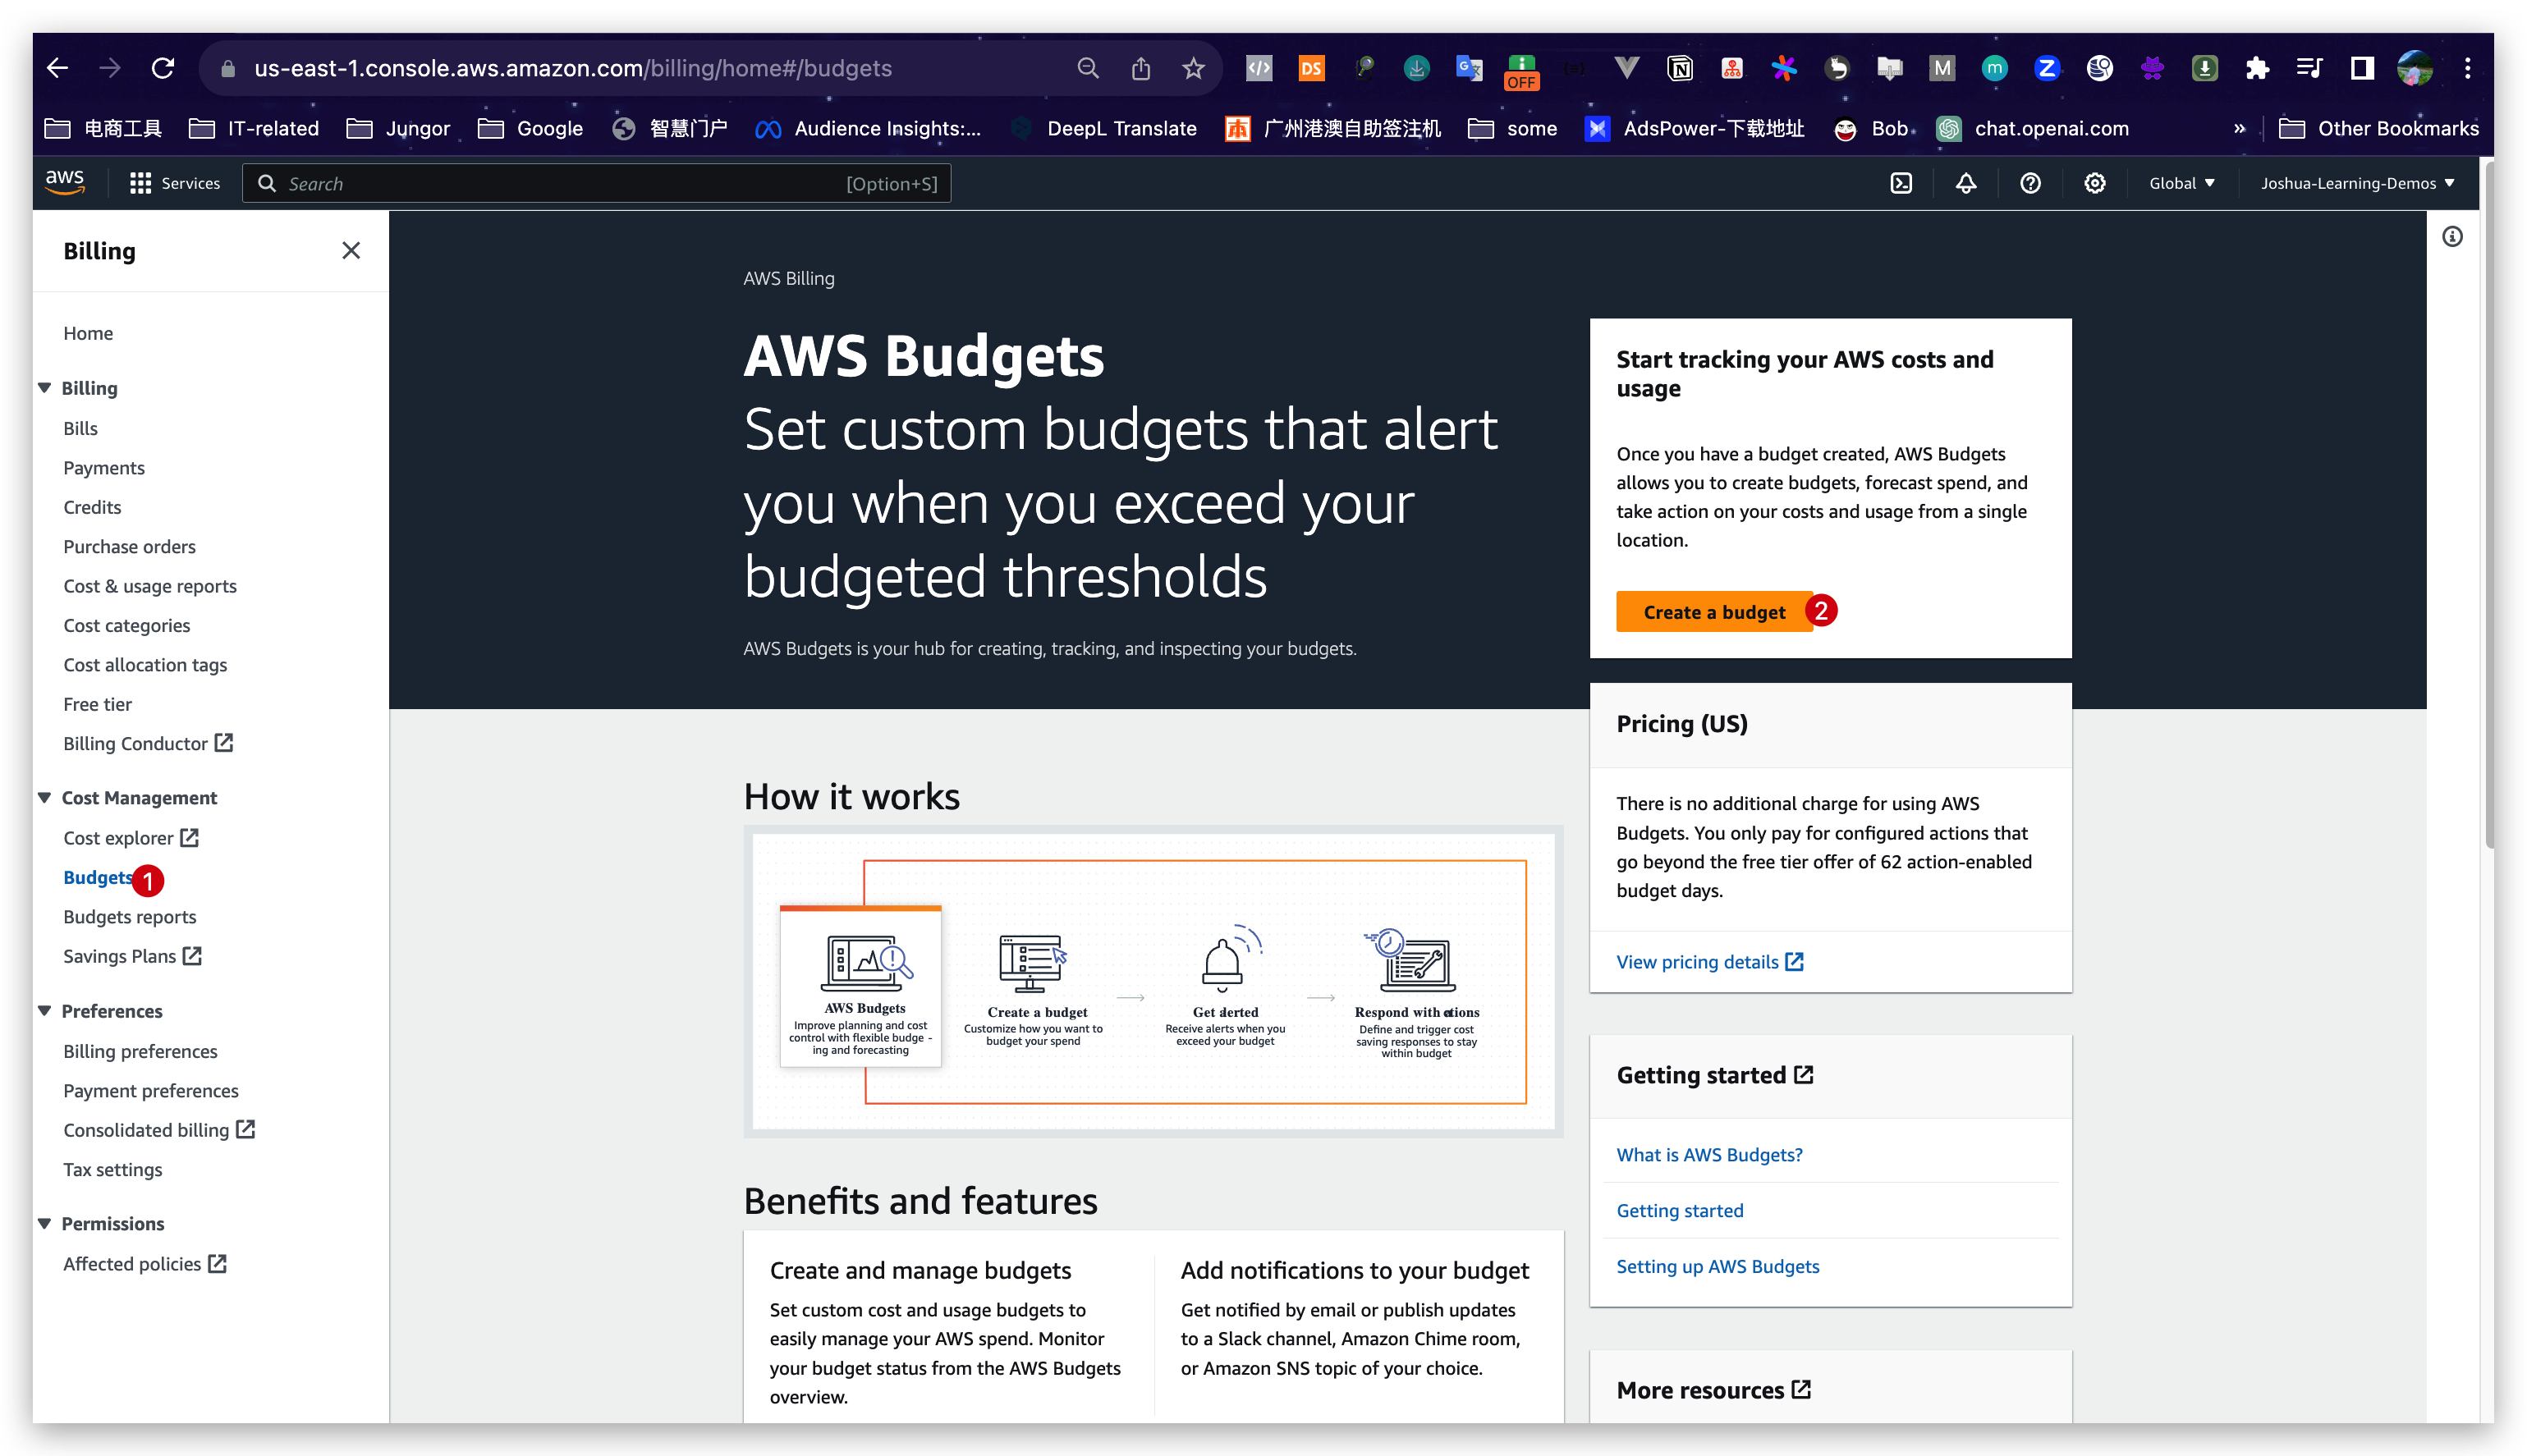
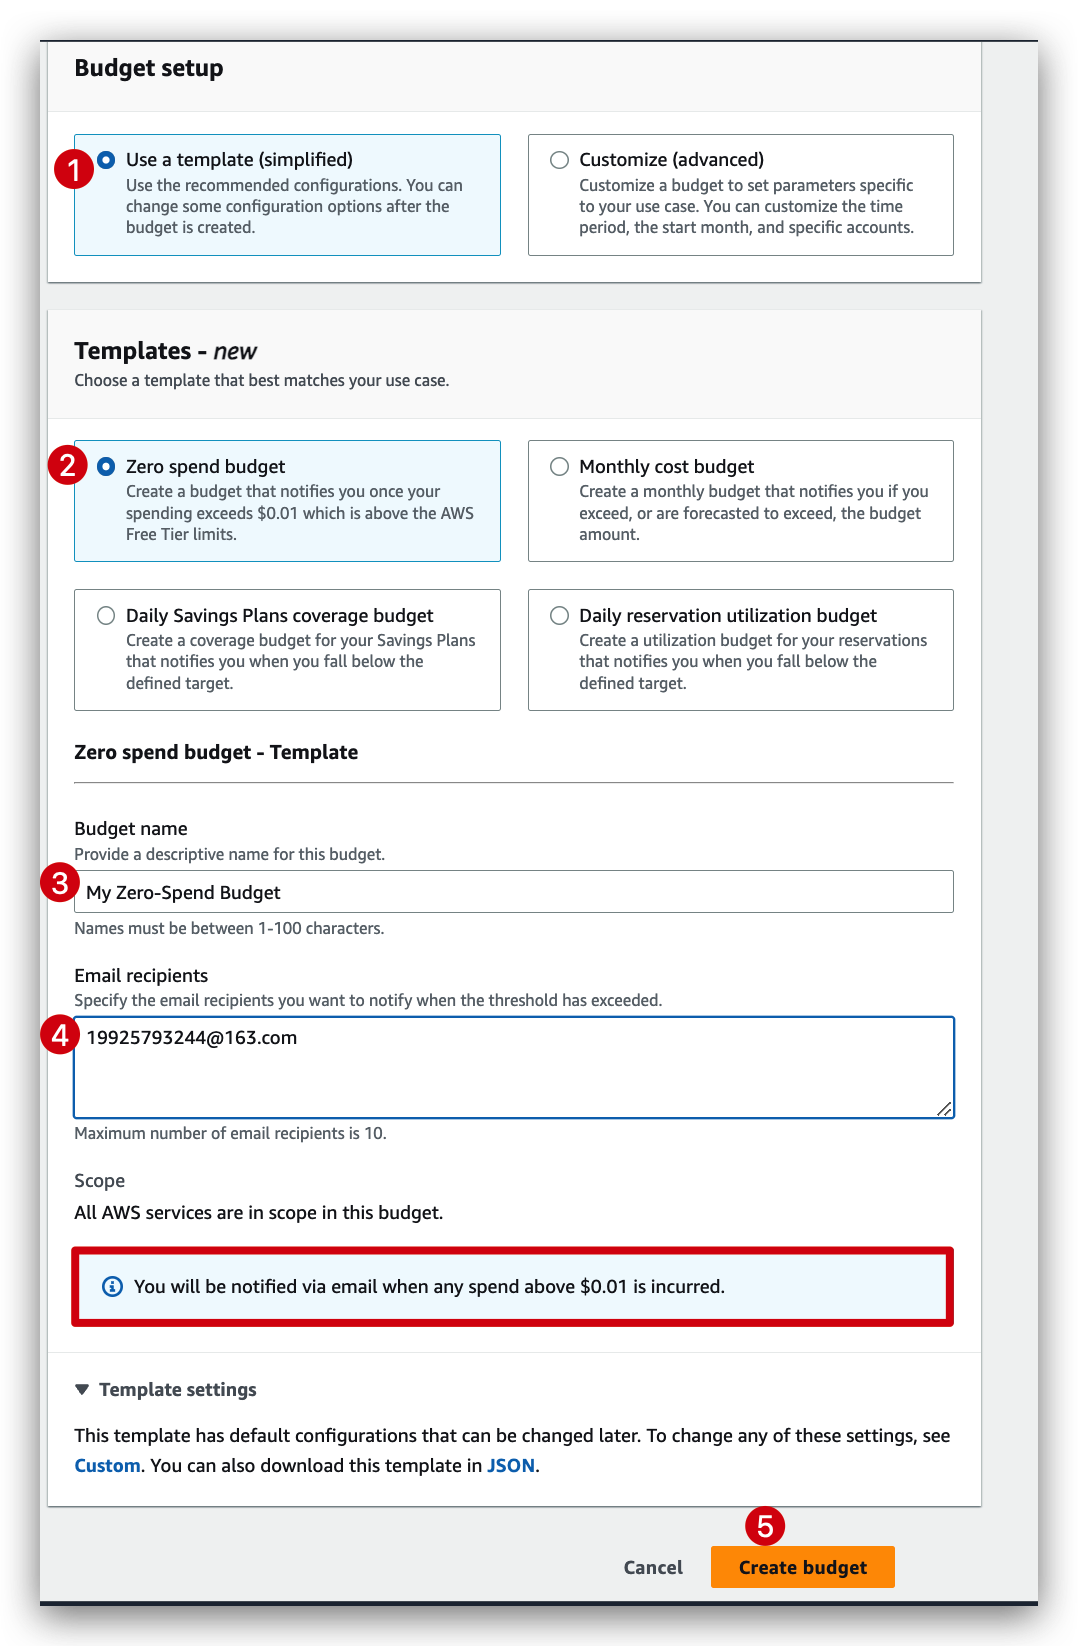
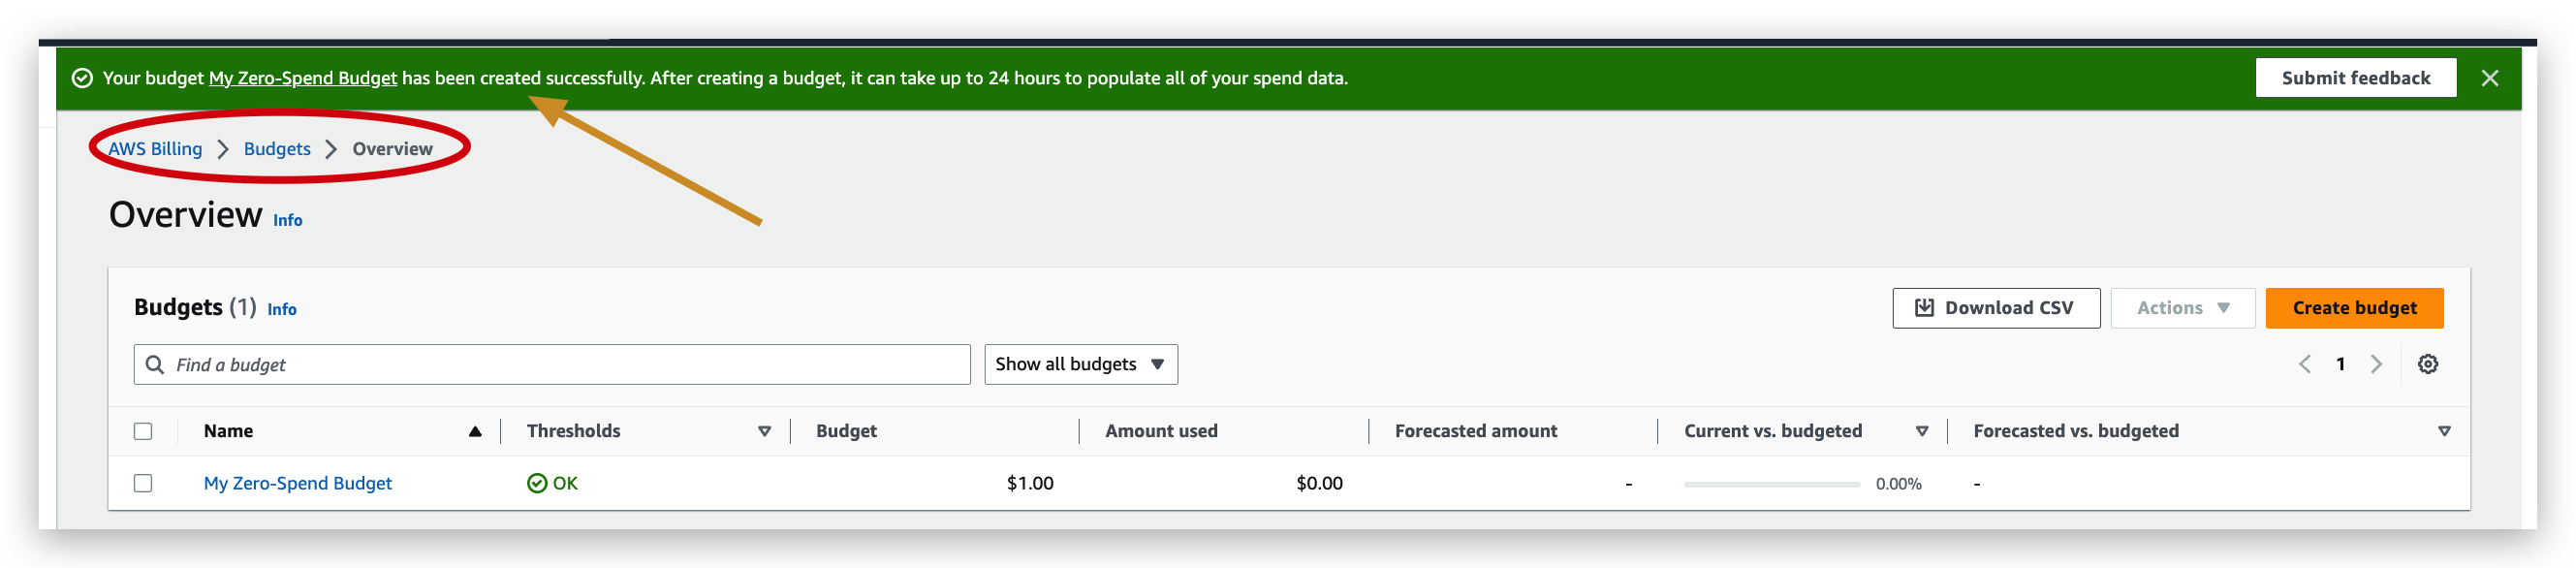
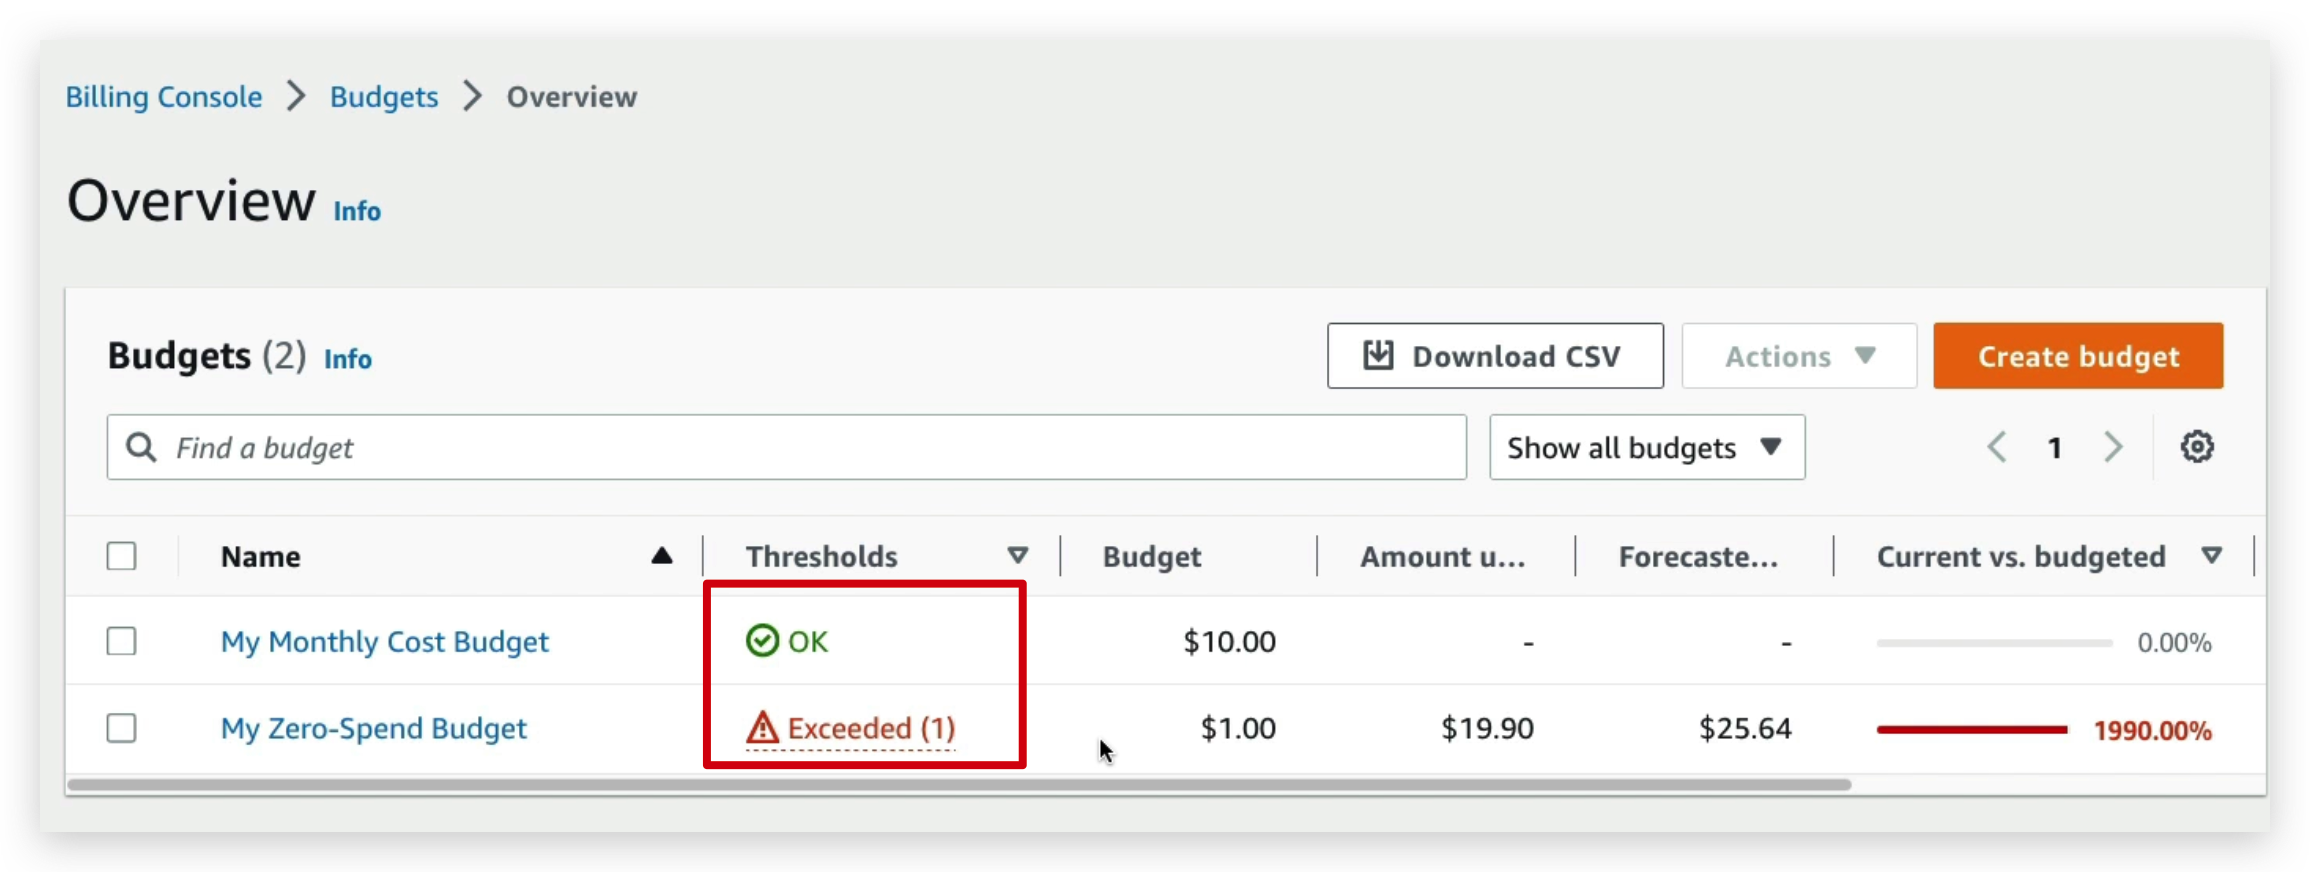
budget creation
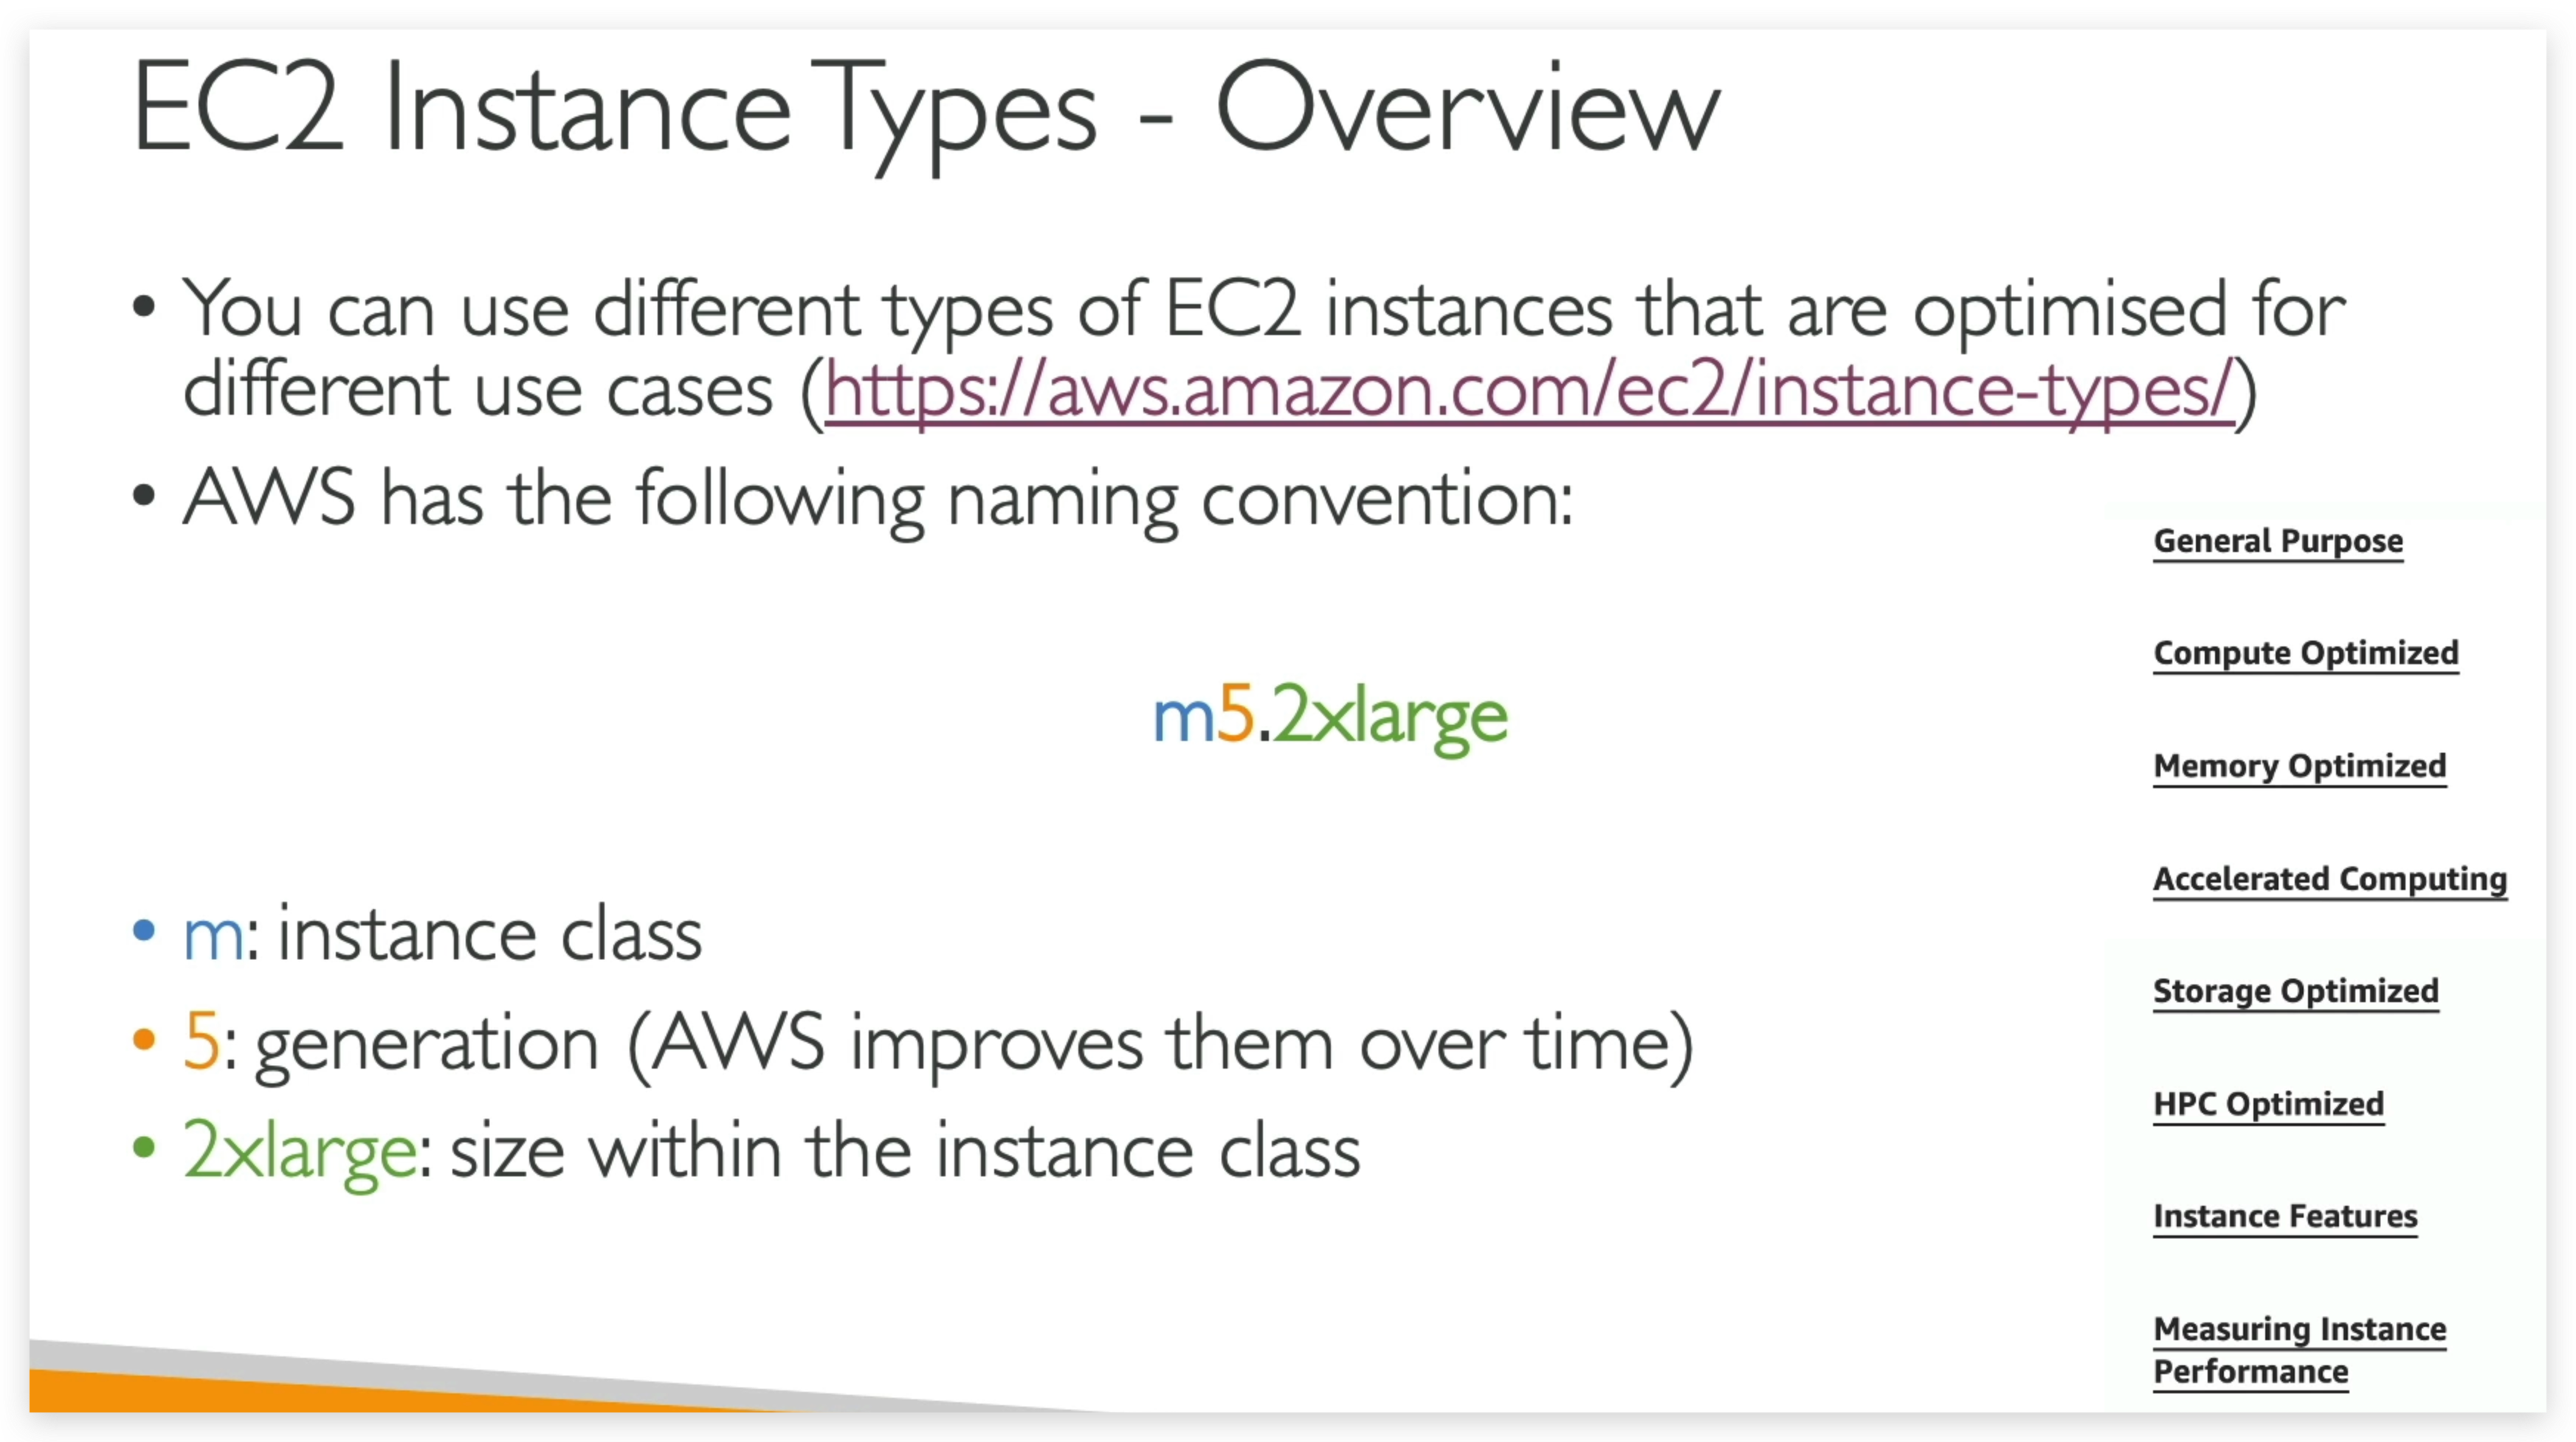
So we have lots and lots of options and as you’ll see in the hands-on, even more options at other certification levels that you need to know in EC2 instances, but at a core of it what you need to remember is that you can choose pretty much how you want your visual machine to be, and you can rent it from AWS. And that is the power of the cloud. You can do this by just in the blink of the eye, really.
EC2 User Data
It is possible to bootstrap our instances using an EC2 User data script.
Bootstrapping means launching commands when a machine starts.
That script is only run once at the instance first start.
EC2 user data is used to automate boot tasks such as:
- Installing updates
- Installing software
- Downloading common files from the internet
- Anything you can think of
The EC2 User Data Script runs with the root user
So it could be whatever you want, but just know that the more you add into your User Data script, the more your instant has to do at boot time and longer it will take to bring the instance up.
EC2 instance example
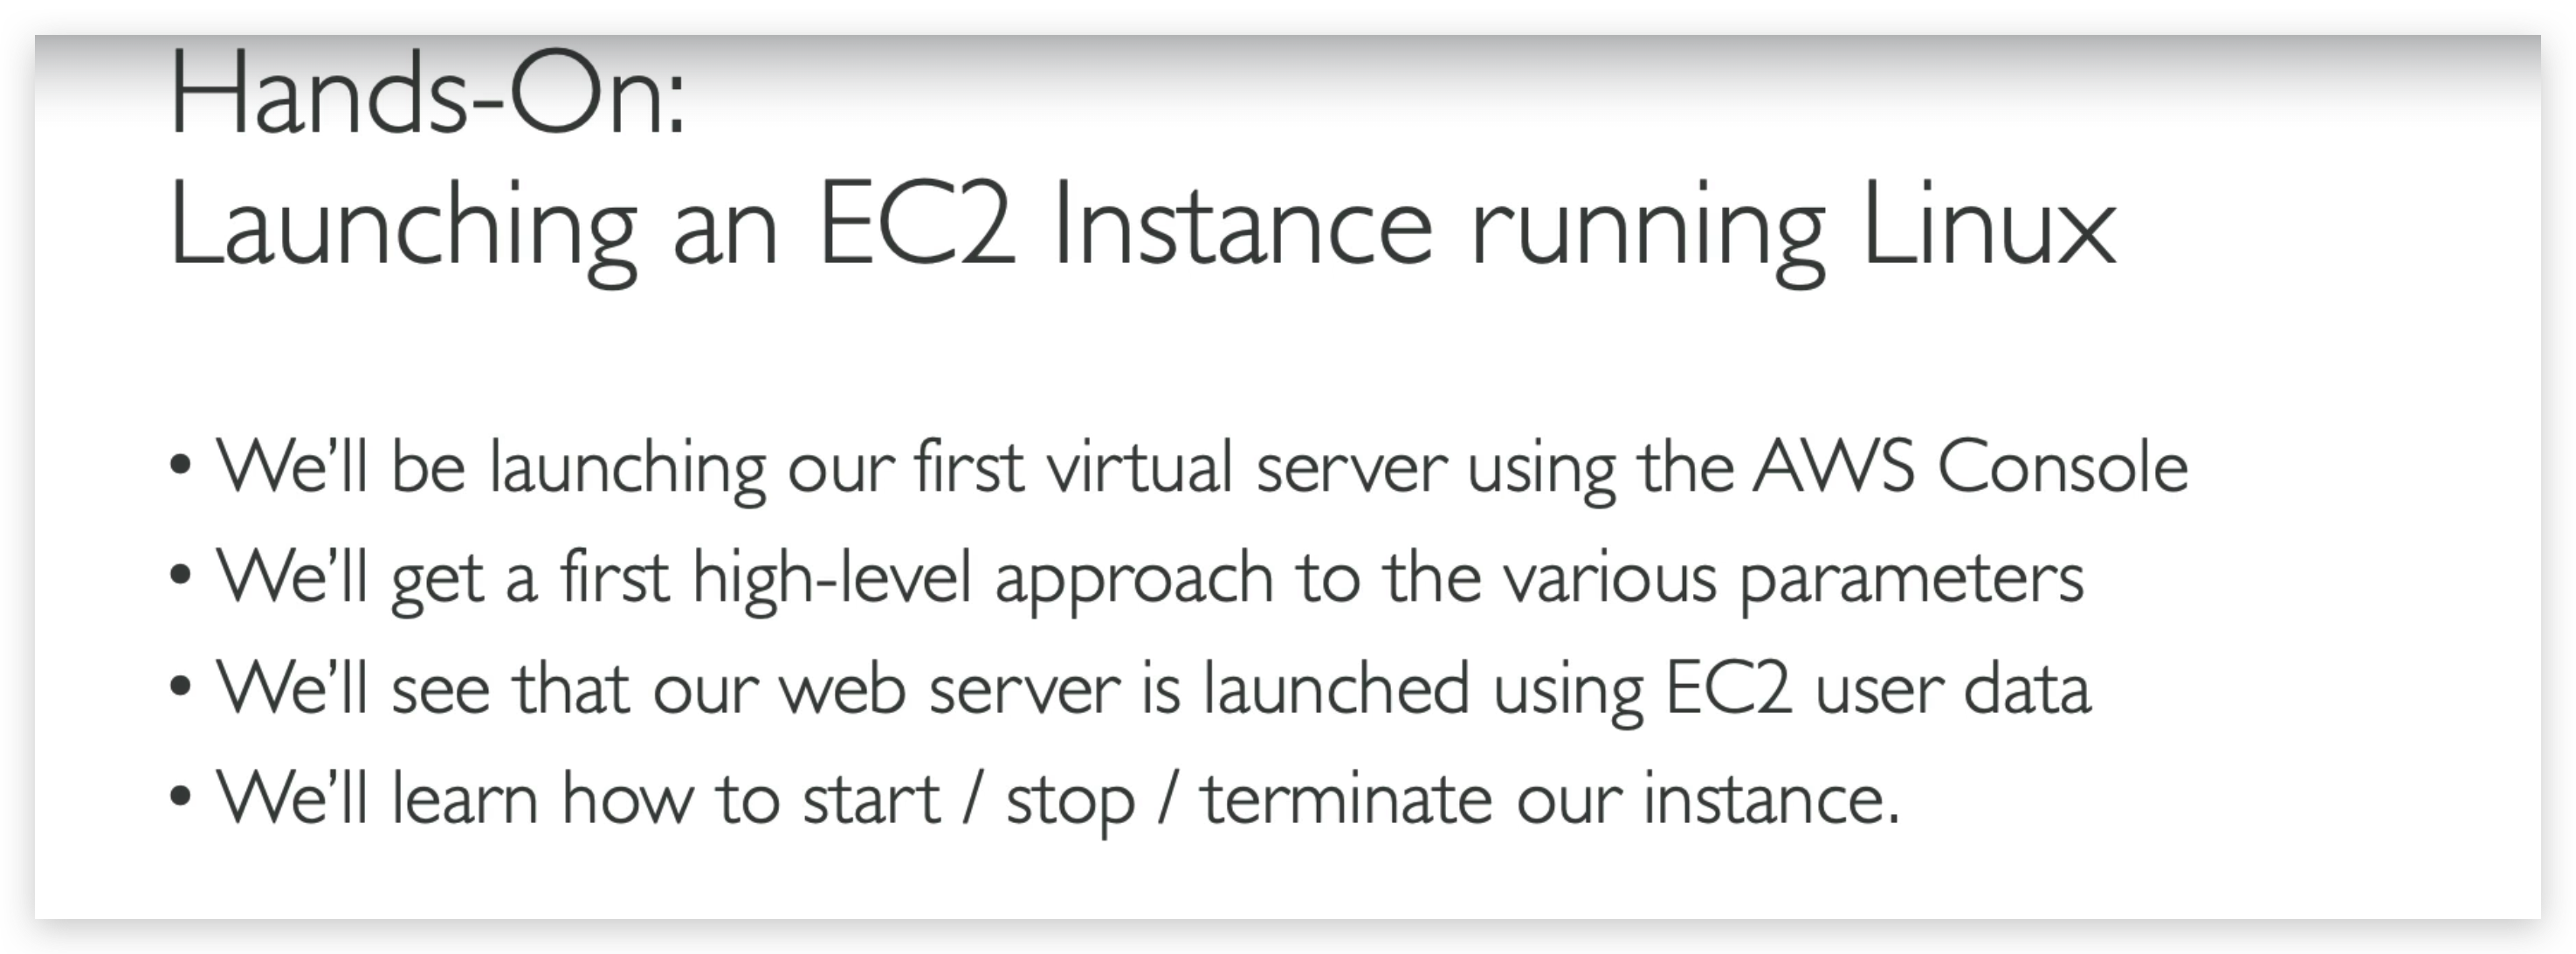
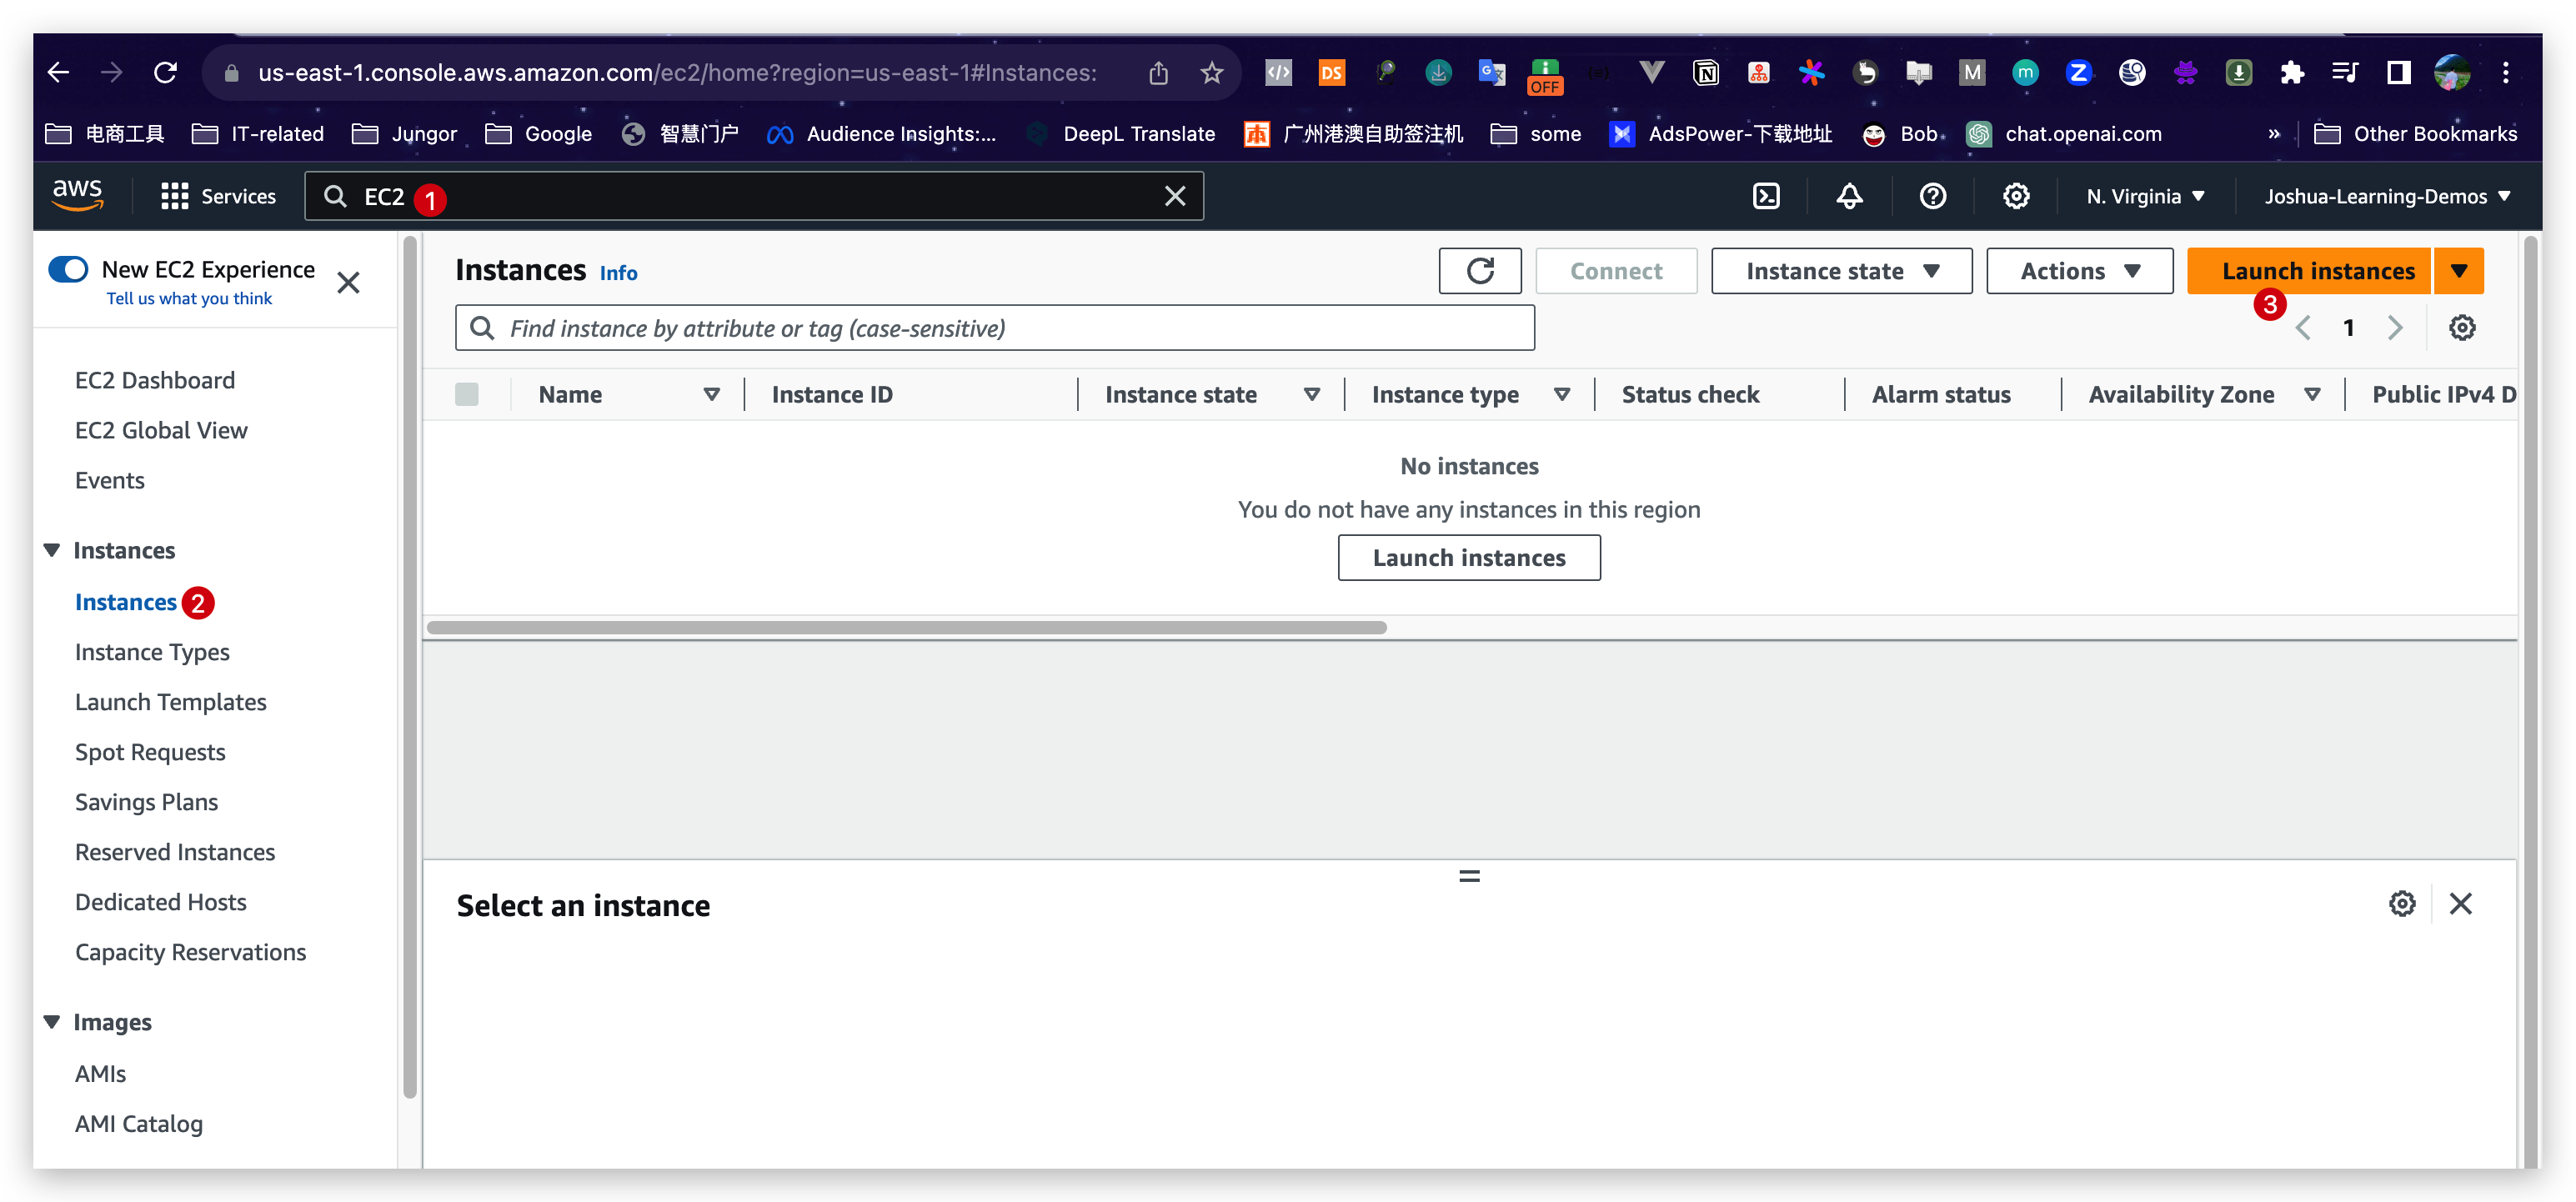
EC2 instance launch
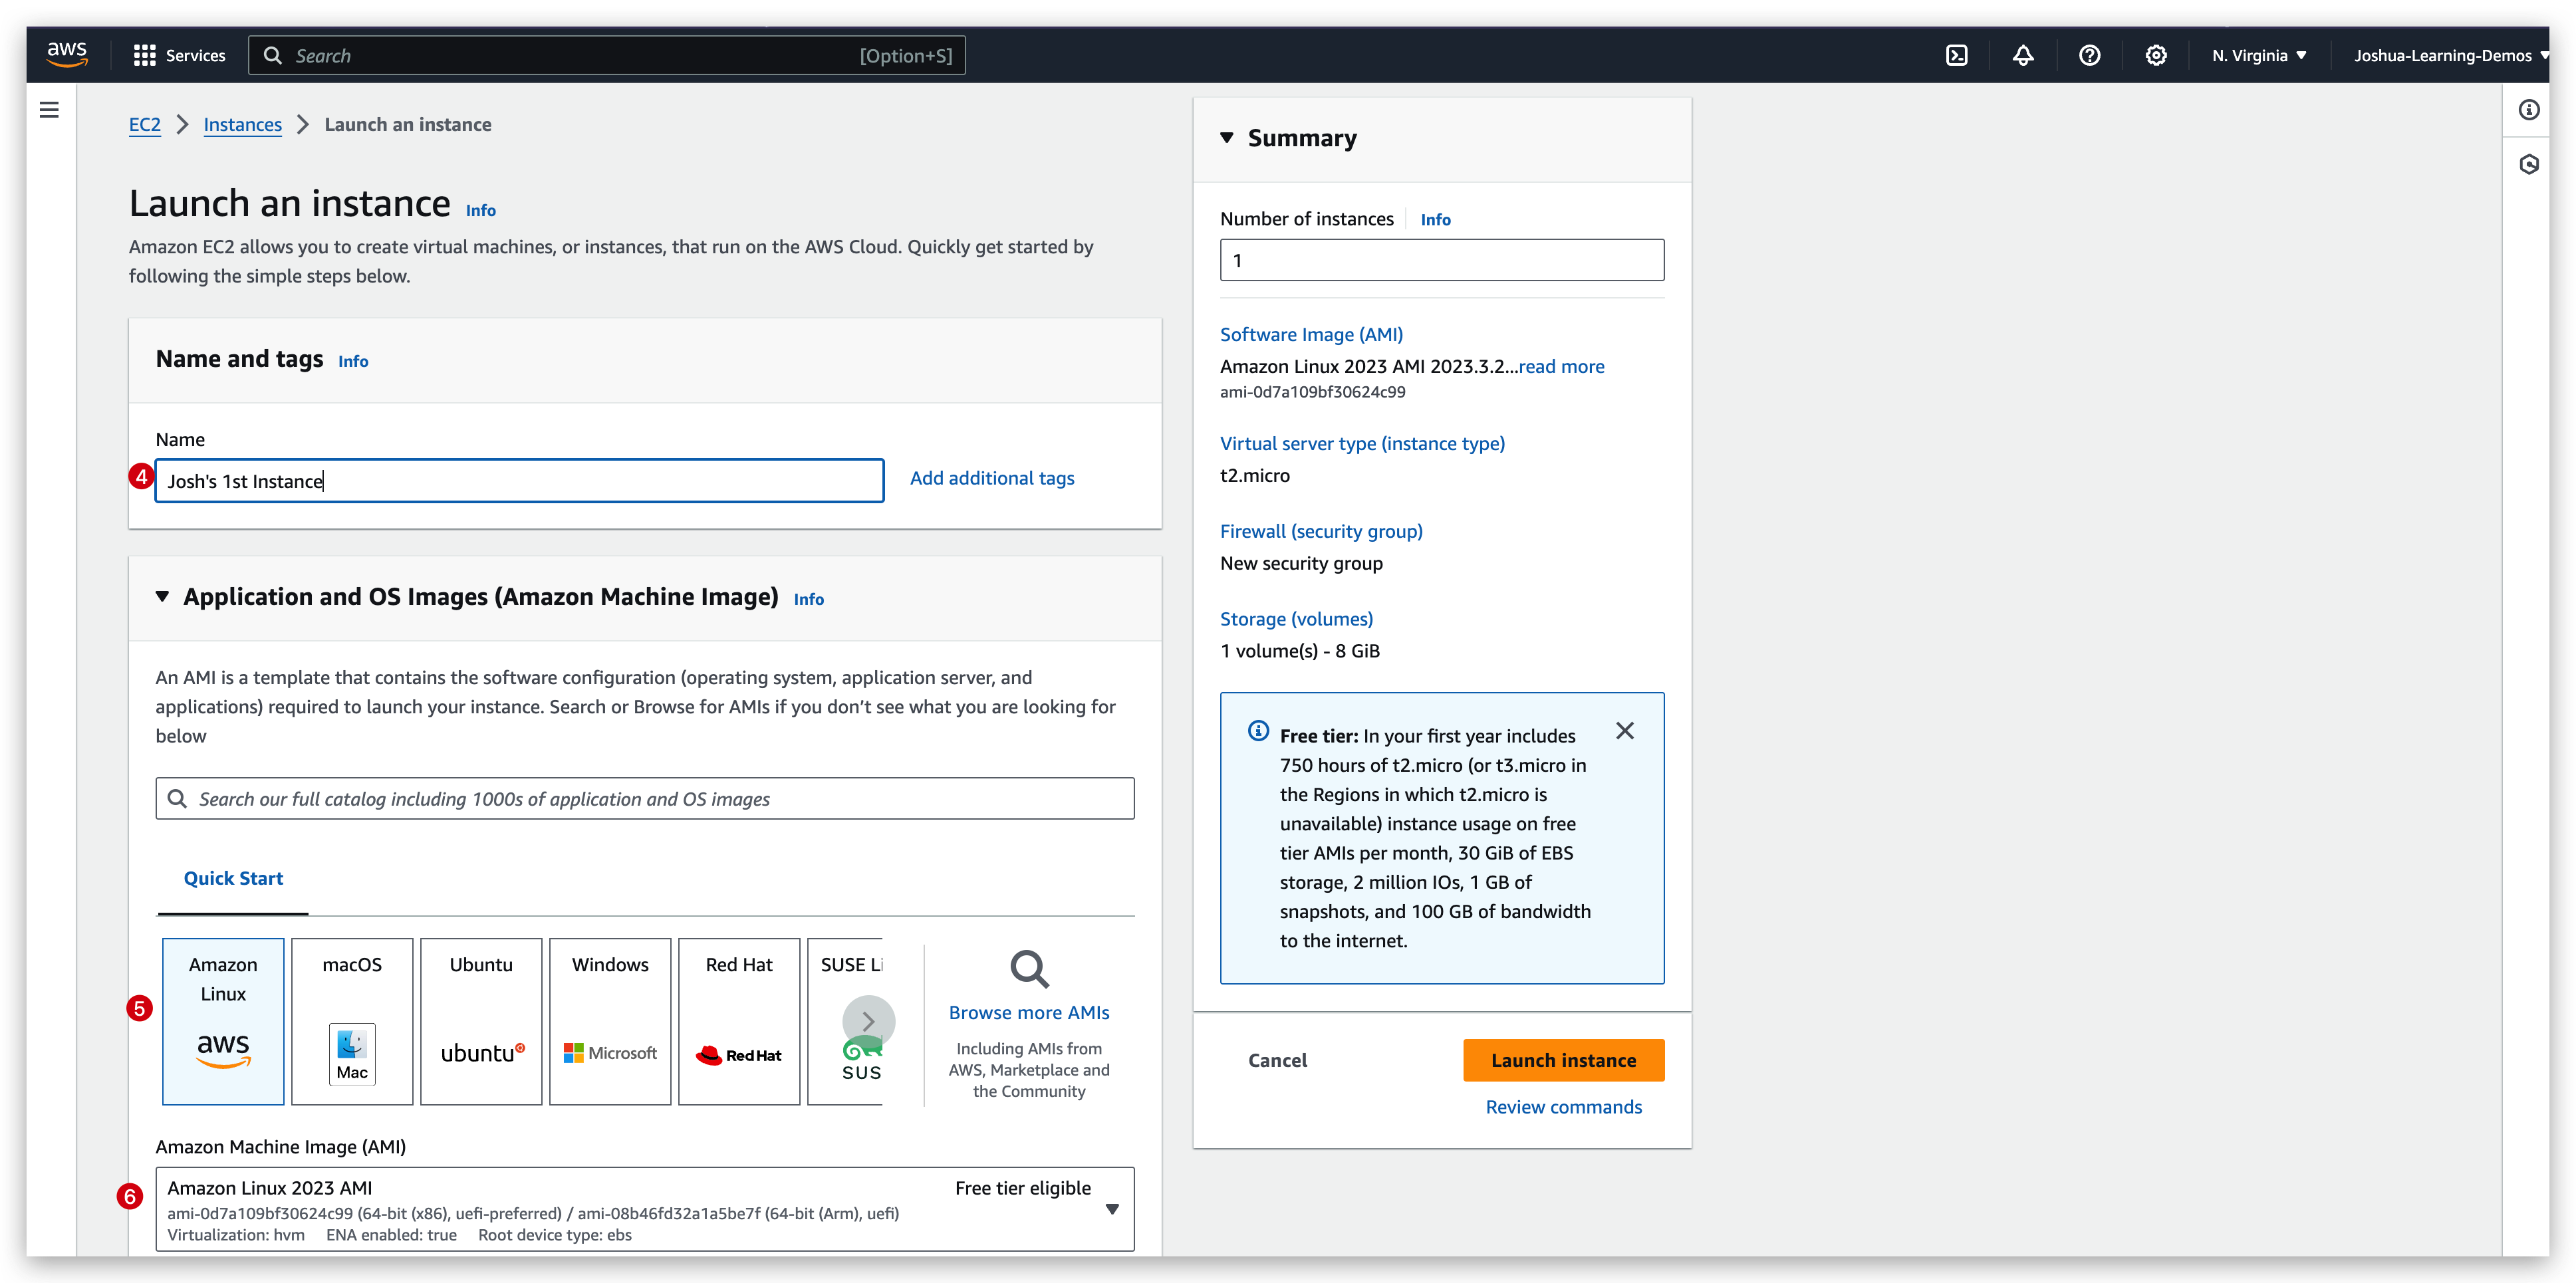

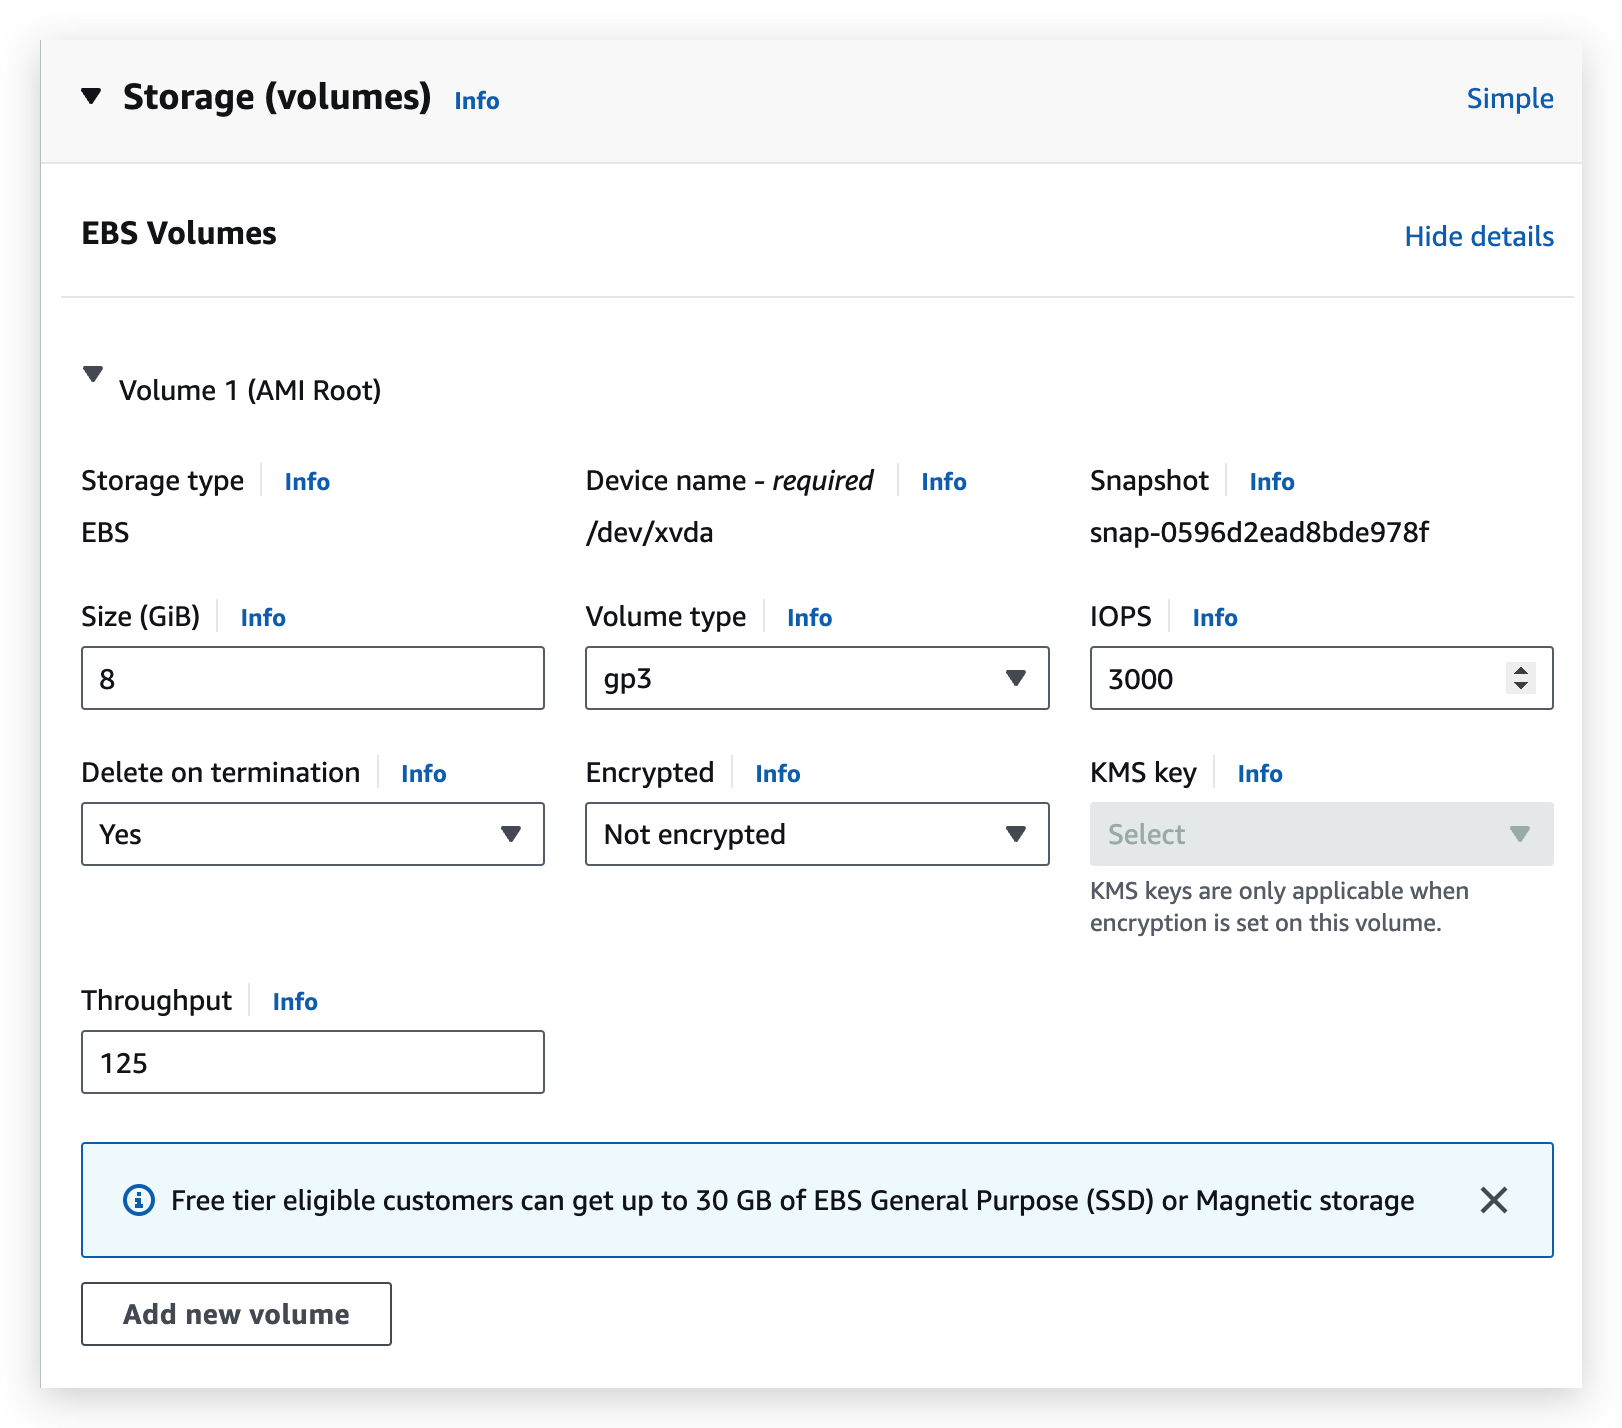
You can change the default settings such as the Delete on terminate option, but for now we will just keep it as it is.
From official link here, you can compare all the EC2 instance specifications.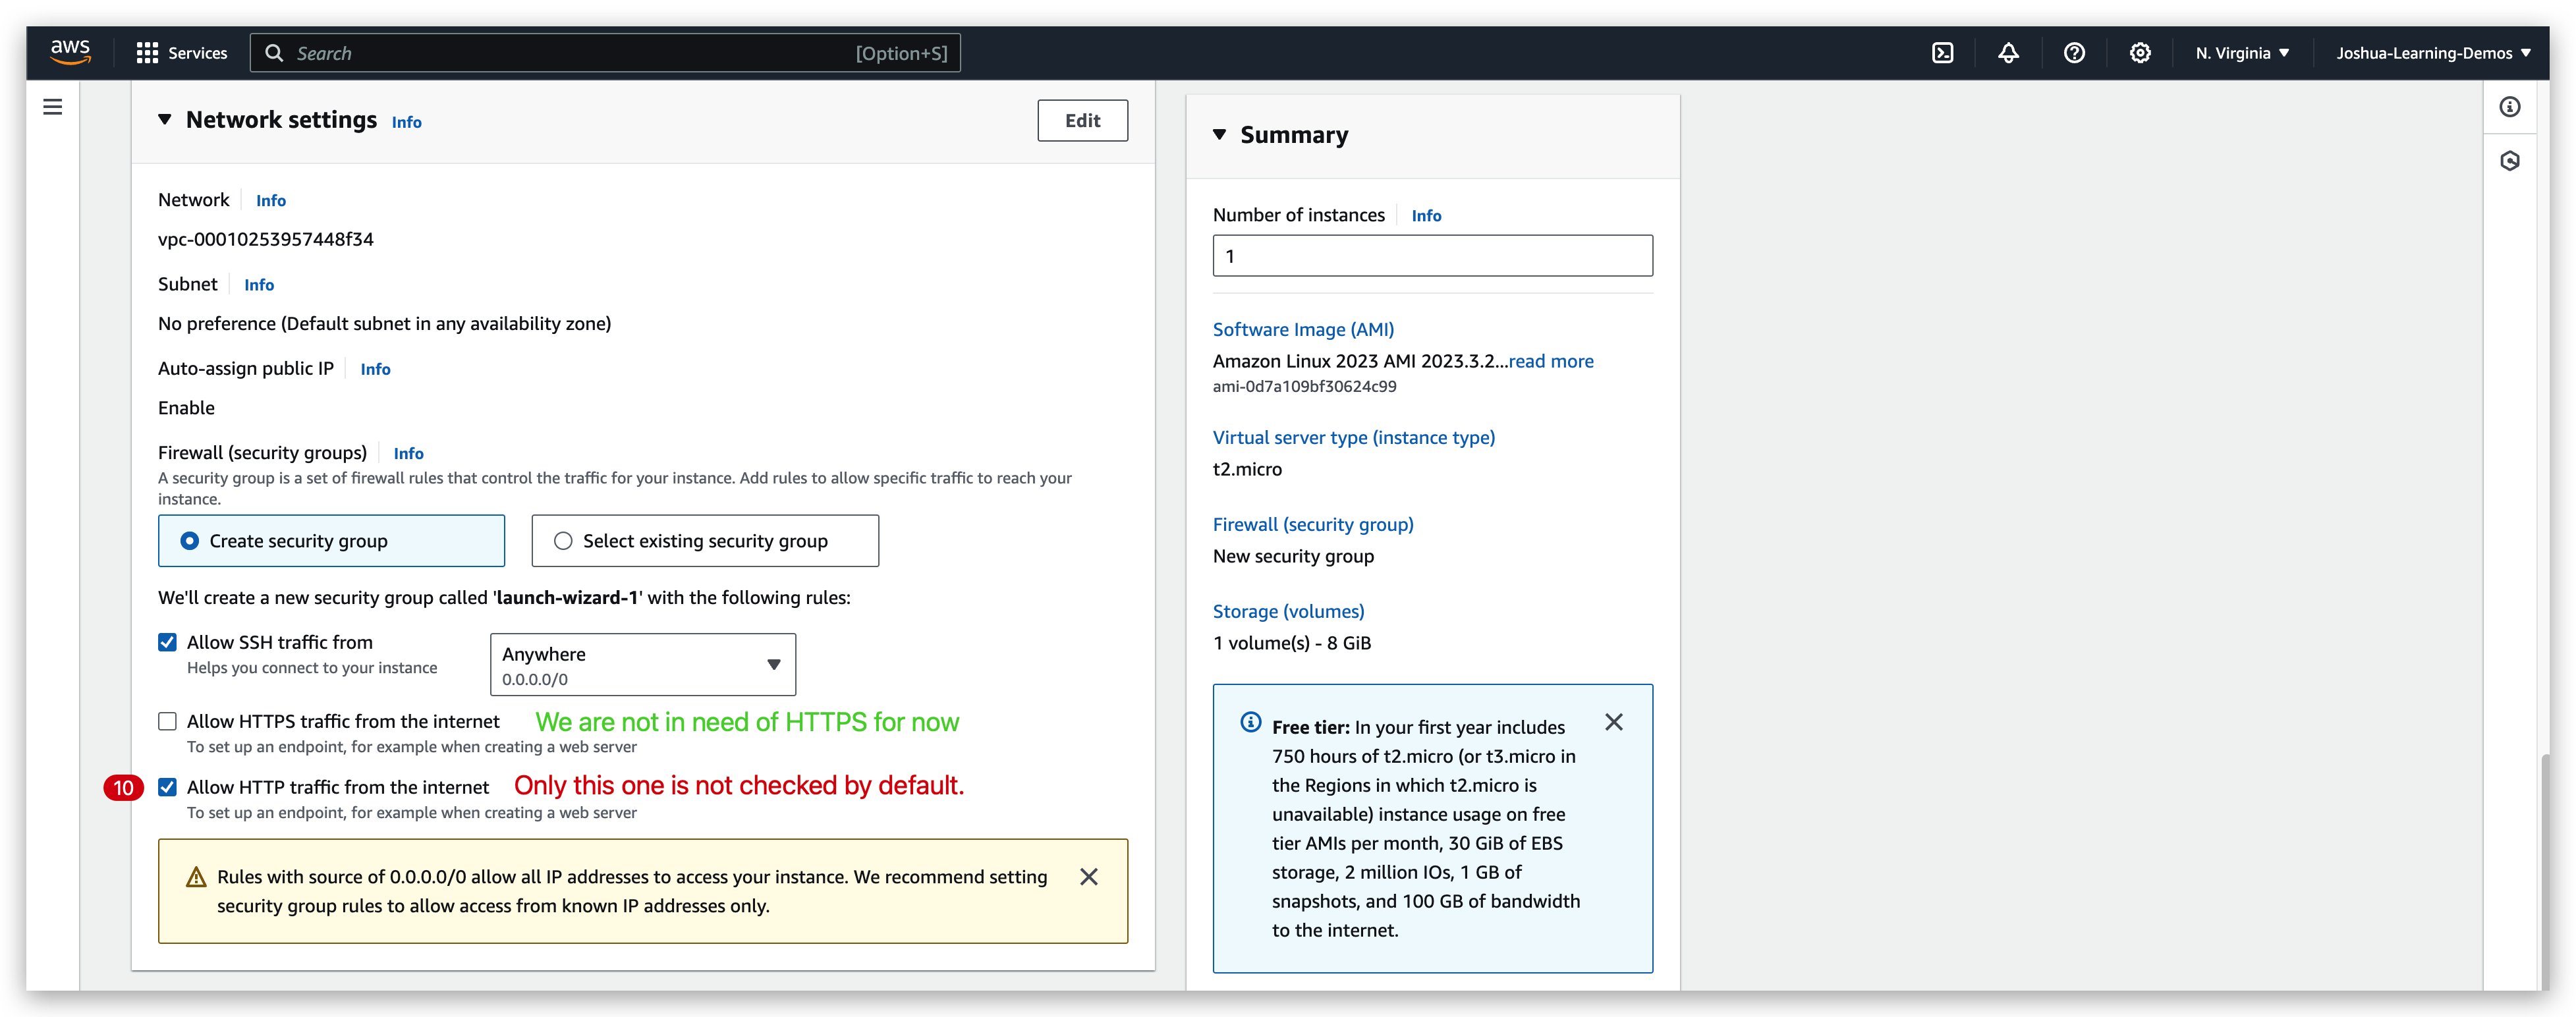
You can see above, the “Allow SSH traffic from” checkbox is checked because we are using SSH in this course to communicate with this instance.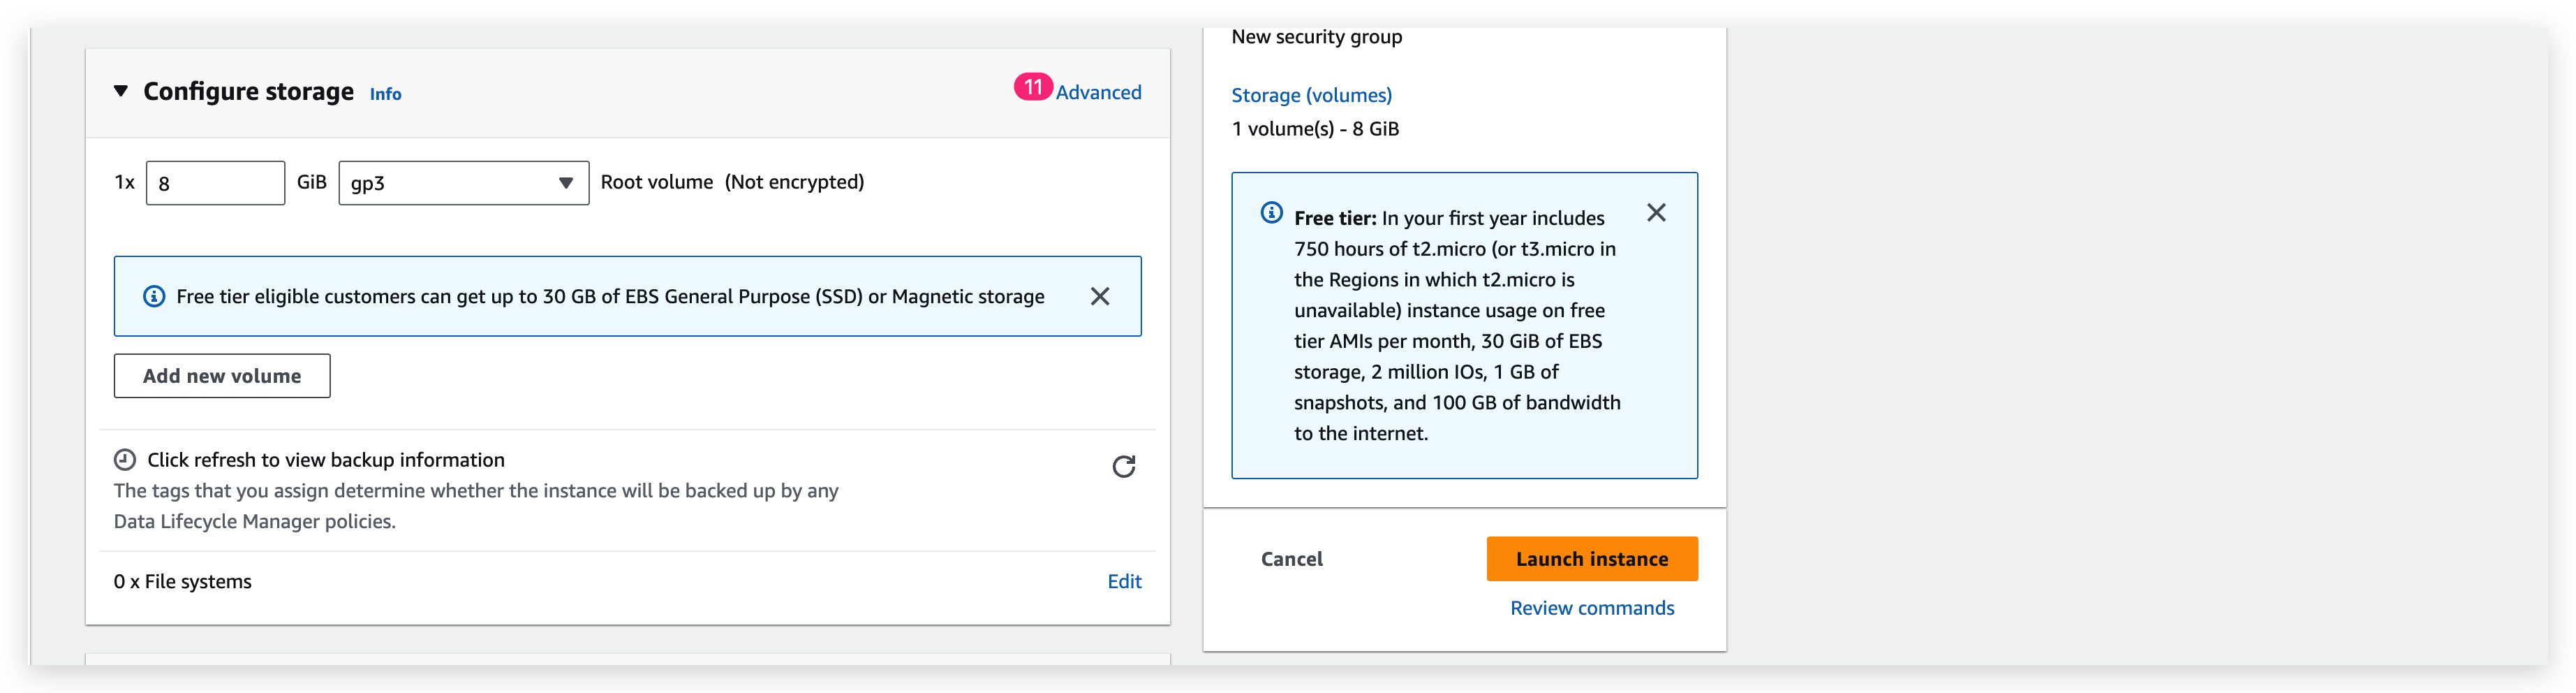

When all set, you can toggle the menus to see the summary as below: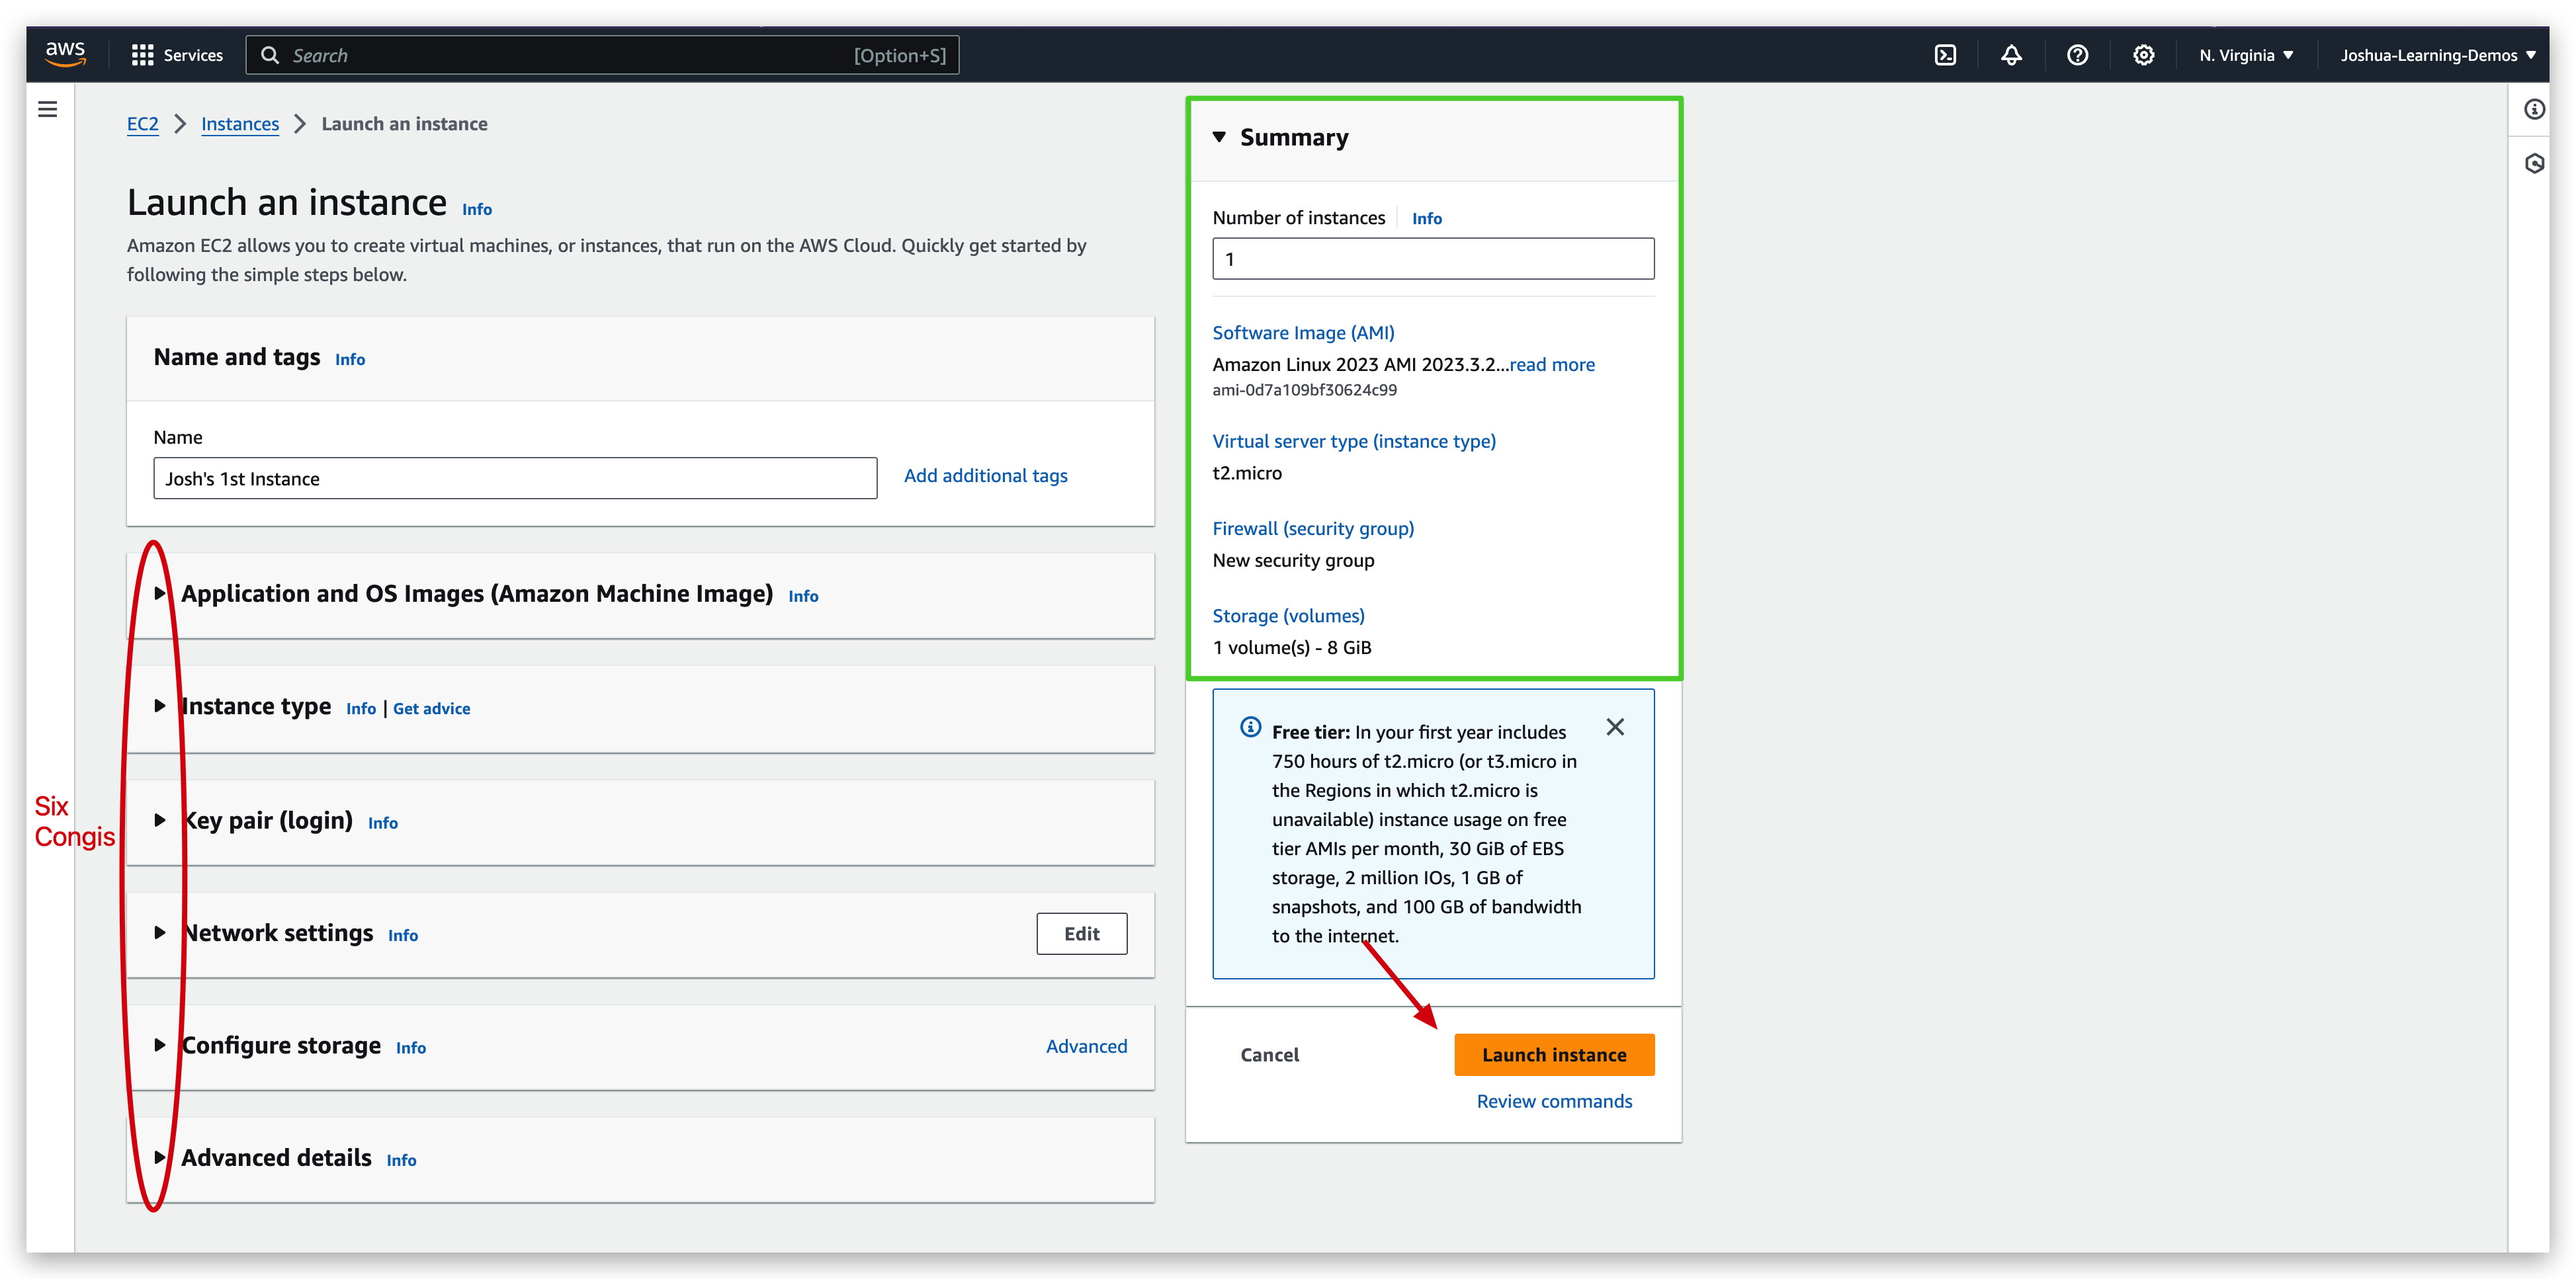
Hit the launch instance button, it will start the launching and one started it will prompt a green bar in the top of the page with launching logs shown below: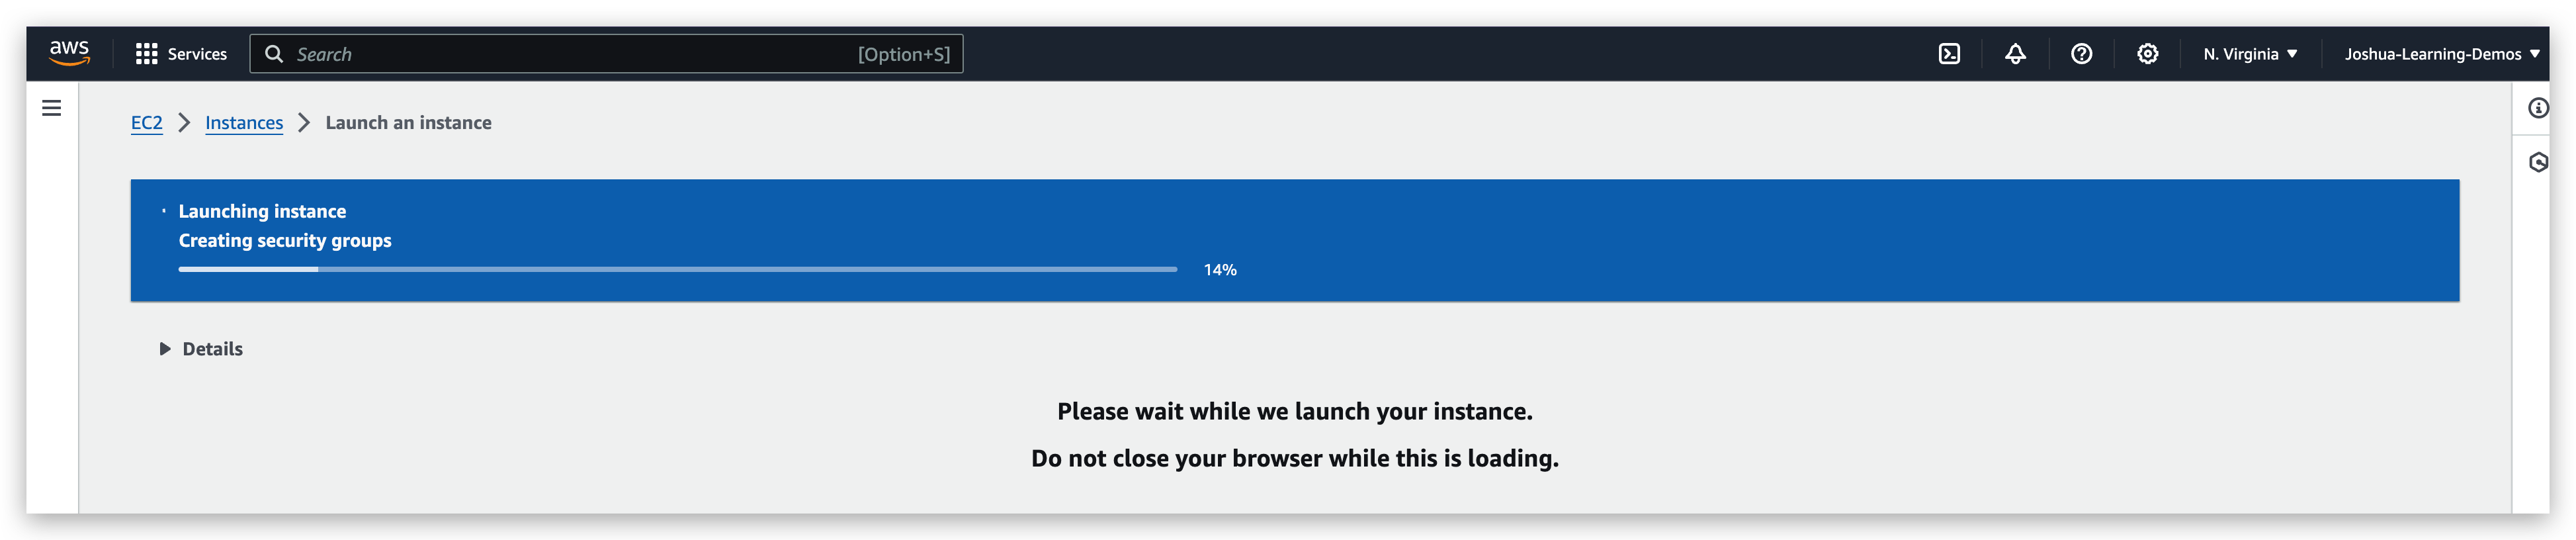
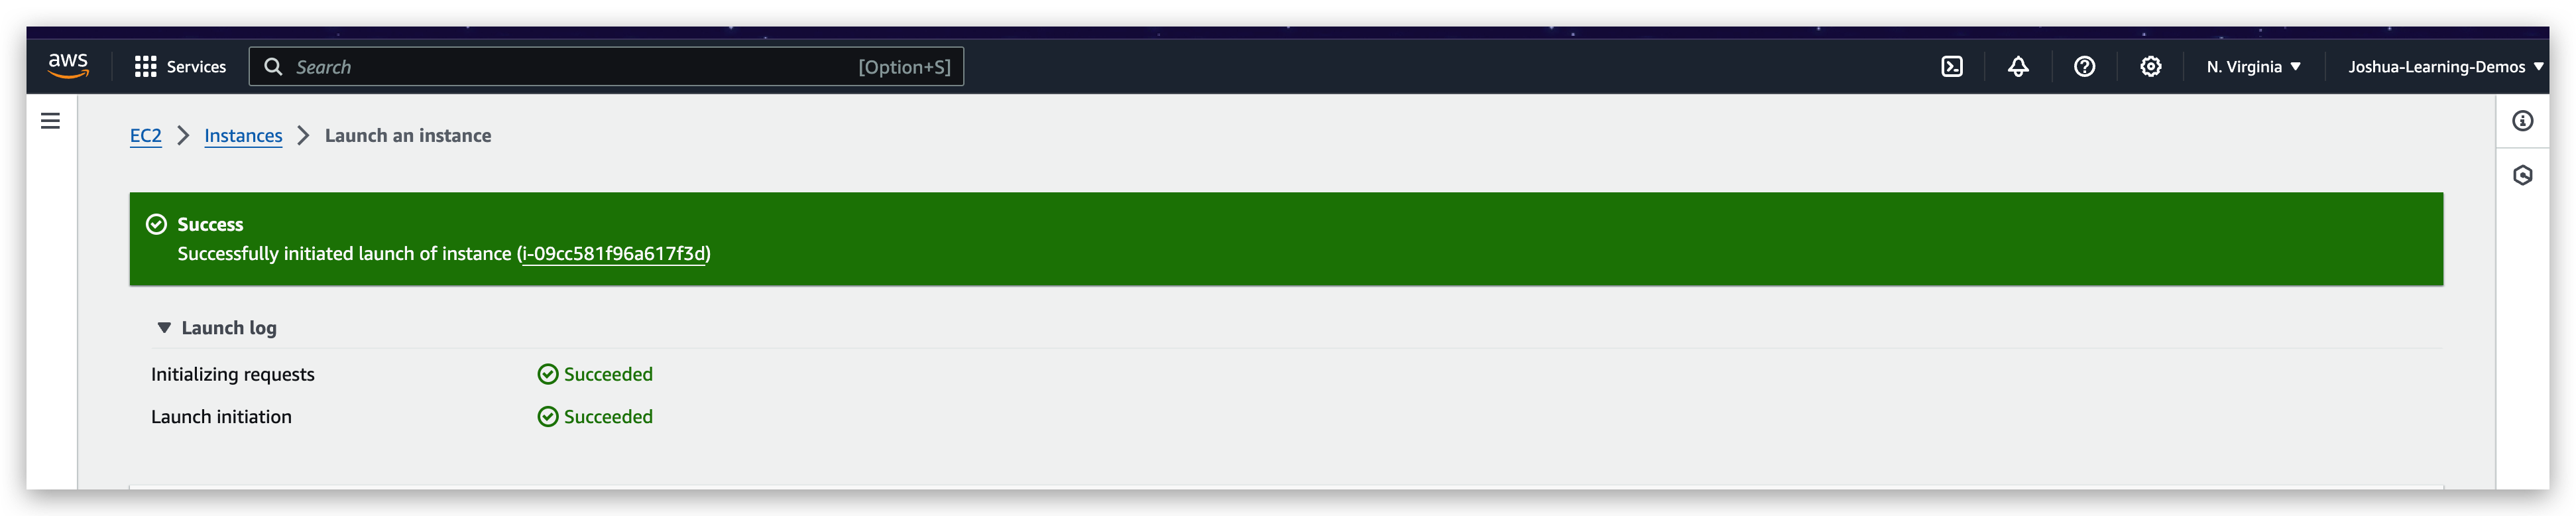
IF you go to the instance dashboard, you will find the instance just launched there, running.
Thanks to the cloud, I am able to create an instance or 100 of them very quickly in less than 10 seconds without me owning any single server.
So that is extremely powerful, and we just scratched the surface of the power of the cloud, obviously because the course is just getting started, but you can get a feeling of the advances and the speed we can have on the cloud thanks to this.
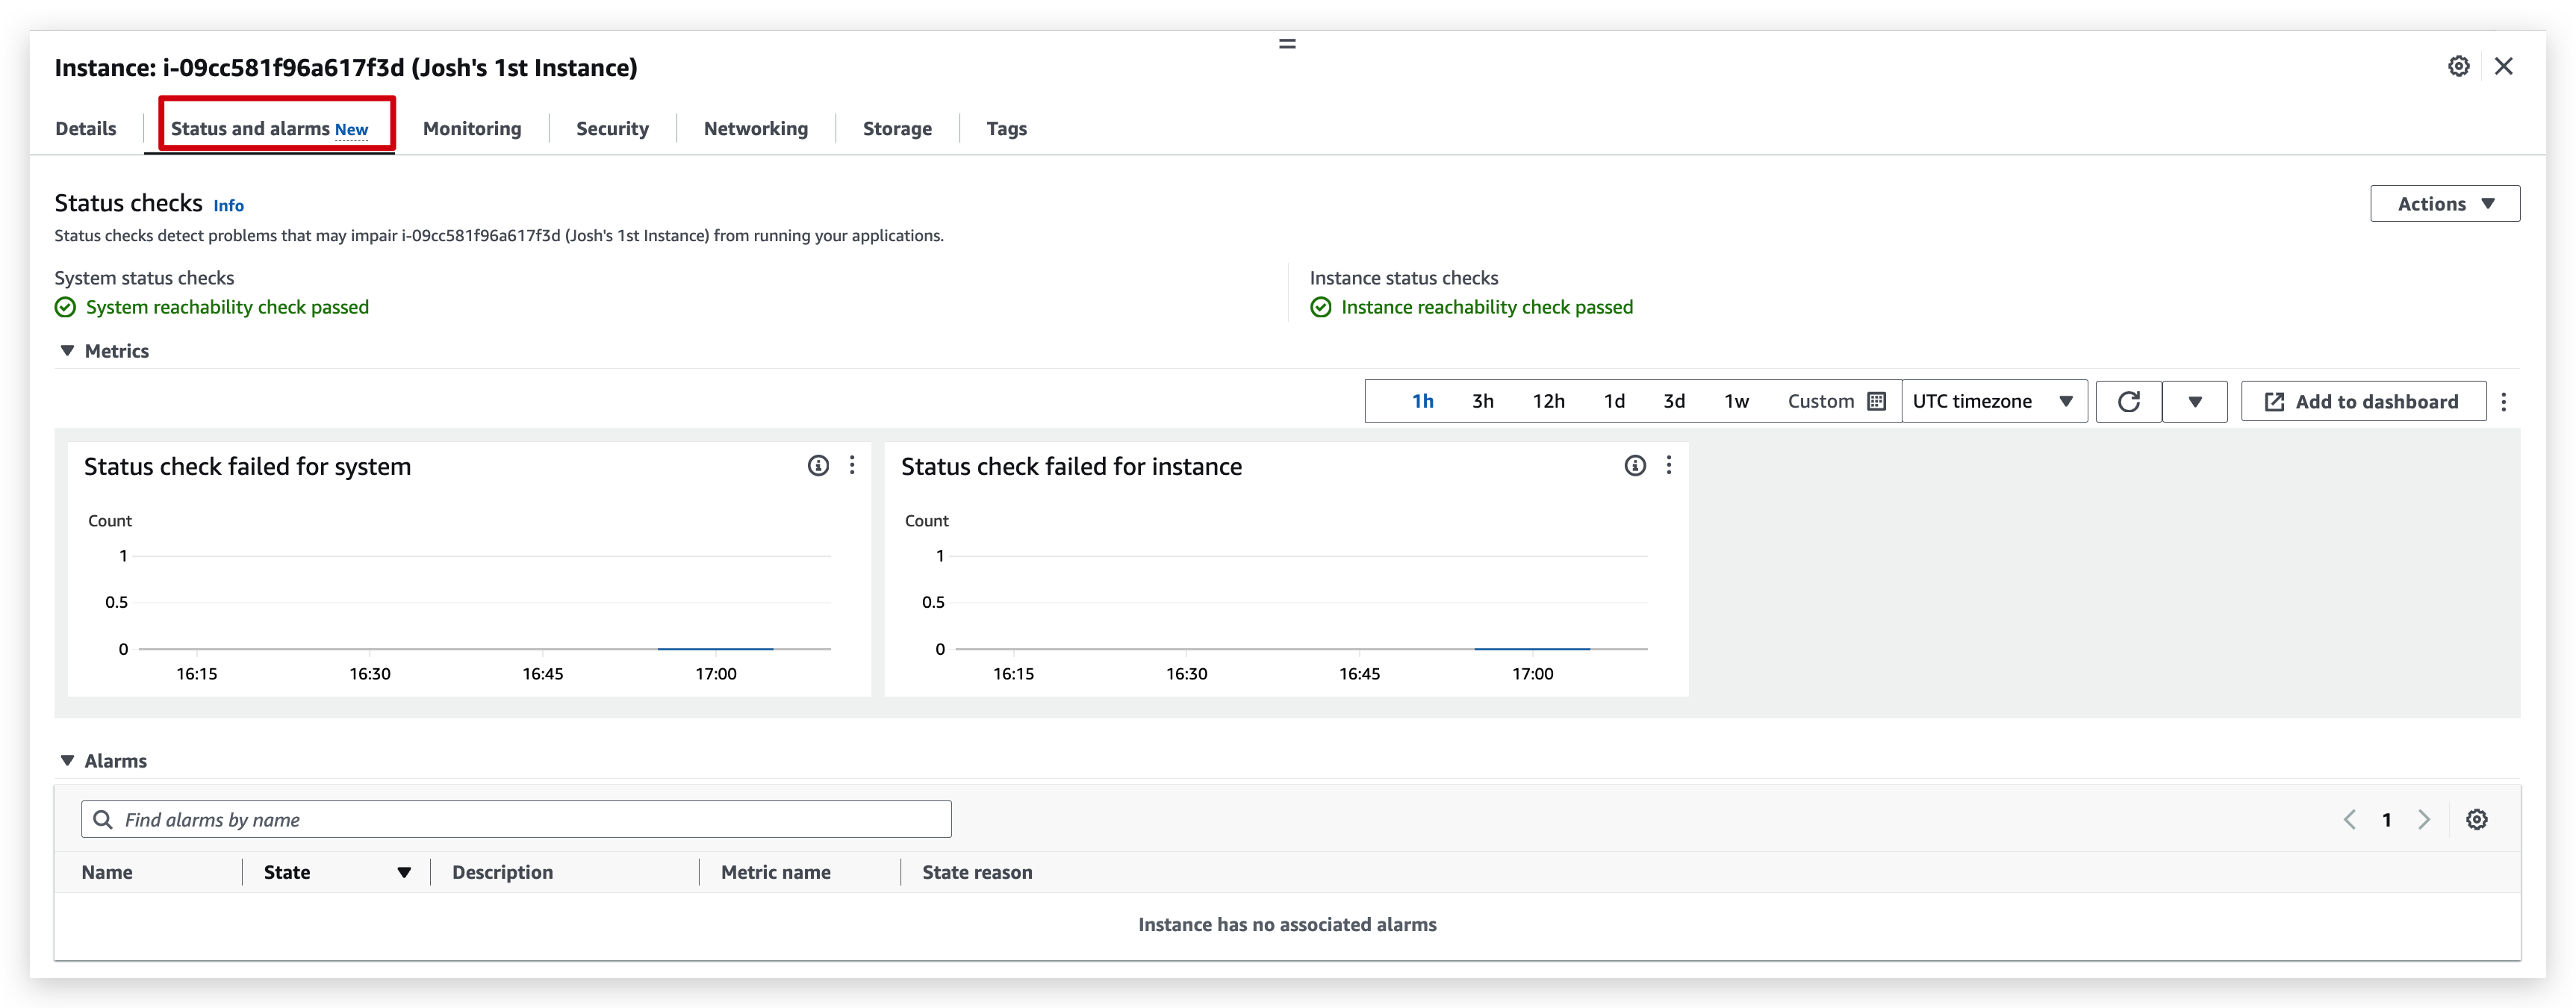
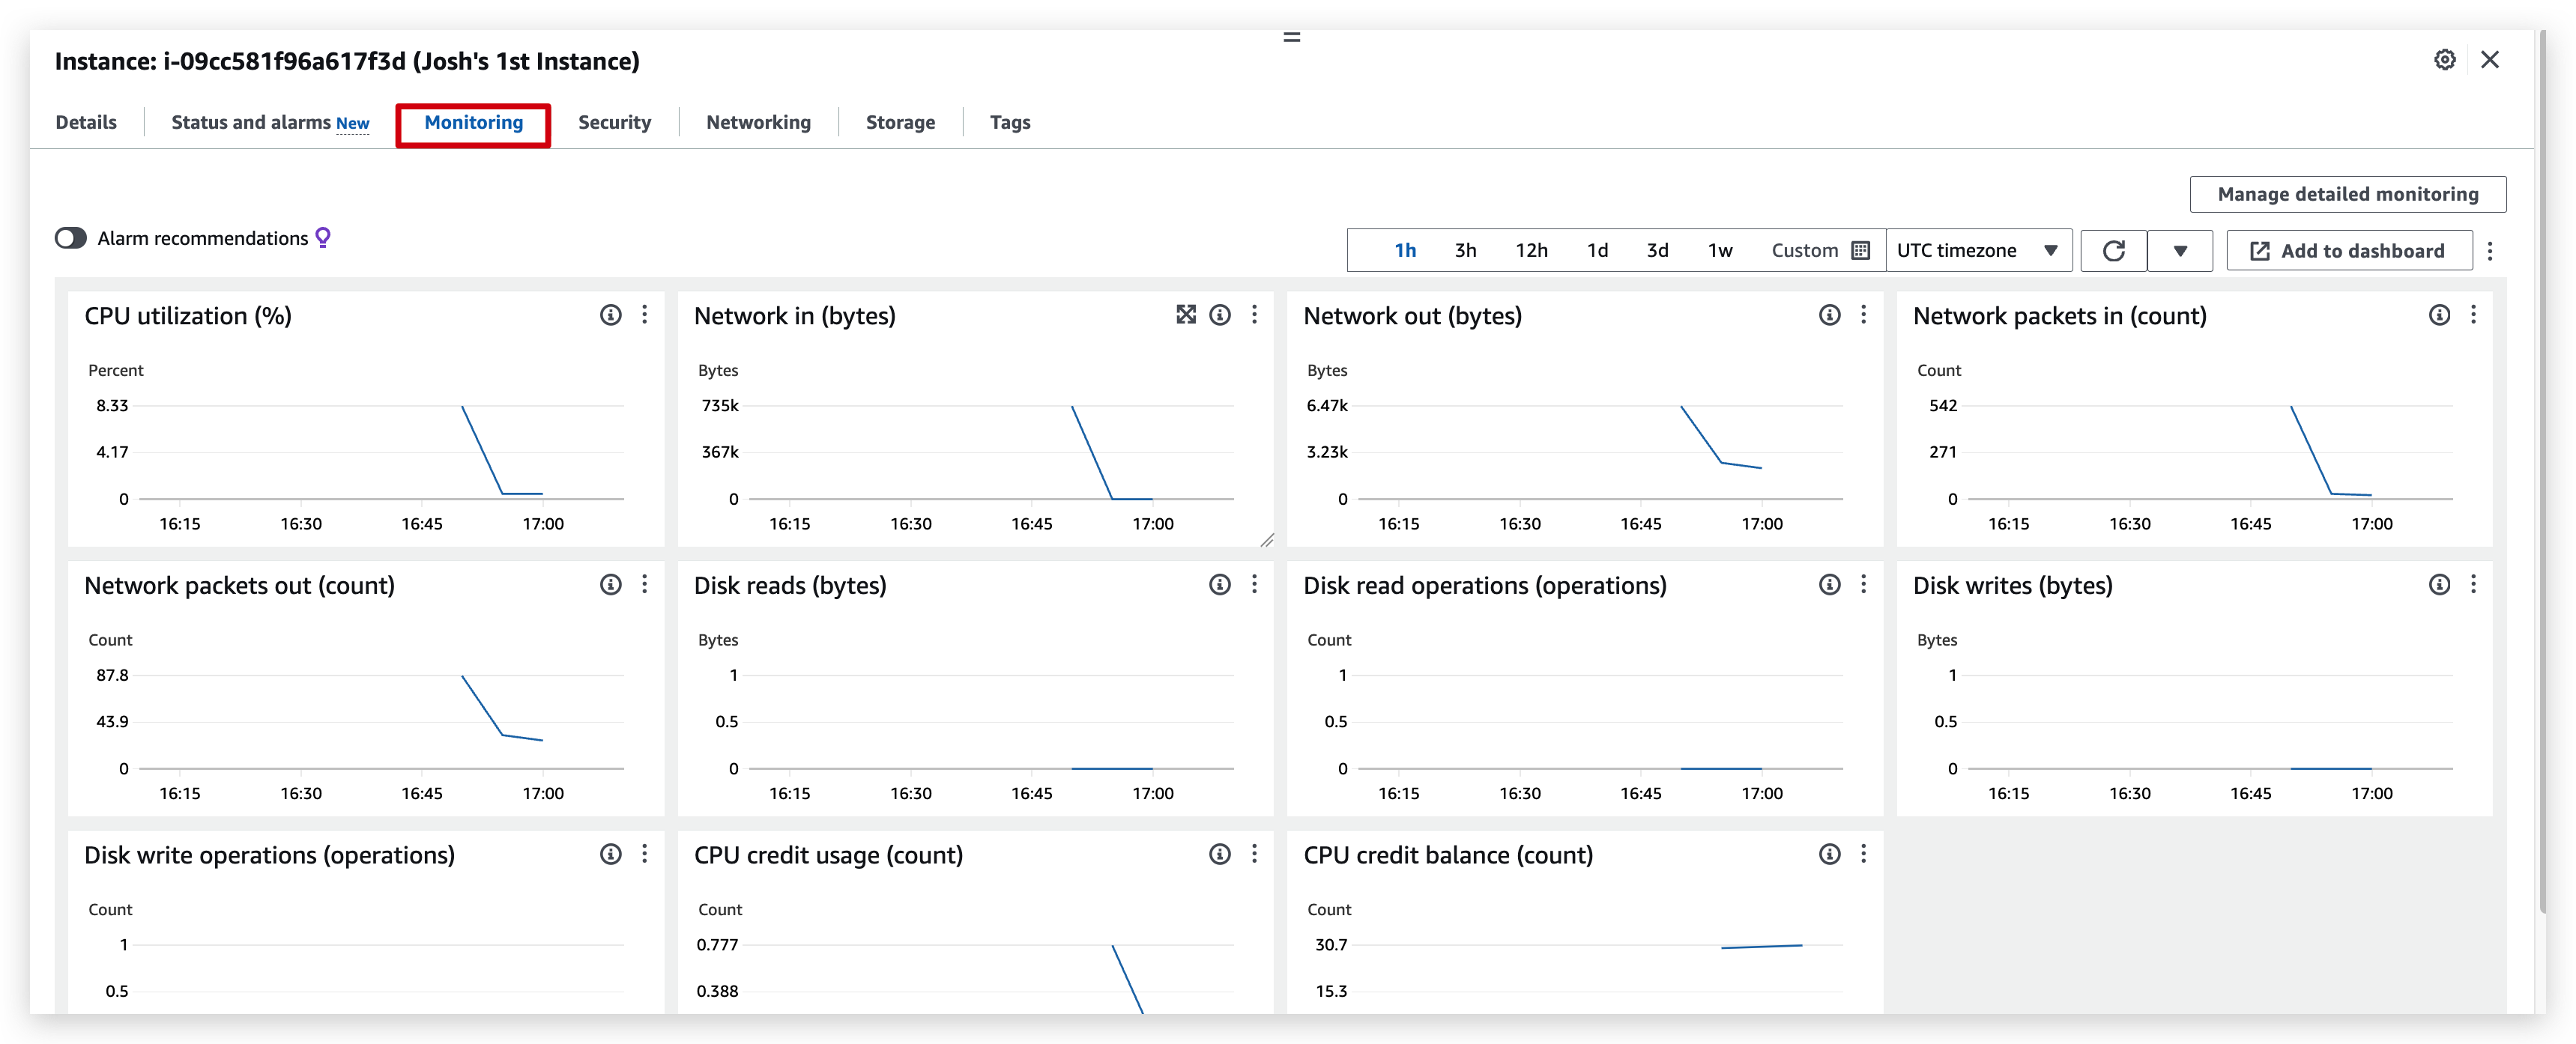
You can check the details of the instance like below: (need to check the checkbox of the instance and switch between the tabs for different information you require to inspect)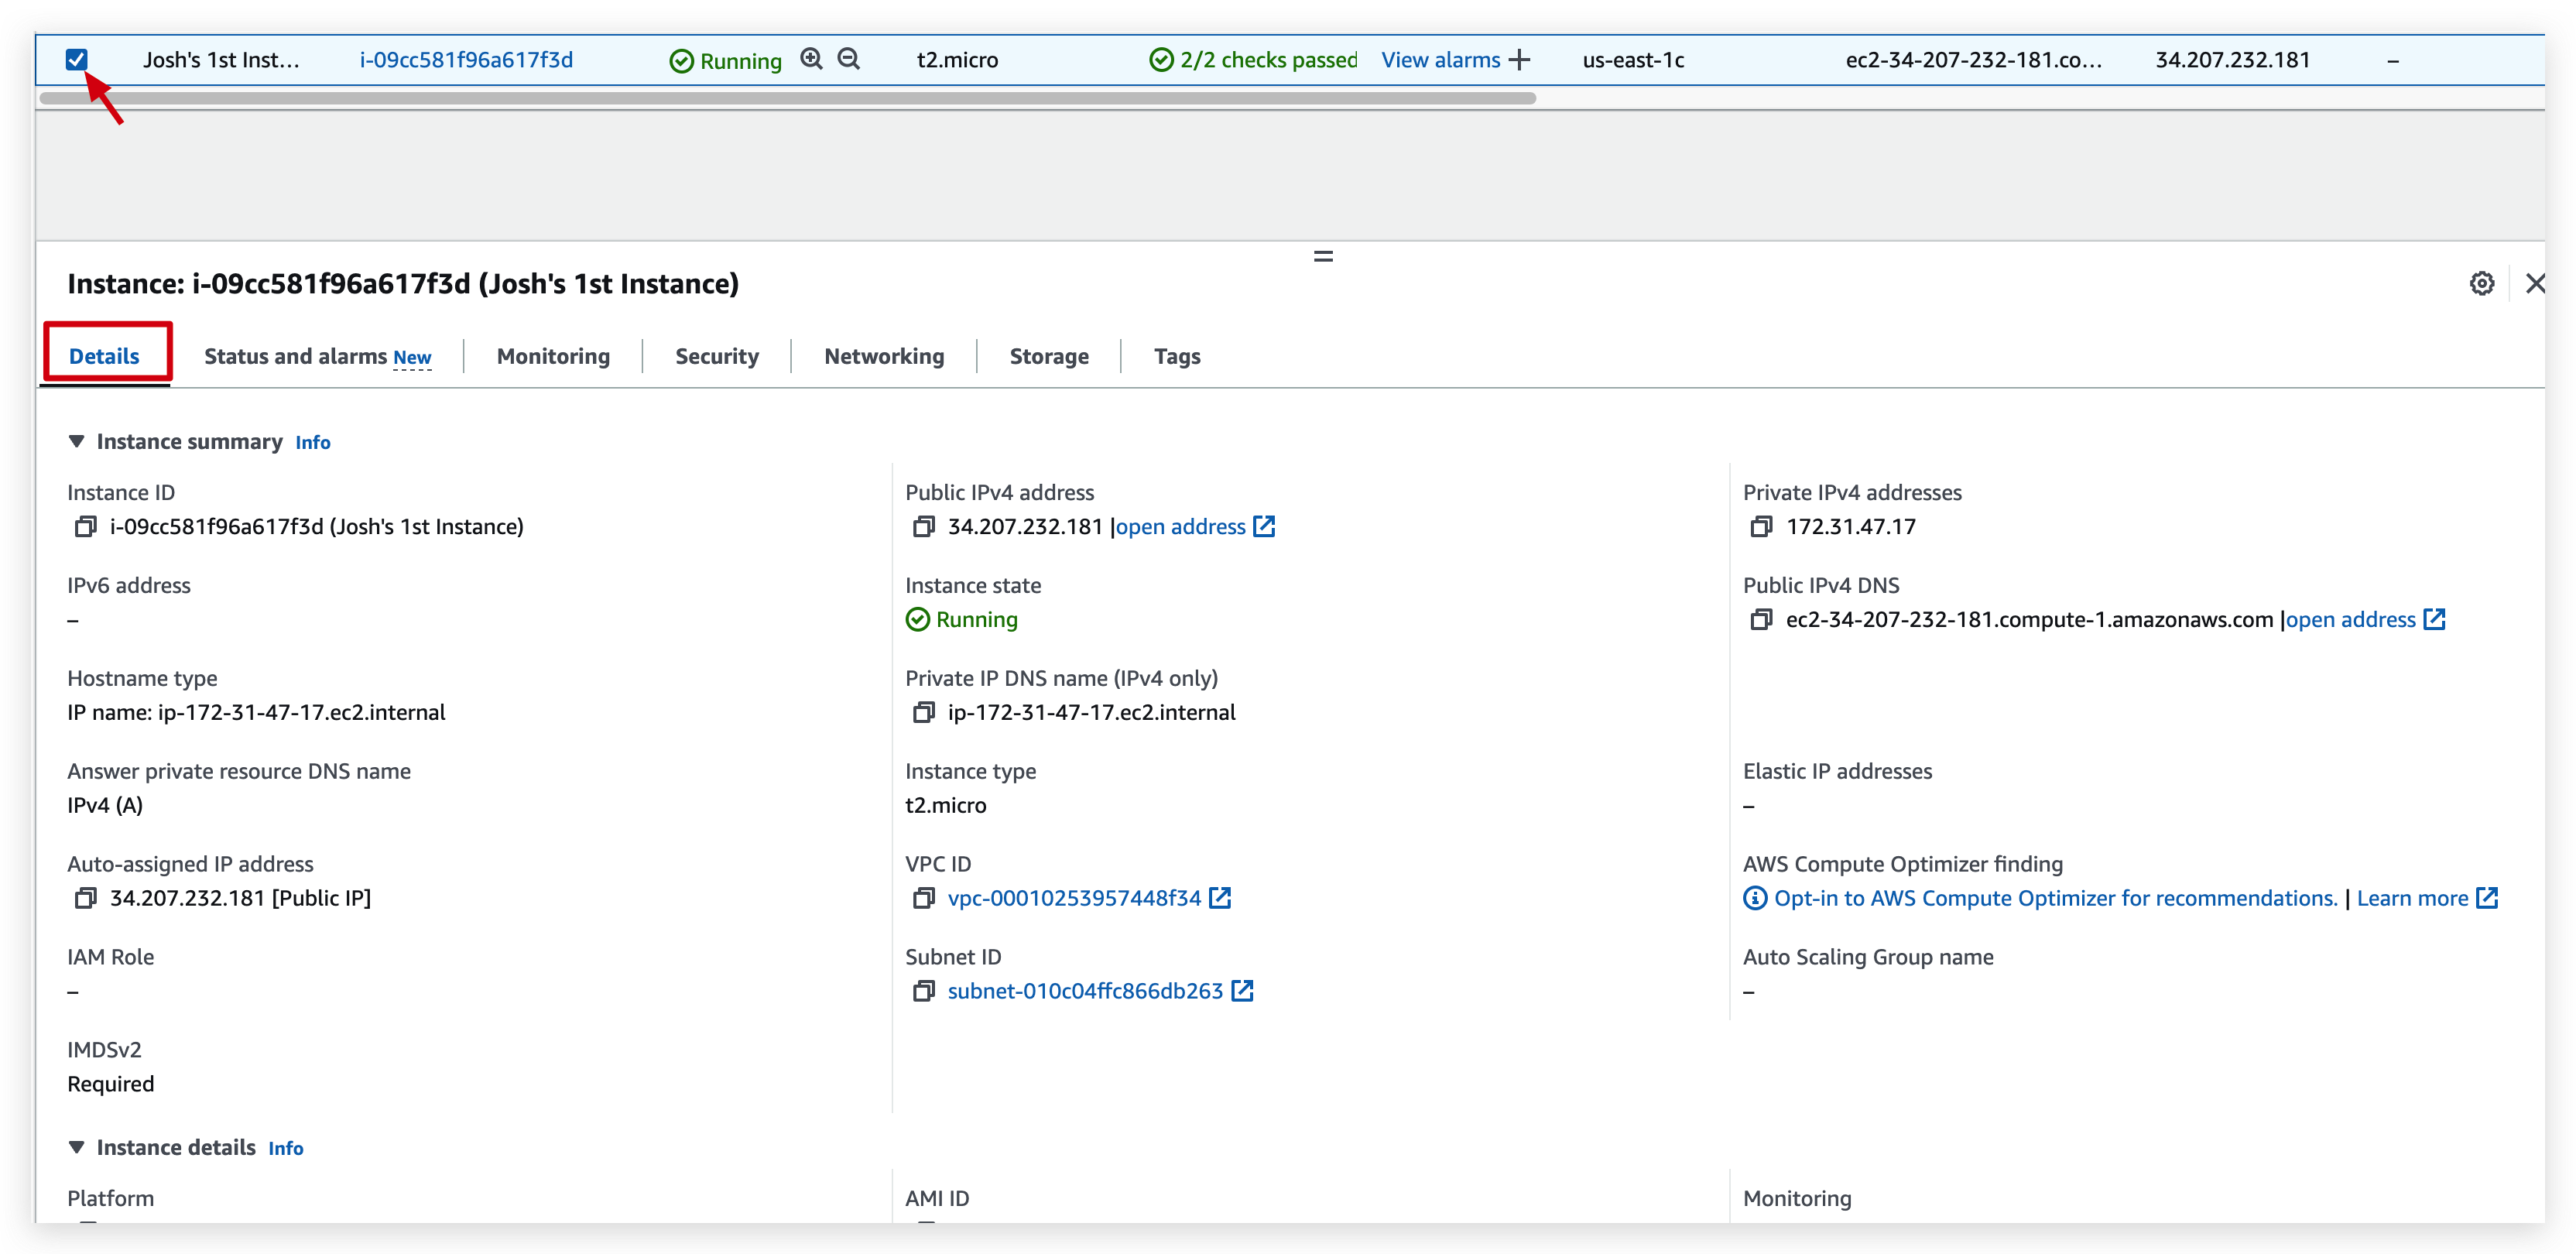
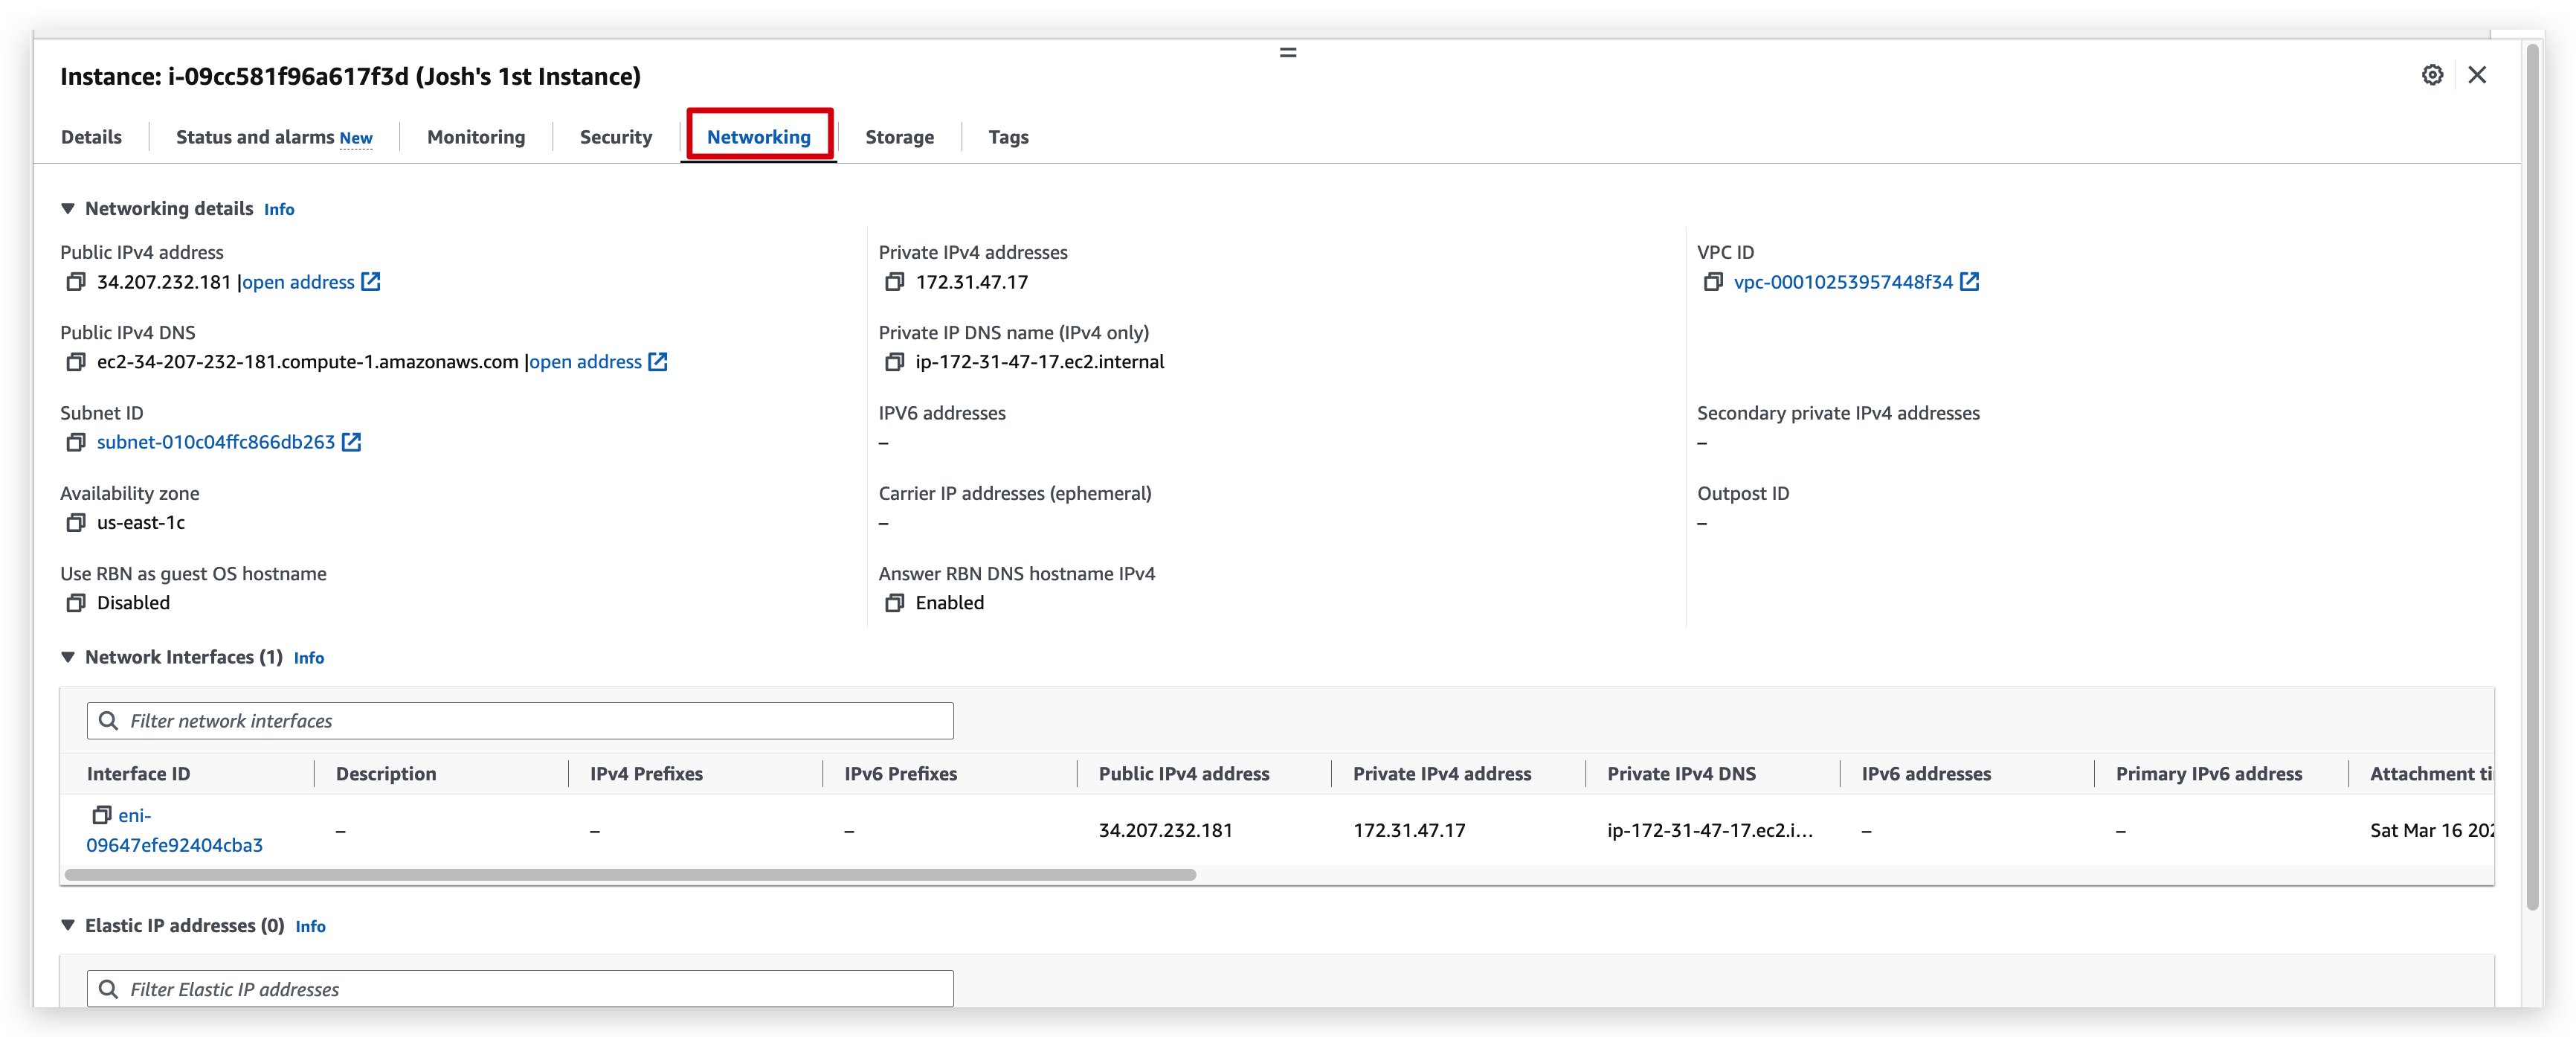


From the details tab of the instance, you can open the hyperlink of the public IP,
and you will see this: (if it’s not showing, you need to change the protocol to http from https because while configuring the instance we checked only allow HTTP traffic from internet)
If you stop an instance, and then you start it later on, then AWS probably changes its public IPv4. But private IPv4 will stay same
Instance Types
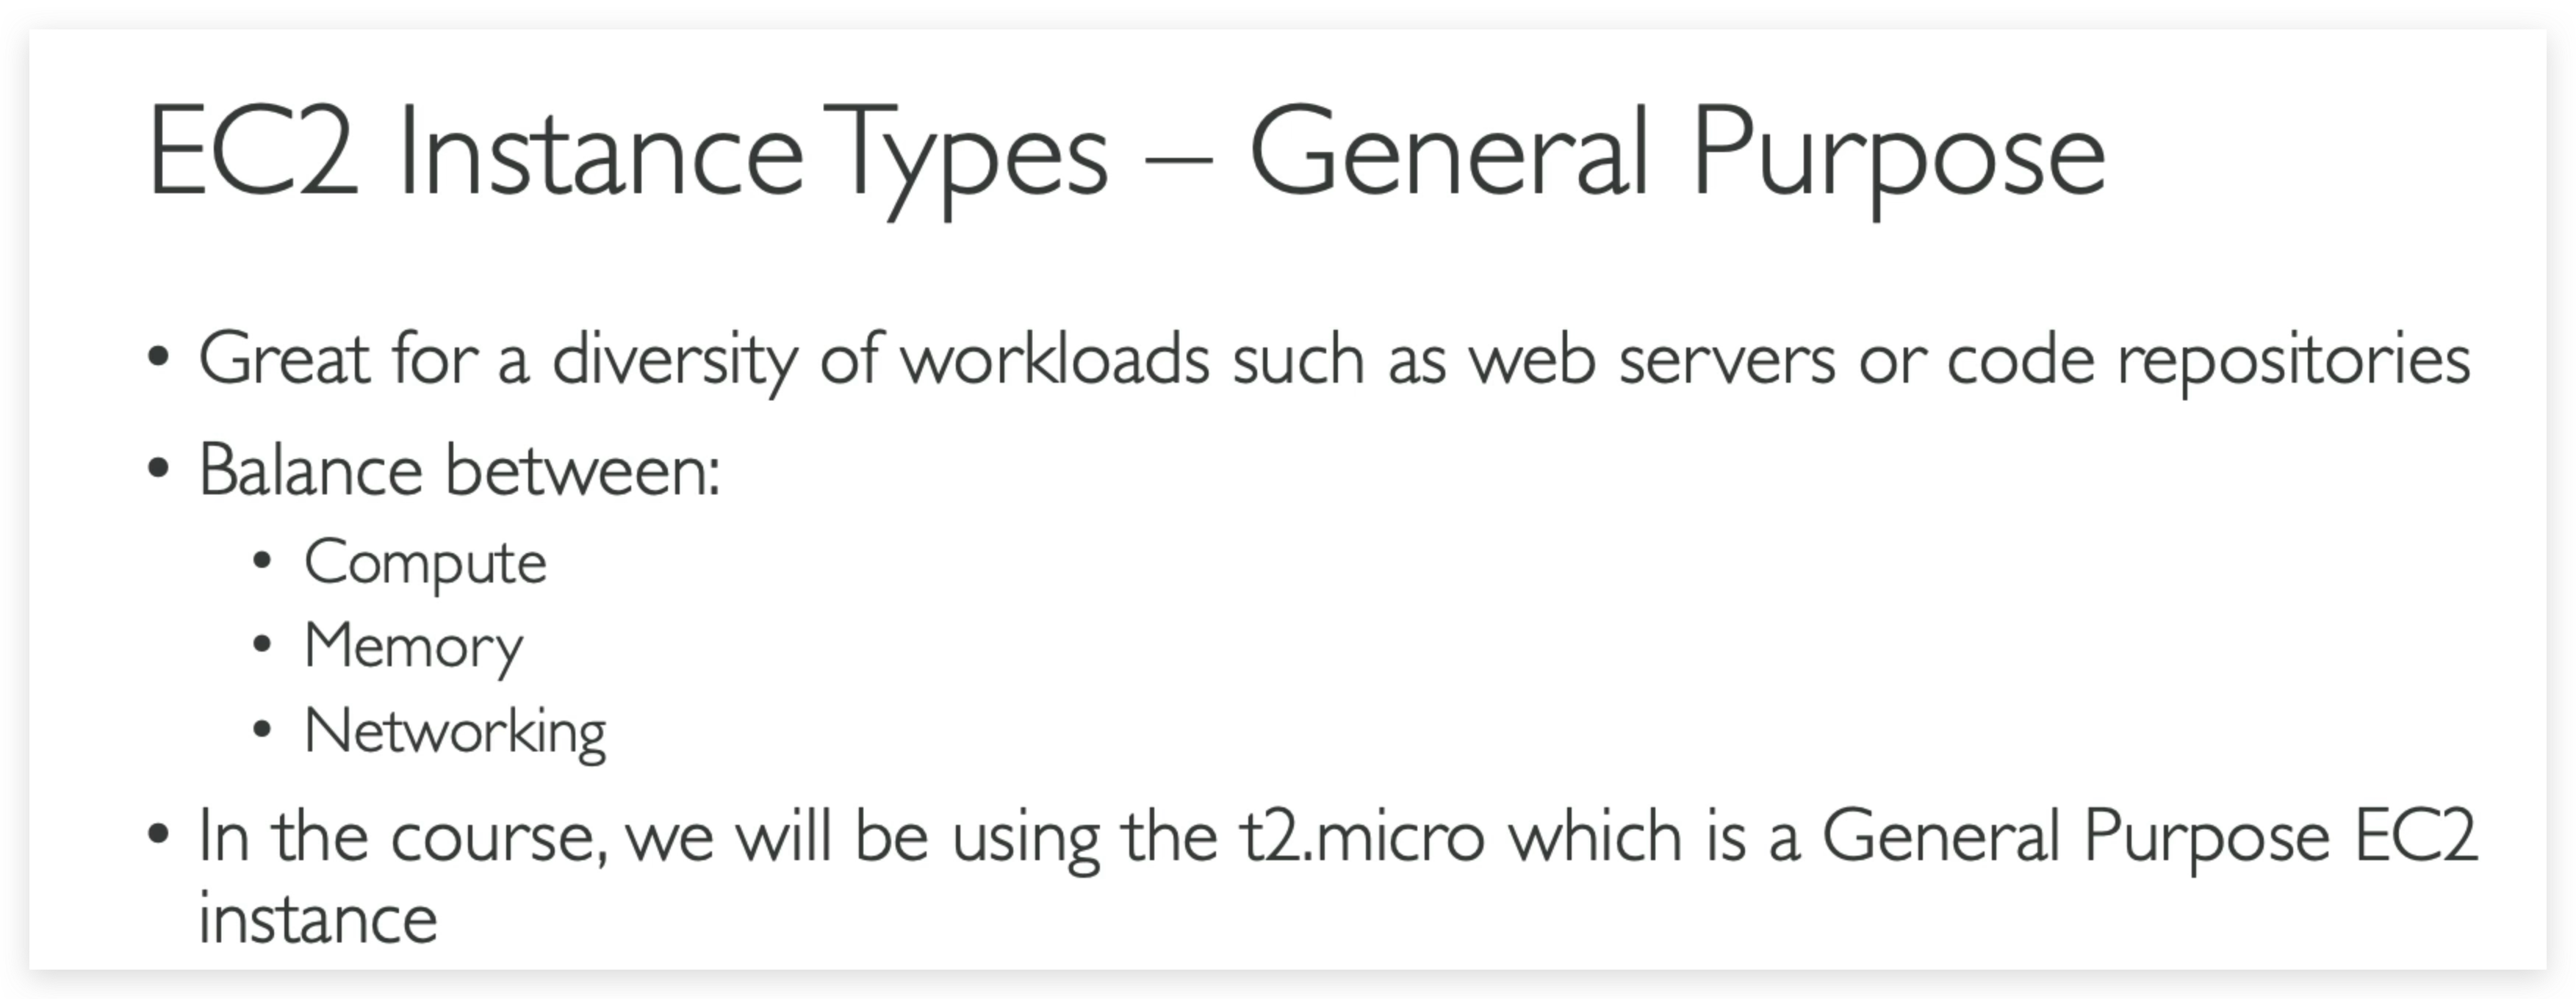
General Type
this list will evolve over time, please check the AWS website for the latest information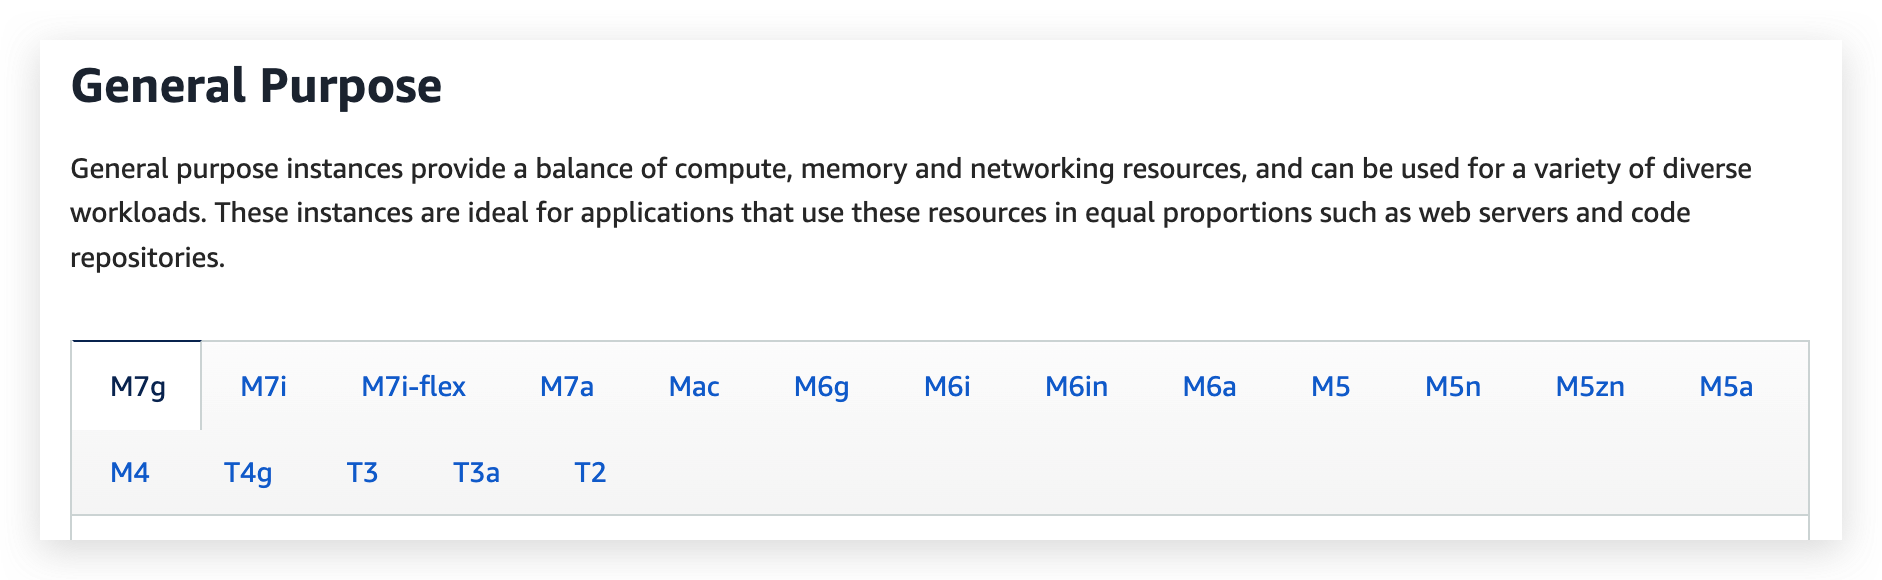
Compute Optimized
Compute Optimized instances are ideal for compute bound applications that benefit from high performance processors. Instances belonging to this category are well suited for batch processing workloads, media transcoding, high performance web servers, high performance computing (HPC), scientific modeling, dedicated gaming servers and ad server engines, machine learning inference and other compute intensive applications.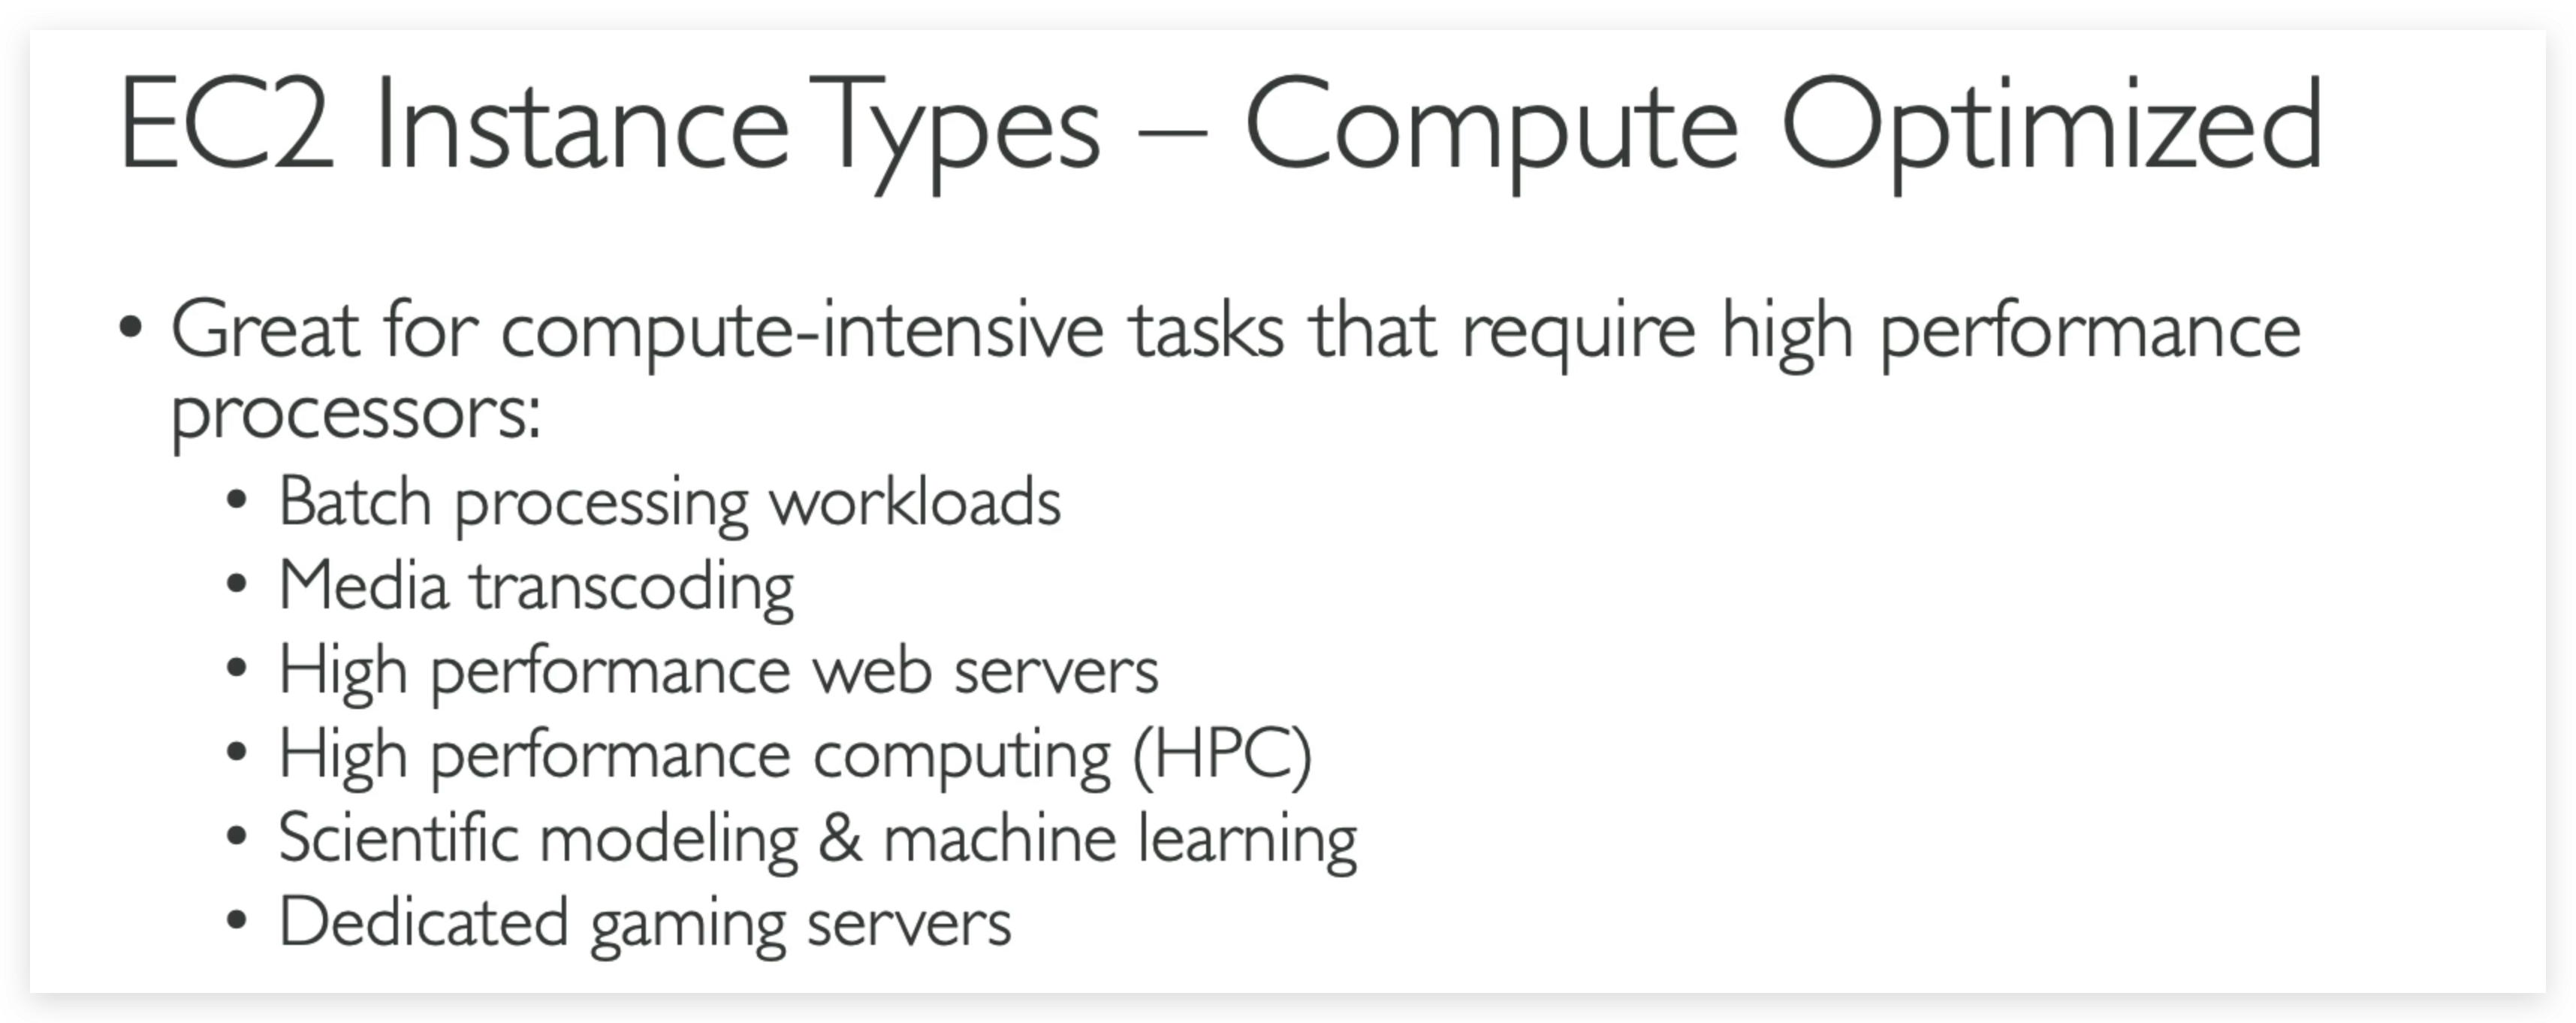
Memory Optimized
Memory optimized instances are designed to deliver fast performance for workloads that process large data sets in memory.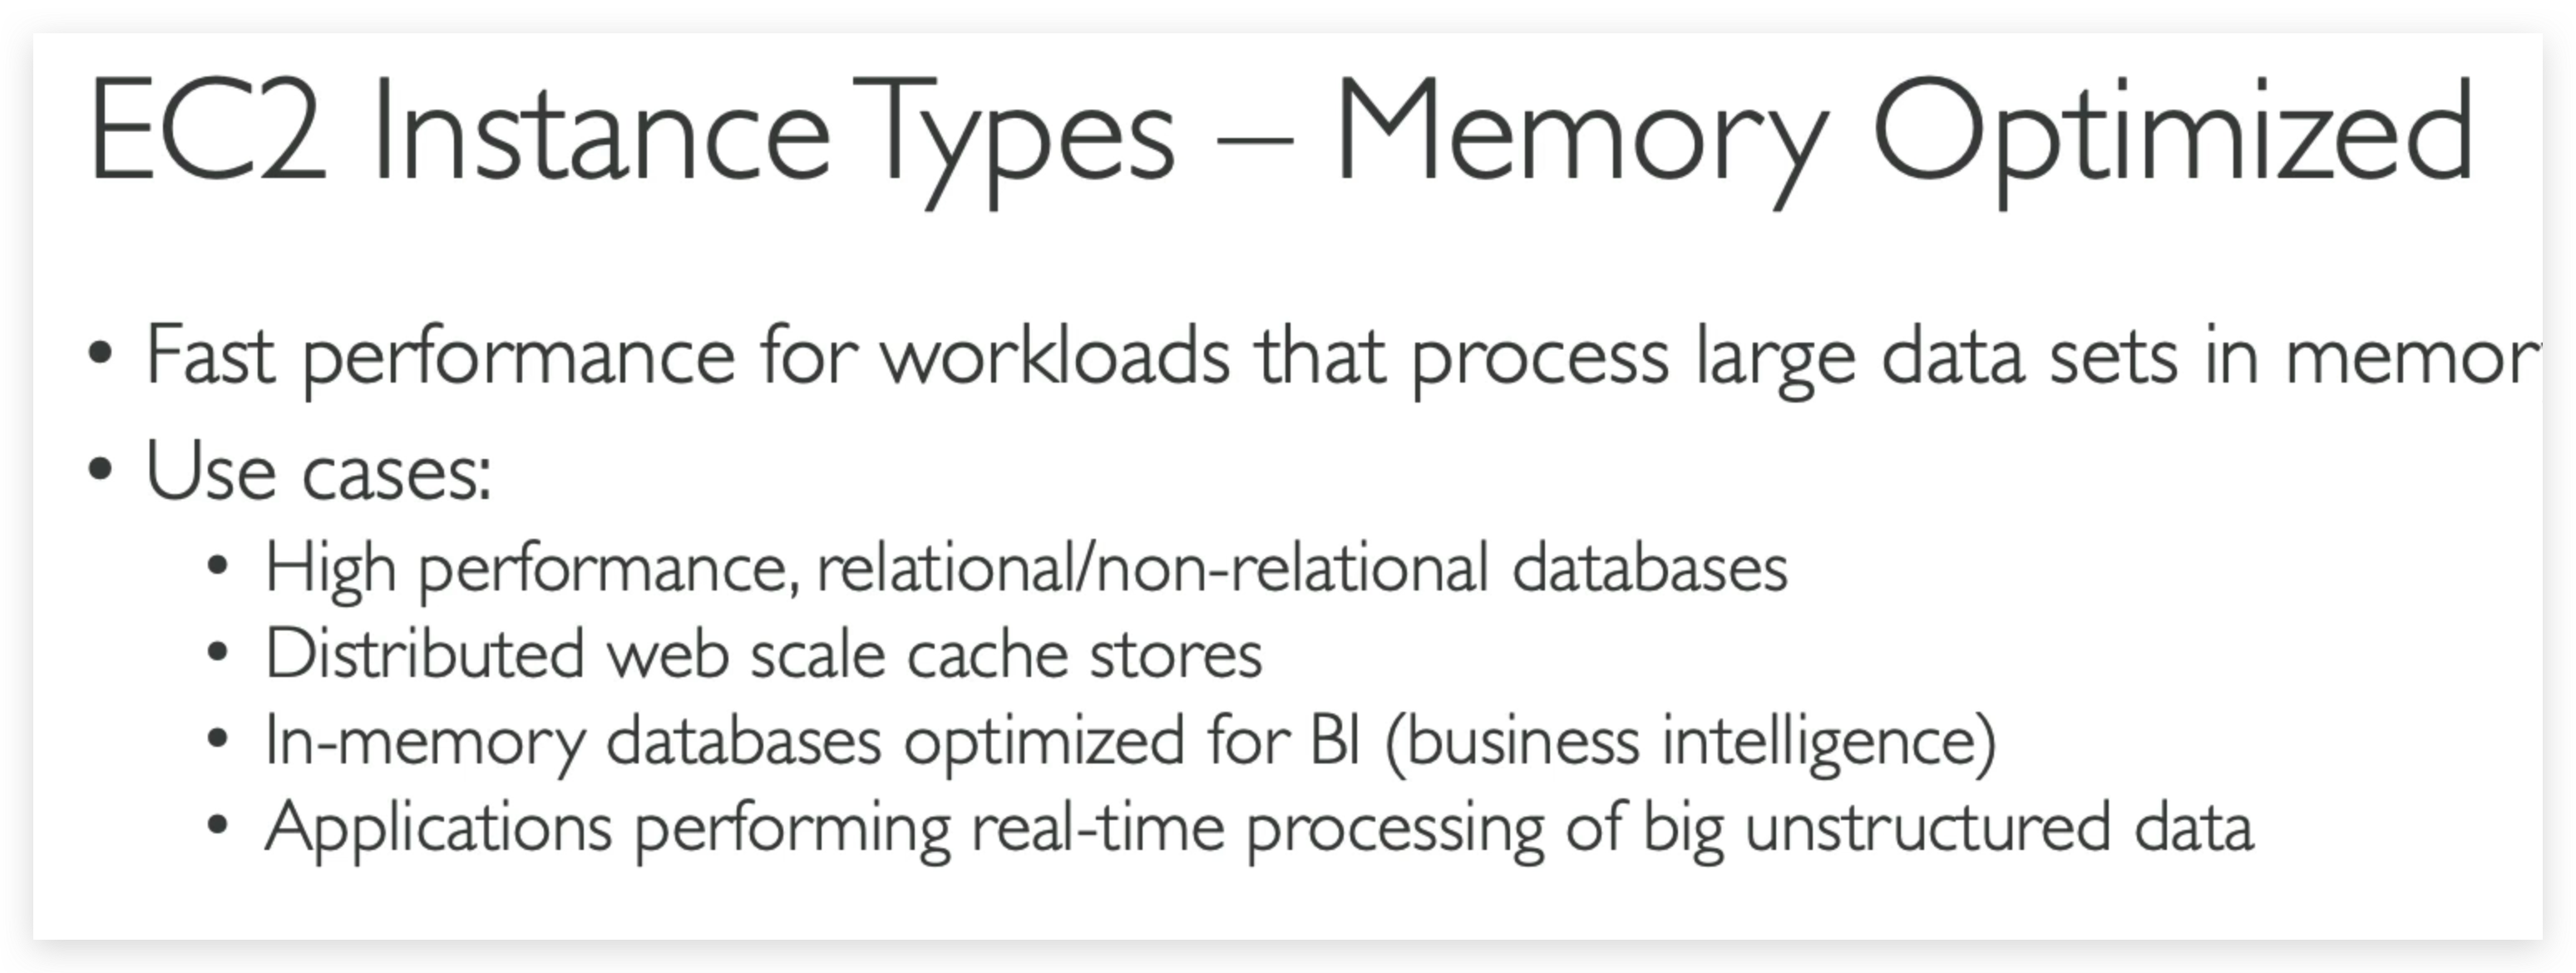
Storage Optimized
Storage optimized instances are designed for workloads that require high, sequential read and write access to very large data sets on local storage. They are optimized to deliver tens of thousands of low-latency, random I/O operations per second (IOPS) to applications.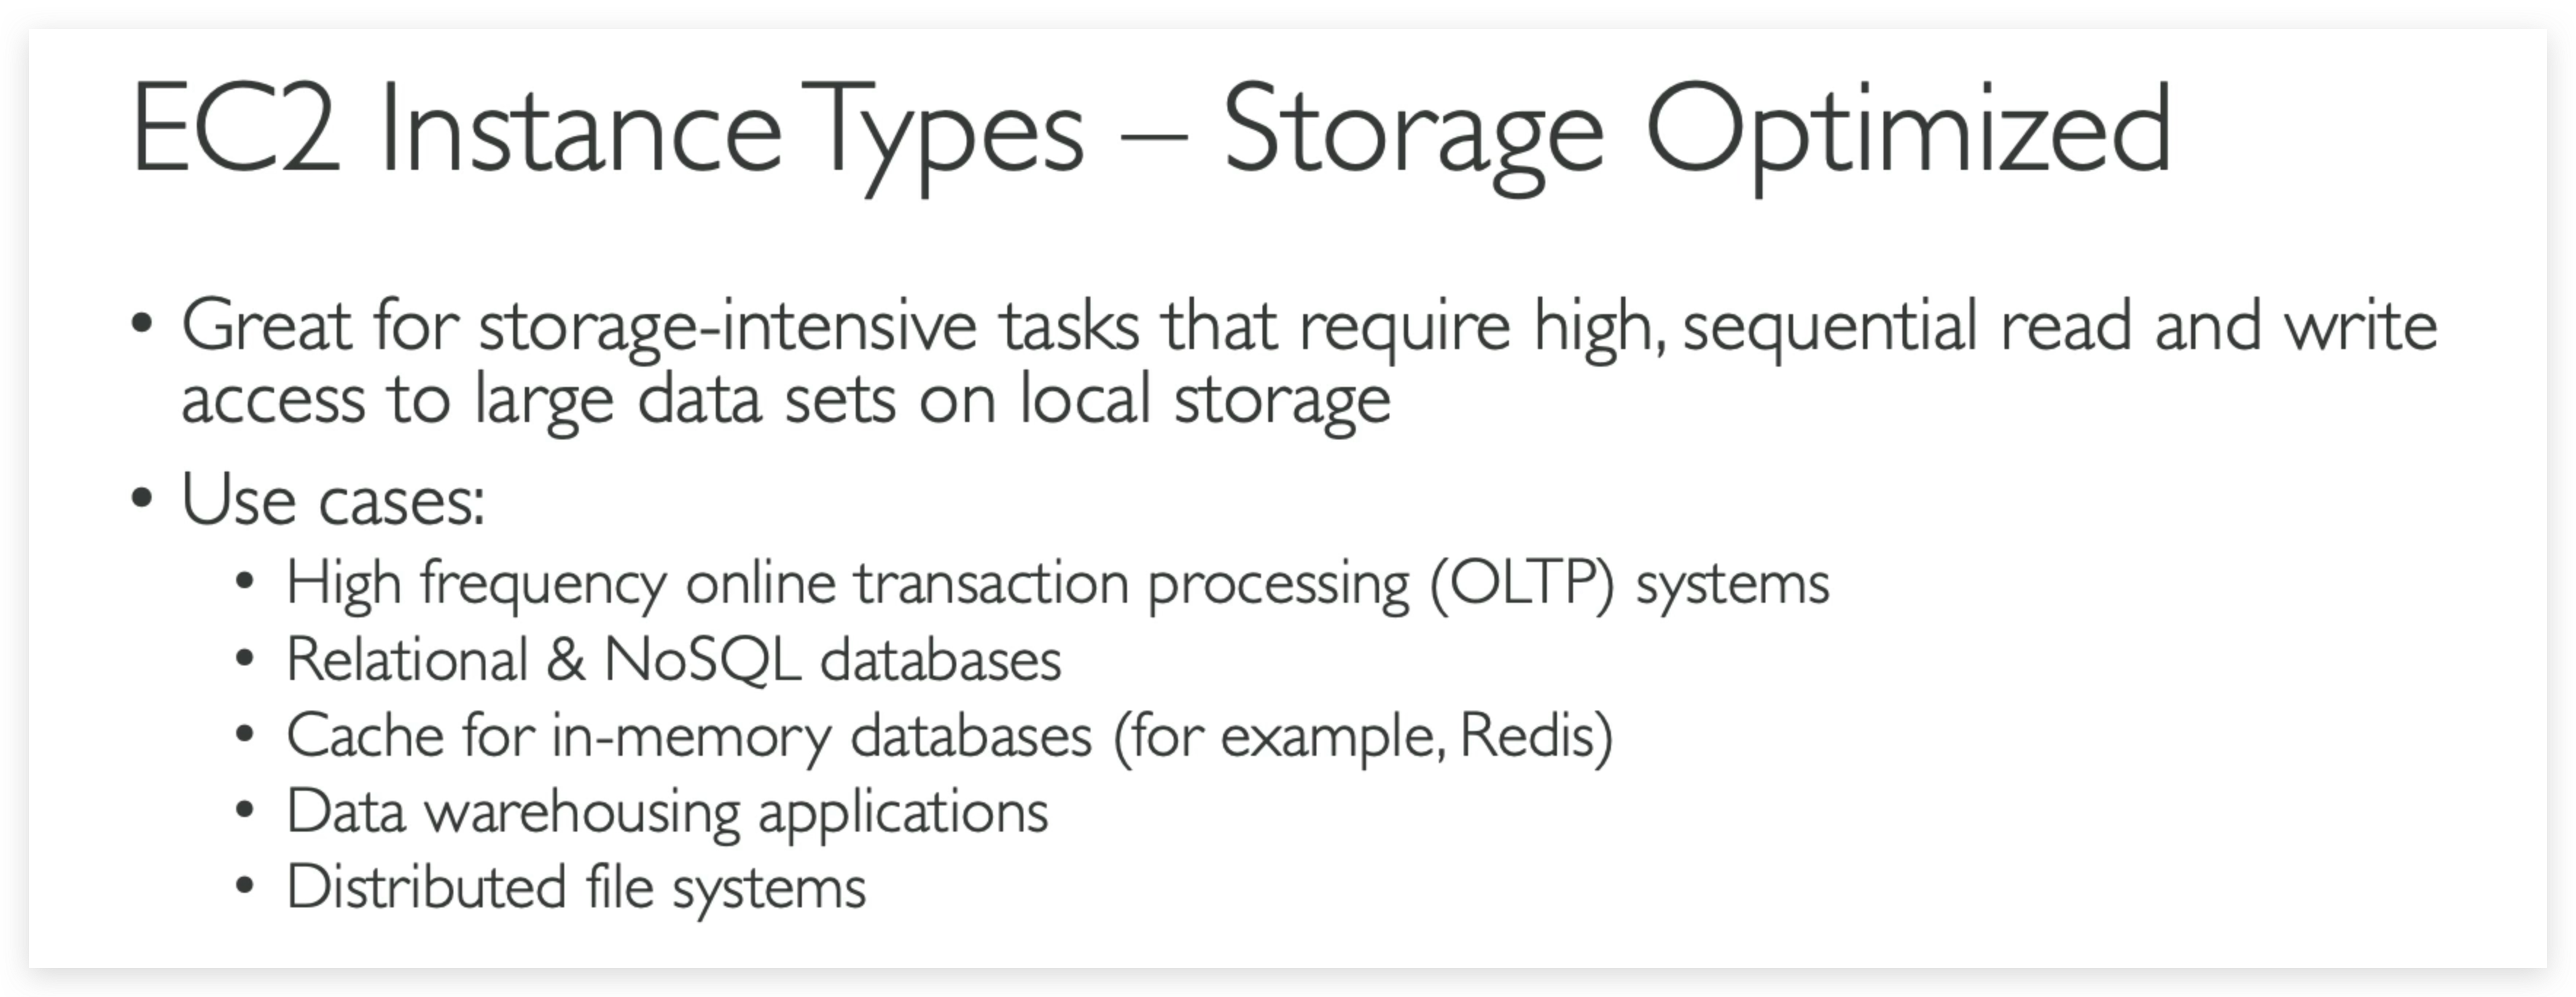
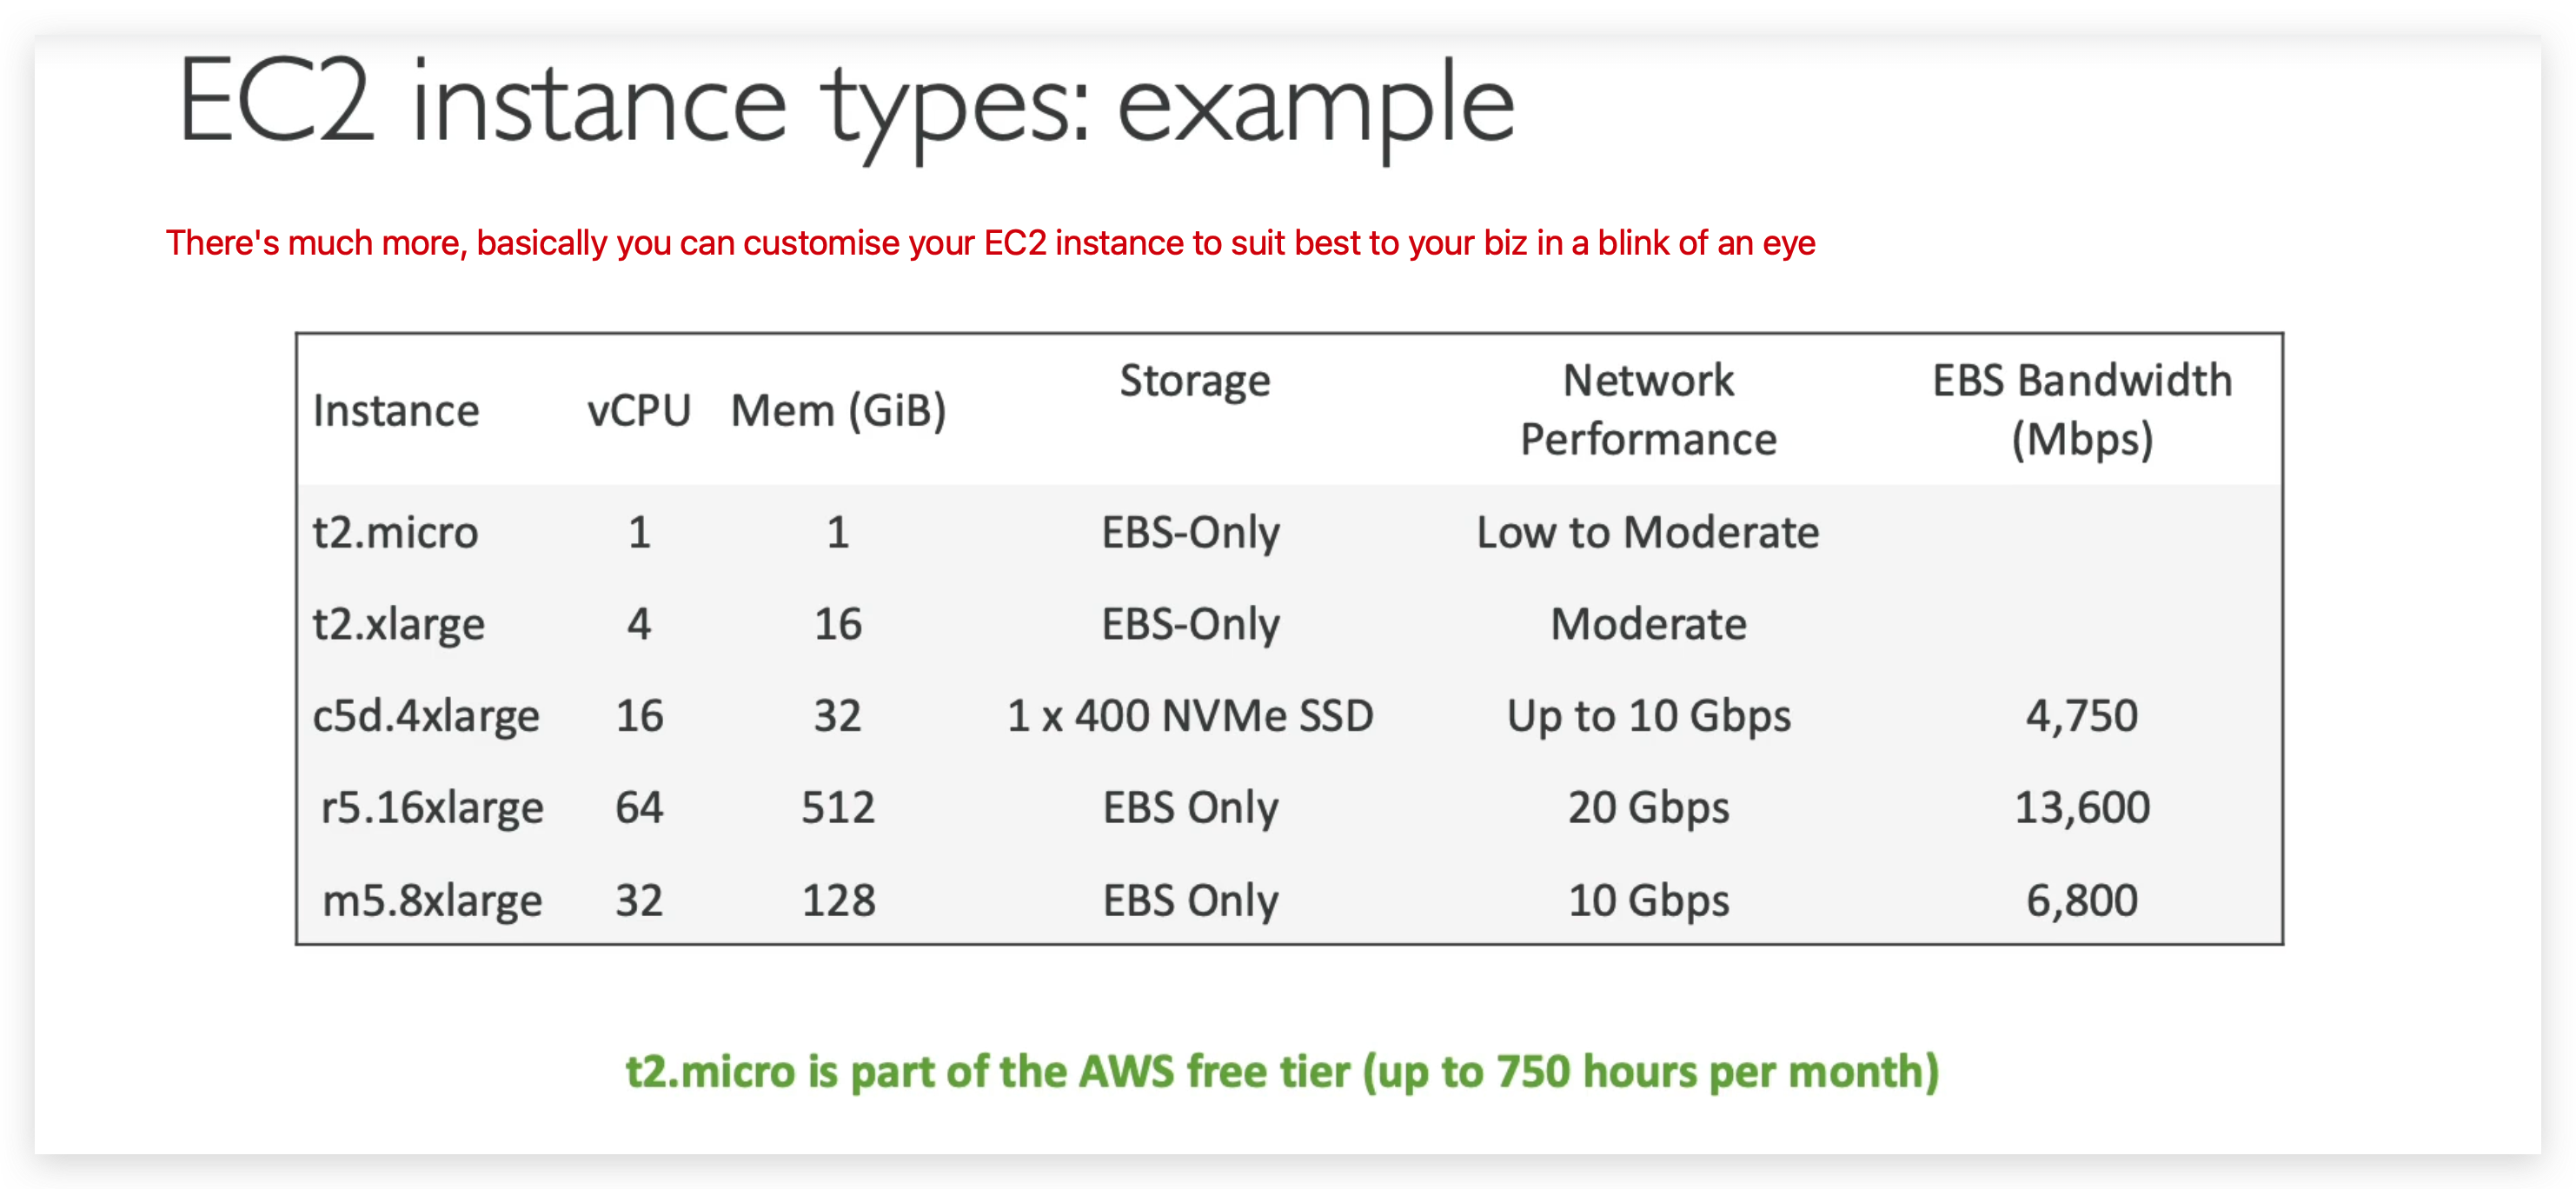
To recap the types with a comparison graph, consider the following example:
from here you can check all the instances available shown as a list with spec and pricing. Or here, if the first link is NOT working.
Security Groups & Classic Ports Overview
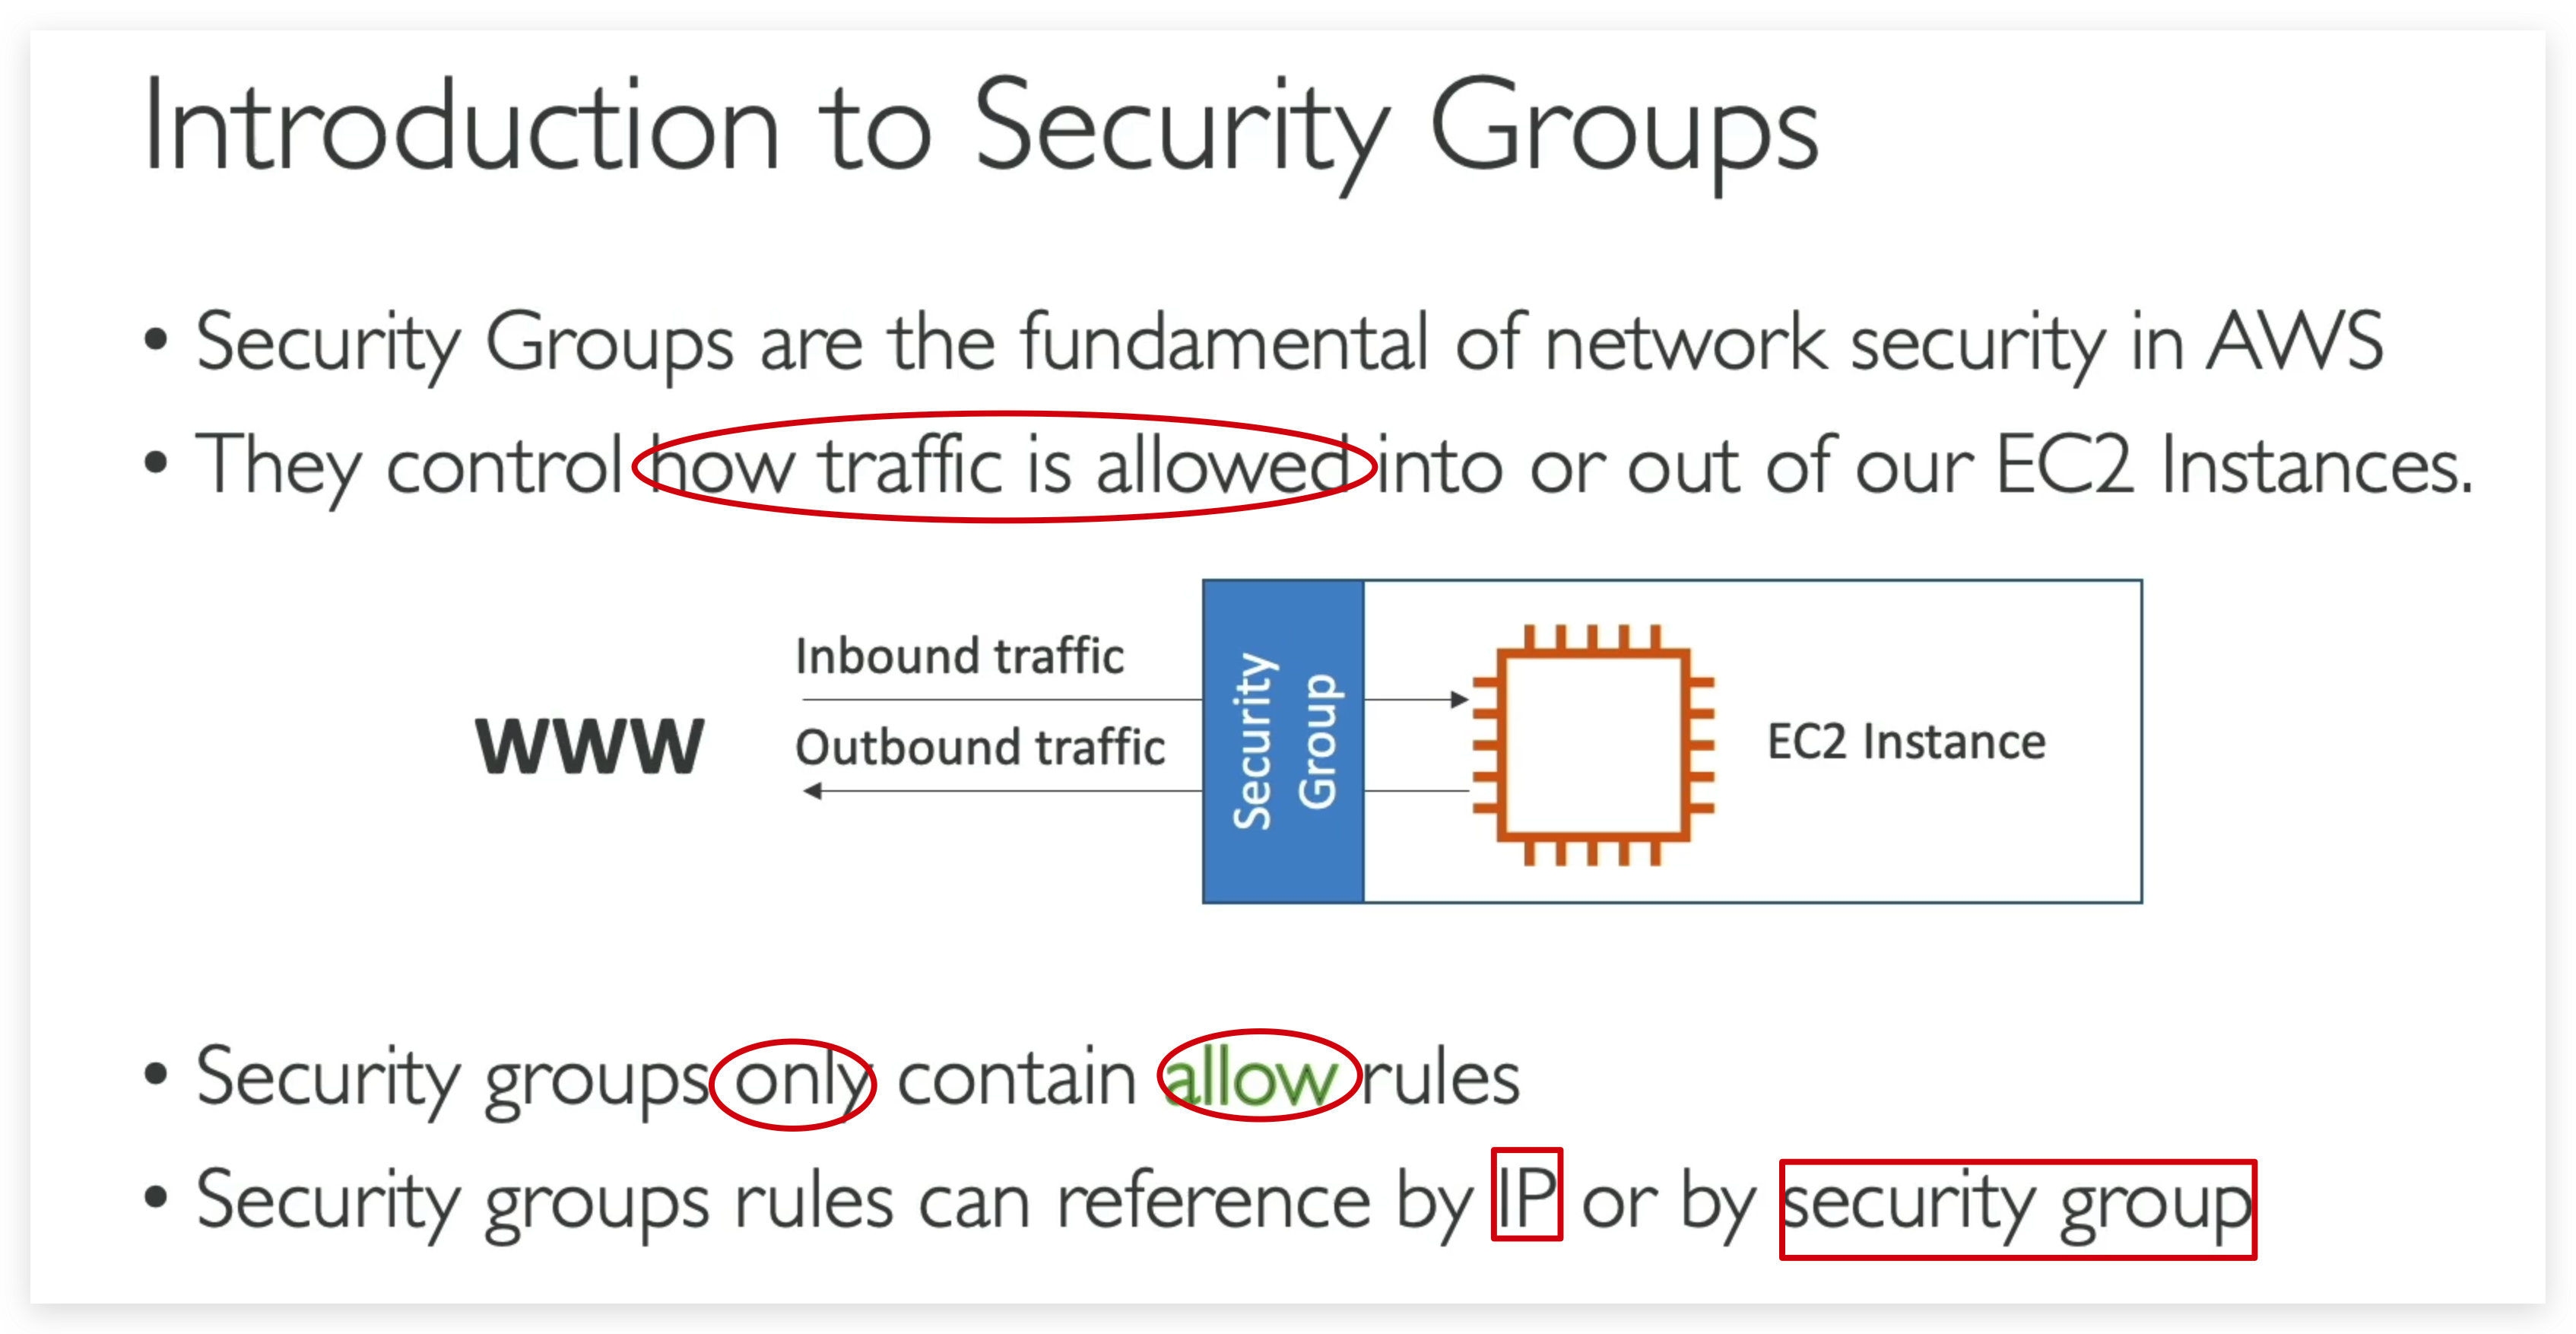
Illustration of Security Groups
Deeper Dive
- Security groups are acting as a “firewall”‘ on EC2 instances
- They regulate:
Access to Ports
Authorised IP ranges - IPv4 and IPv6
Control of inbound network (from other to the instance)
Control of outbound network (from the instance to other)

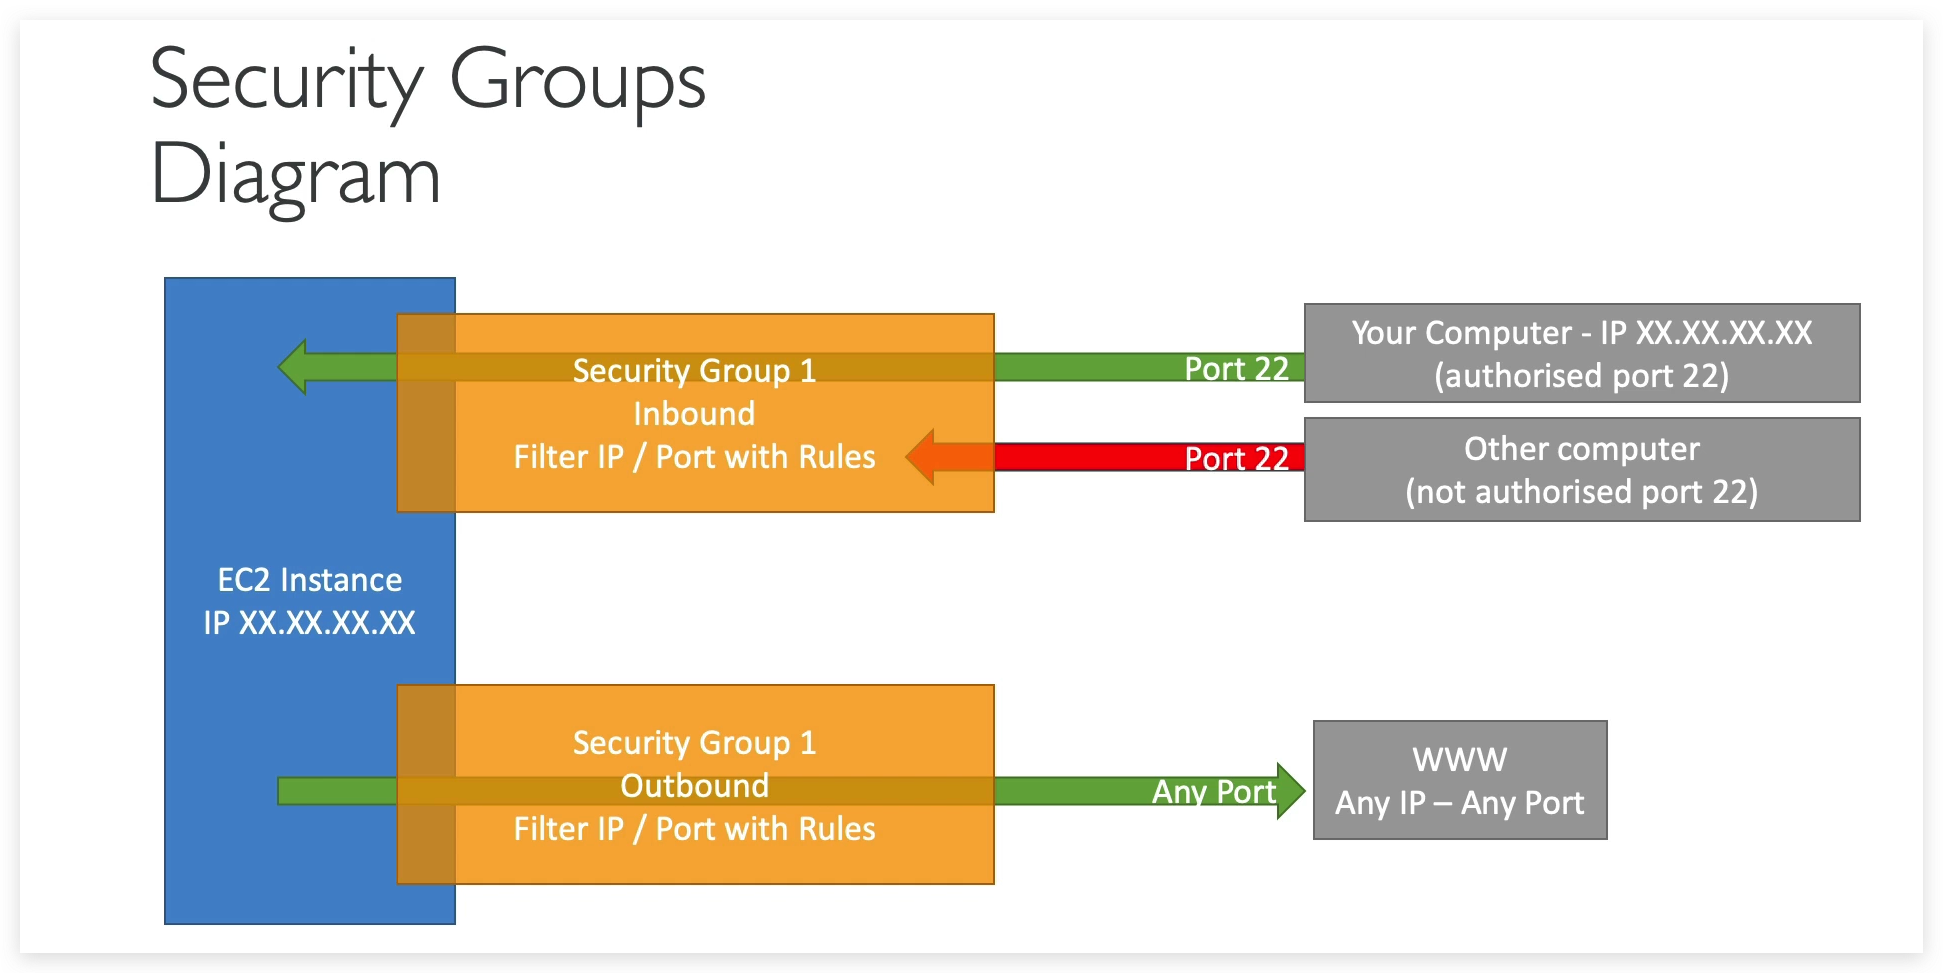
Only those authorized port and IPs can be leveraged to access the EC2 instance from outside, traffic from any unauthorized port will be blocked.
By default, any aws EC2 instance is allowed to access outside networks. You can change this setting as you wish.
Good to knows :
- Can be attached to multiple instances. (N * N)
- Locked down to a region /VPC combination
- Does live “outside” the EC2 - if traffic is blocked the EC2 instance won’t see it
- It’s good to maintain one separate security group for SSH access
- If your application is not accessible (time out), then it’s a security group issue • If your application gives a “connection refused” error, then it’s an application error, or it’s not launched
- All inbound traffic is blocked by default
- All outbound traffic is authorised by default
Now there is a small advanced feature that I really, really like, and I think it’s perfect if you start using load balancers, and we’ll see this in the next lecture as well, which is how to reference security groups from other security groups.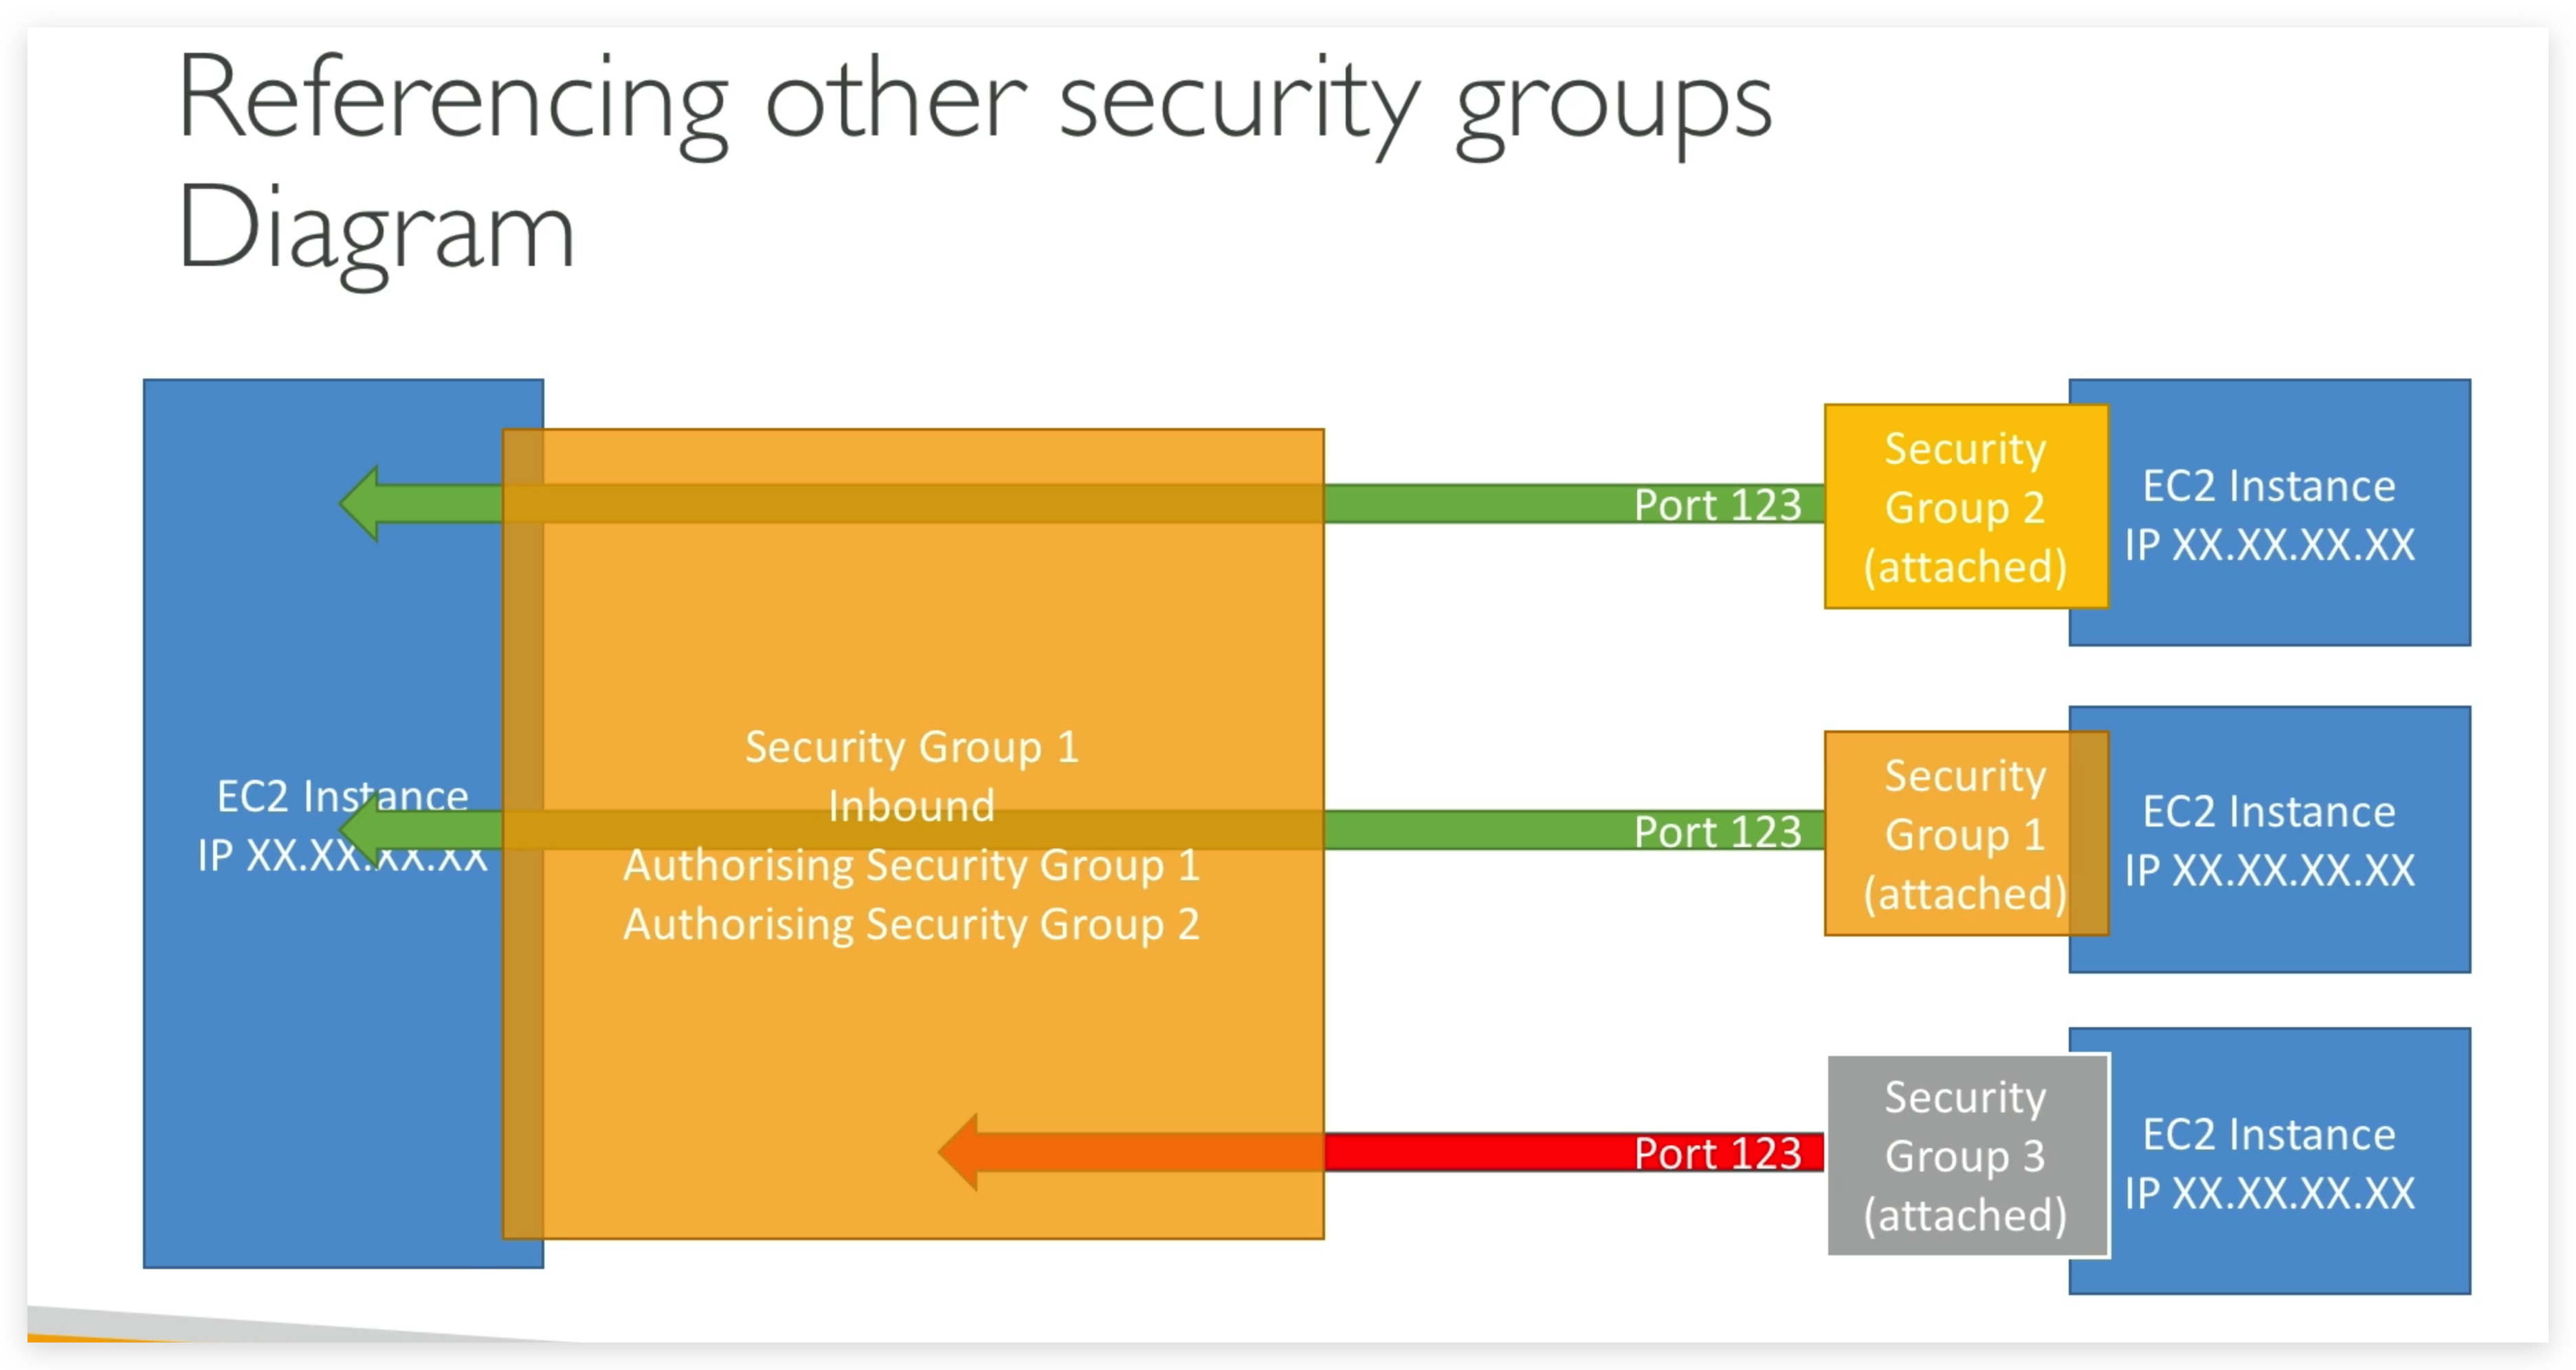
So let me explain things (of above snippet).
So we have an EC2 instance, and it has a security group,what I call group number one. And the inbound rules is basically saying, I’m authorizing security group number one inbound and security group number two.
So why would we even do this?
Well, if we launch another EC2 instance,and it has security group two attached to it, well, by using the security group run rule that we just set up, we basically allow our EC2 instance to go connect straight through on the port we decided onto our first EC2 instance.
Similarly, if we have another EC2 instance with a security group one attached, well, we’ve also authorized this one to communicate straight back to our instances. And so regardless of the IP of our EC2 instances, because they have the right security group attached to them, they’re able to communicate straight through to other instances.
And that’s awesome because it doesn’t make you think about IPs all the time.
And if you have another EC2 instance, maybe with security group number three attached to it, well, because group number three wasn’t authorized in the inbound rules of security group number one, then it’s being denied and things don’t work.
So that’s a bit of an advanced feature, but we’ll see it when we’ll deal with load balancers ‘cause it’s quite a common pattern. I just want you to know about it. Again, just remember this diagram.
And by now you should be really good at security groups and understand them correctly.
Classic Ports to know
• 22 = SSH (Secure Shell) - log into a Linux instance
• 21 = FTP (File Transfer Protocol) - upload files into a file share
• 22 = SFTP (Secure File Transfer Protocol) - upload files using SSH
• 80 = HTTP - access unsecured websites
• 443 = HTTPS - access secured websites
• 3389 = RDP (Remote Desktop Protocol) - log into a Windows instance
Security Groups Hands-on
Find the menu: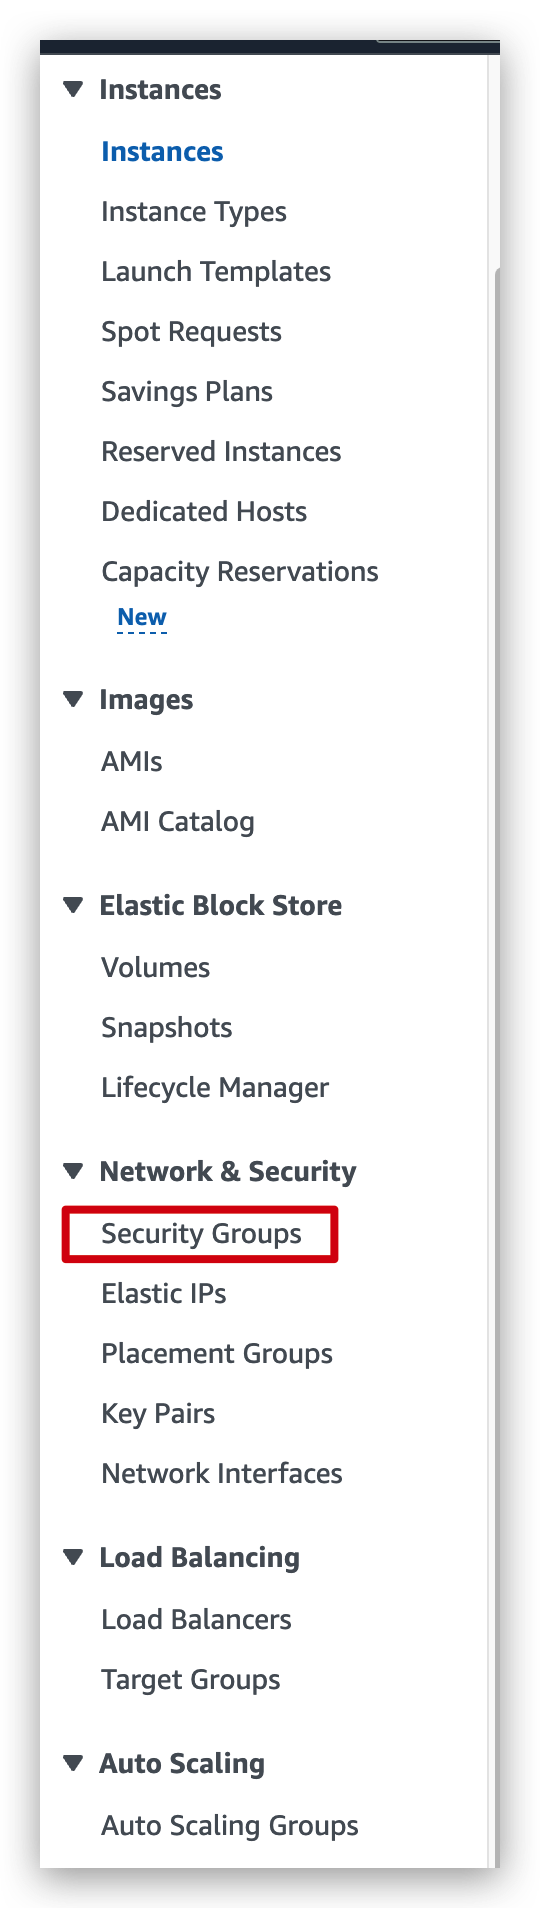
See the Security Group list: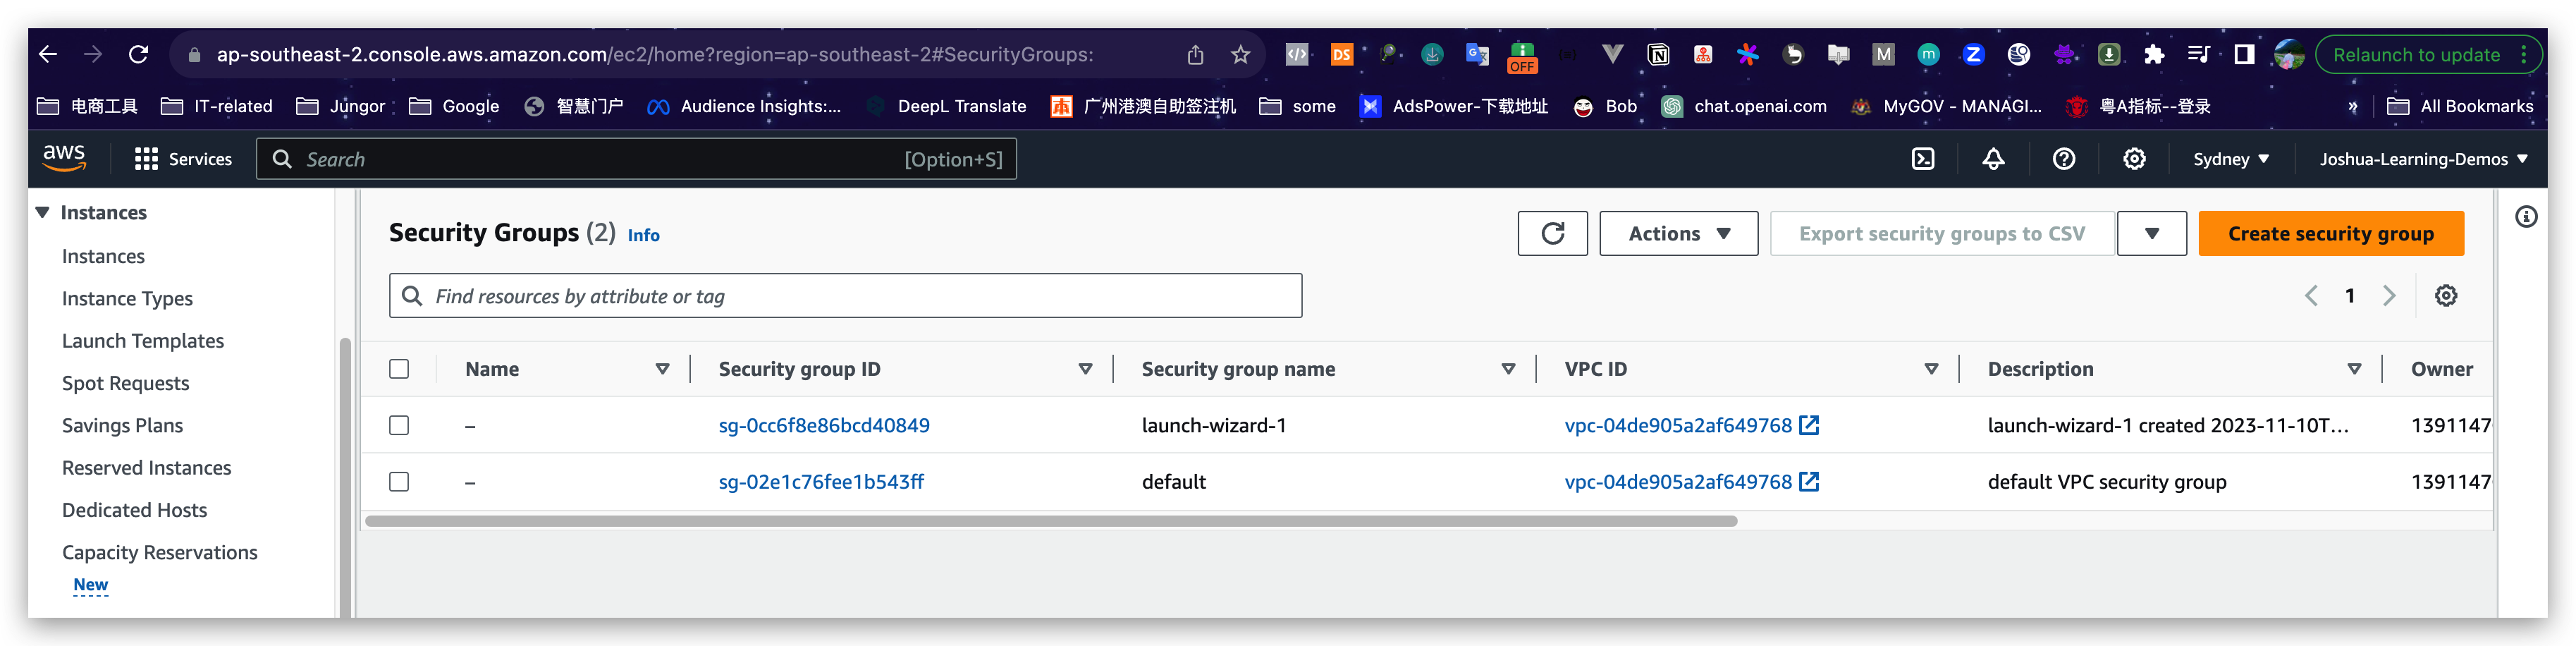
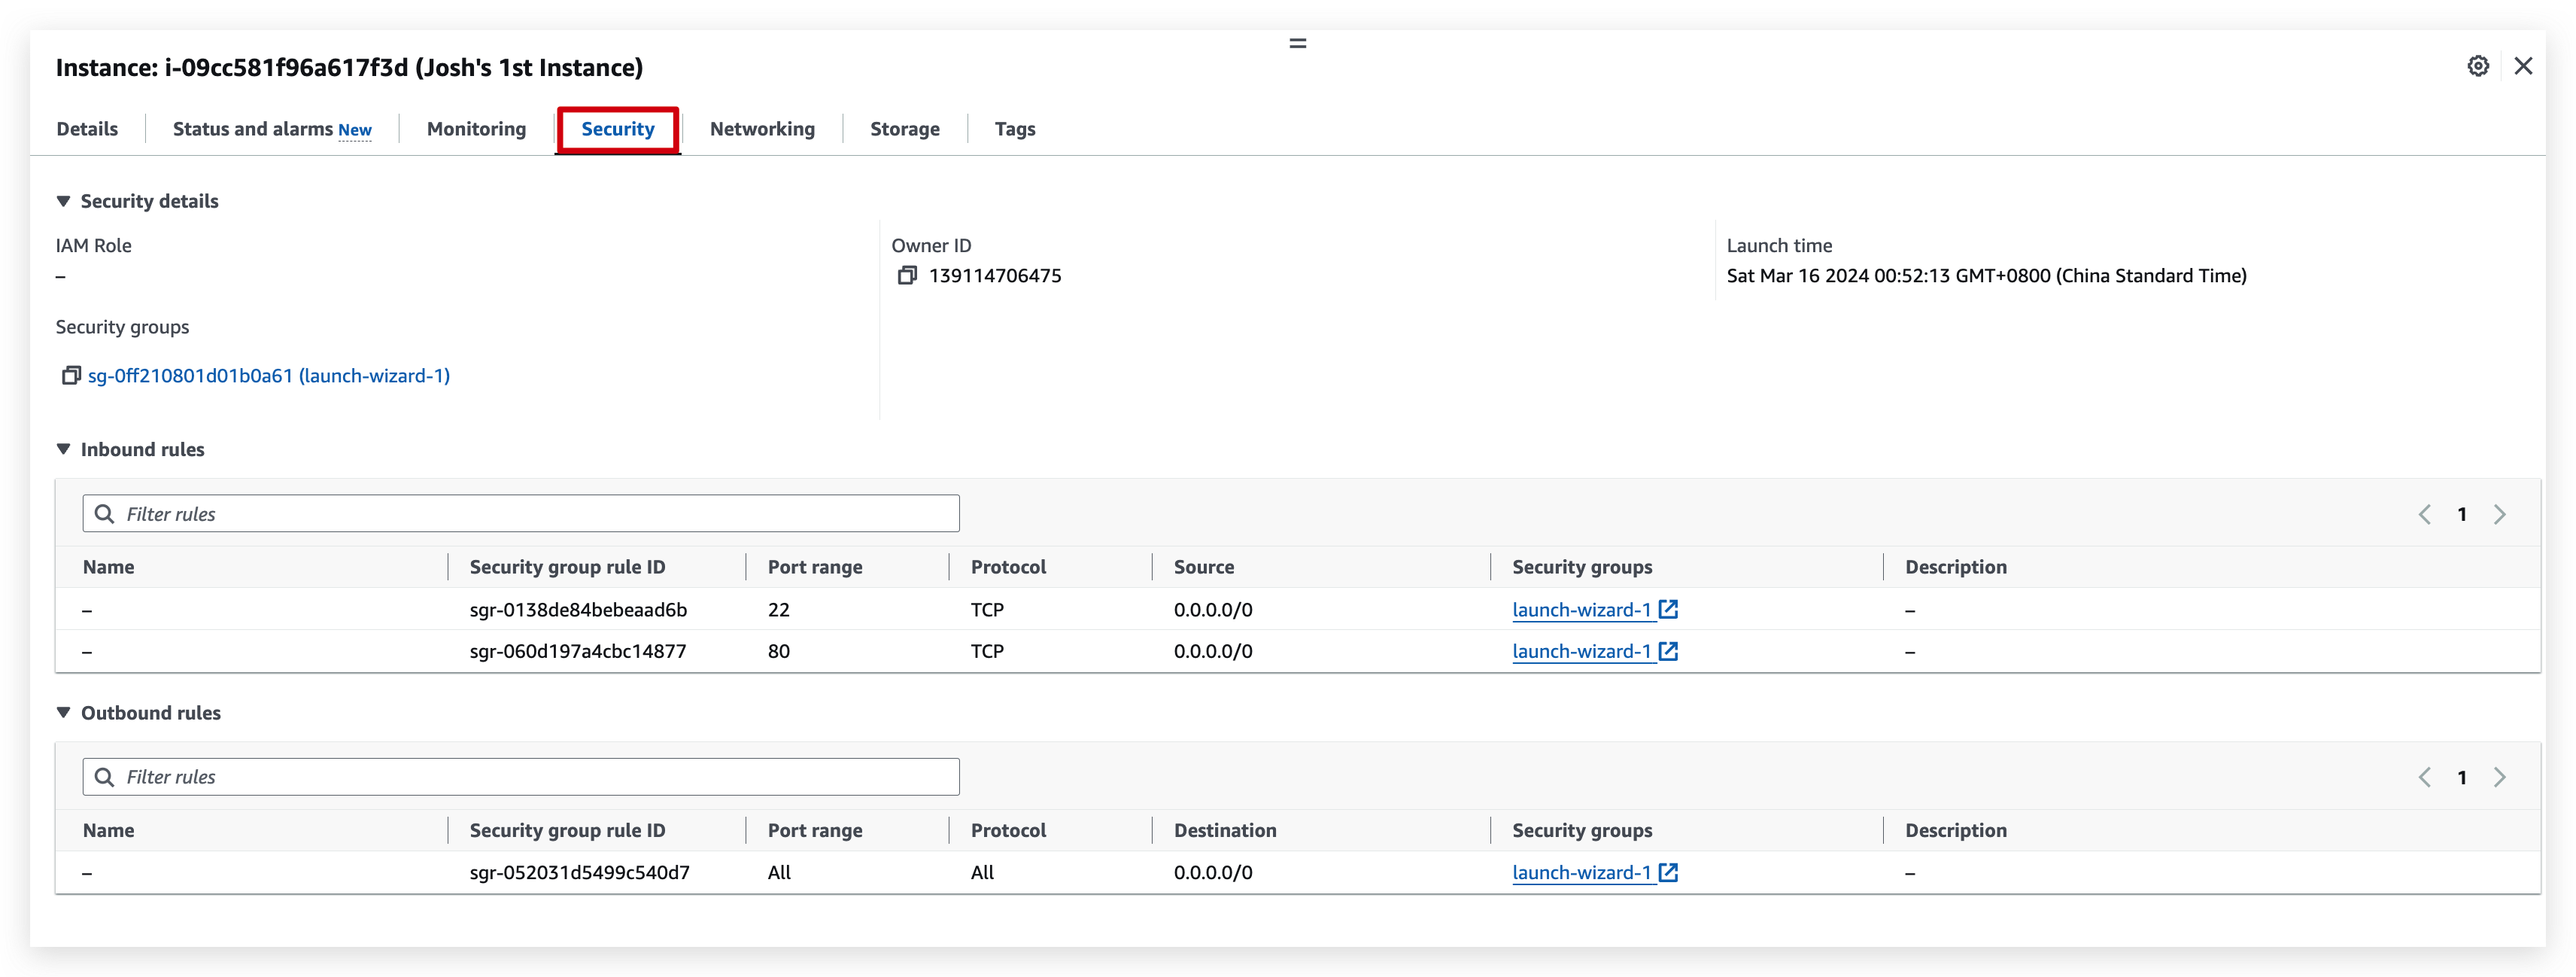
check details: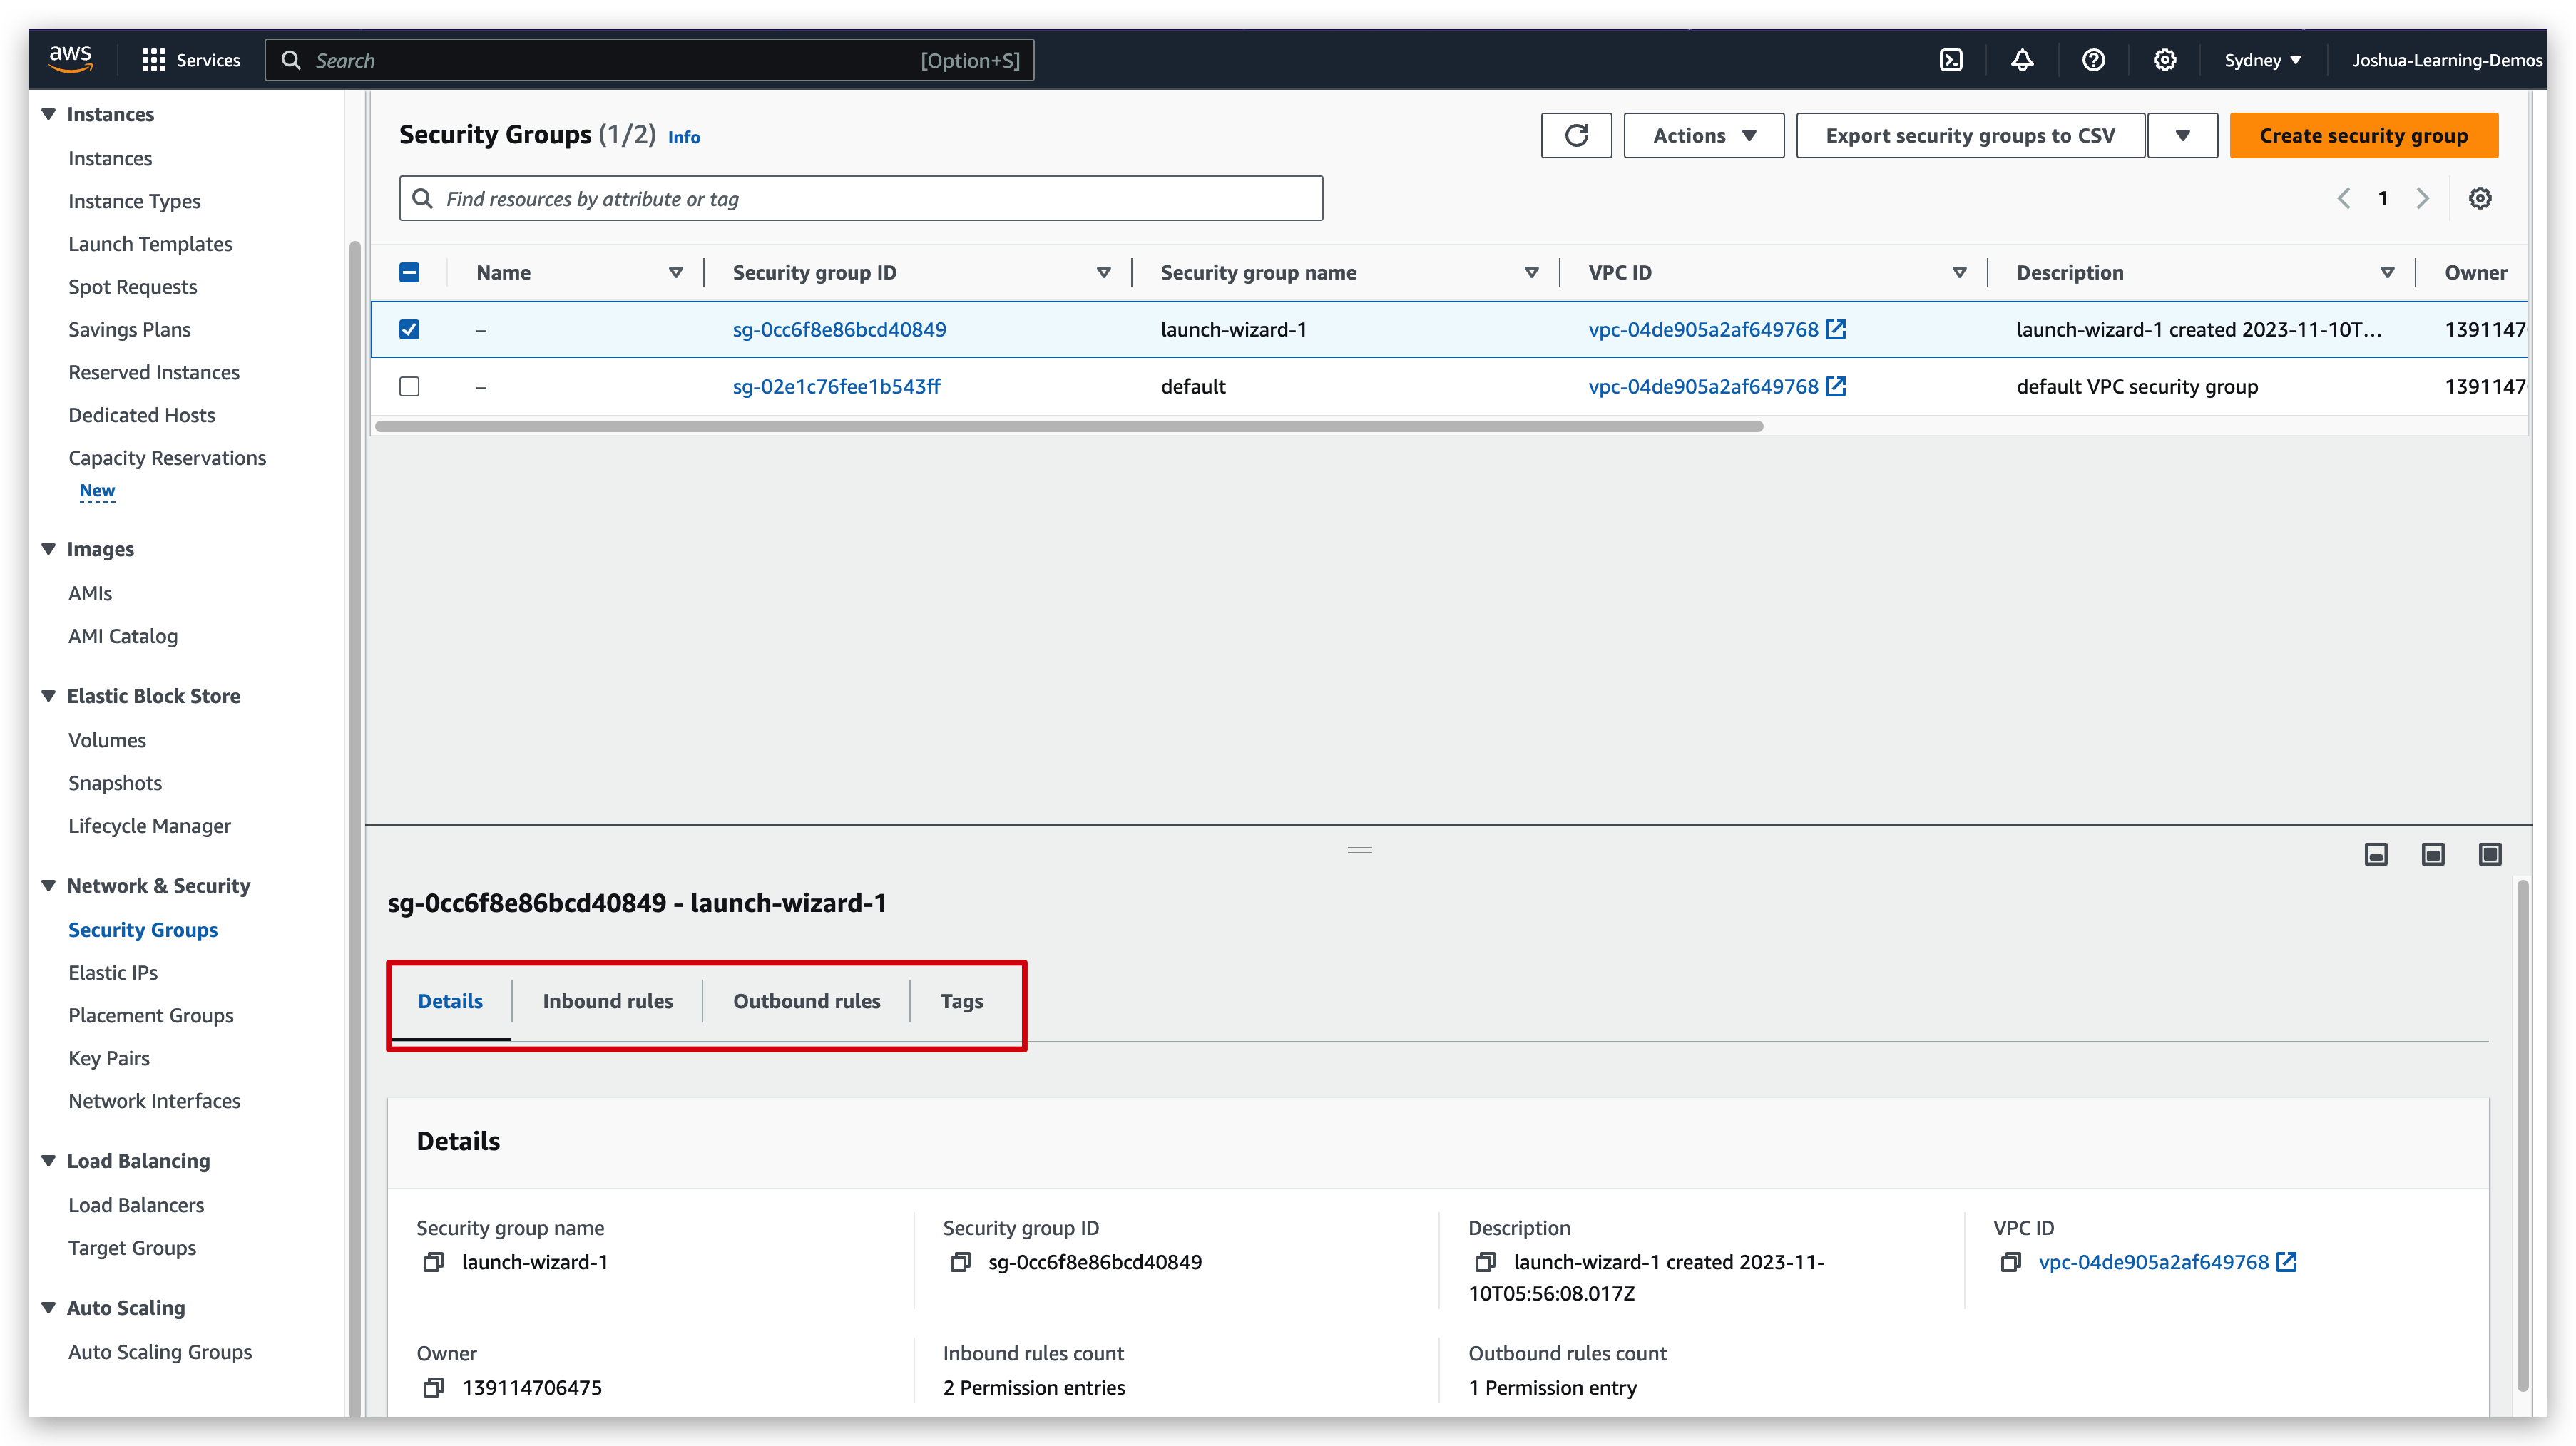
check the inbound rules(edit to see more info):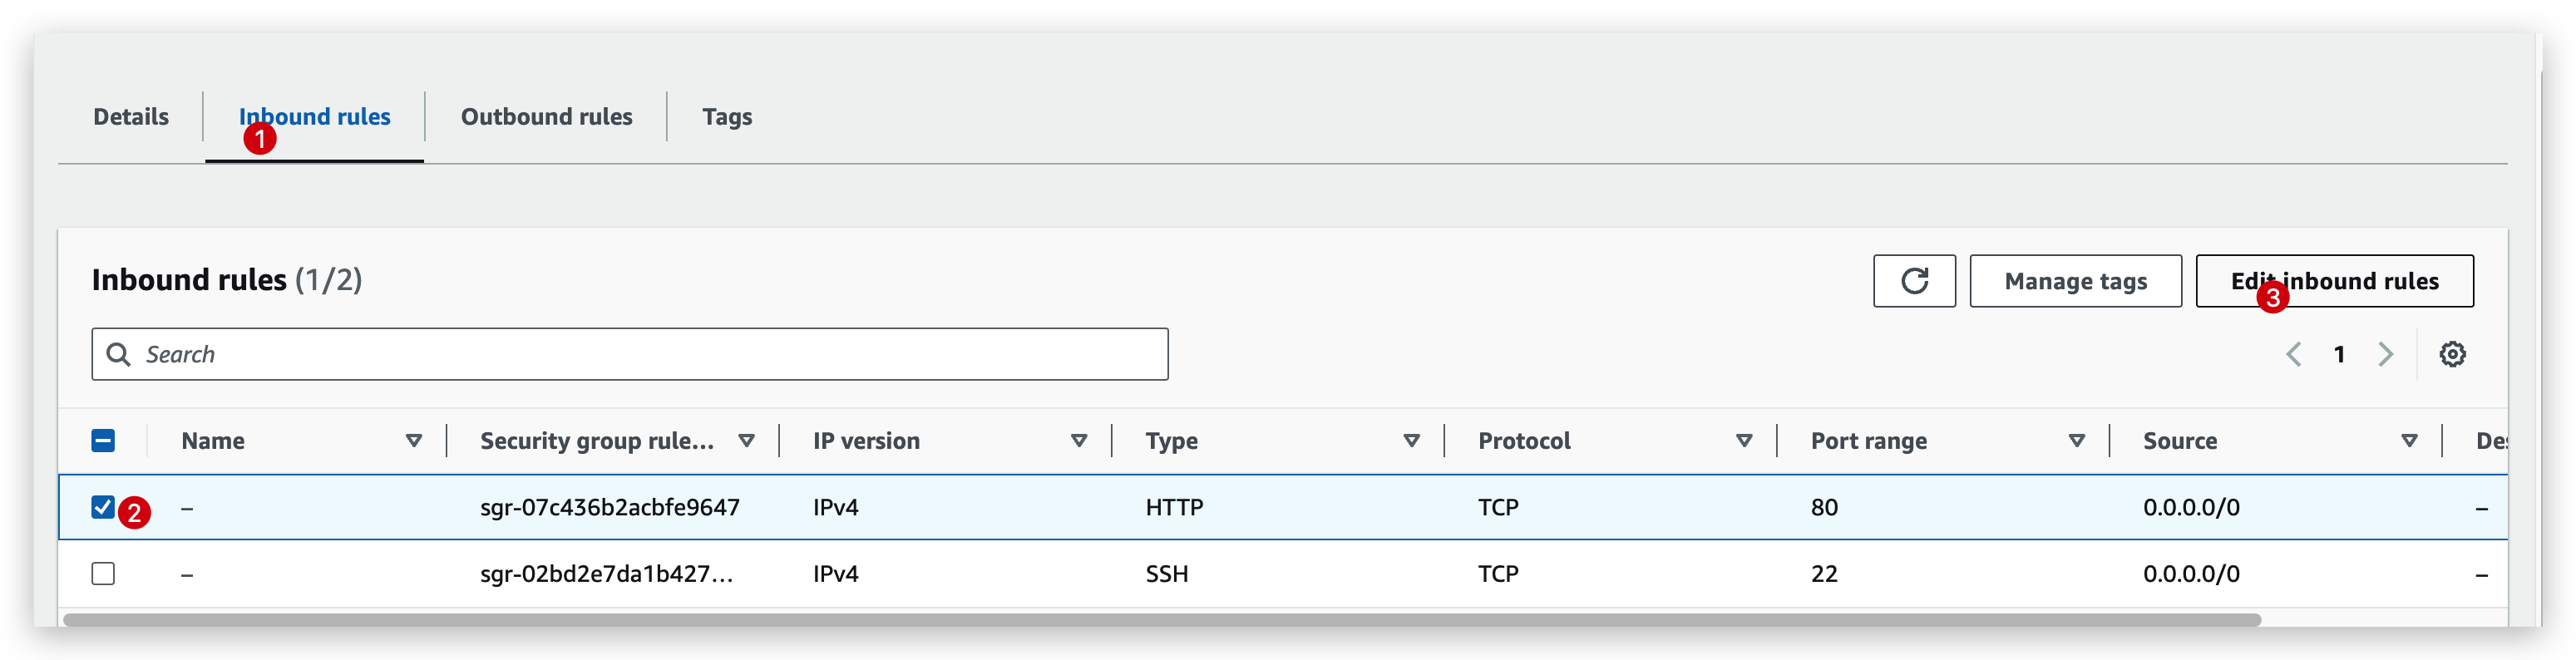
inbound rule representation: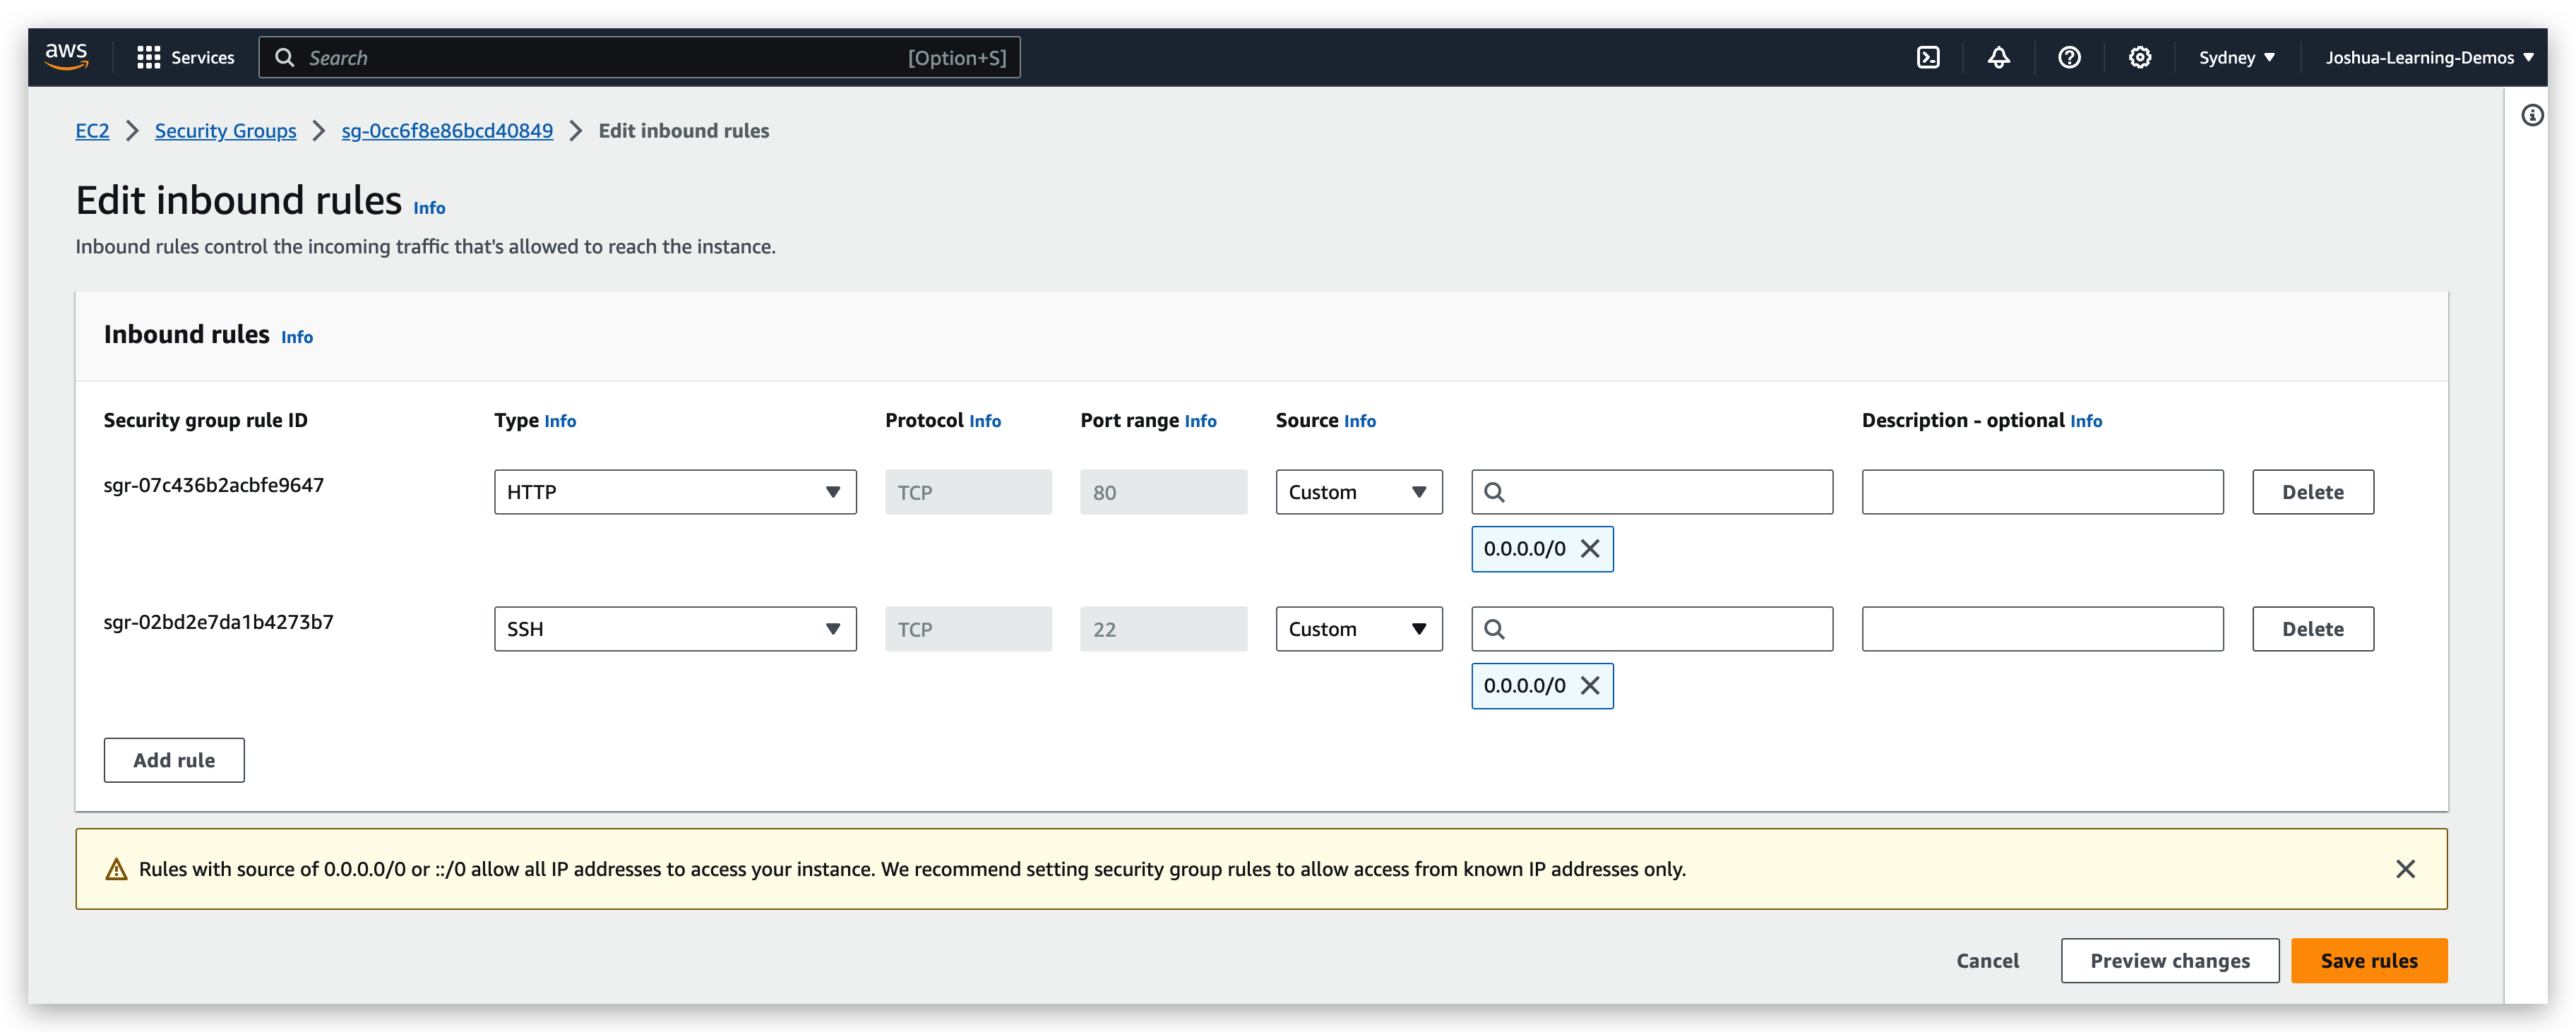
A simple example of the inbound rules is that when we delete the record of HTTP (port 80) rule or narrow down the source IP range, we will no longer be able to access the instance from outside with the http protocol with public IPv4.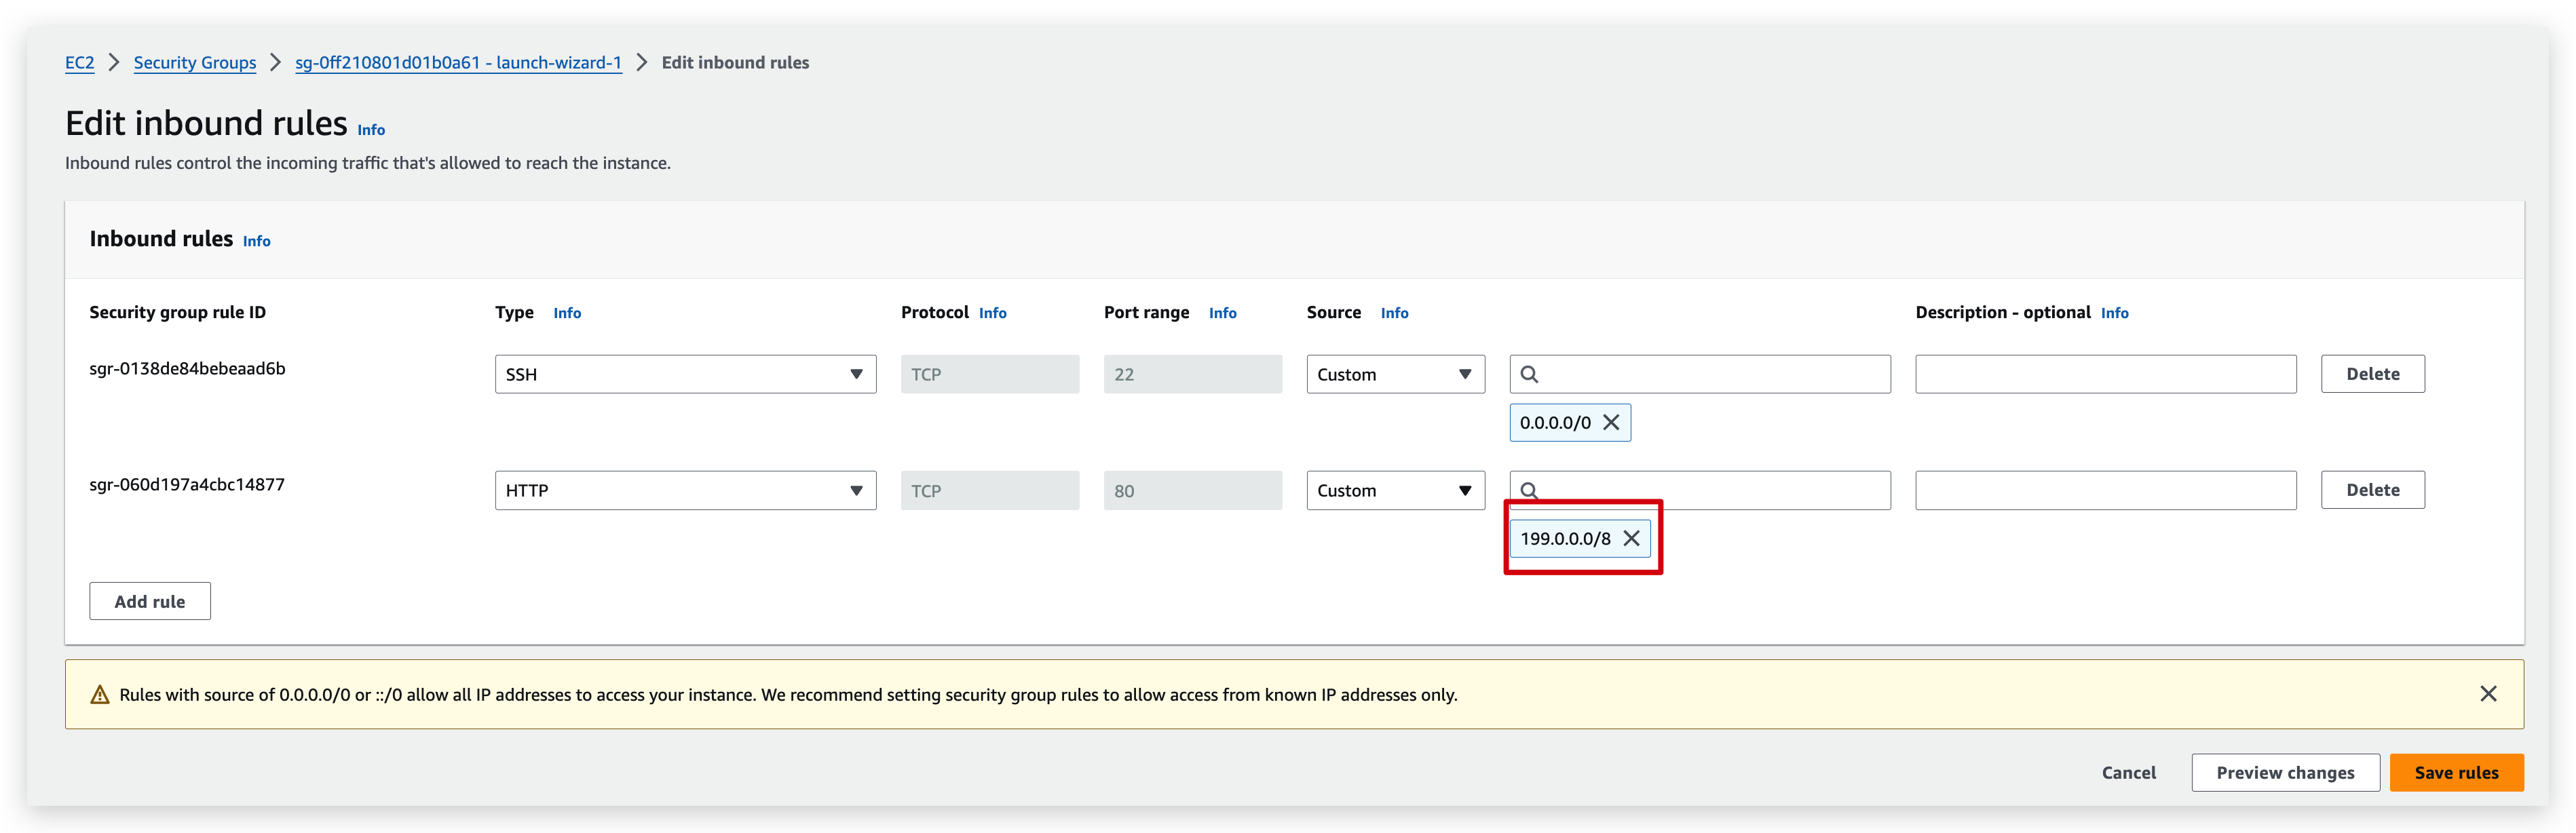

A tip:
So if you see a timeout when trying to establish any kind of connection into your EC2 instances, for example, if you try to SSH into it, but there’s a timeout, or if you try to do an HTTP query, but there’s a timeout, or if you try to do anything with it and there is a timeout, this is 100%, for sure, the cause of an EC2 security group. Okay, so in that case, go to your security group rules and make sure that they are correct, because if they’re not correct, then you will get a timeout. So to fix this, we can add back a rule.
SSH
Overview
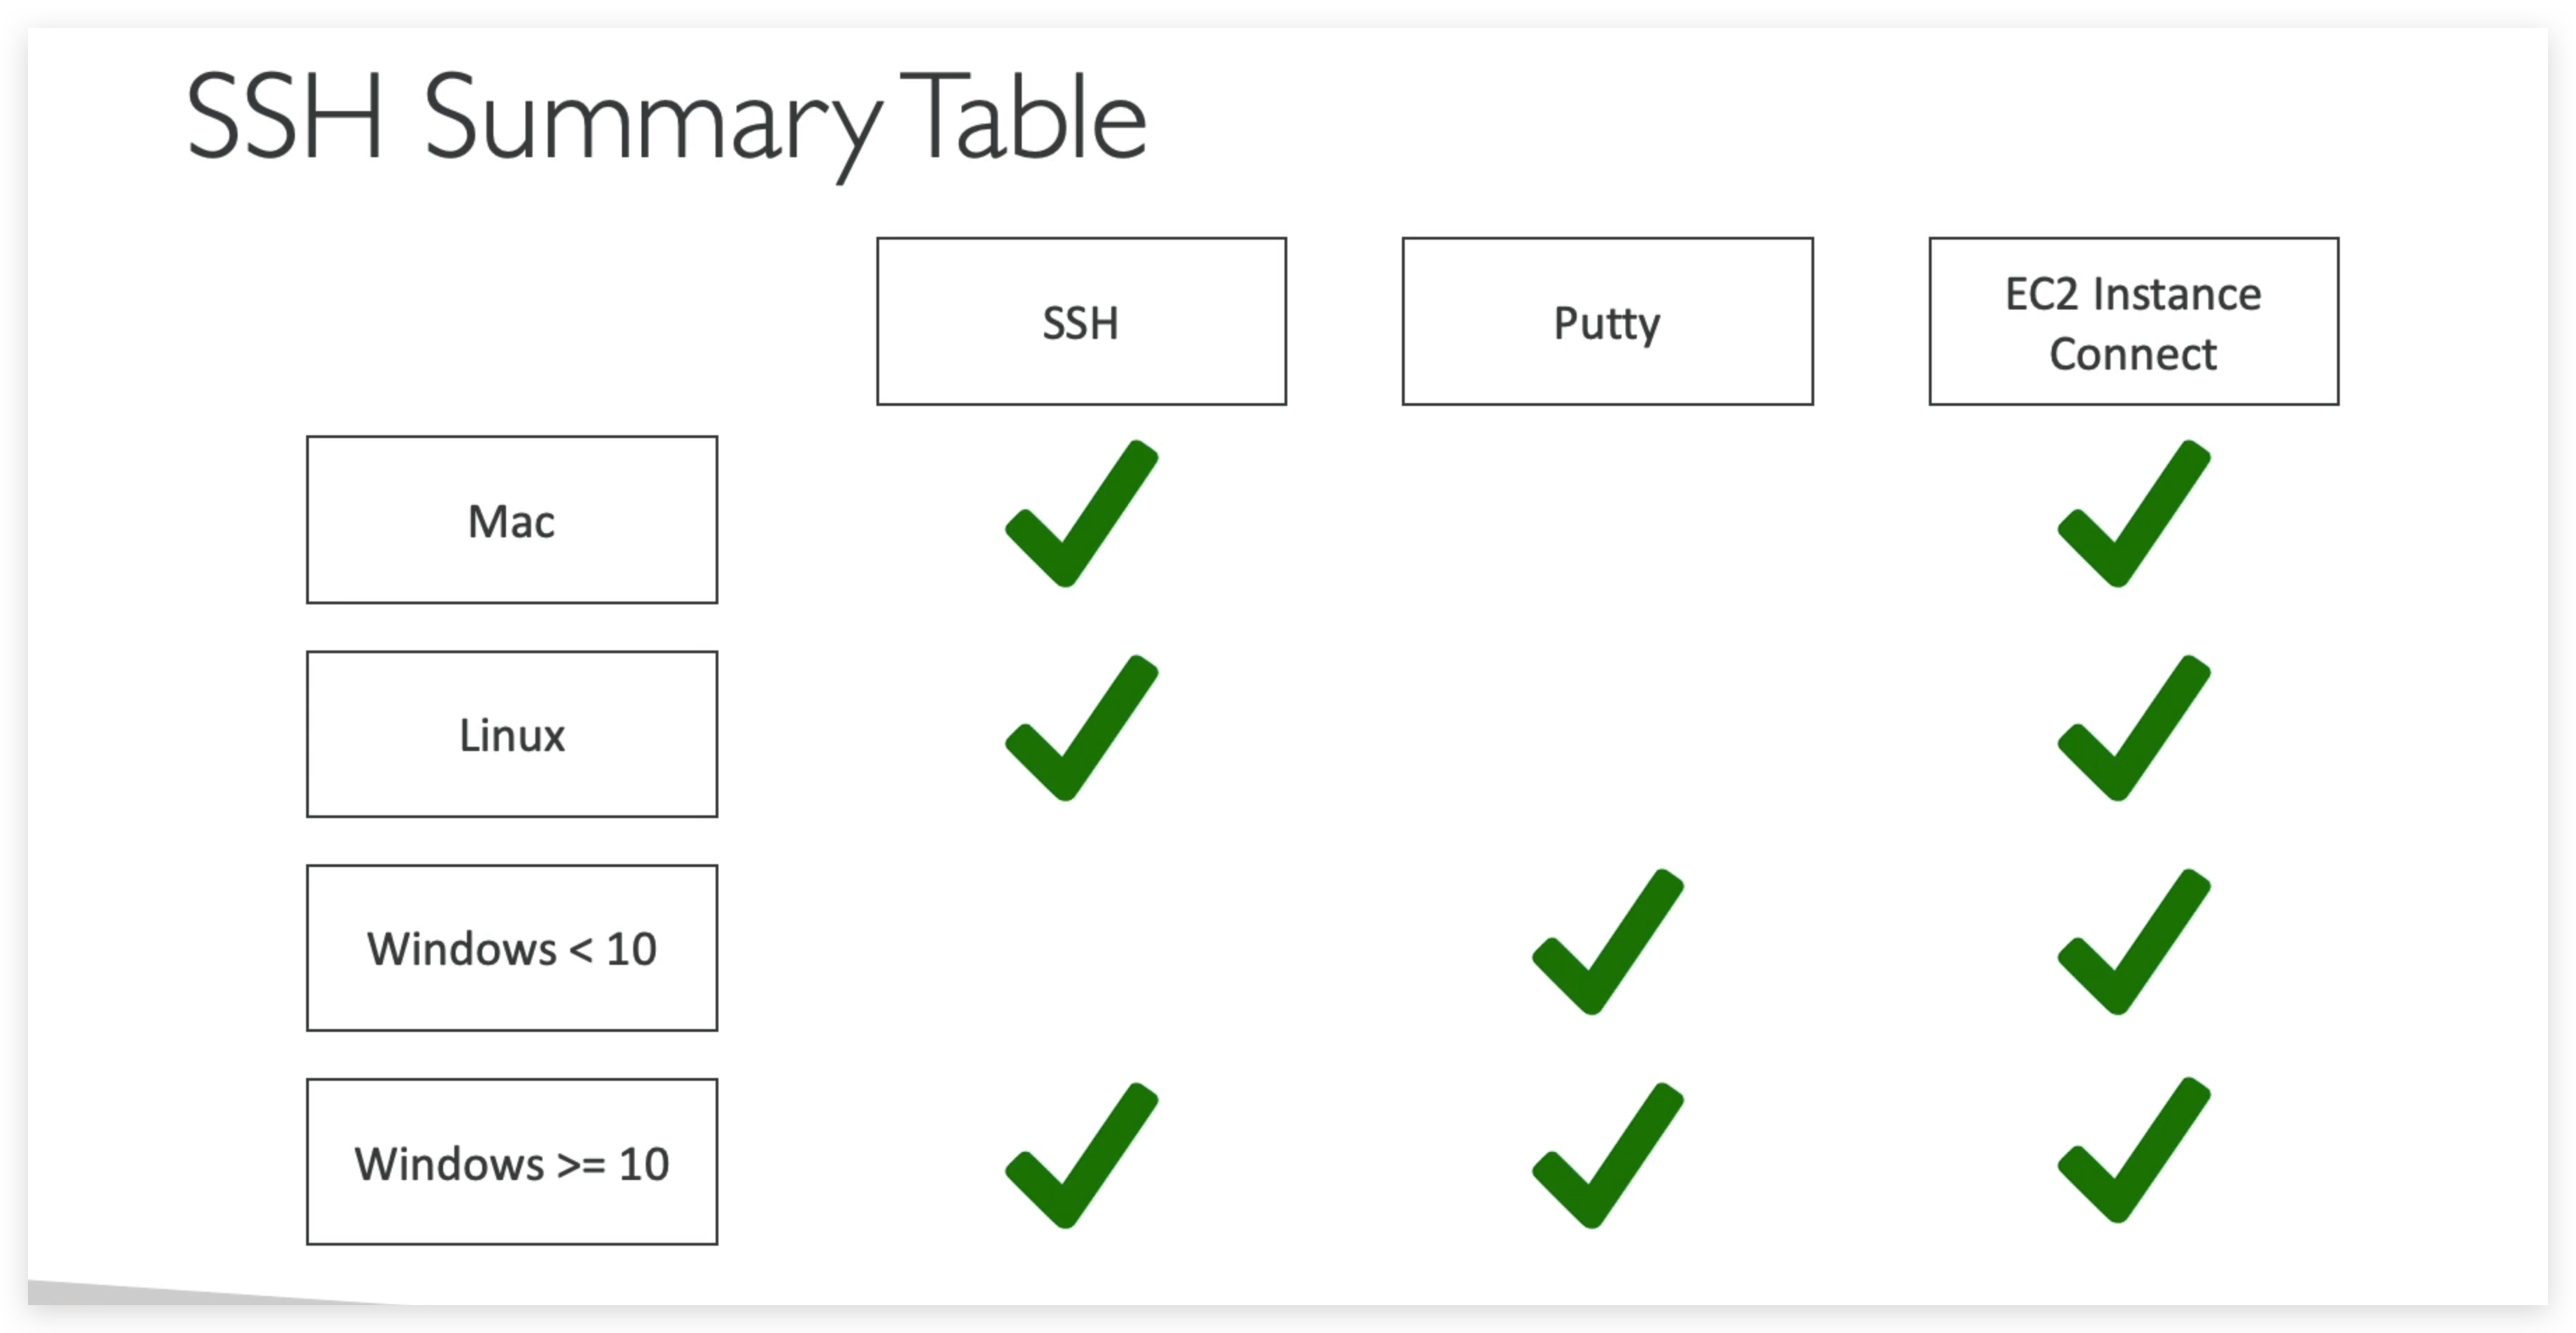
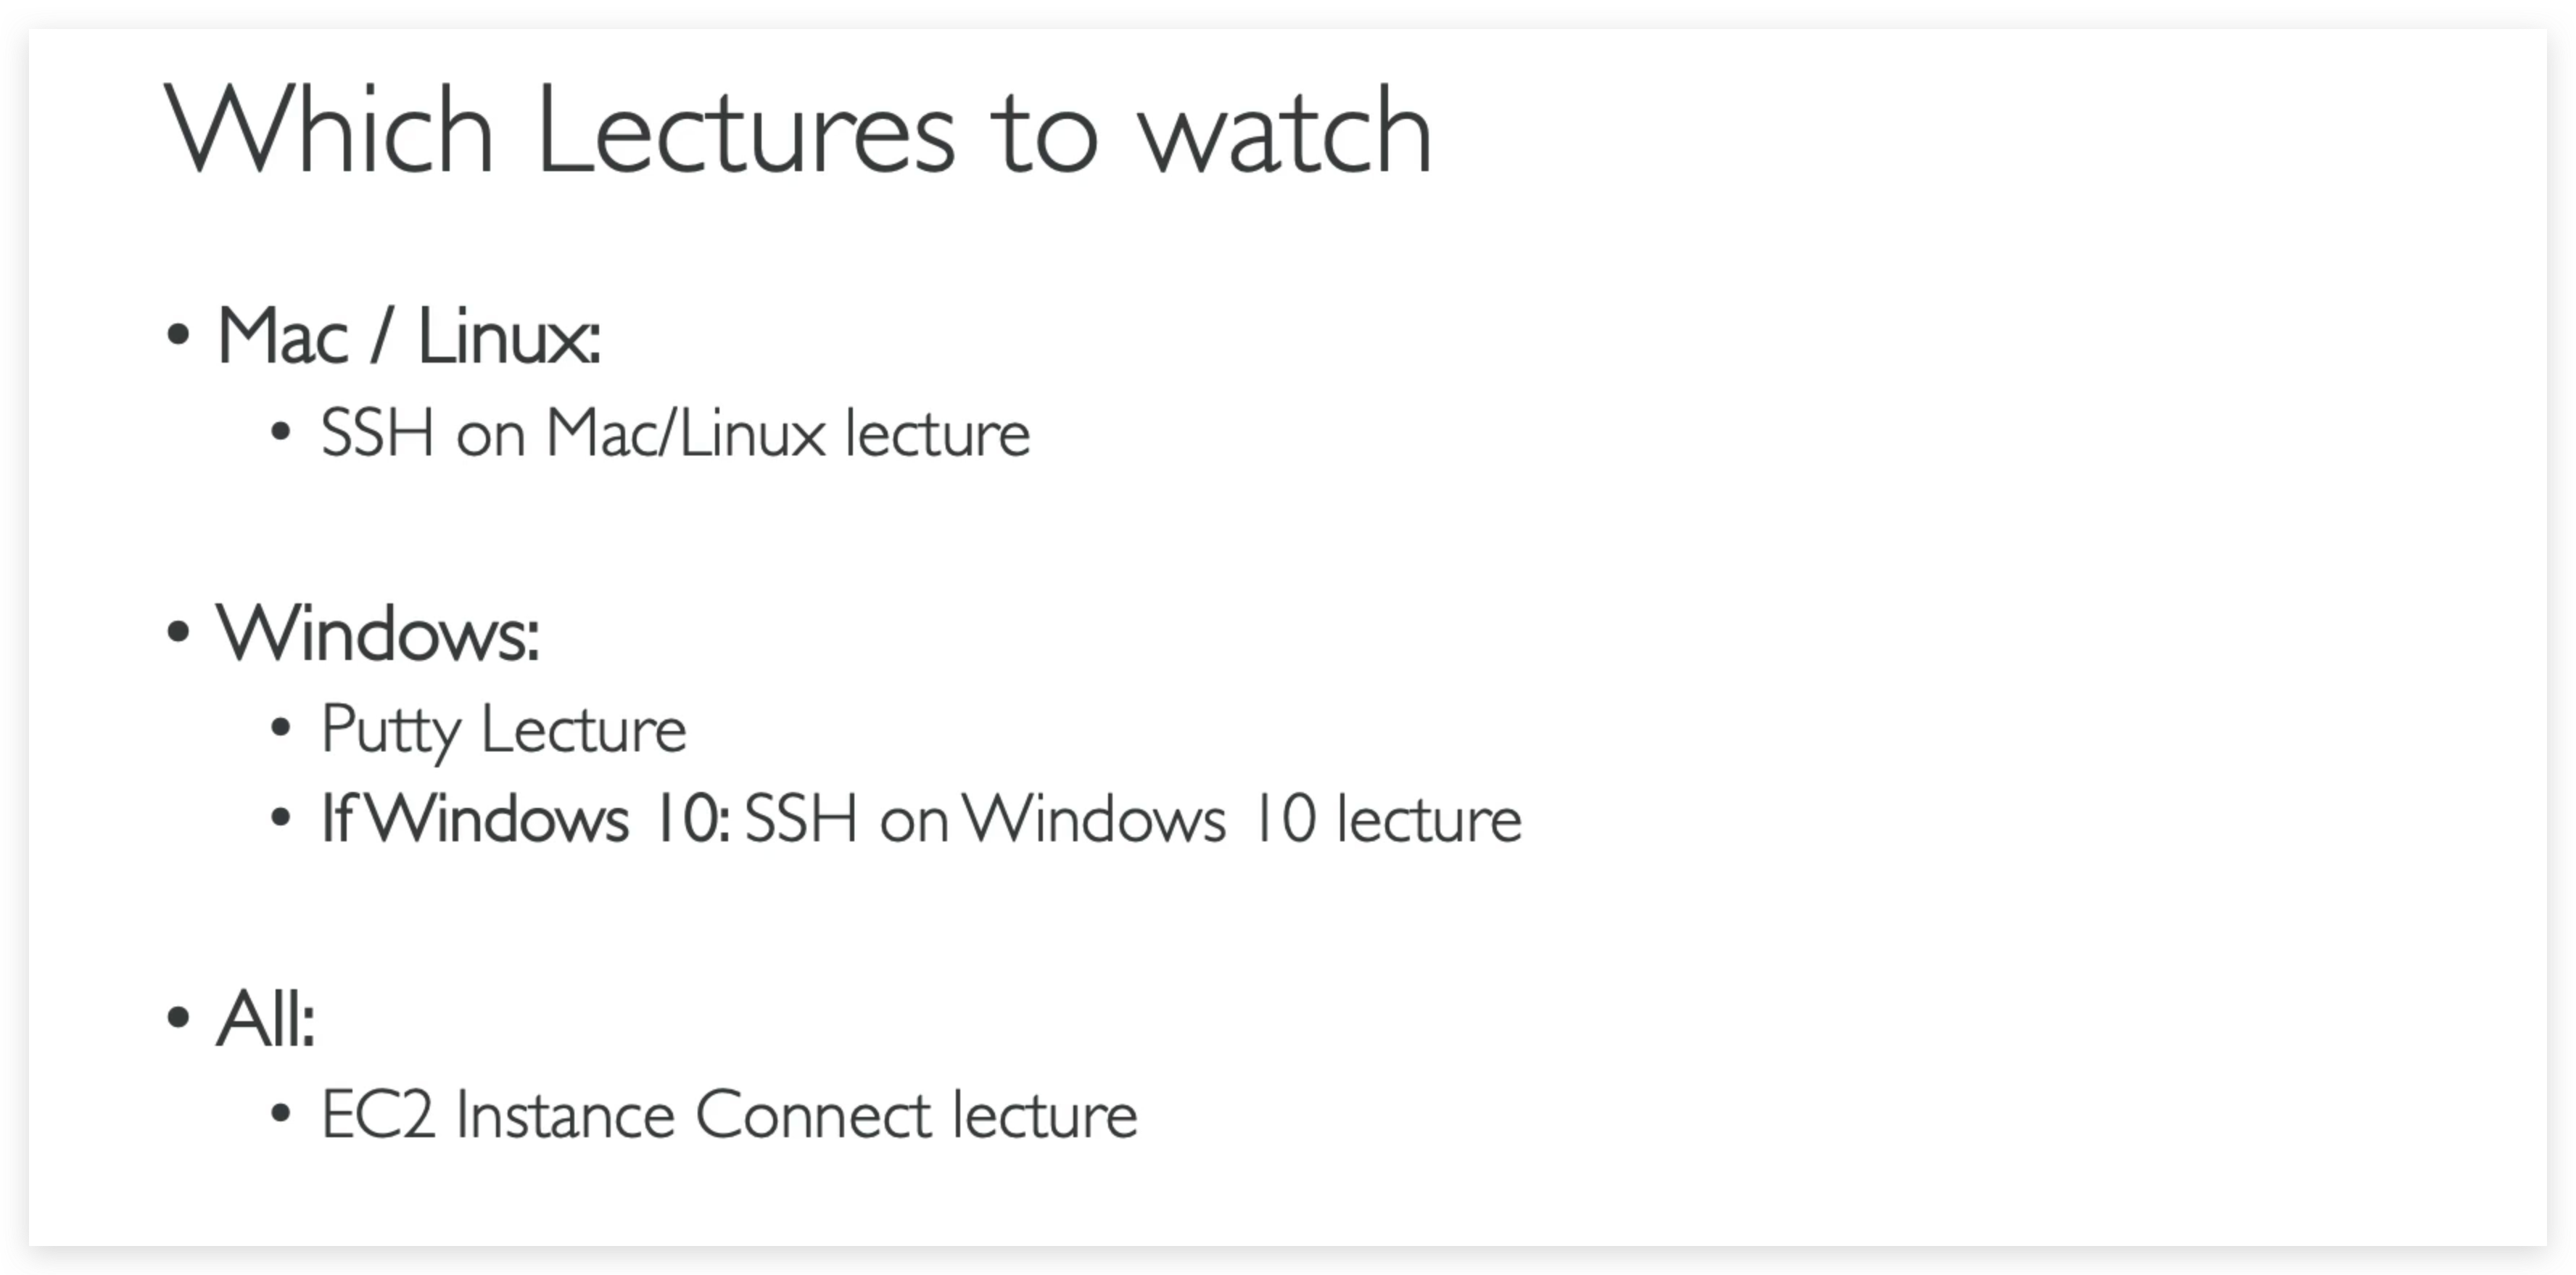
How to SSH into your EC2 instance from Mac / Linux
SSH is one of the most important function. It allows you to control a remote machine, all using the command line.
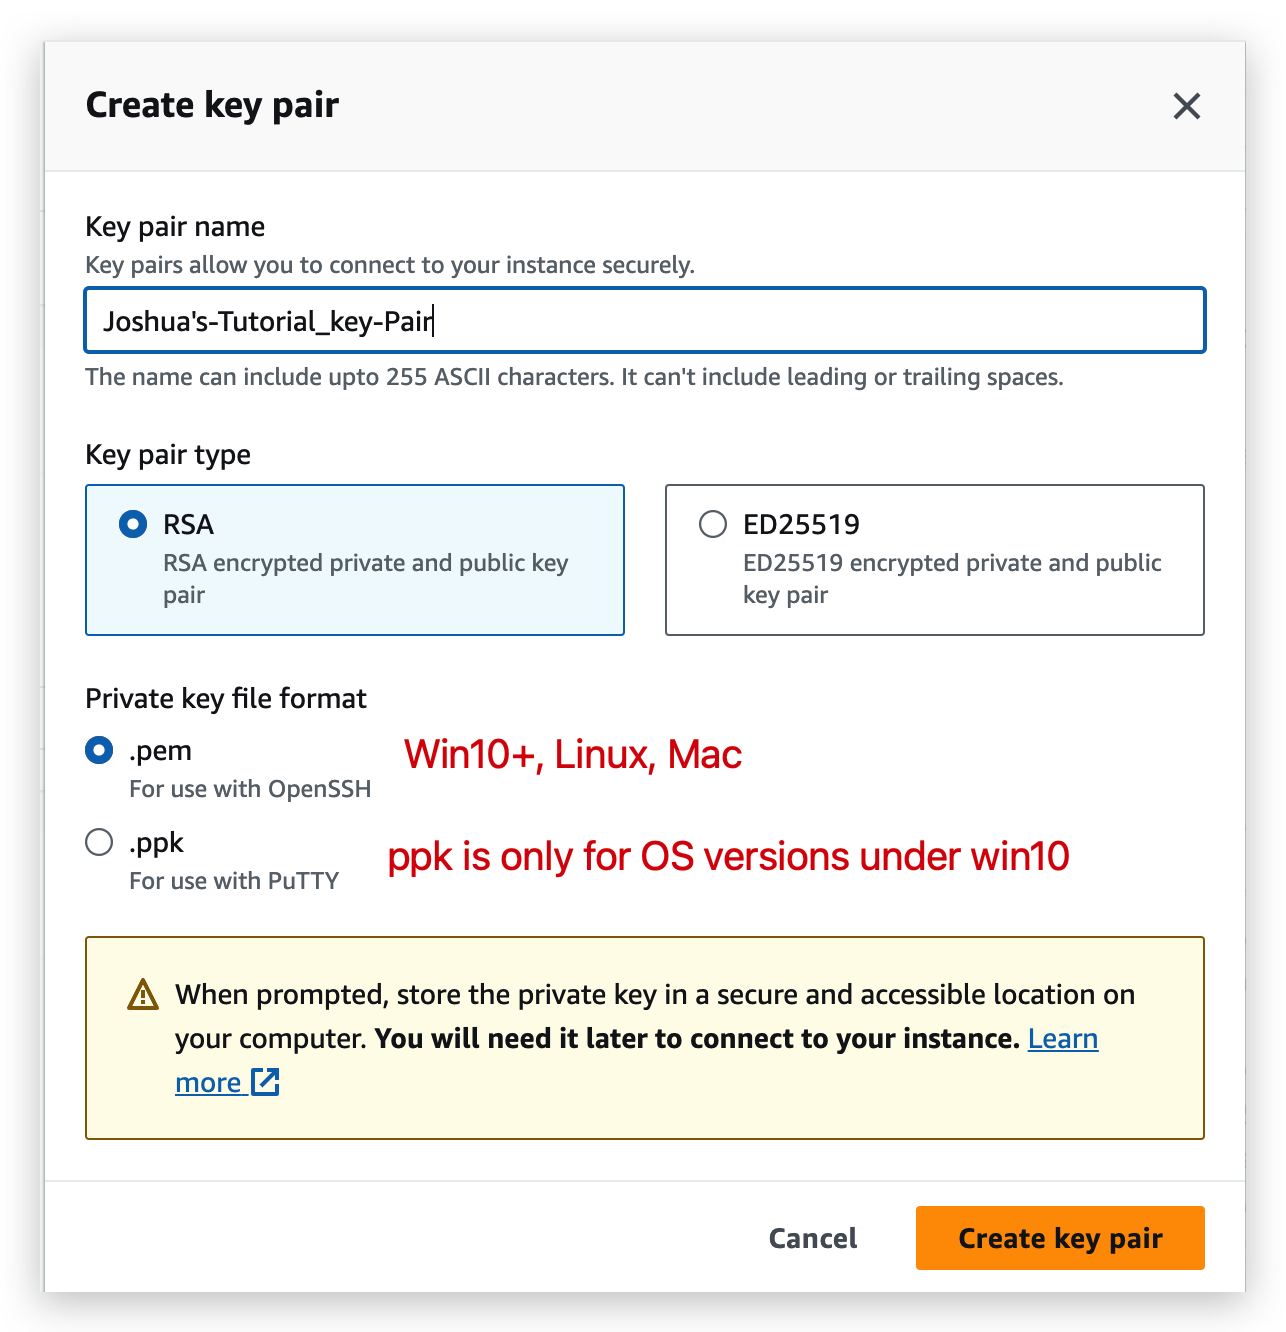
- Retrieve the pem file which was created when launching the EC2 instance. For me, it’s the one called “Joshua’s-Tutorial_key-Pair.pem“ stored in local drive: /Users/JoshuaBrooks/Downloads
- Get the public IPv4 address of the instance.
- Check the security groups bundled to the instance and ensure that it’s available from the IP that I am trying to SSH into via the corresponding port. (The inbound rule is 0.0.0.0/0:22, should be fine)
- execute the ssh command to SSH into the instance:
shell ssh -i ec2-user@34.207.232.181
So the reason why we use ec2-user is, because the Amazon Linux 2 AMI has one user already set up for us and that user is named ec2-user. 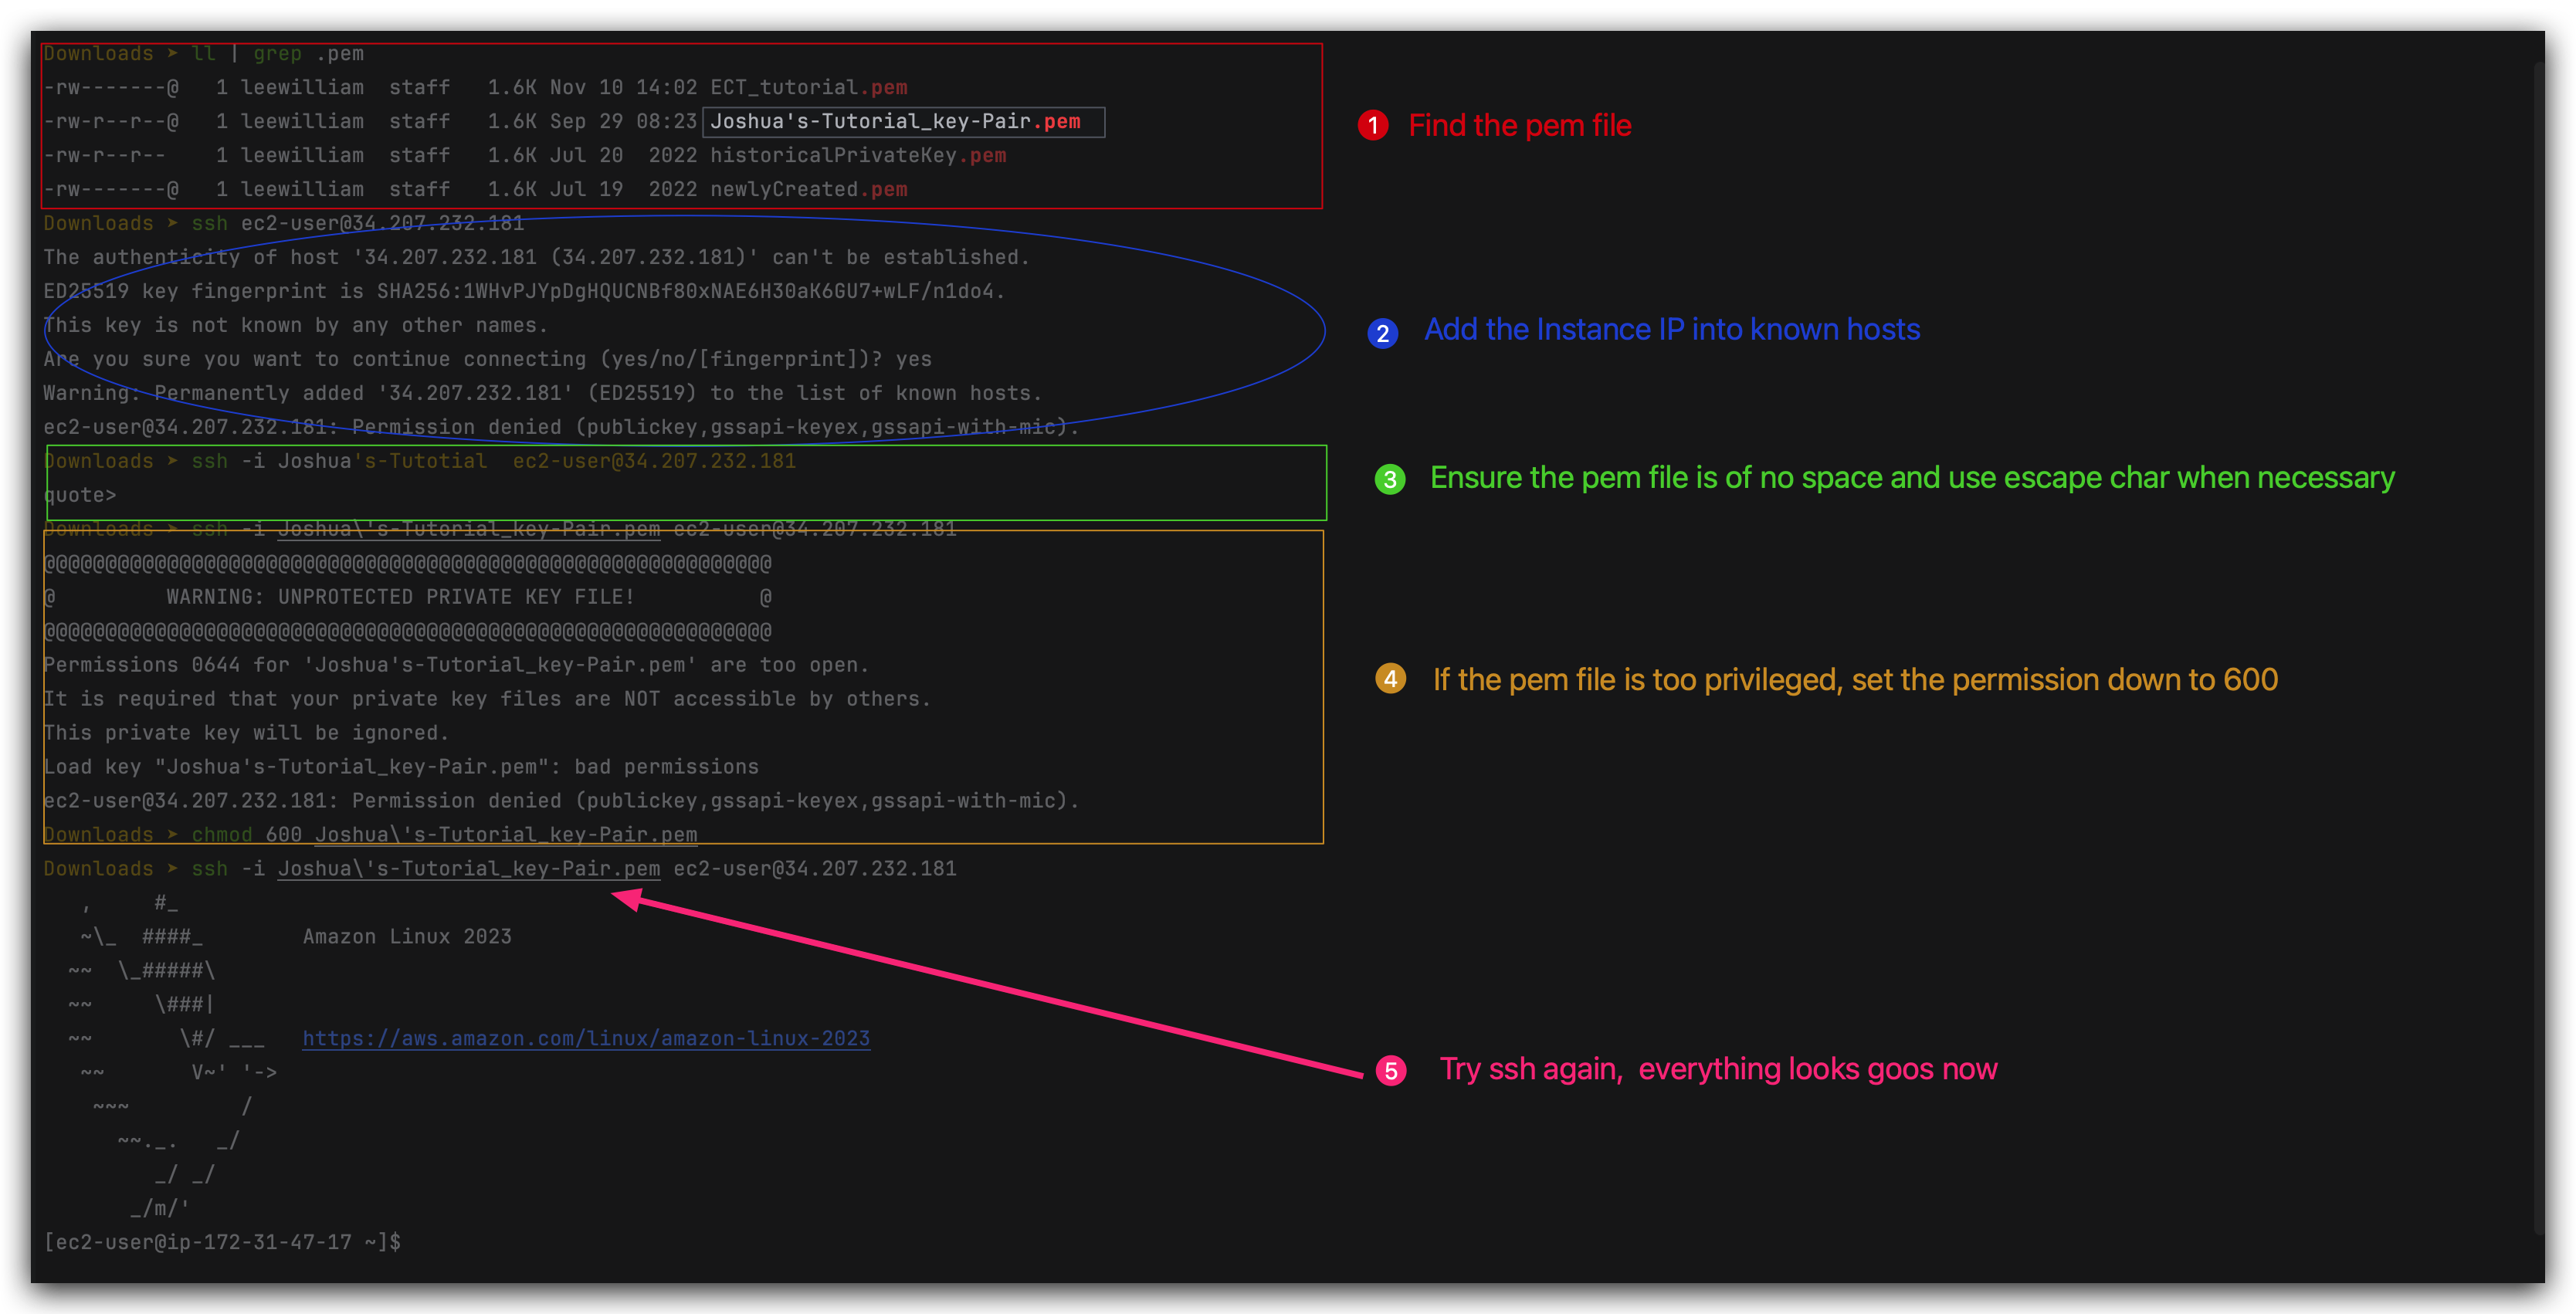
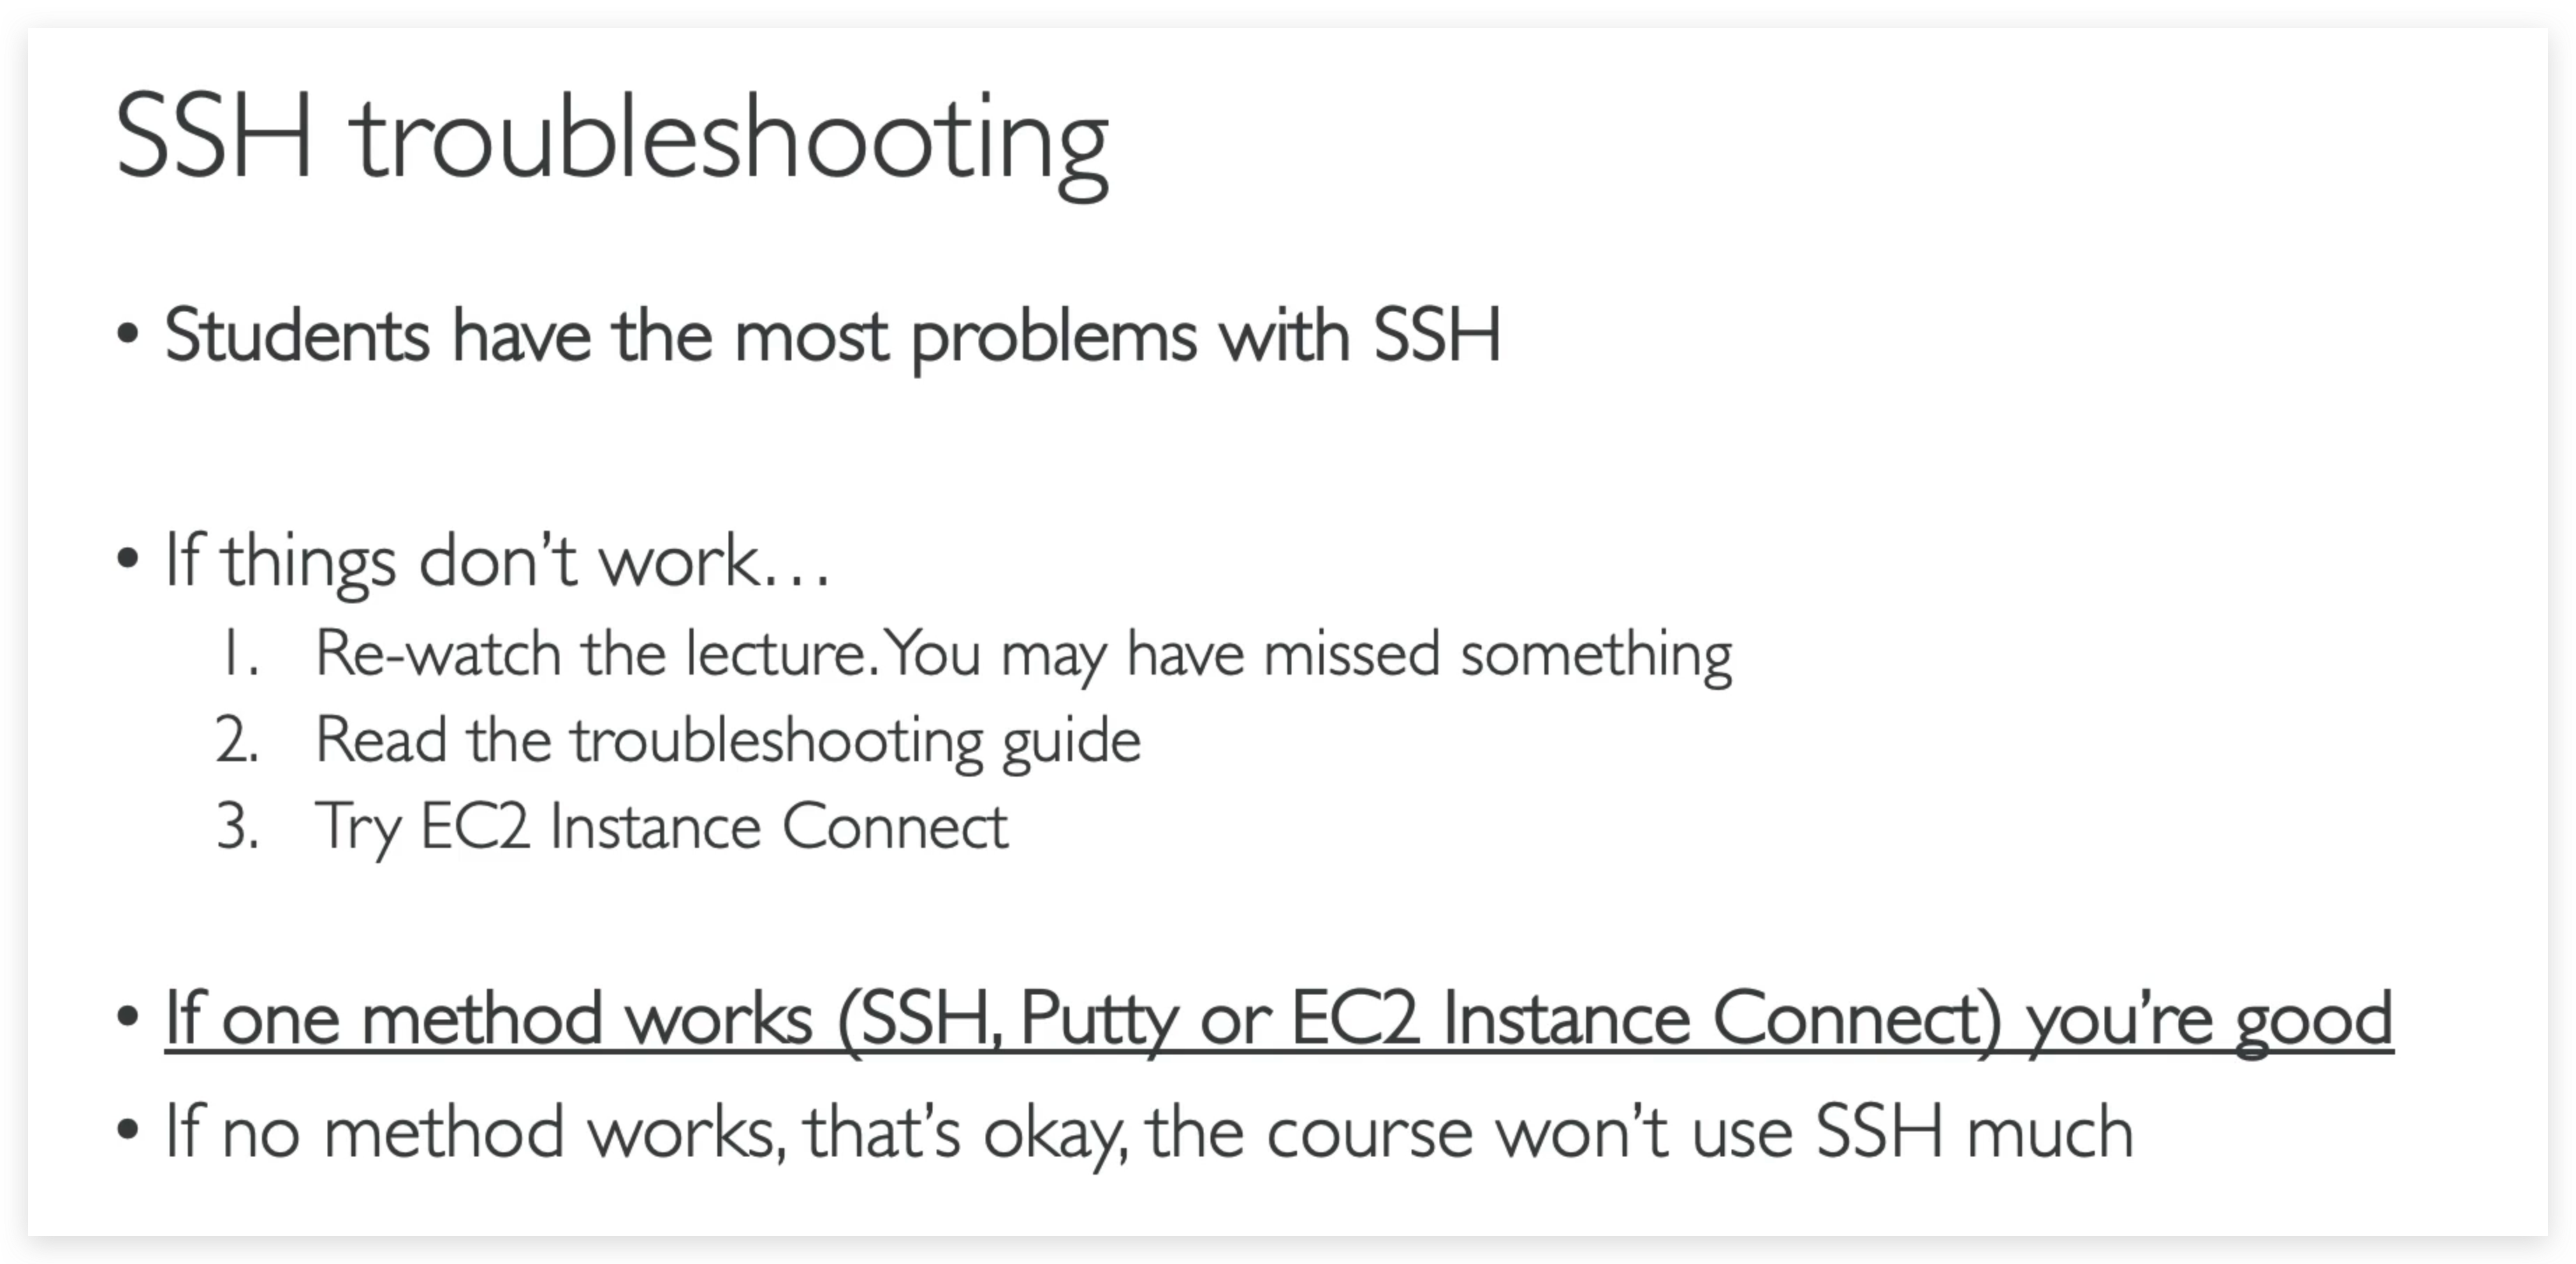
SSH troubleshooting
1) There’s a connection timeout
This is a security group issue. Any timeout (not just for SSH) is related to security groups or a firewall. Ensure your security group looks like this and correctly assigned to your EC2 instance.
2) There’s still a connection timeout issue
If your security group is properly configured as above, and you still have connection timeout issues, then that means a corporate firewall or a personal firewall is blocking the connection. Please use EC2 Instance Connect as described in the next lecture.
3) SSH does not work on Windows
If it says:ssh command not found, that means you have to use Putty Follow again the video. If things don’t work, please use EC2 Instance Connect as described in the next lecture
4) There’s a connection refused
This means the instance is reachable, but no SSH utility is running on the instance
- Try to restart the instance.
- If it doesn’t work, terminate the instance and create a new one. Make sure you’re using Amazon Linux 2.
EC2 Instance Connect
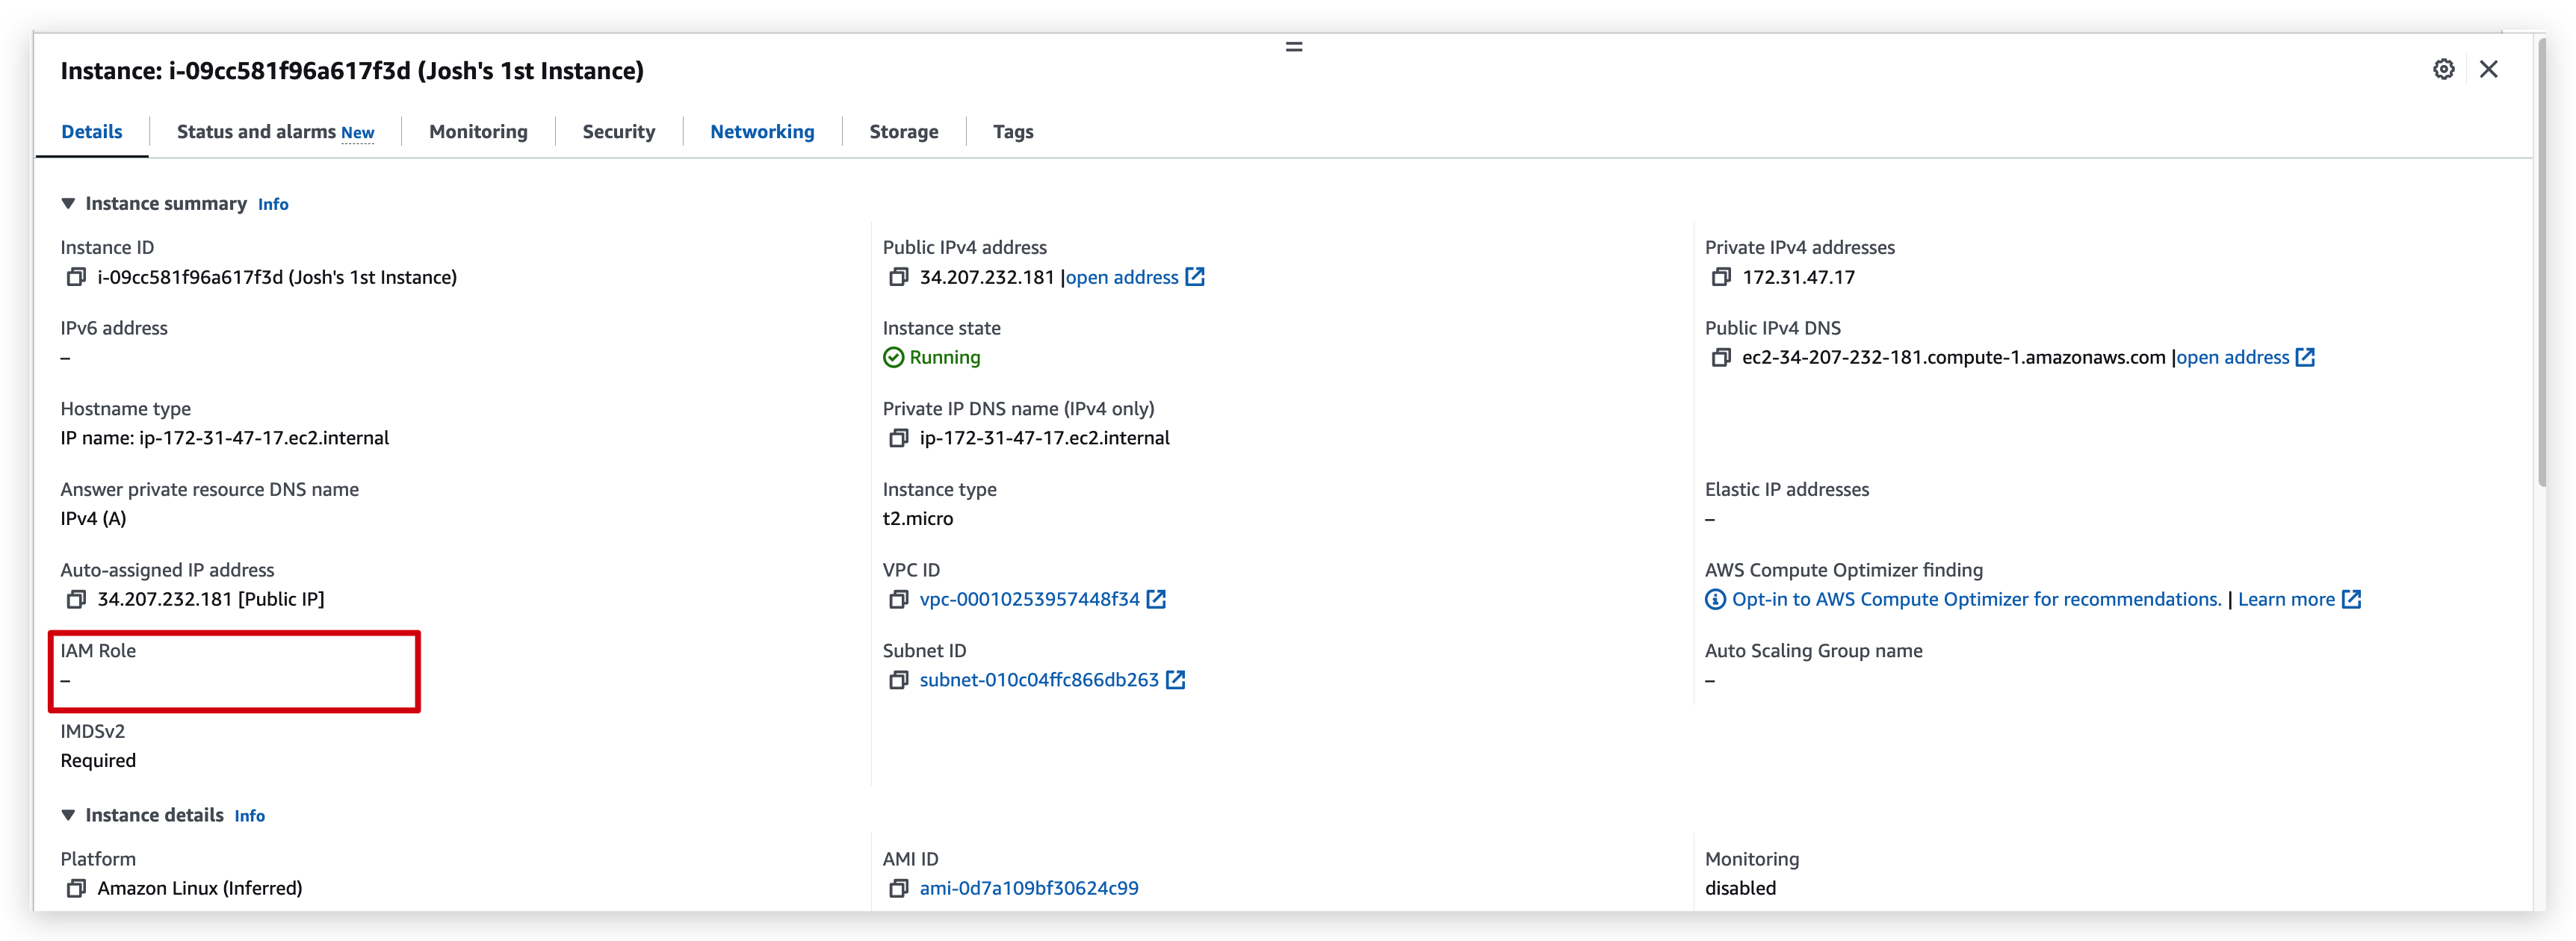
If we check the checkbox of the Josh’s 1st Instance instance(we created earlier), and hit the connect button on the top corner of the portal: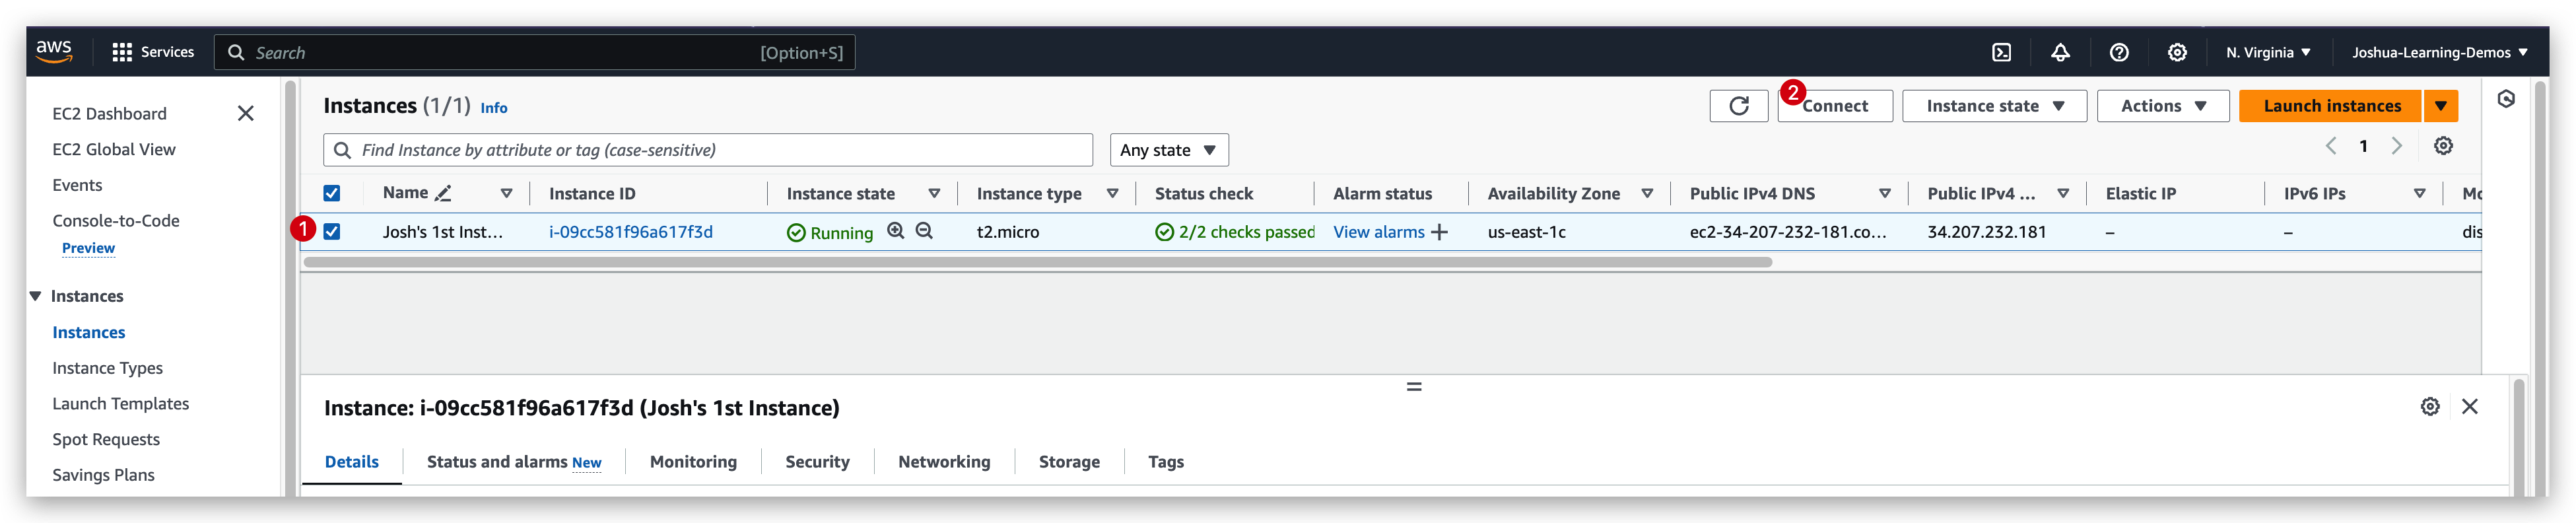
It will redirect us to a page of connection method selection page: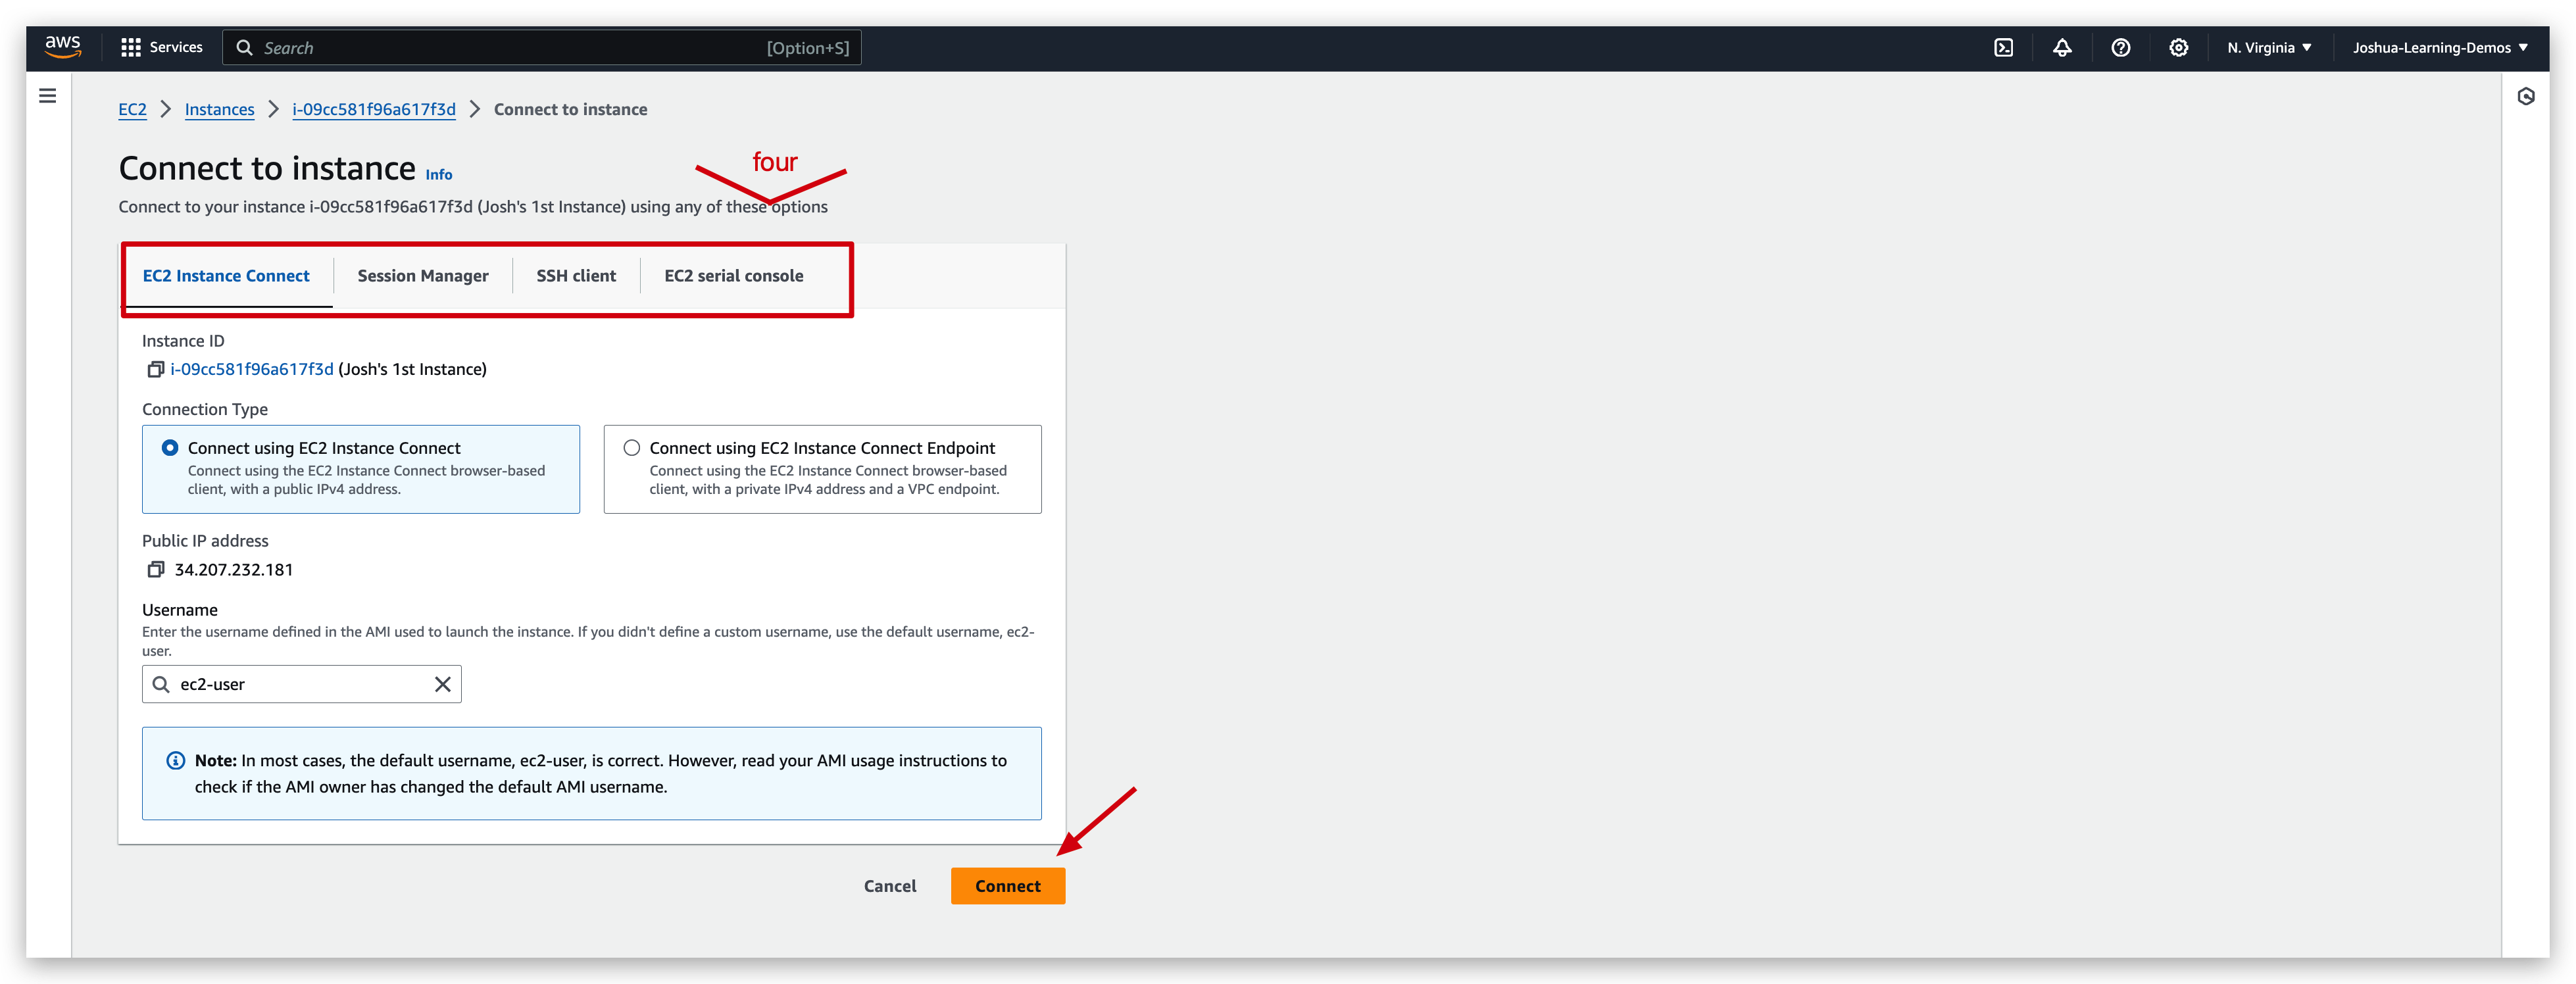
Once we hit the connect button, it will create us a new browser based session wherein we can execute aws / linux command just like what we did in terminal.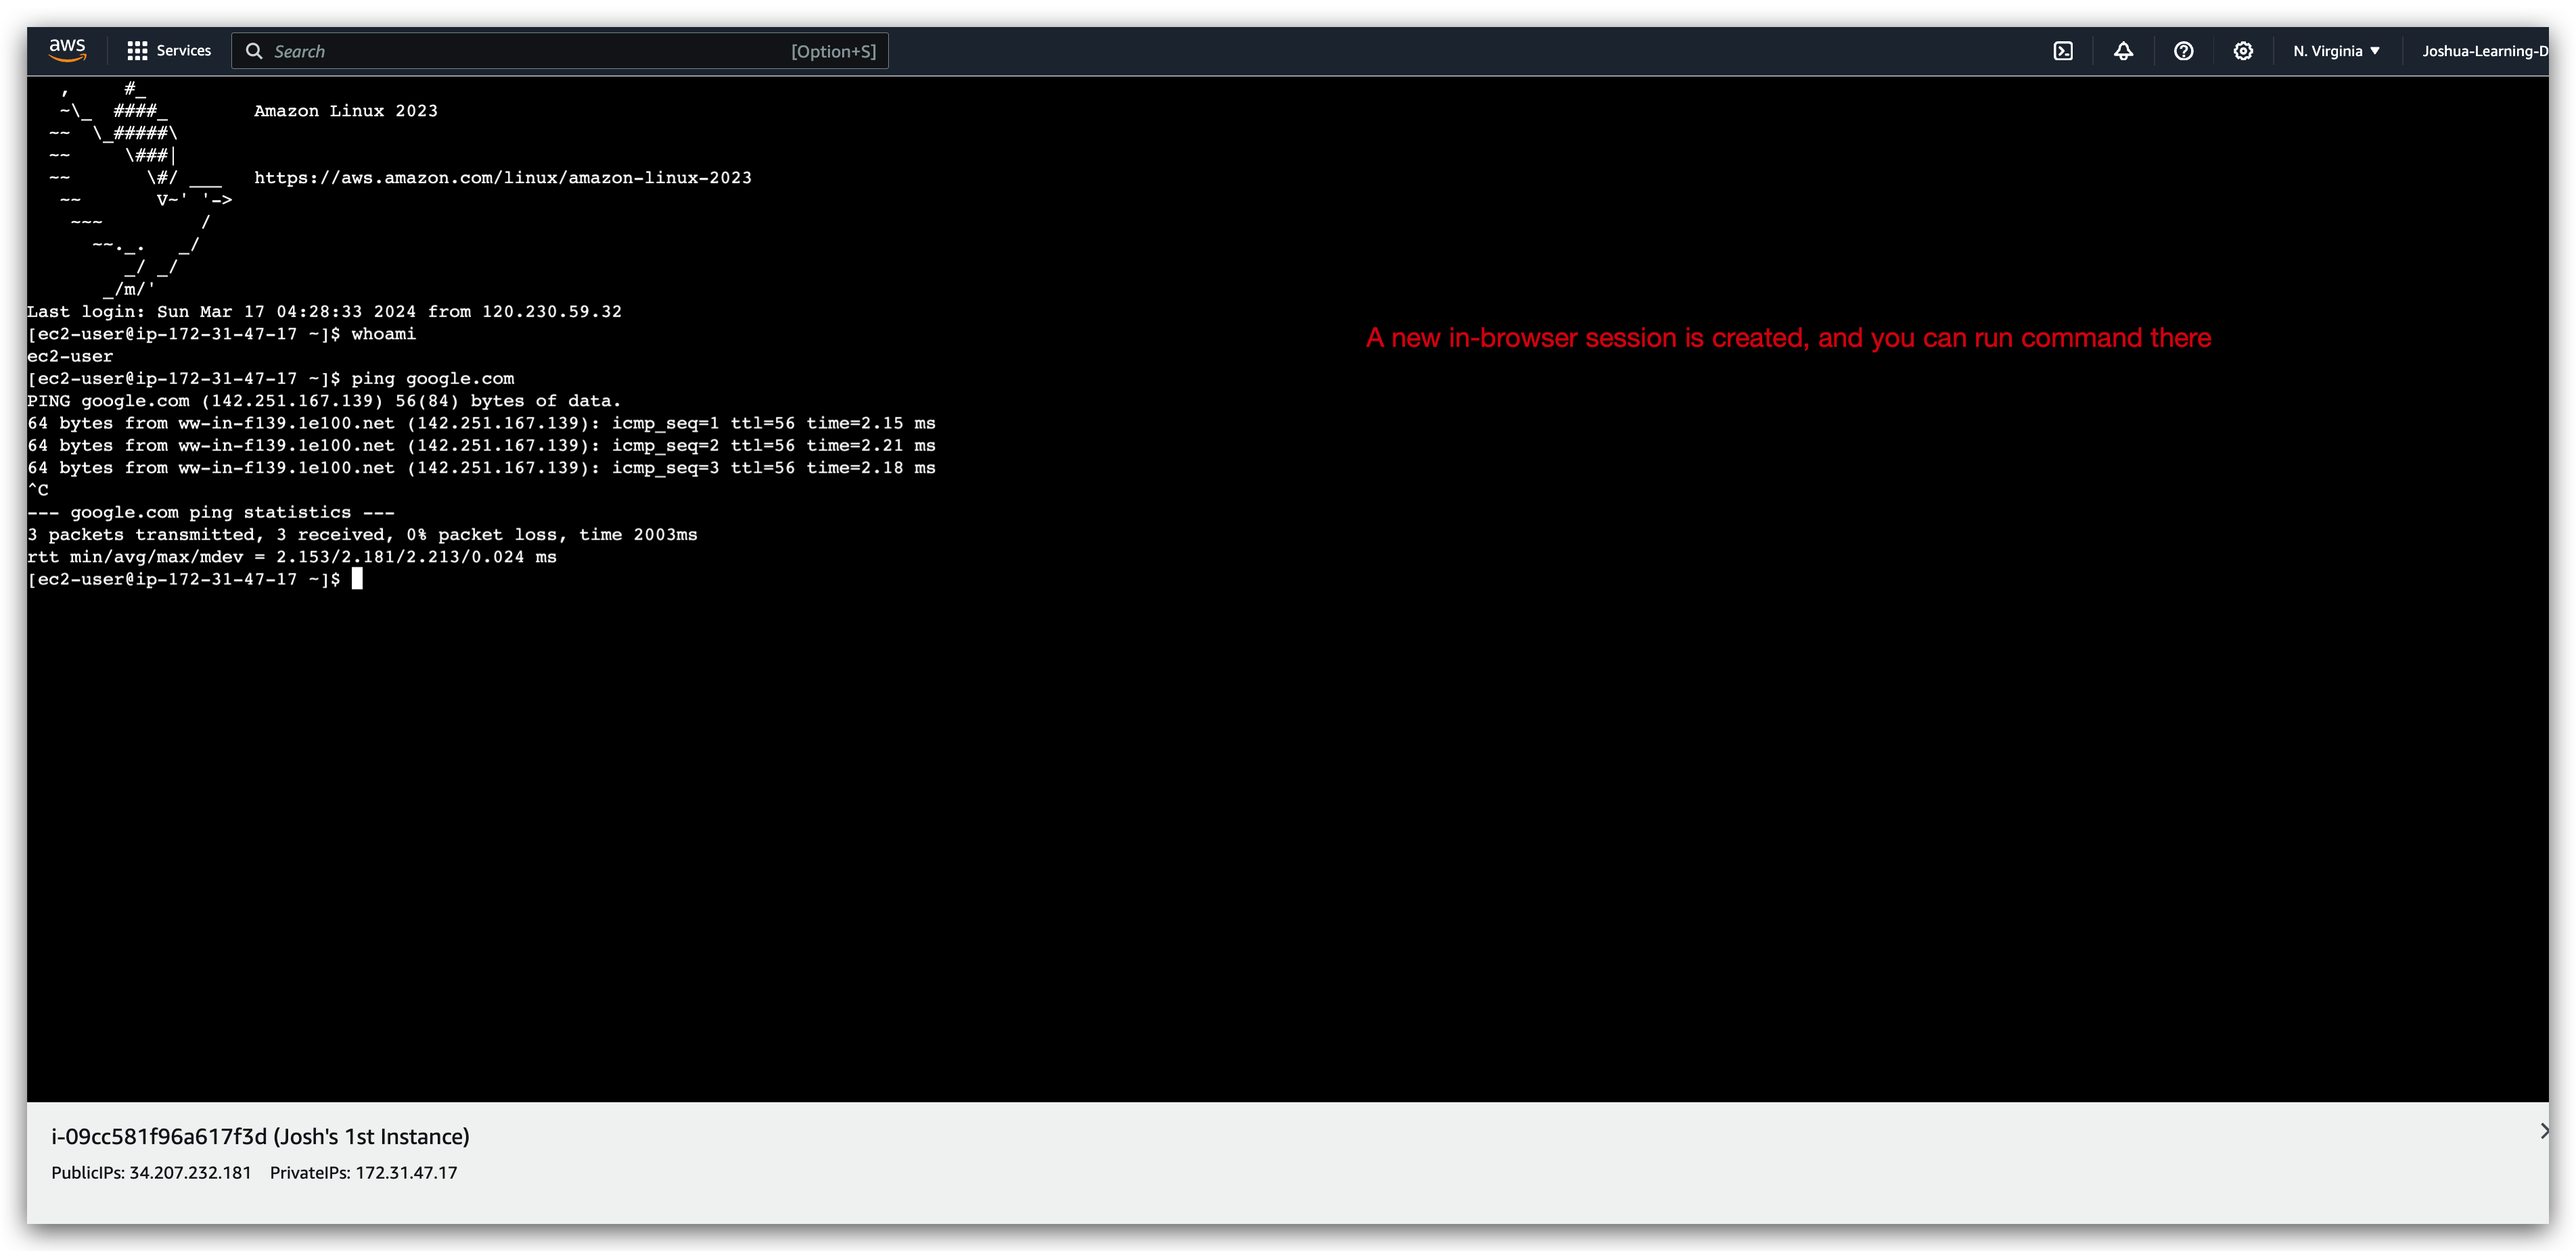
If we execute:
1 | aws iam list-users |
We will be returned with a error message / prompt:
Hence, we tried to add a role to this instance so that it’a able to do IAM related action:
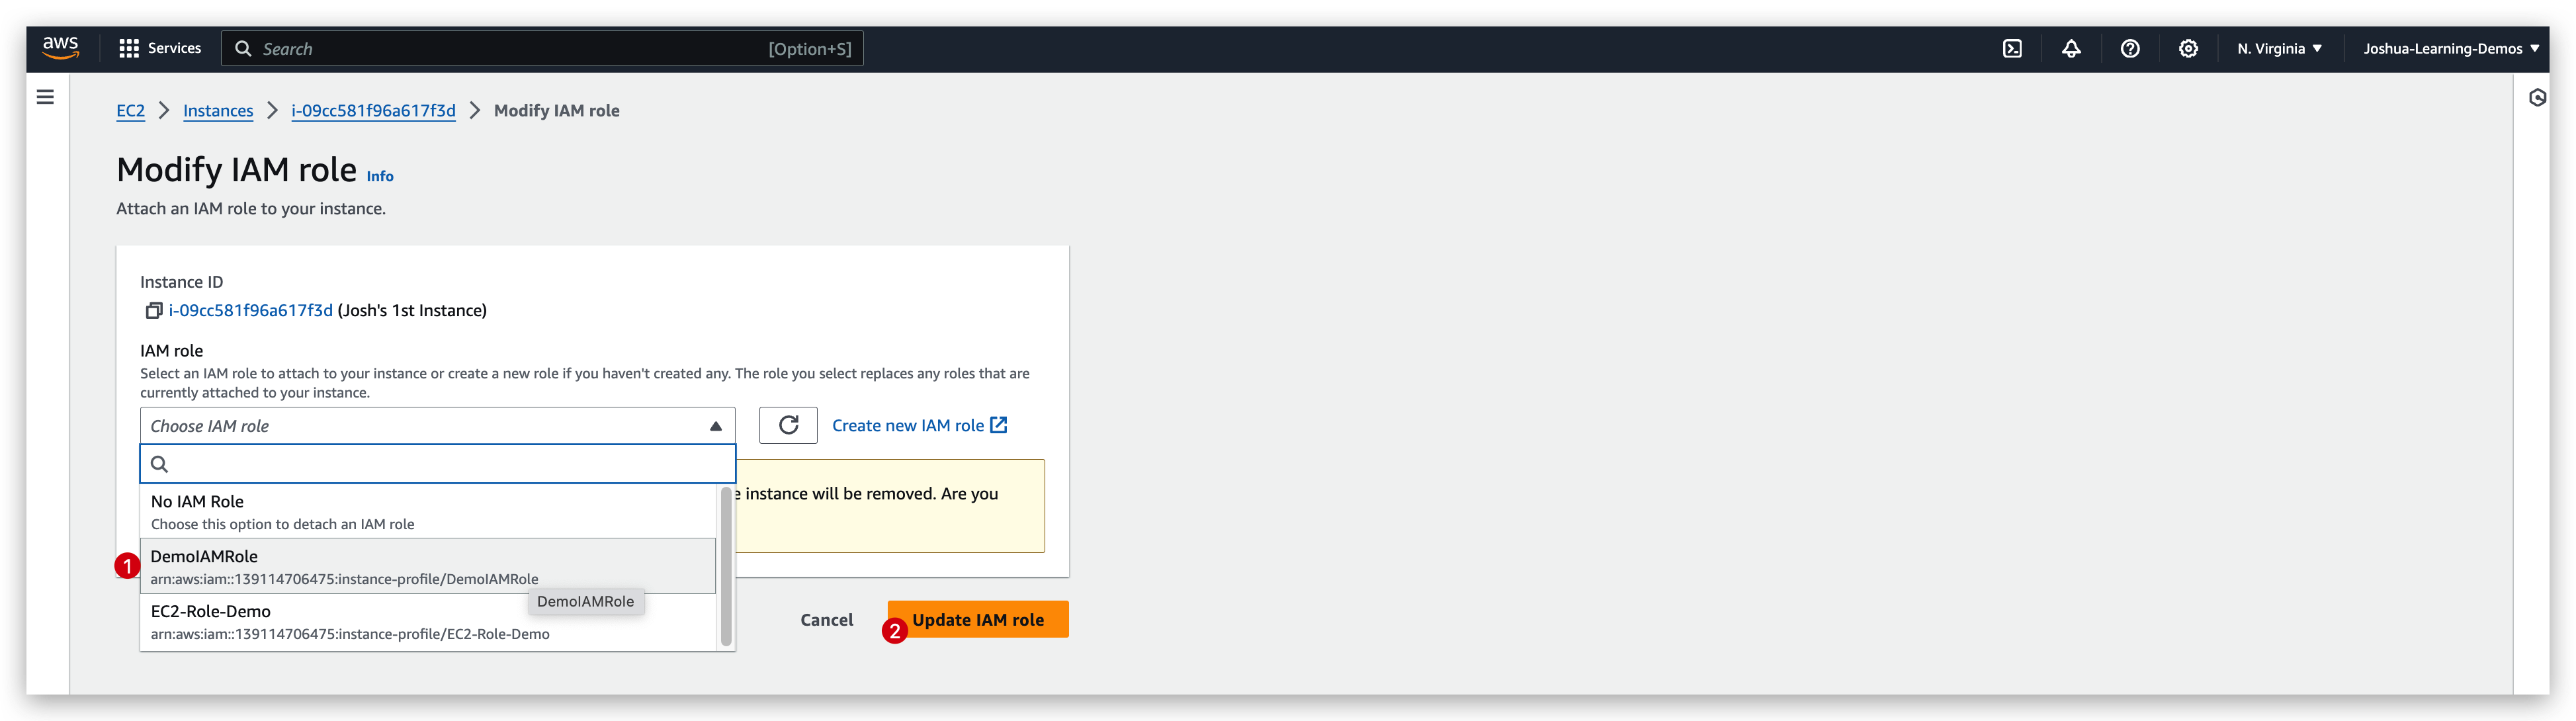
IAM role checking: before V.S after
Now rerun the iam command: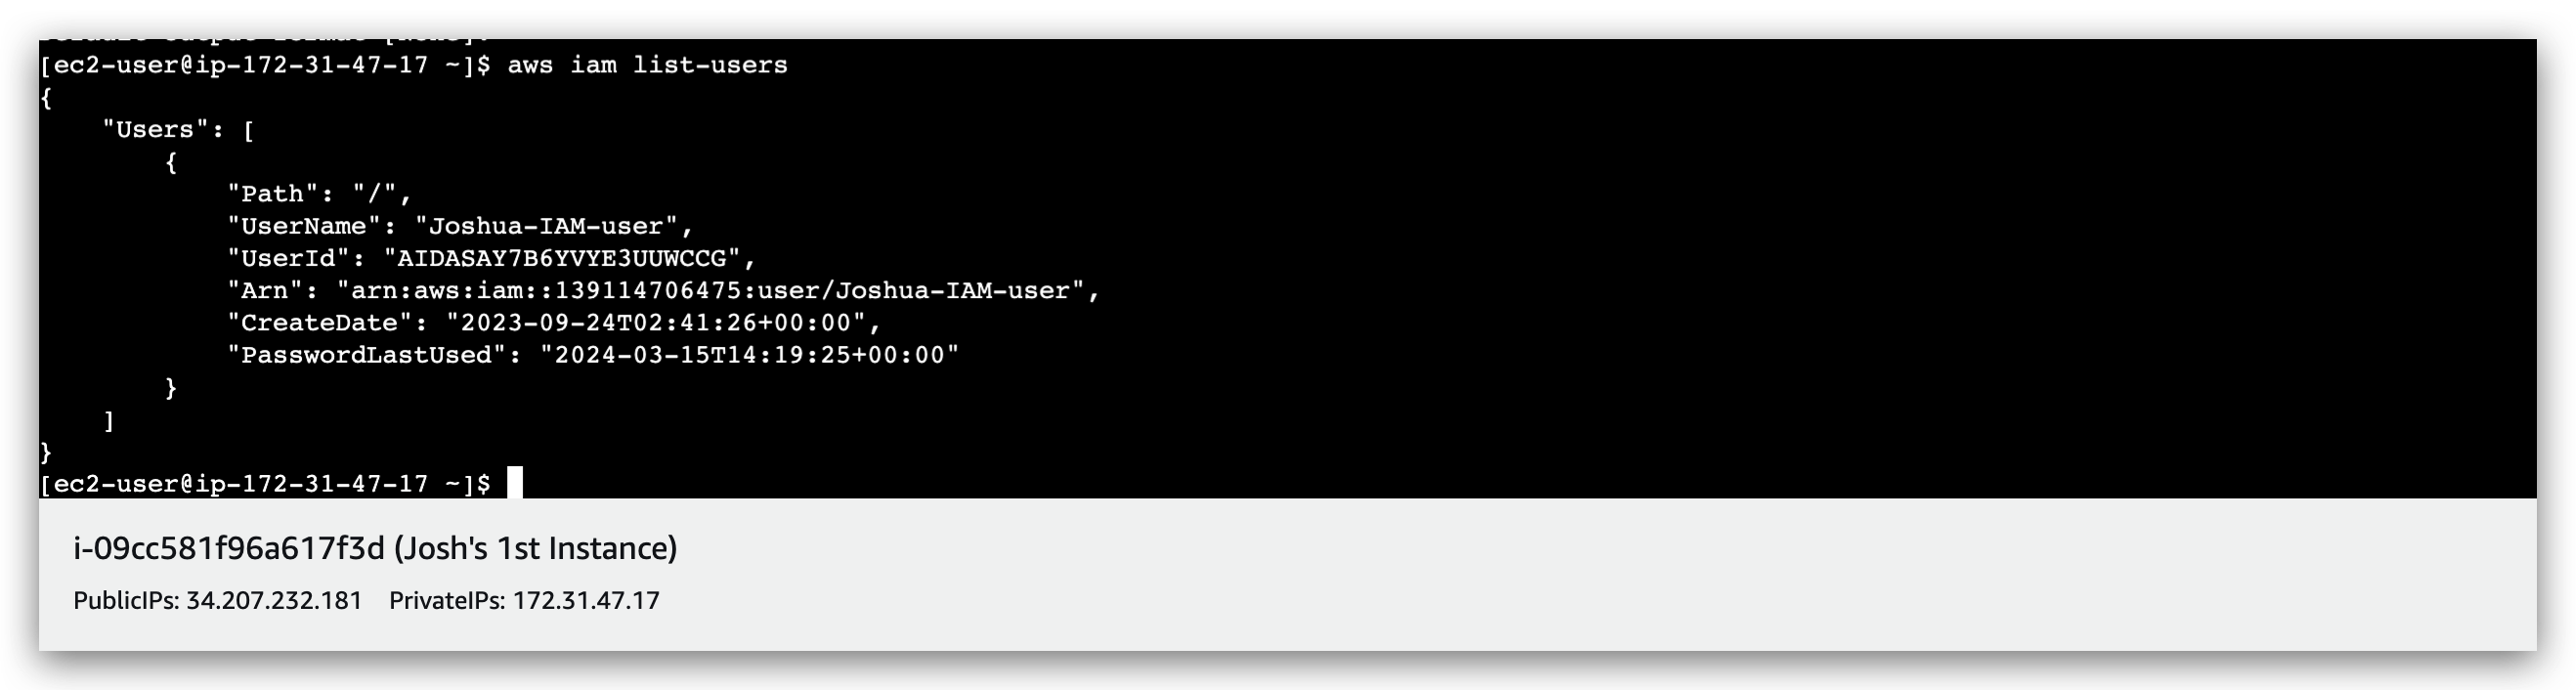
We can also demonstrate that it is the IAM role working by removing the permission of that role like: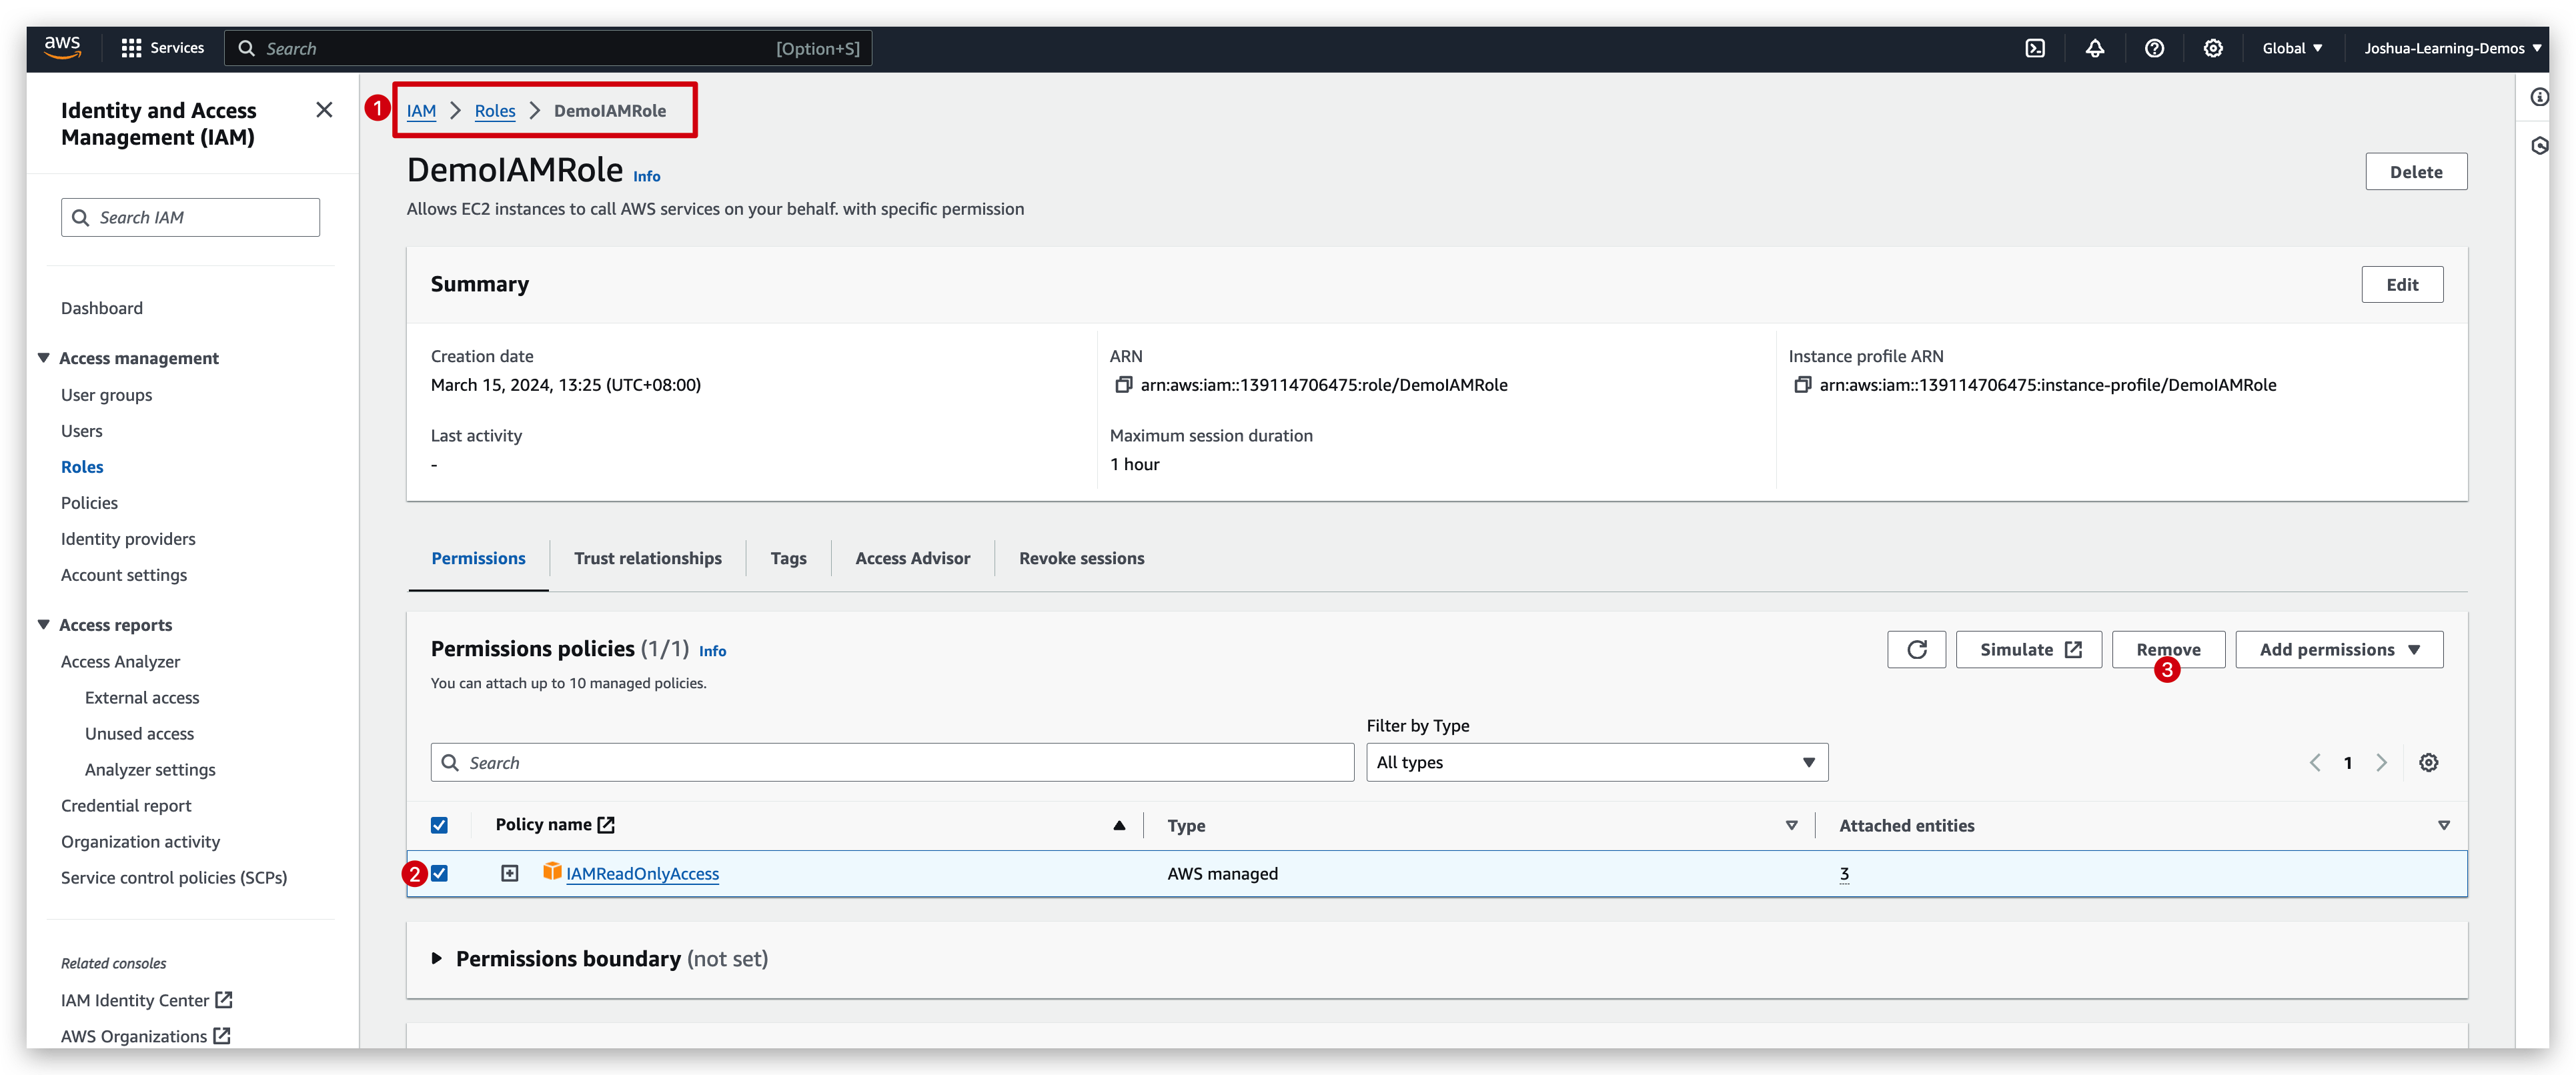
And then we rerun the iam command again: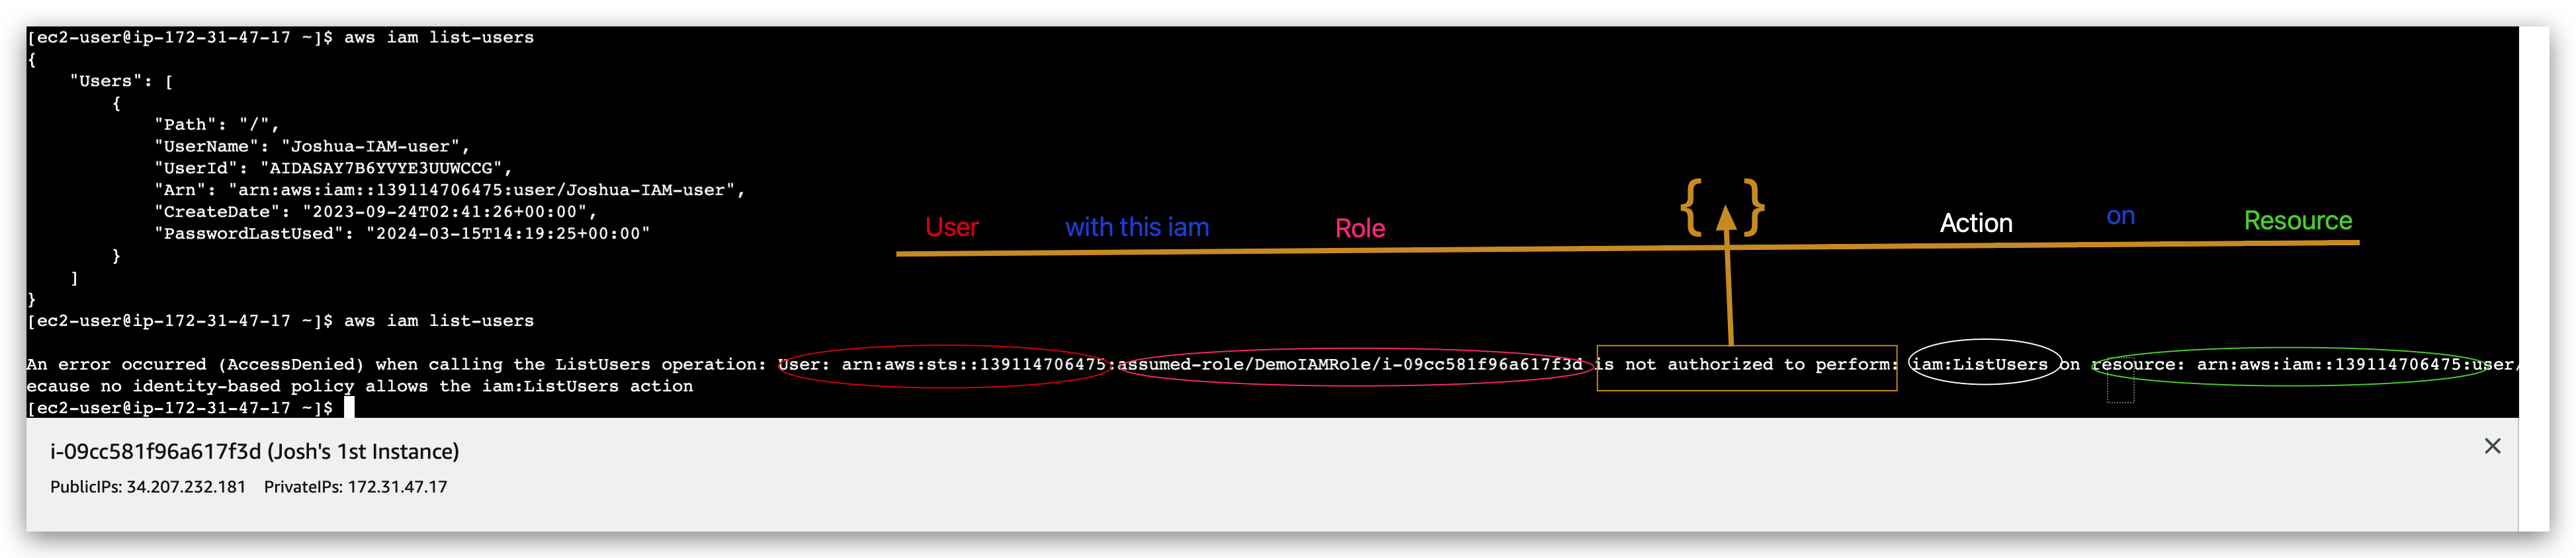
But if we delete the inbound rule of the security group of this specific instance, and try to connect again It will fail because of below error:
If we selected the SSH connection, the instructions shown below is exactly what we did in last step of the SSH connection section.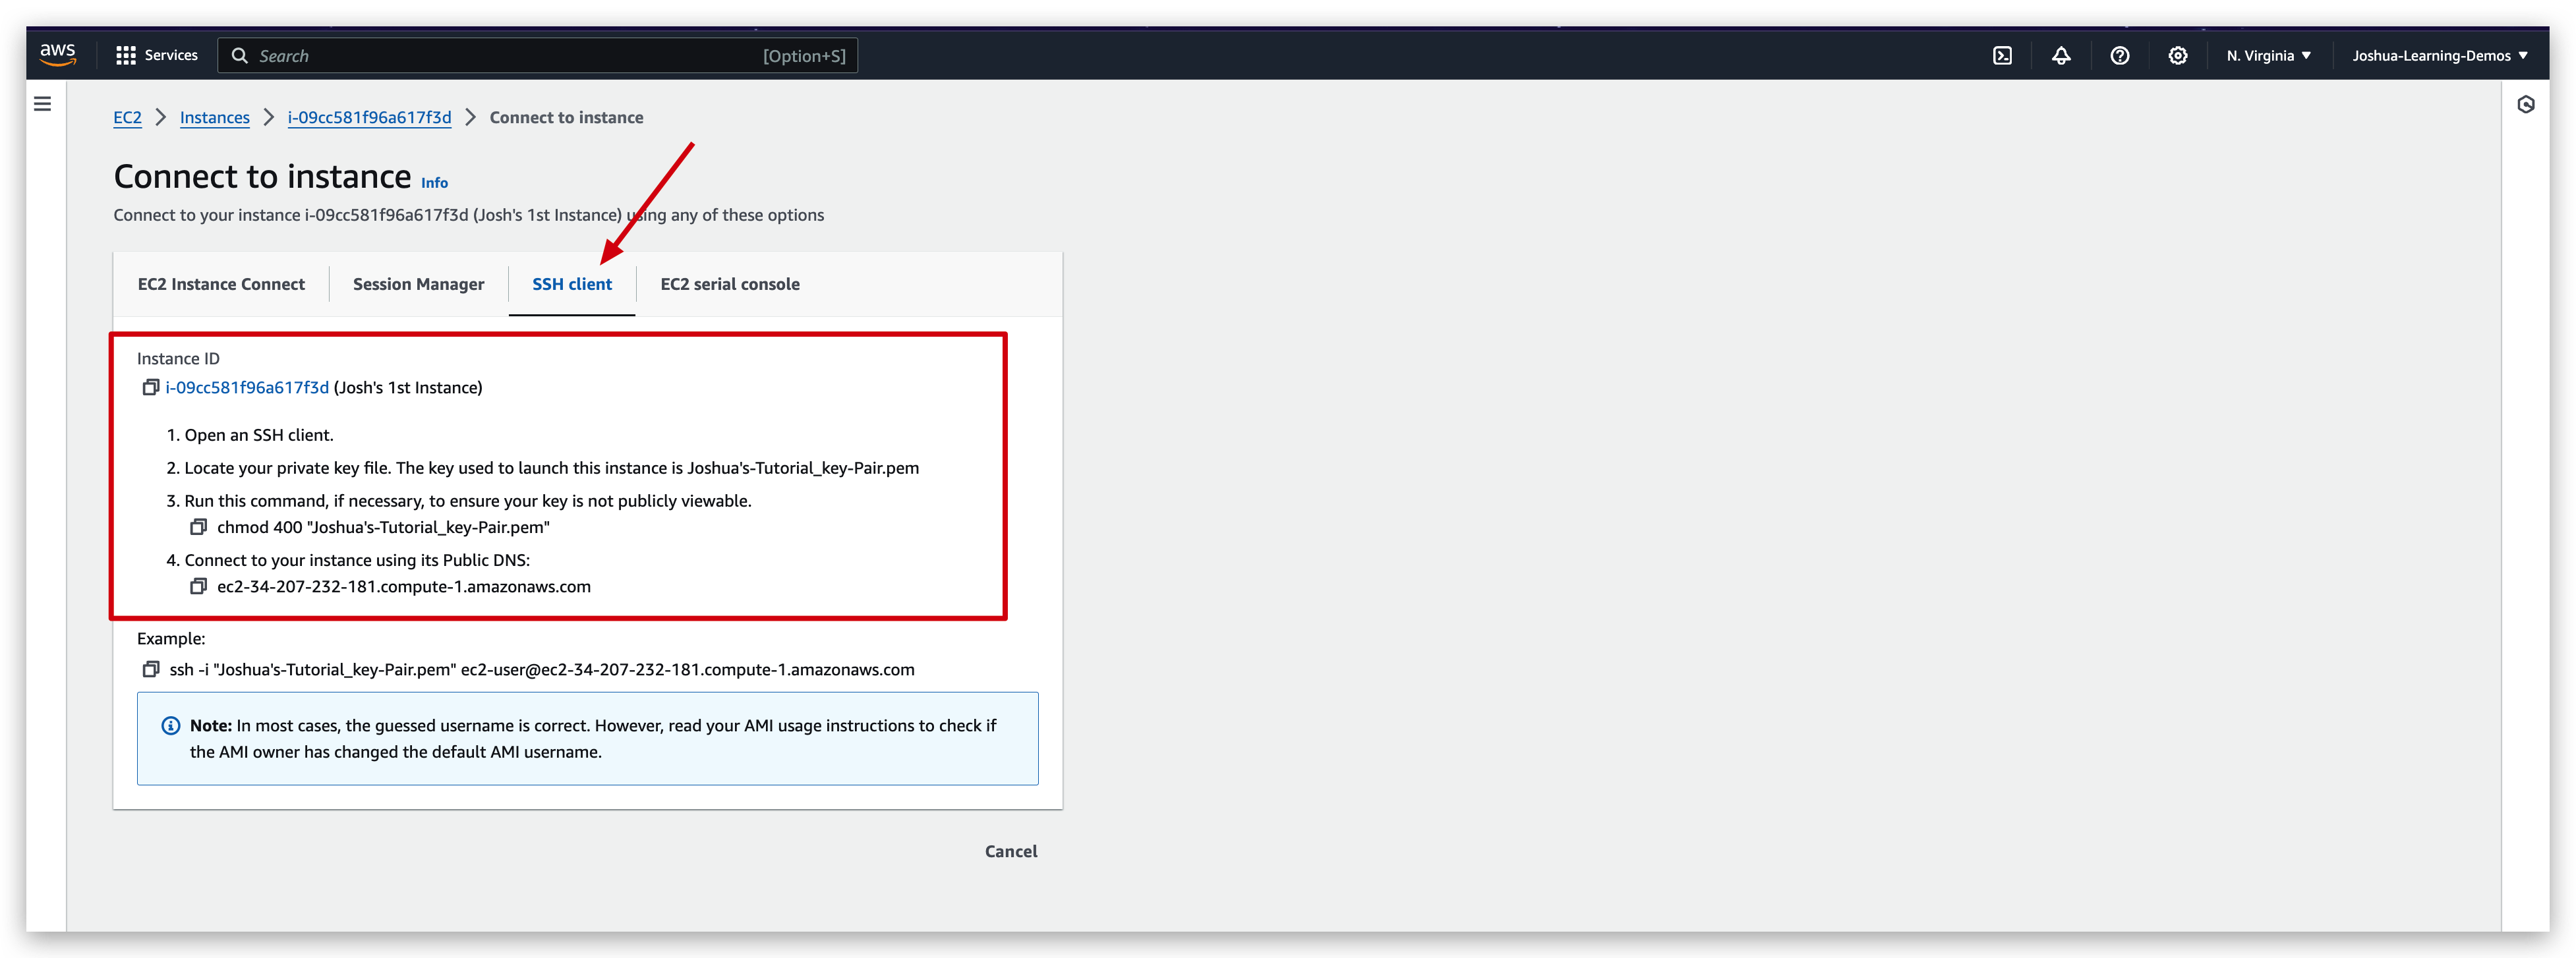
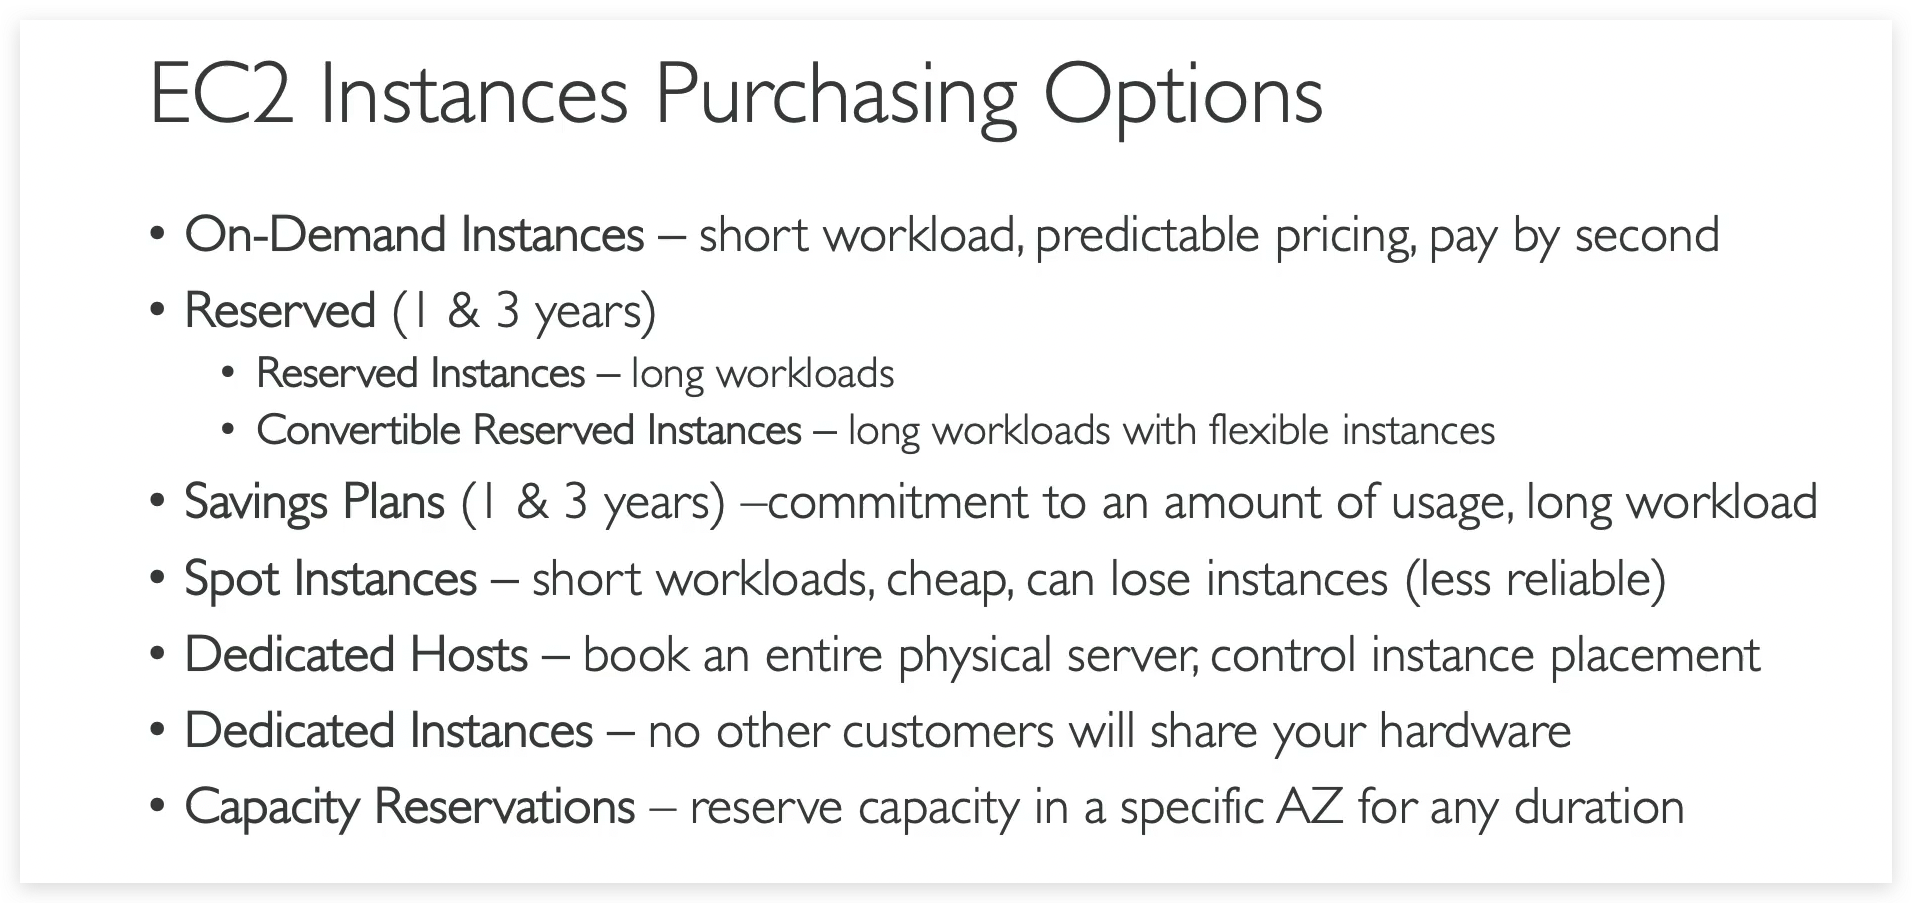
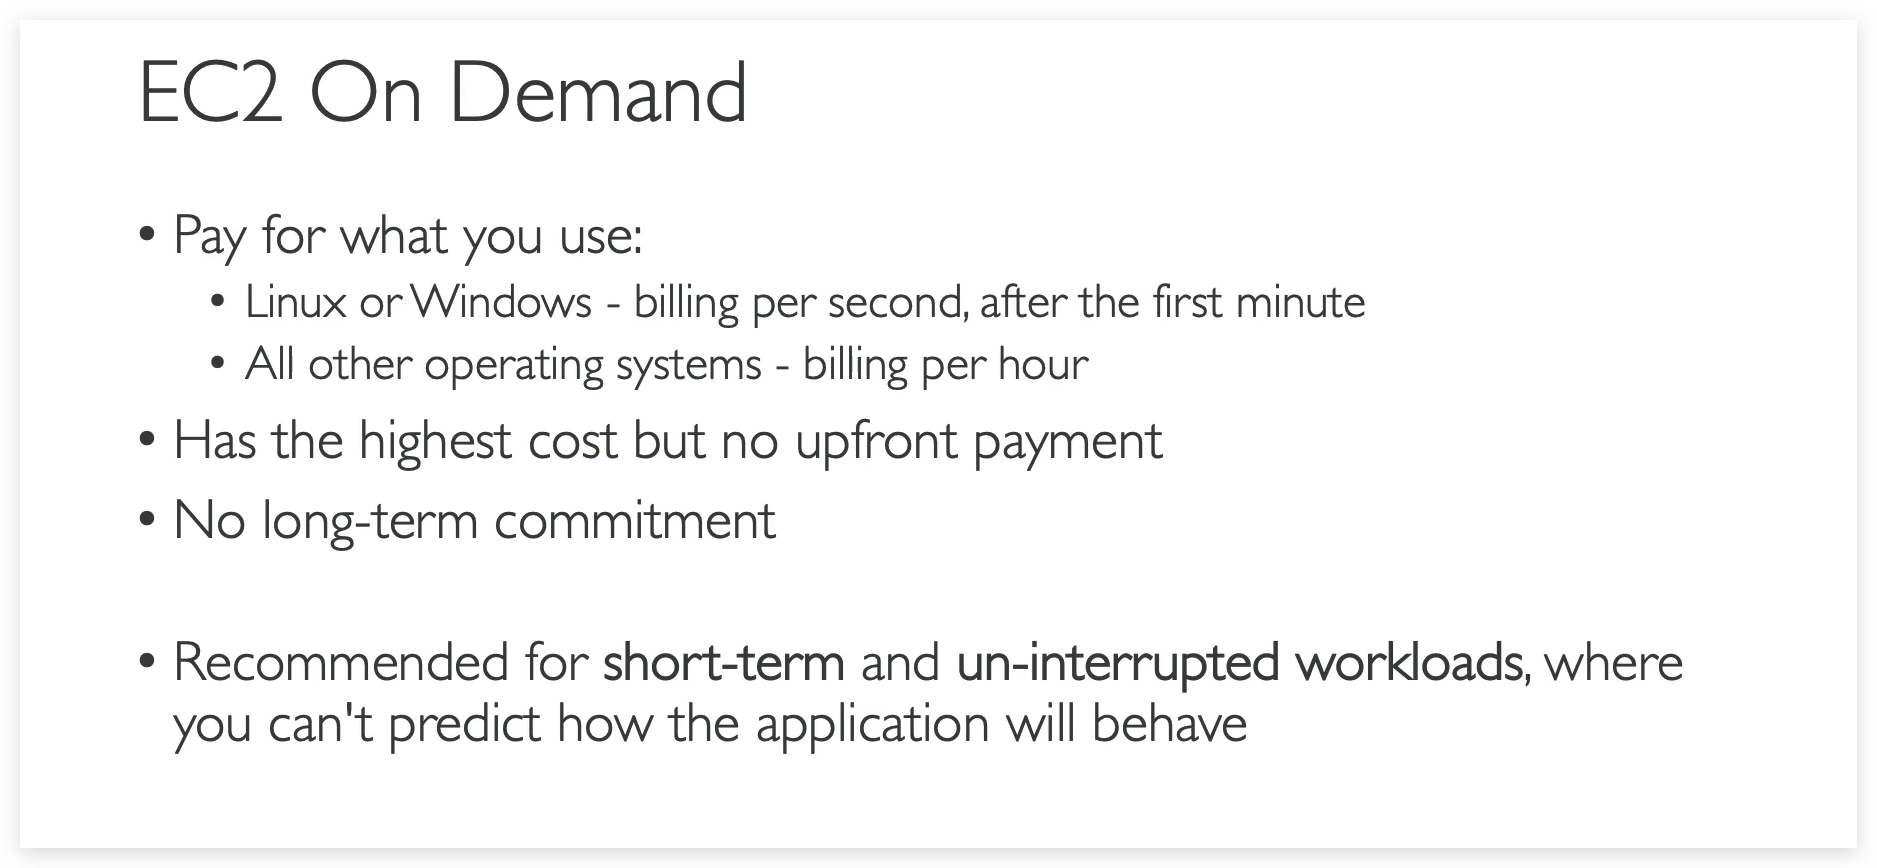
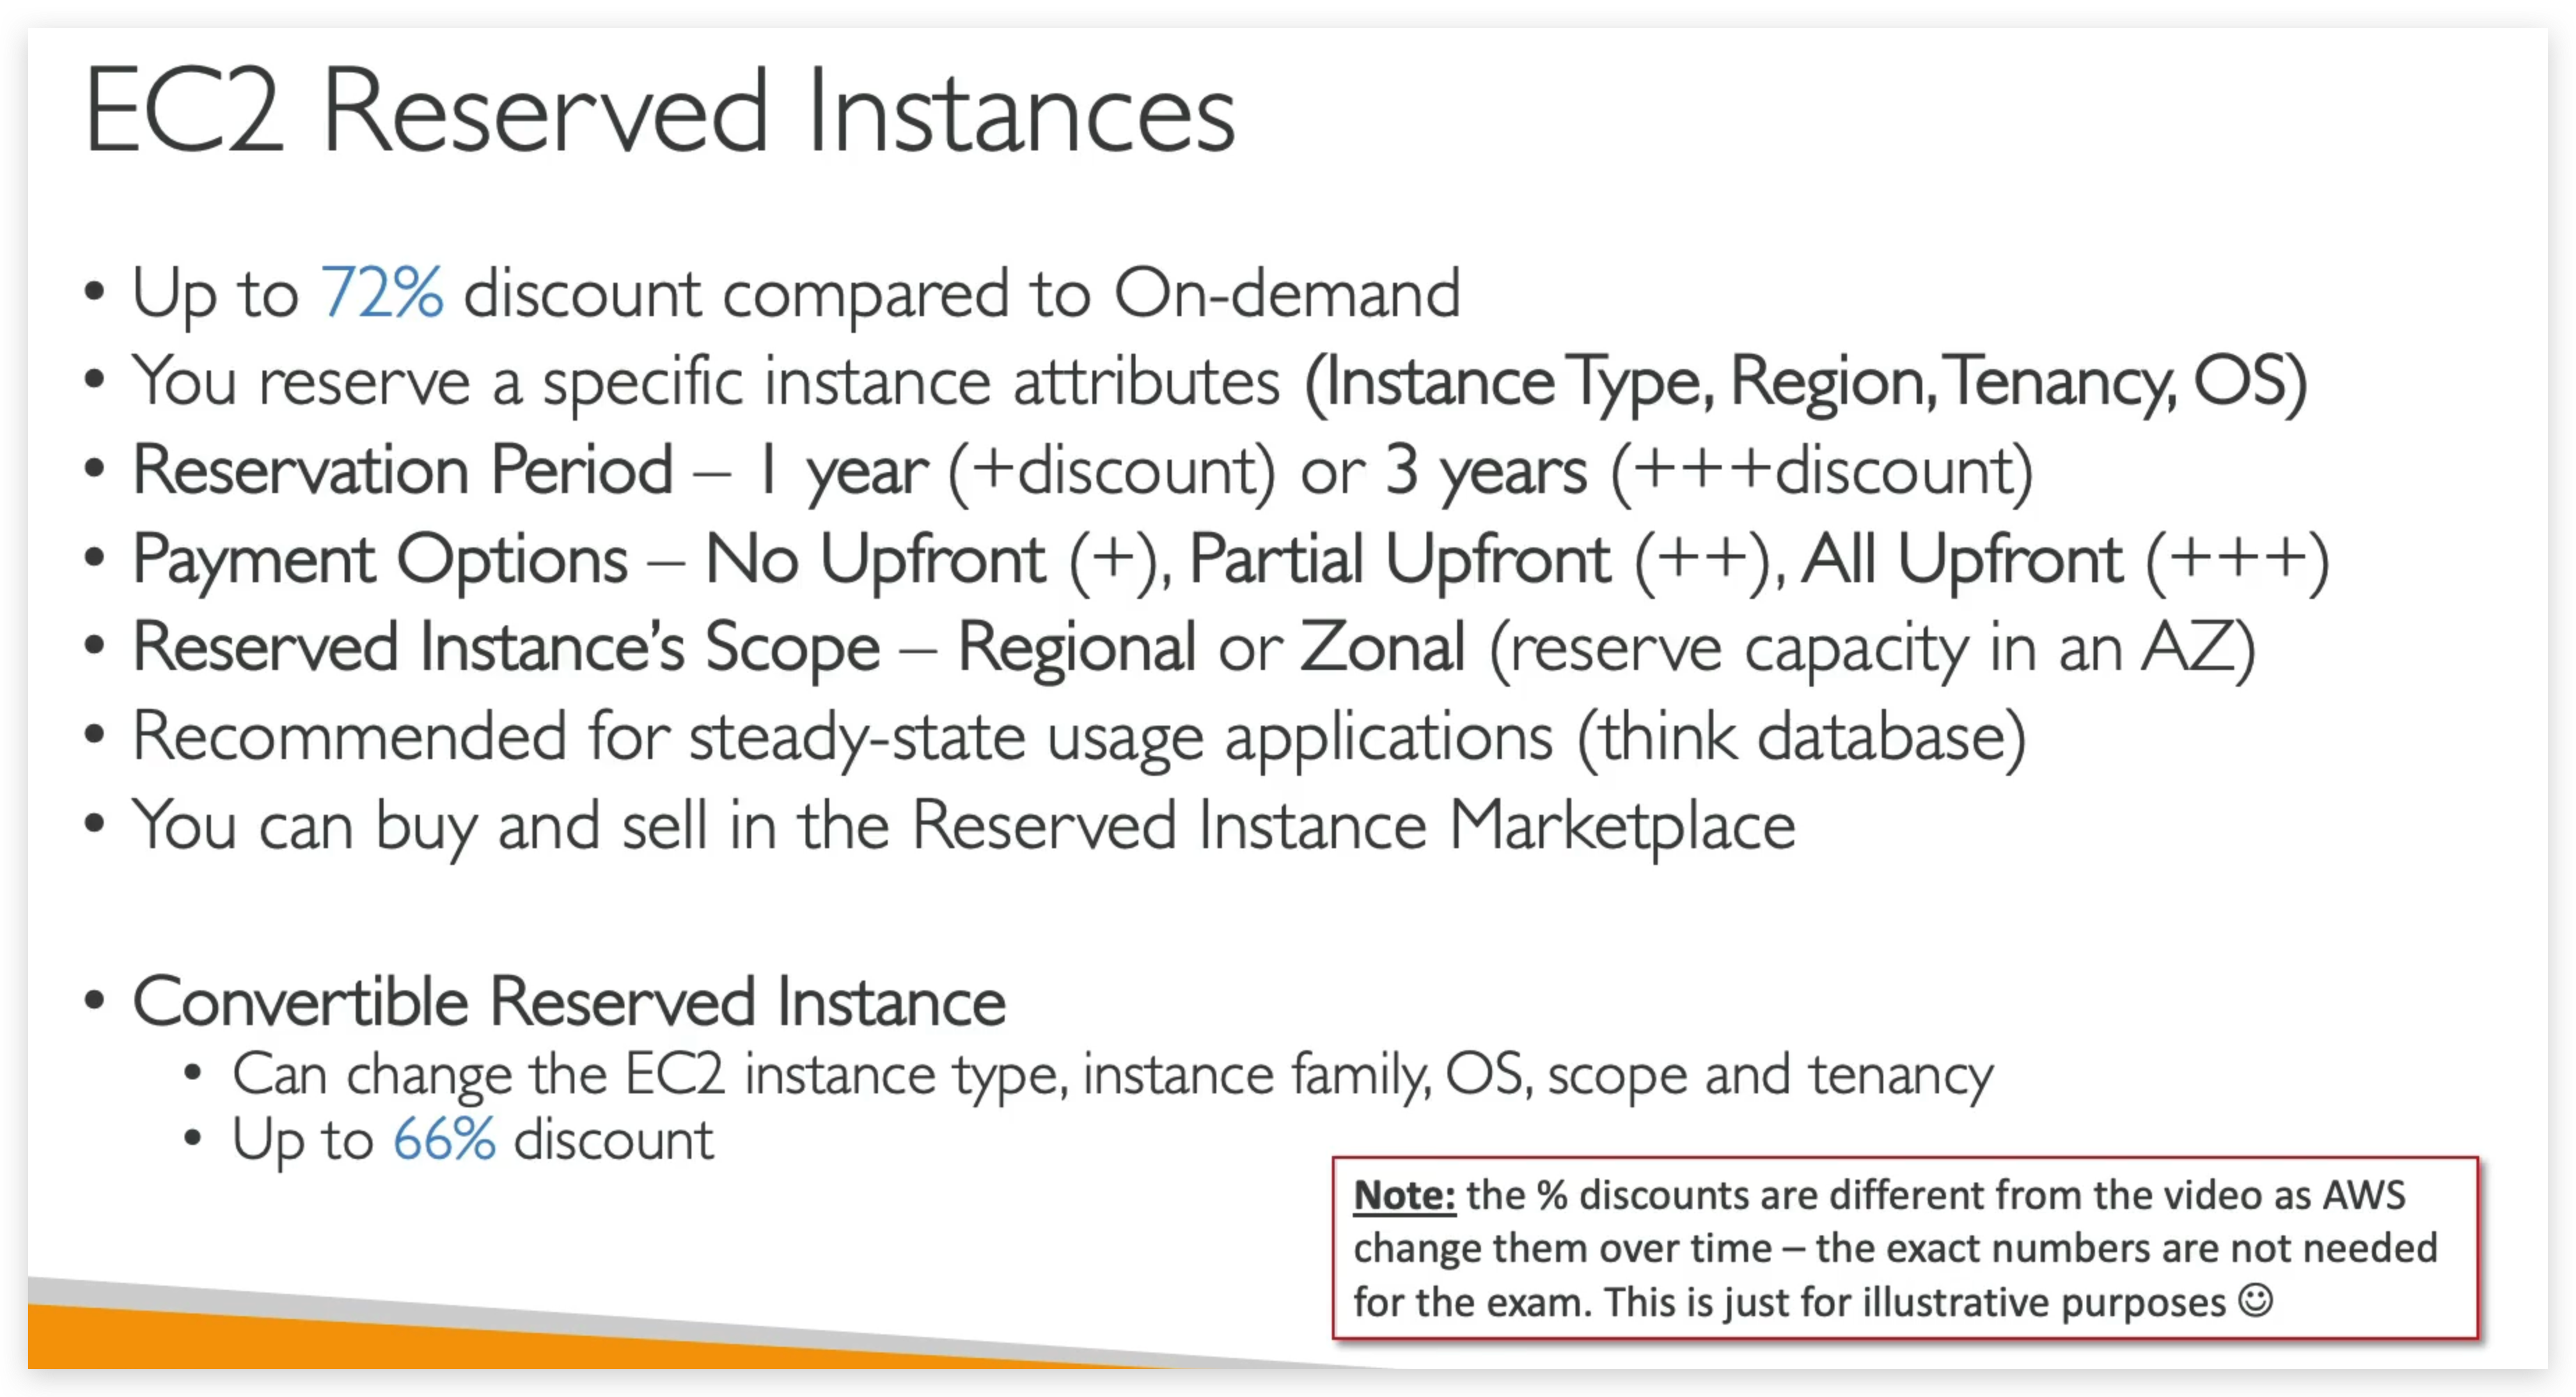
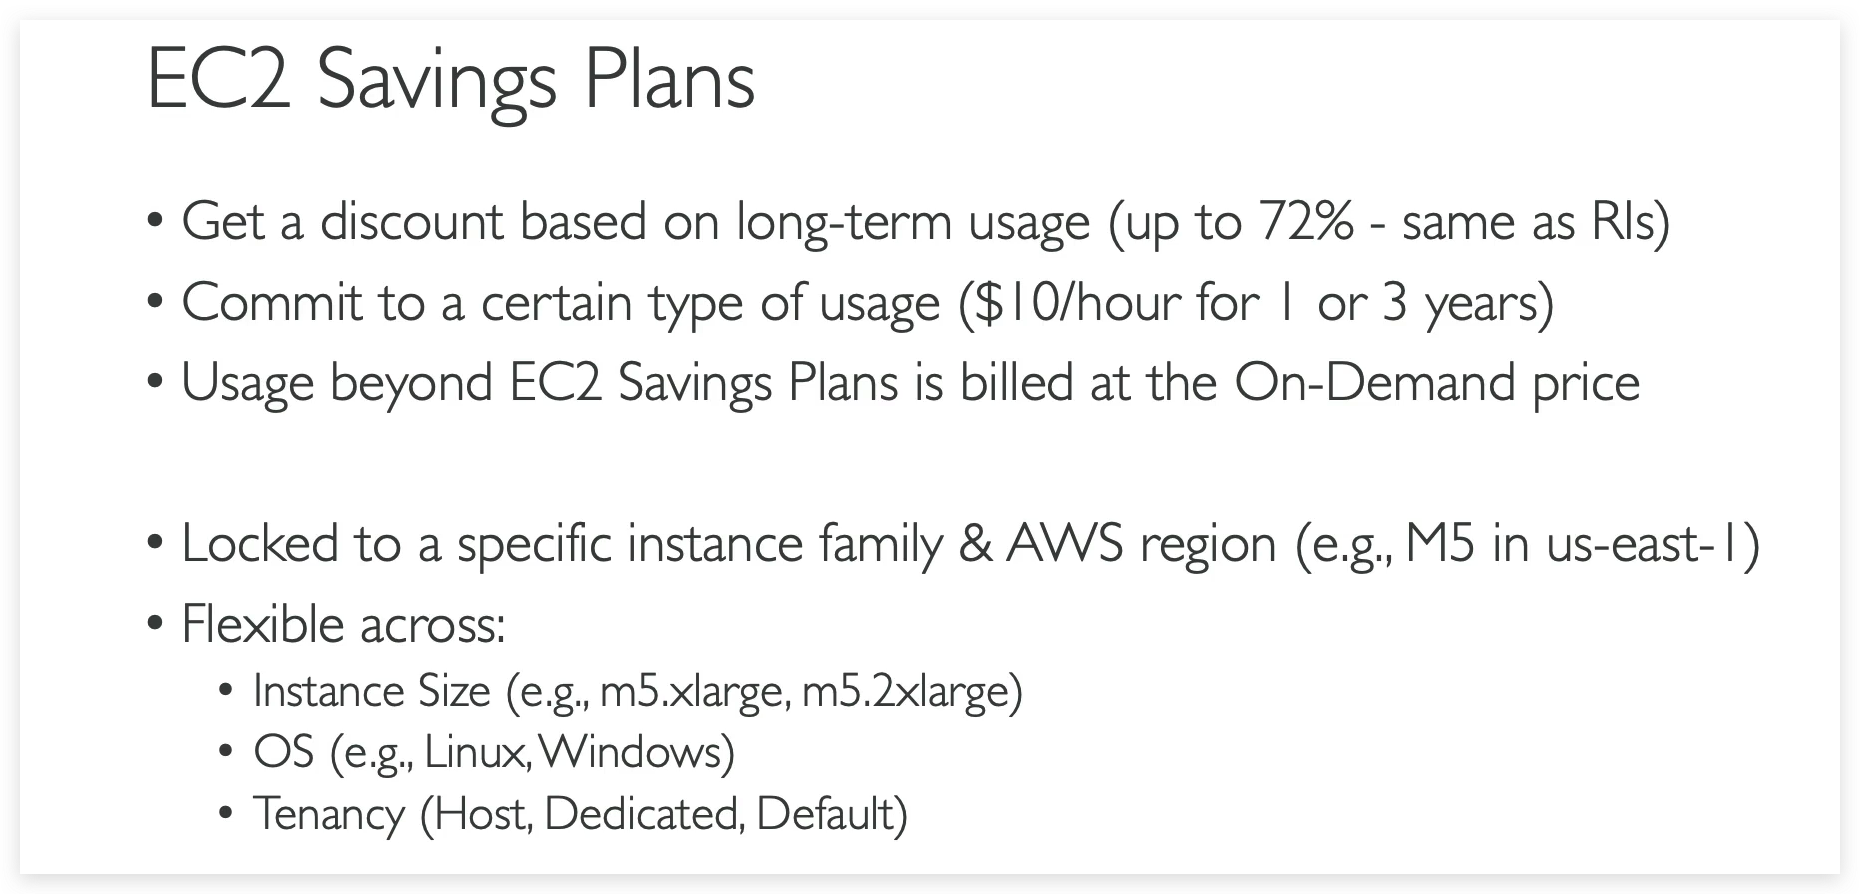
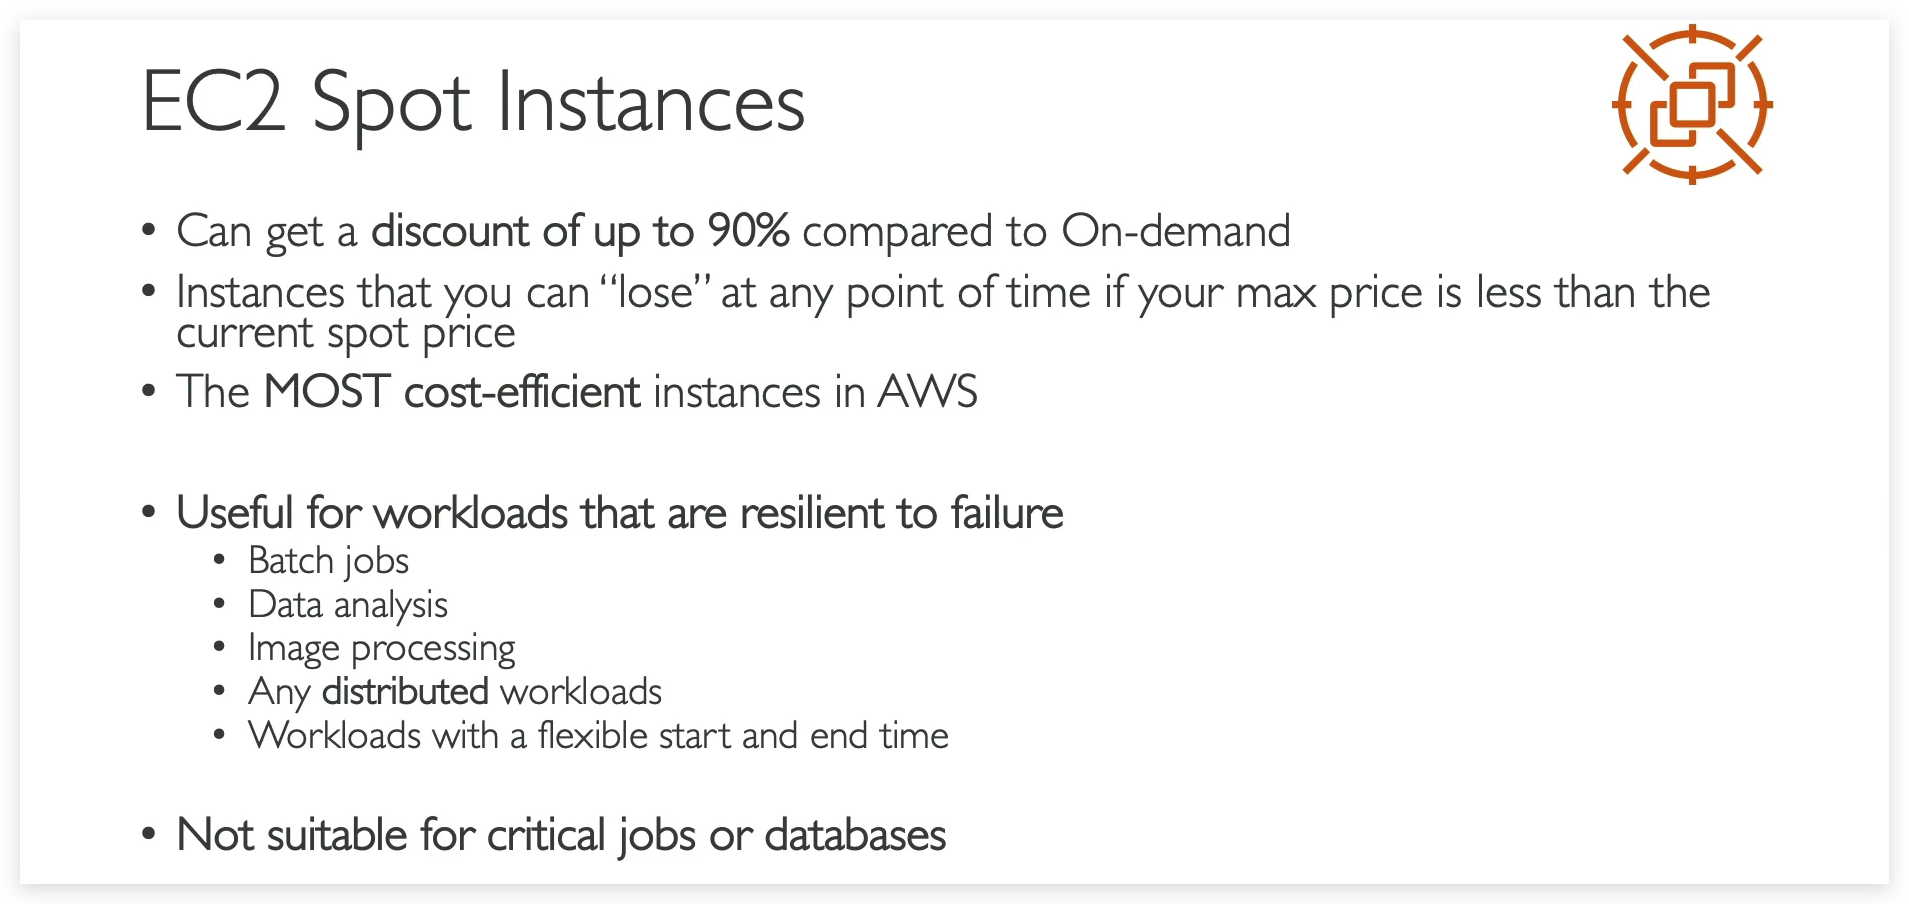
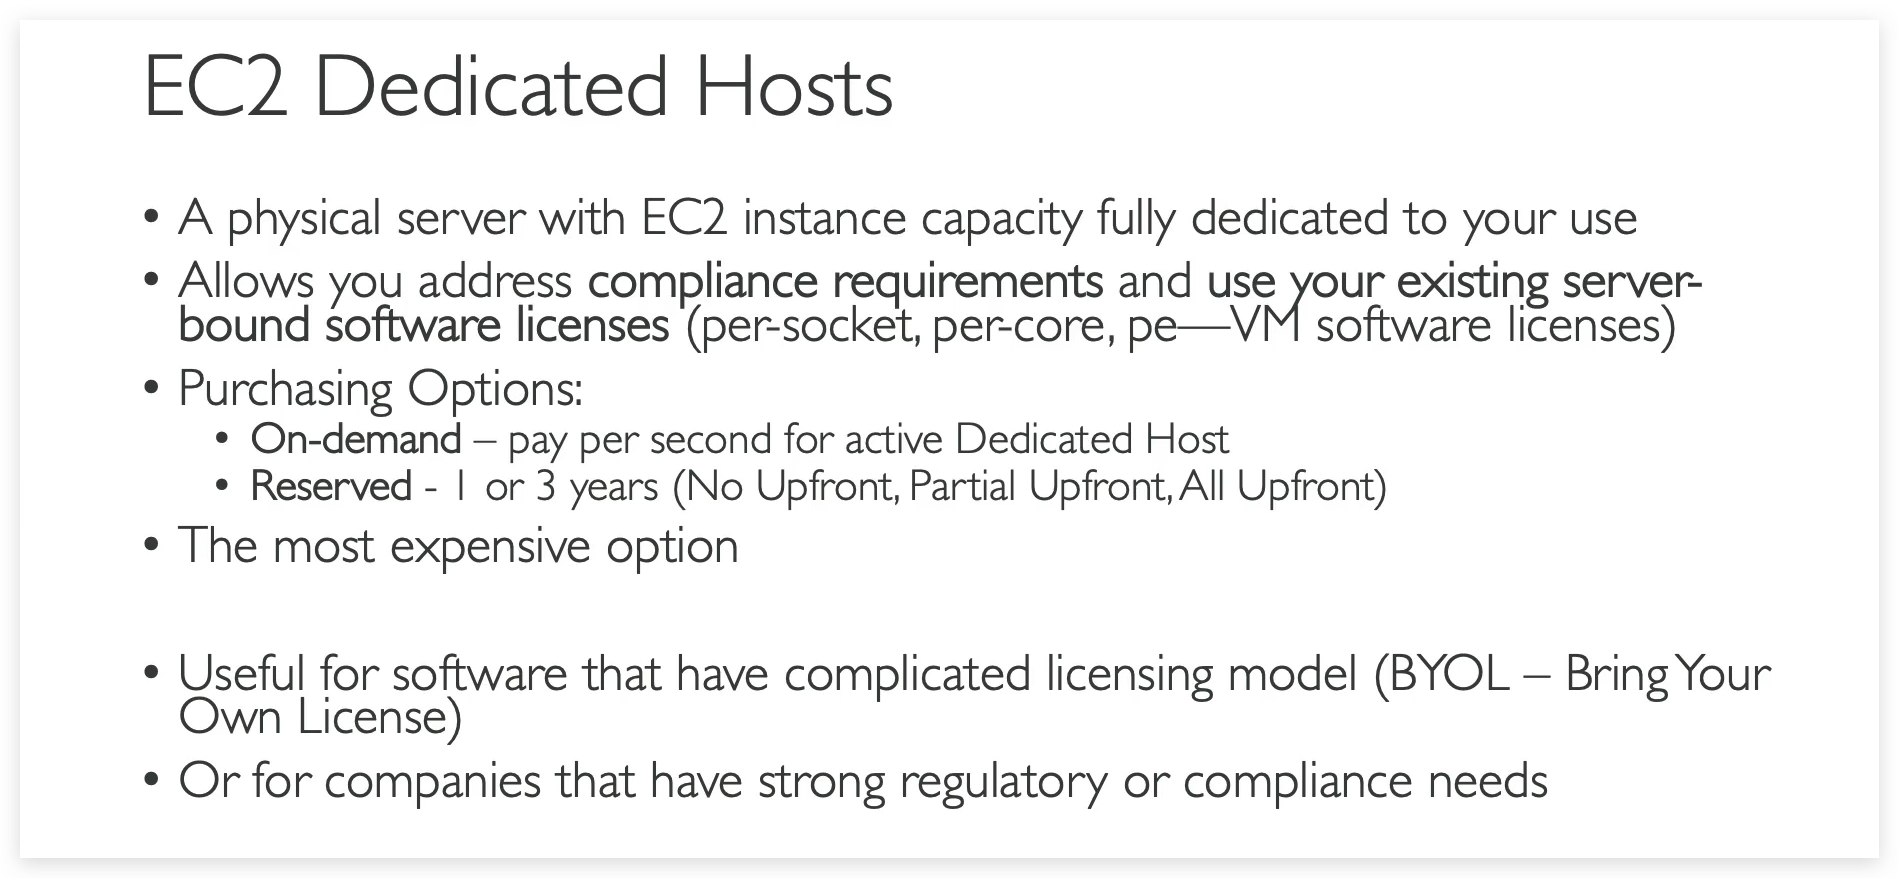
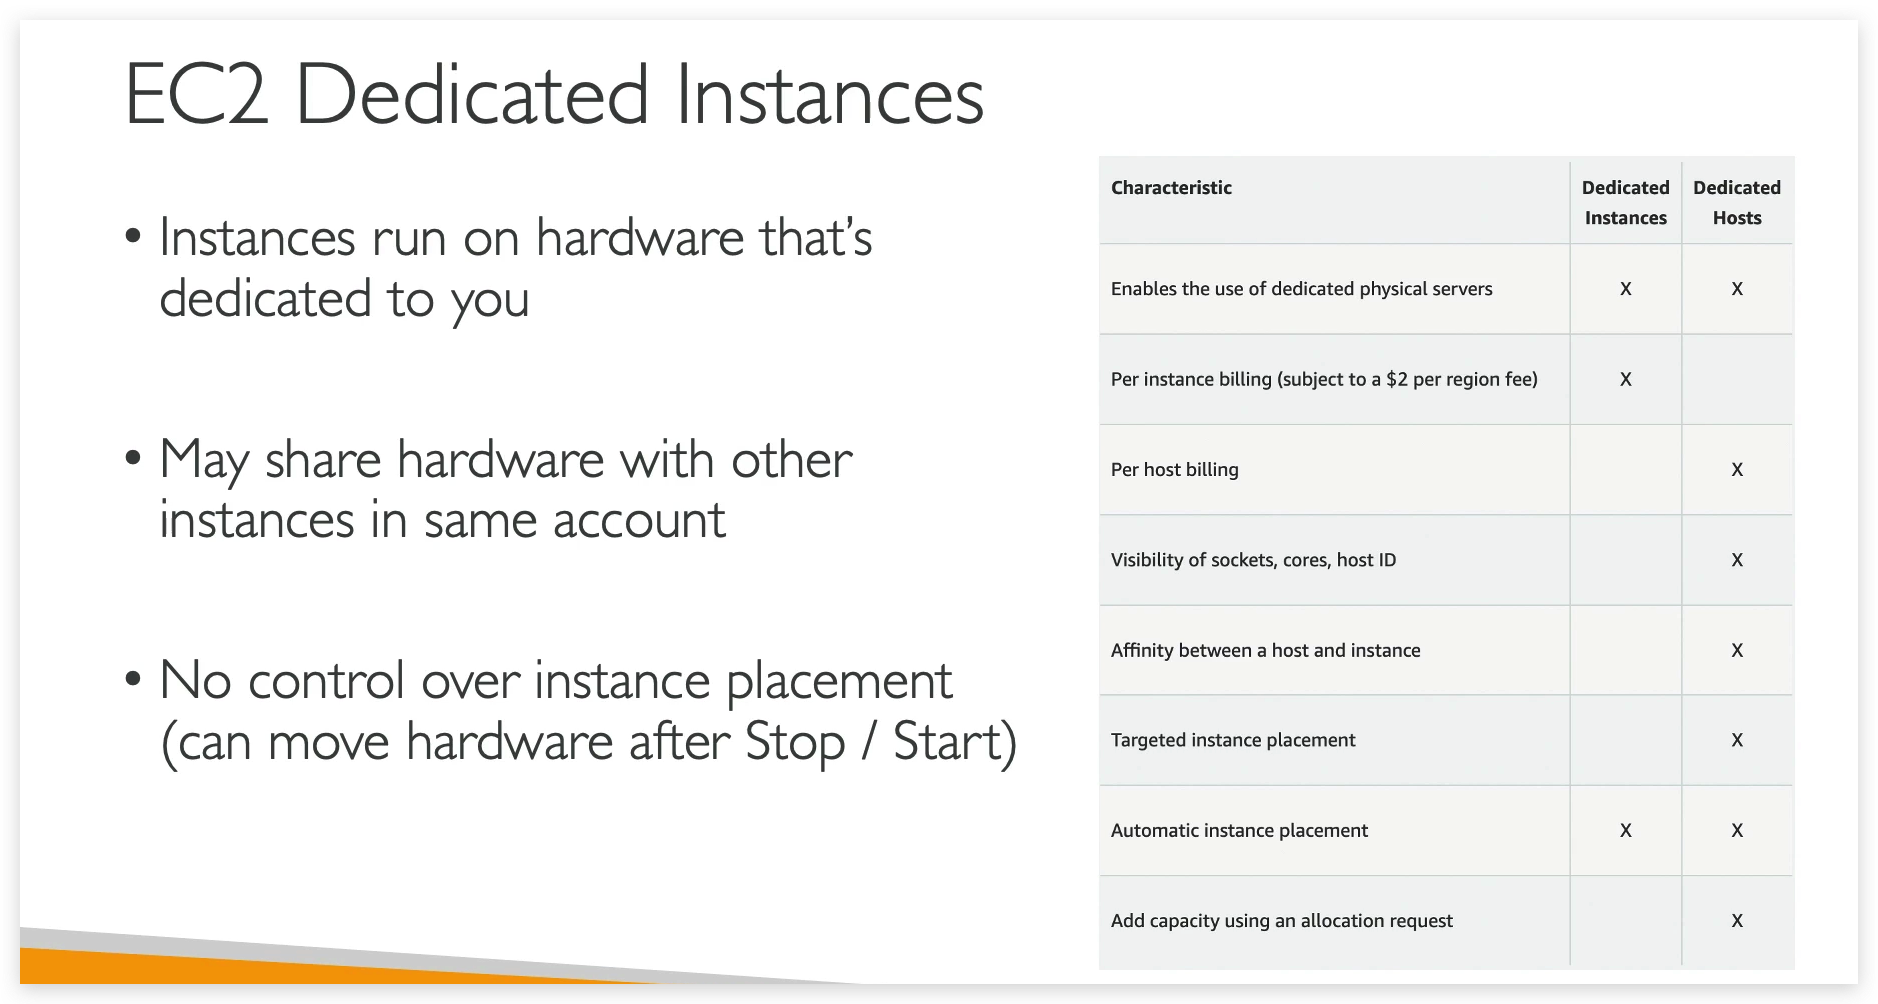
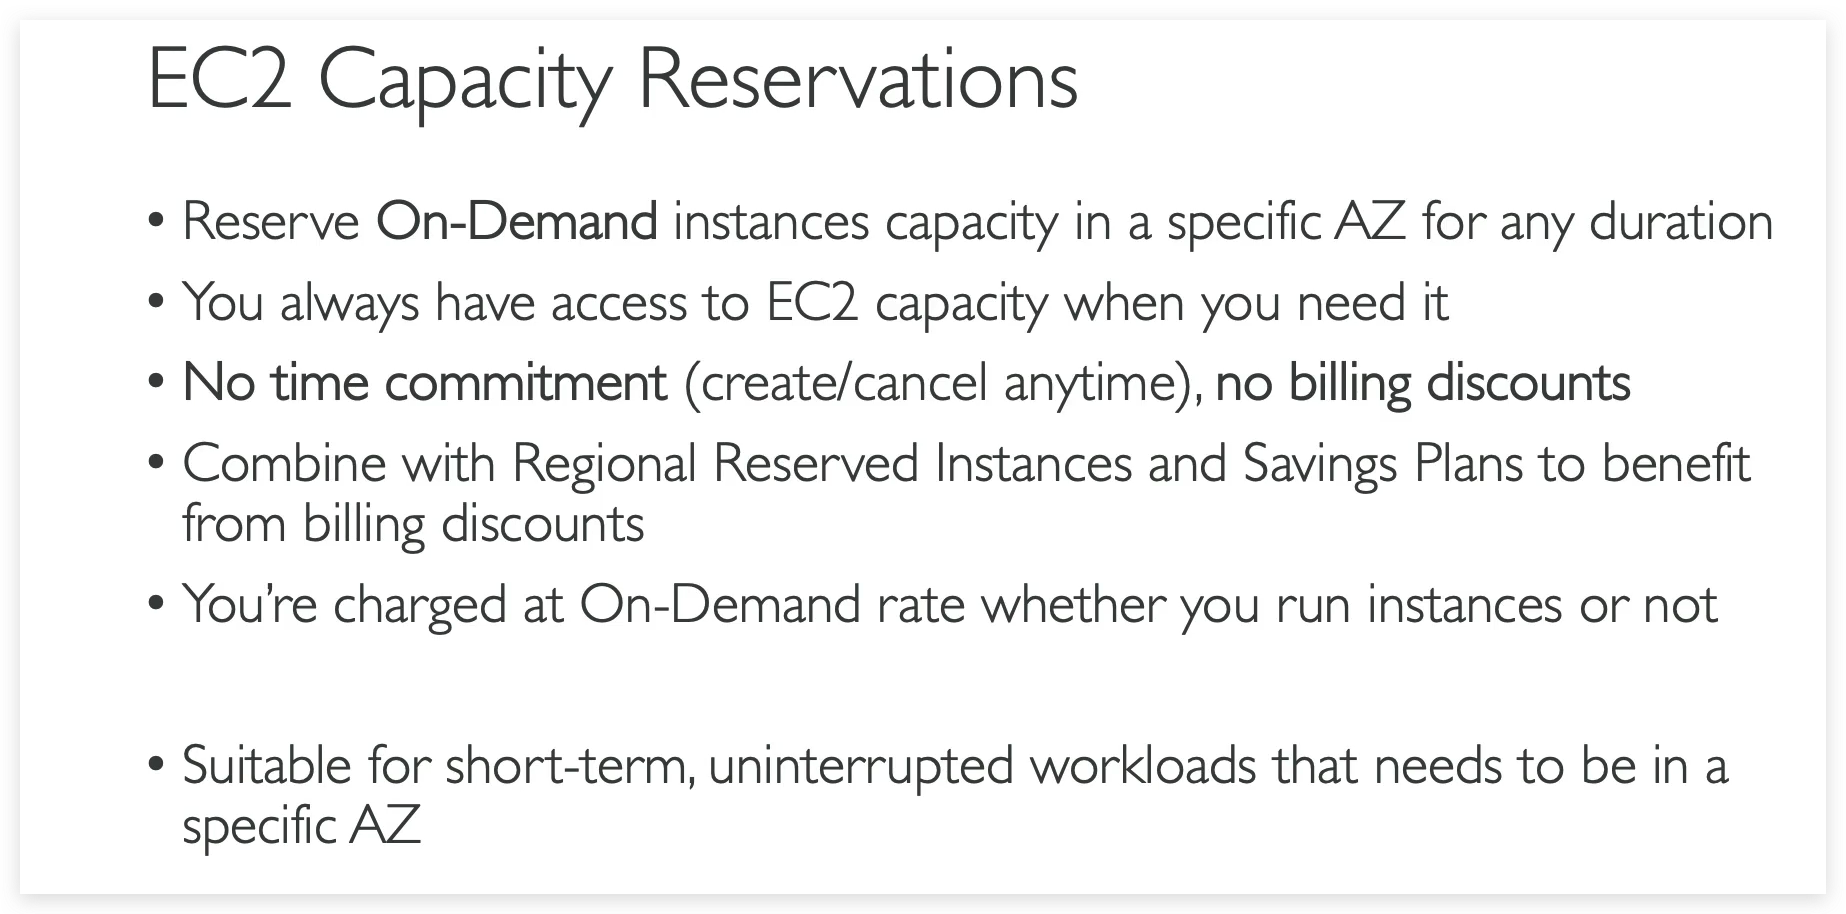
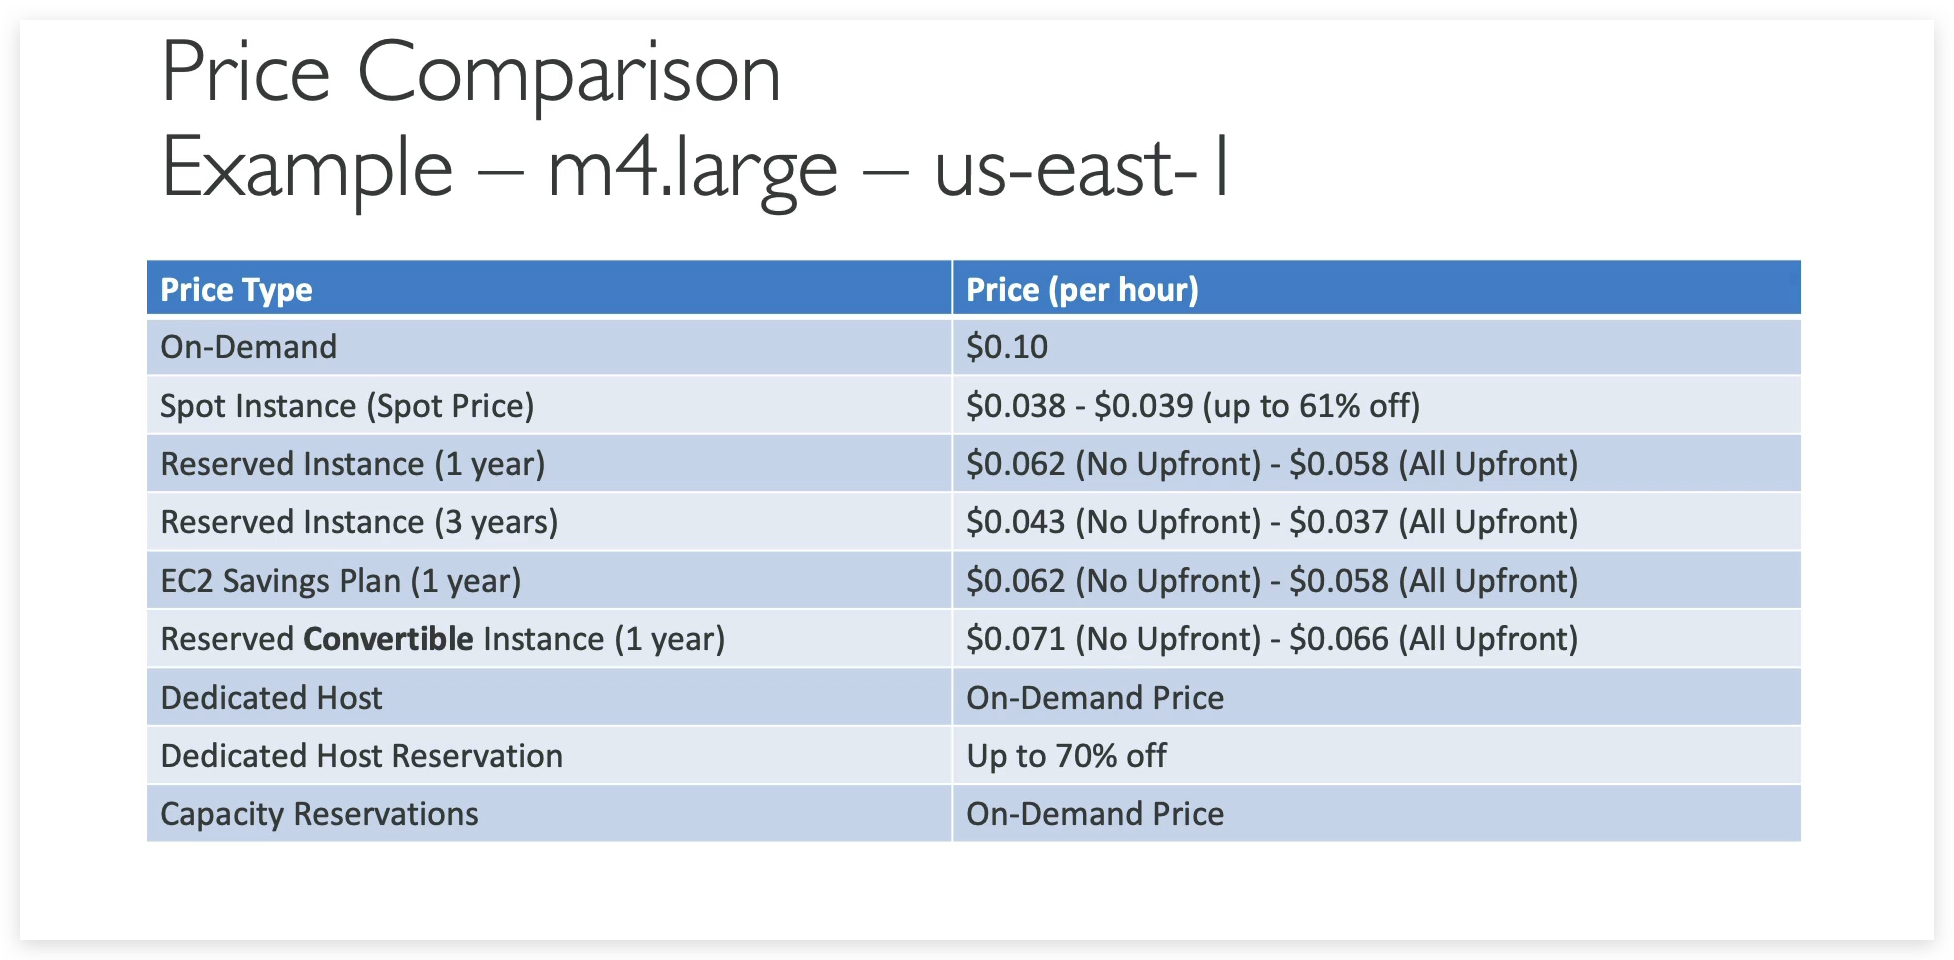
EC2 instance purchasing
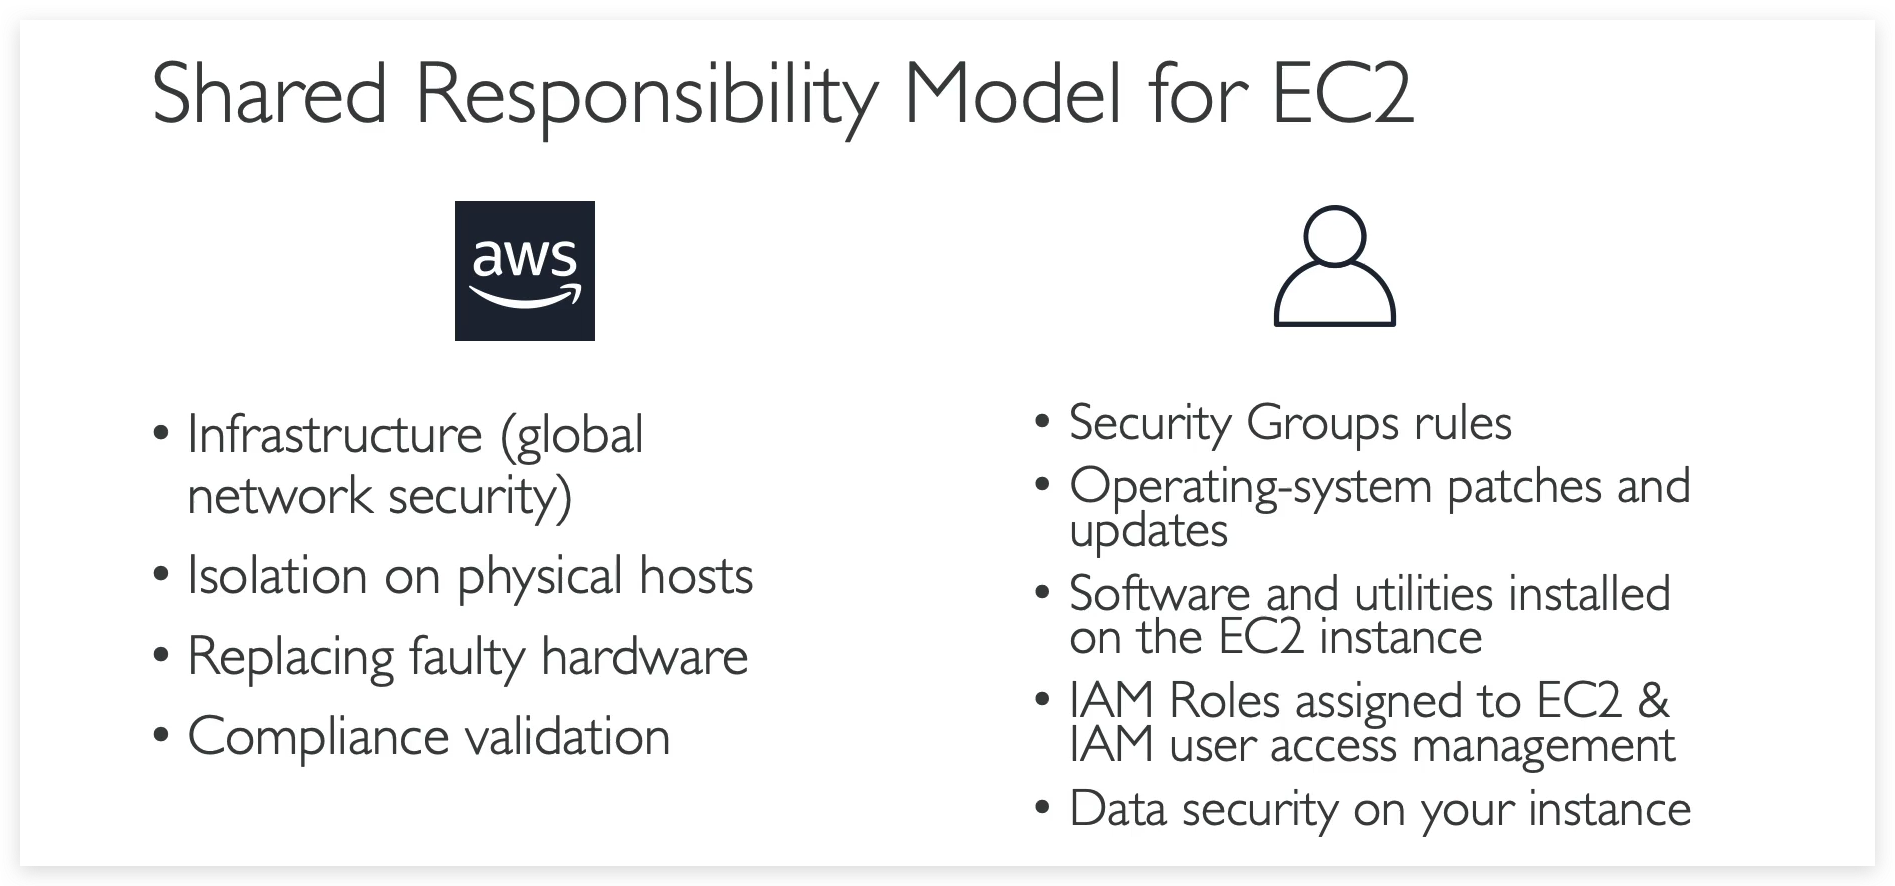
Shared Responsibility Model for EC2
Summary on EC2
Let’s do a summary on what we learned for EC2.
- So we have created an EC2 instance, composed of an AMI, which was defining the operating system. Then we defined an instance size where we defined how much CPU power we want and how much RAM we want. We described the storage for our EC2 instance.
- We defined the firewall on our EC2 instance with the security groups.
- And finally, a bootstrap script called the EC2 User Data that was started when the EC2 instance was started. So the security groups are attached to EC2 instances, and they are a firewall outside your instance.
And you can define rules to allow which ports and which IP can access your EC2 instance. For EC2 user data, this was a script that we launched at the first start of an instance that we used to set up our EC2 instance to be a web server and say, “Hello, world.”- SSH was our way for us to start a terminal from our computers into our EC2 instances to start issuing commands on port 22.
- And once we did it, we were able to leverage an EC2 instance role that was similar to an IAM role to have our EC2 instance issue commands against IAM.
- In terms of purchasing options, you have multiple options you need to know for the exam. You have on-demand, spot instances, reserved instances for standard or convertible, dedicated host, dedicated instance, and that’s it.