Symmetric encryption:
It depends on a secret whihc should be known to both parties of the data transferring.
Asymmetric encryption:
Below is the OAuth2 notes taken from UDemy 1 2 3 # 用base64编码文件 e.g.图片 然后输出到到文件 txt base64 -i Xnip2022-07-20_13-05-30.png -o Xnip2022-07-20_13-05-30-encoded.txt # 用base64解码编码过的文件 得到原图片,可以看见其内容大小都与原图片一致 base64 -d -i Xnip2022-07-20_13-05-30-encoded.txt -o Xnip2022-07-20_13-05-30-decoded.png
1 2 3 4 # dgst 代表 digest openssl dgst Xnip2022-07-20_13-05-30.png # if you want to use sanother algo, just add it in the command openssl dgst -sha512 Xnip2022-07-20_13-05-30.png
1 2 # echo -n abc | openssl dgst -sha512
1
2
3
4
# openssl passwd 会在生成hash 前默认加盐, -6 表示使用sha512 openssl passwd -6 openssl passwd -6 -salt ThisIsMyOwnSalt1234
注意⚠️:
Mac 系统有些可以在Linux正常执行并返回结果的openssl命令不生效的原因:
1
2
# 为了临时用默认openssl 需要调用全路径。 如果需要永久切换为传统openssl,要改环境变量 /opt/homebrew/opt/openssl@1.1/bin/openssl passwd -6
用openssl随机提供的salt时,每次生成的hash都不一样, 见下图1&2, 当自己指定salt时,一样,见下图3&4:
1 2 echo -n "Danger. Run now." | /opt/homebrew/opt/openssl@1.1/bin/openssl enc -aes-256-cbc -k secret -md sha1 -pbkdf2 echo -n "Danger. Run now." | /opt/homebrew/opt/openssl@1.1/bin/openssl enc -aes-256-cbc -k secret -md sha1 -pbkdf2 -base64
1 2 3 4 5 # encrypt /opt/homebrew/opt/openssl@1.1/bin/openssl enc -aes-256-cbc -k MySecret -md sha1 -pbkdf2 -base64 -in Xnip2025-09-25_23-05-25.png -out Xnip2025-09-25_23-05-25.txt # decrypt /opt/homebrew/opt/openssl@1.1/bin/openssl enc -d -aes-256-cbc -k MySecret -md sha1 -pbkdf2 -base64 -in Xnip2025-09-25_23-05-25.txt -out Xnip2025-09-25_23-05-25-decrypted.png
这个 openssl enc命令是用 AES-256-CBC 算法加密文件 的操作,结合了 PBKDF2 密钥派生和 Base64 编码,适合将二进制文件(如图片)转为可文本存储的加密结果。以下是逐参数拆解+整体逻辑 的详细解释:
一、核心命令结构 openssl enc是 OpenSSL 的对称加密/解密子命令 (enc= encode/decode),用于对文件进行加密(-in输入、-out输出)或解密(-d选项)。本命令是加密操作 (无 -d),完整逻辑是:
用密码派生密钥 → AES-256-CBC 加密 → Base64 编码 → 输出密文
二、逐参数解释
参数
含义与作用
encOpenSSL 的子命令,代表“对称加密/解密”(symmetric encryption/decryption)。
-aes-256-cbc加密算法+模式 : - aes-256:使用 AES 对称加密算法,密钥长度 256 位(高安全性); - cbc:使用 CBC 模式(密码块链,Chain Block Cipher),需配合盐(salt) 和初始化向量(IV) 防止重复加密相同明文。 (注:AES 还有 GCM 等更安全的模式,但 CBC 是经典模式。)
-k secret指定密码(Passphrase) :-k后接的字符串 secret是加密用的“原始密码”。OpenSSL 会通过密钥派生函数(KDF) 将这个密码转为 AES 所需的 256 位密钥。 (⚠️ 注意:密码越复杂越安全,secret是示例,实际需换强密码。)
-md sha1指定 KDF 的哈希算法 :-md定义密钥派生时使用的消息摘要算法 (此处为 SHA-1)。结合后面的 -pbkdf2,实际是PBKDF2-HMAC-SHA1 (PBKDF2 用 HMAC-SHA1 作为伪随机函数)。 (注:现代推荐用 -md sha256,SHA-1 已不够安全,但命令中用了 SHA-1。)
-pbkdf2启用 PBKDF2 密钥派生 : PBKDF2(Password-Based Key Derivation Function 2)是一种安全的密钥派生标准 (替代 OpenSSL 旧版的 EVP_BytesToKey方法),通过盐(salt)+ 多次迭代哈希 将弱密码转为强密钥,抵御暴力破解。 默认迭代次数通常为 10000 次(可通过 -iter自定义)。
-base64输出 Base64 编码 :加密后的结果是二进制数据,用 -base64转为可打印的 ASCII 文本 (方便存储/传输,如邮件、配置文件)。 (解密时需用 -base64反向解码,或直接用 -A选项处理单行 Base64。)
-in a.png输入文件 :指定要加密的原始文件(此处是图片 a.png)。
-out a-enc输出文件 :指定加密后的结果文件(此处为 a-enc,内容是 Base64 编码的密文)。
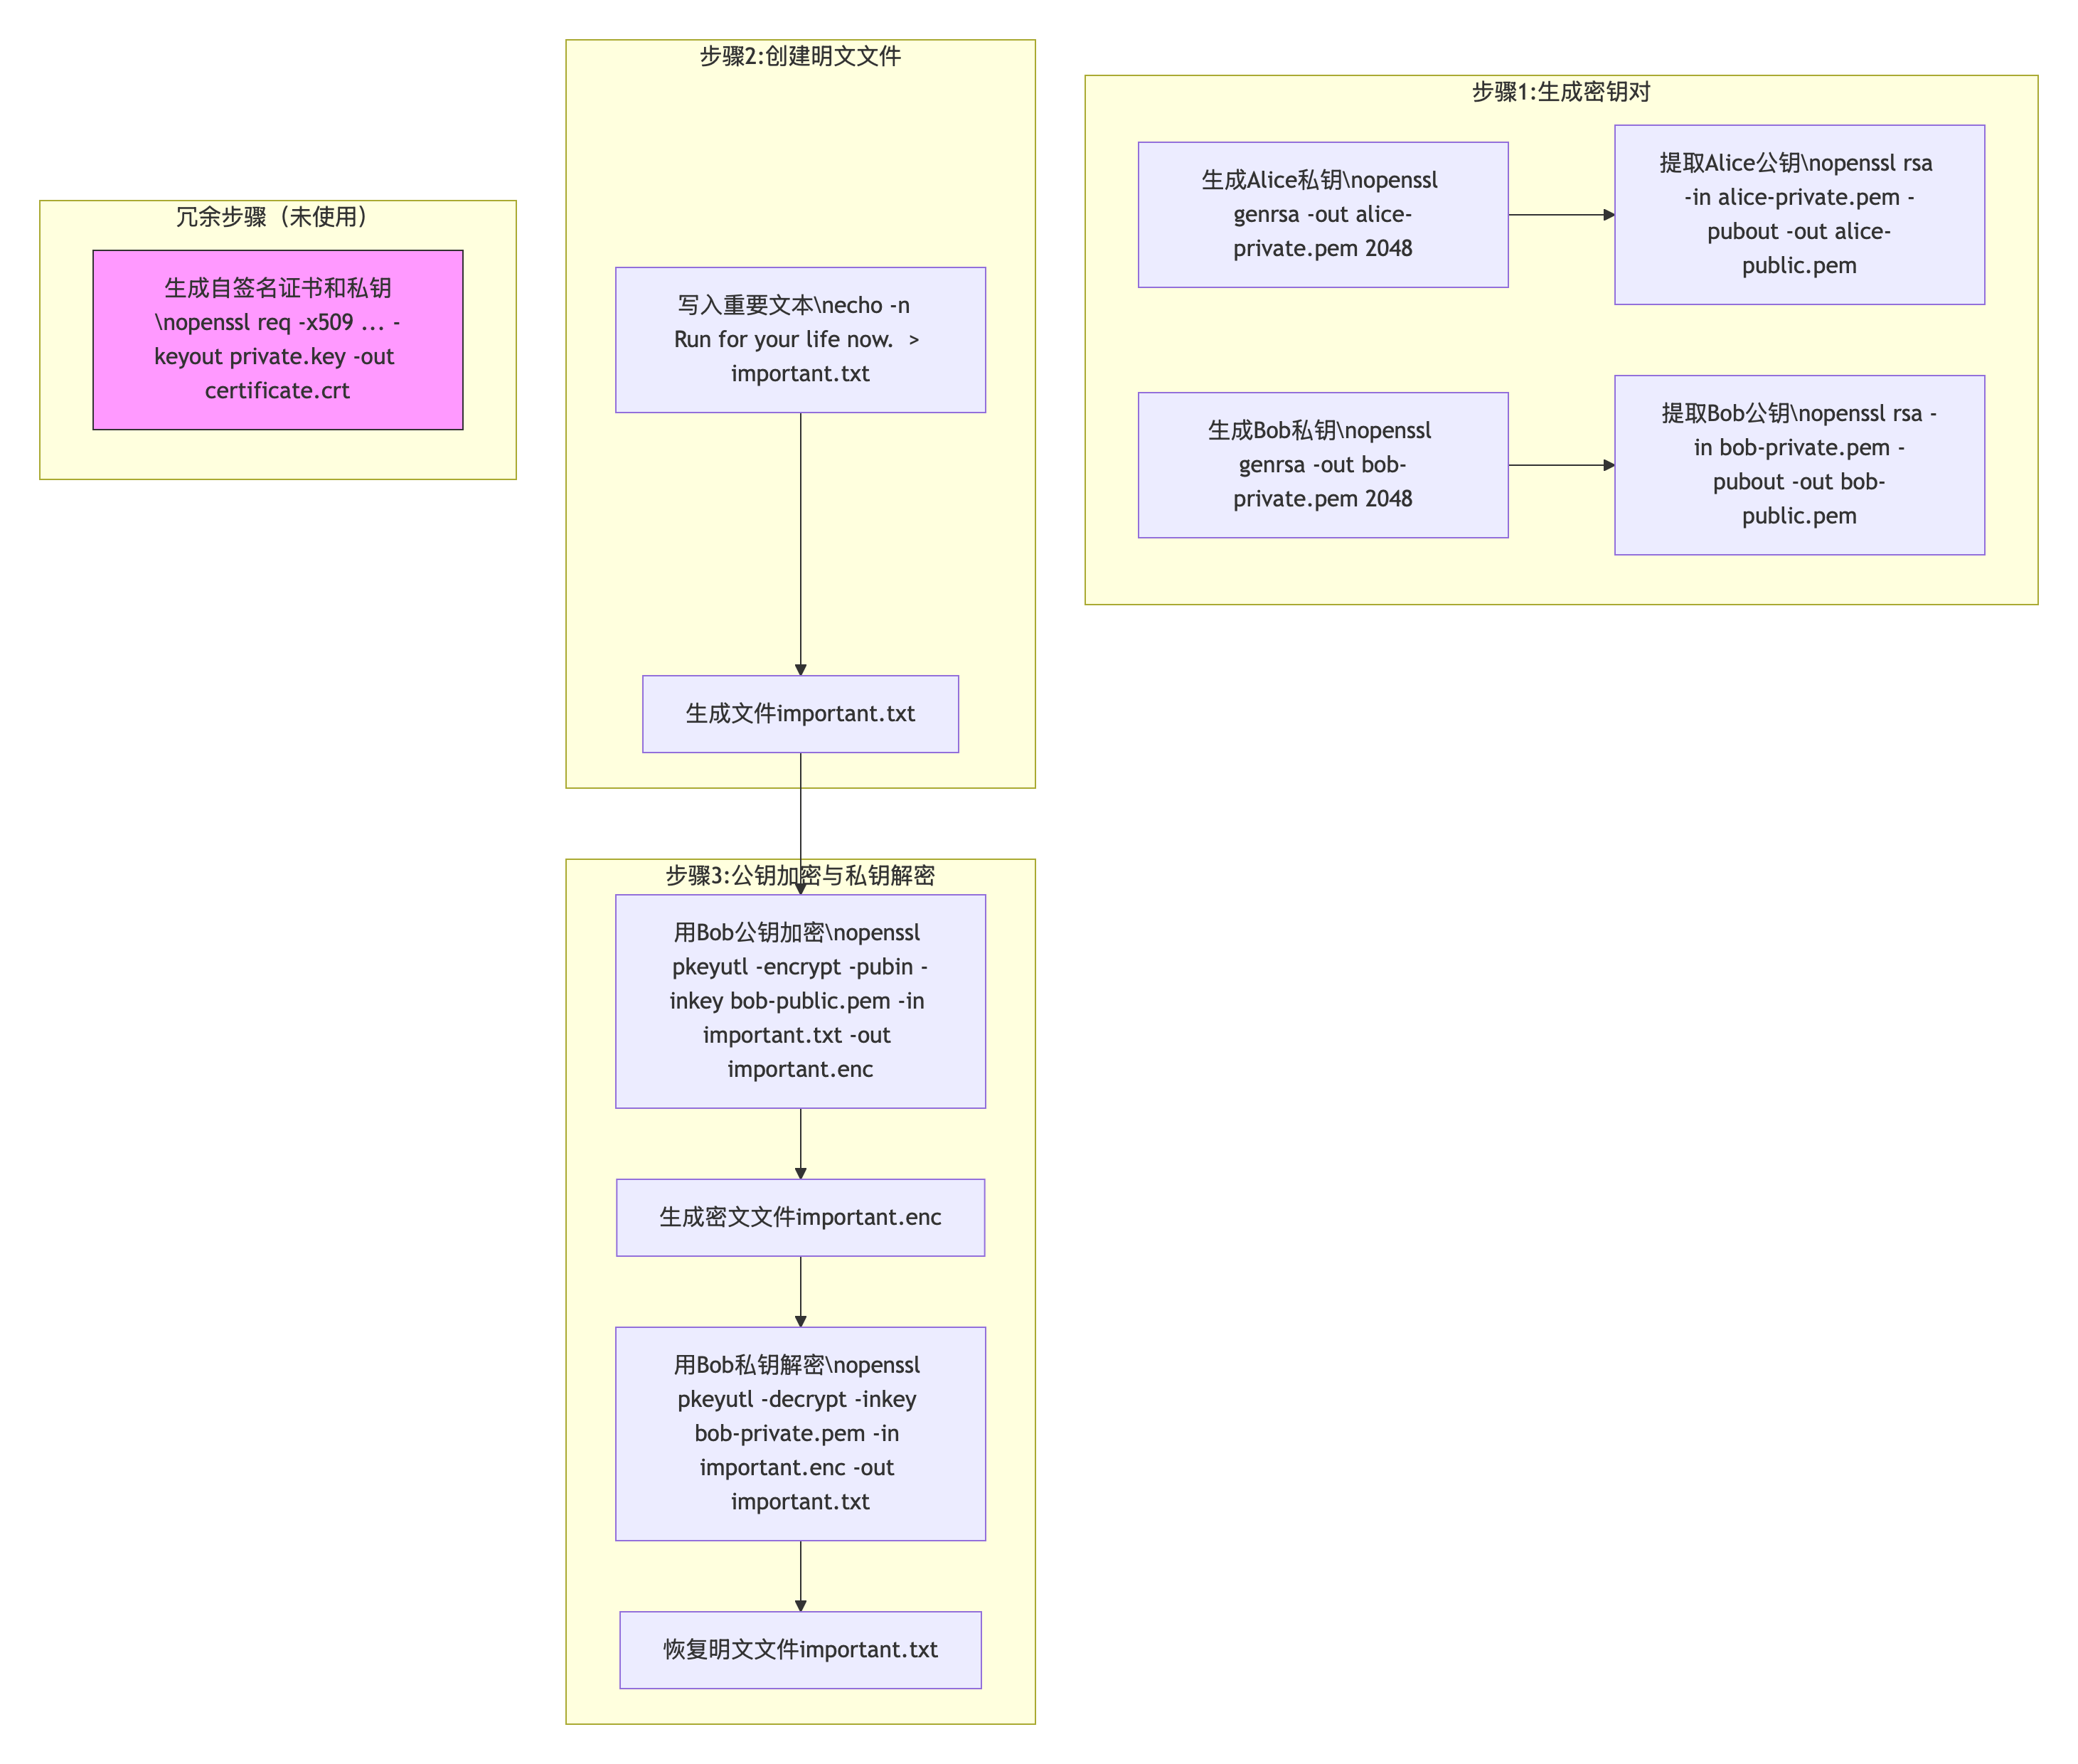
Asymmetric Encryption 1 2 3 4 5 6 7 8 9 10 11 12 13 14 # generate a private key in a file called private.key and a self-signed X509 certificate /opt/homebrew/opt/openssl@1.1/bin/openssl req -x509 -nodes -sha256 -days 3650 -newkey rsa:2048 -keyout private.key -out certificate.crt ------------------------------------------------------- 作用:生成一个自签名X.509证书(certificate.crt)和配套的未加密RSA私钥(private.key)。 参数: -x509:直接生成自签名证书(无需CA); -nodes:私钥不加密(“No DES”); -sha256:用SHA-256签名证书; -days 3650:有效期10年; -newkey rsa:2048:生成2048位RSA密钥对; -keyout private.key:私钥输出到private.key; -out certificate.crt:证书输出到certificate.crt。 注意:后续命令未使用该证书和私钥,属于冗余步骤(可能是用户误加或示例残留)。
1 2 3 4 5 6 7 8 9 # generateing private key for alice & bob respectively /opt/homebrew/opt/openssl@1.1/bin/openssl genrsa -out alice-private.pem 2048 /opt/homebrew/opt/openssl@1.1/bin/openssl genrsa -out bob-private.pem 2048 ------------------------------------------------------- 作用:生成Alice的RSA私钥,保存到alice-private.pem。 参数: genrsa:生成RSA私钥的子命令; -out alice-private.pem:输出文件名; 2048:密钥长度2048位(安全标准)。
1 2 3 4 # generateing ENCRYPTED(via aes256) private key for alice & bob respectively /opt/homebrew/opt/openssl@1.1/bin/openssl genrsa -aes256 -out alice-private-enc.pem 2048 /opt/homebrew/opt/openssl@1.1/bin/openssl genrsa -aes256 -out bob-private-enc.pem 2048 -------------------------------------------------------
Above are generated with passphrase being ALICE & BOBS respectively. ()
1 2 3 4 5 6 7 8 9 10 11 12 # generate the public key with the private key /opt/homebrew/opt/openssl@1.1/bin/openssl rsa -in alice-private.pem -pubout -out alice-public.pem /opt/homebrew/opt/openssl@1.1/bin/openssl rsa -in bob-private.pem -pubout -out bob-public.pem ------------------------------------------------------- 作用:从Alice的私钥中提取公钥,保存到alice-public.pem。 参数: rsa:RSA密钥处理子命令; -in alice-private.pem:输入Alice的私钥; -pubout:输出公钥(而非私钥); -out alice-public.pem:公钥输出文件。 Same for bob's
1 2 3 4 5 6 7 8 9 10 11 12 13 14 15 16 17 18 19 20 21 22 23 24 25 26 27 28 # prepare a txt file for encryption soon echo -n "Run for your life now." > important.txt # alice encrypting the file with Bob's pubkey /opt/homebrew/opt/openssl@1.1/bin/openssl pkeyutl -encrypt -pubin -inkey bob-public.pem -in important.txt -out important.enc # when bog gets the encrypted file, will decrypt it with his own private key /opt/homebrew/opt/openssl@1.1/bin/openssl pkeyutl -decrypt -inkey bob-private.pem -in important.enc -out important.txt ------------------------------------------------------- Line 1: 作用:用echo命令将字符串"Run for your life now."写入文件important.txt。 参数:-n:不添加换行符(确保文件内容与字符串完全一致)。 Line 2: 作用:用Bob的公钥(bob-public.pem)加密important.txt,输出加密后的文件important.enc。 参数: pkeyutl:公钥/私钥工具(Public Key Utility); -encrypt:执行加密操作; -pubin:指定输入密钥为公钥(此处为Bob的公钥); -inkey bob-public.pem:公钥文件路径; -in important.txt:待加密的明文文件; -out important.enc:加密后的密文文件。 Line 3: 作用:用Bob的私钥(bob-private.pem)解密important.enc,恢复明文到important.txt。 参数: -decrypt:执行解密操作; -inkey bob-private.pem:Bob的私钥文件路径(用于解密); -in important.enc:待解密的密文文件; -out important.txt:解密后的明文文件(覆盖原文件)。
Hybrid Encryption 1 2 3 4 5 6 7 8 9 10 # RSA key size must NOT greater than 245. that's the reason why using 245 here /opt/homebrew/opt/openssl@1.1/bin/openssl rand -out passphrase.key 245 # encrypting the image file with AES /opt/homebrew/opt/openssl@1.1/bin/openssl enc -aes-256-cbc -kfile passphrase.key -md sha1 -base64 -pbkdf2 -in testingImg.png -out testingImg-aes # encrypting the image file with using RSA Bob's public key /opt/homebrew/opt/openssl@1.1/bin/openssl pkeyutl -encrypt -inkey bob-public.pem -in passphrase.key -out passphrase_enc.key # decrypt the passphrase /opt/homebrew/opt/openssl@1.1/bin/openssl pkeyutl -decrypt -inkey bob-private.pem -in passphrase_enc.key -out passphrase.key # decrypt the data /opt/homebrew/opt/openssl@1.1/bin/openssl enc -d -aes-256-cbc -kfile passphrase.key -md sha1 -base64 -pbkdf2 -in testingImg-aes -out testingImg_orignal.png
Digital Signature Demo 1 2 3 4 5 6 openssl dgst -sha512 -sign alice-private.pem -out testingImg-digest.sign testingImg.png base64 -i testingImg-digest.sign -o testingImg-digest.sign.base64 base64 -i testingImg.png -o testingImg.png.base64 base64 -d -i testingImg-digest.sign.base64 -o testingImg-digest.sign.original base64 -d -i testingImg.png.base64 -o testingImg.png.original openssl dgst -sha512 -verify alice-public.pem -signature testingImg-digest.sign.original testingImg.png.original